A week mostly not in the shop
Published 17 Dec 2017
Tags: amp, fusion 360, pickups
Due to being under the weather for most of the week I only had one day in the workshop, but it was an important day, getting guitar #3 to live! This involved final assembly after the previous week’s screw failure and soldering the electronics, and indeed fitting the electronics into the tiny cavity inside t-style guitars. For this guitar not only does it have a humbucker in the neck, but I’ve given it a coil tap to add an extra voice.
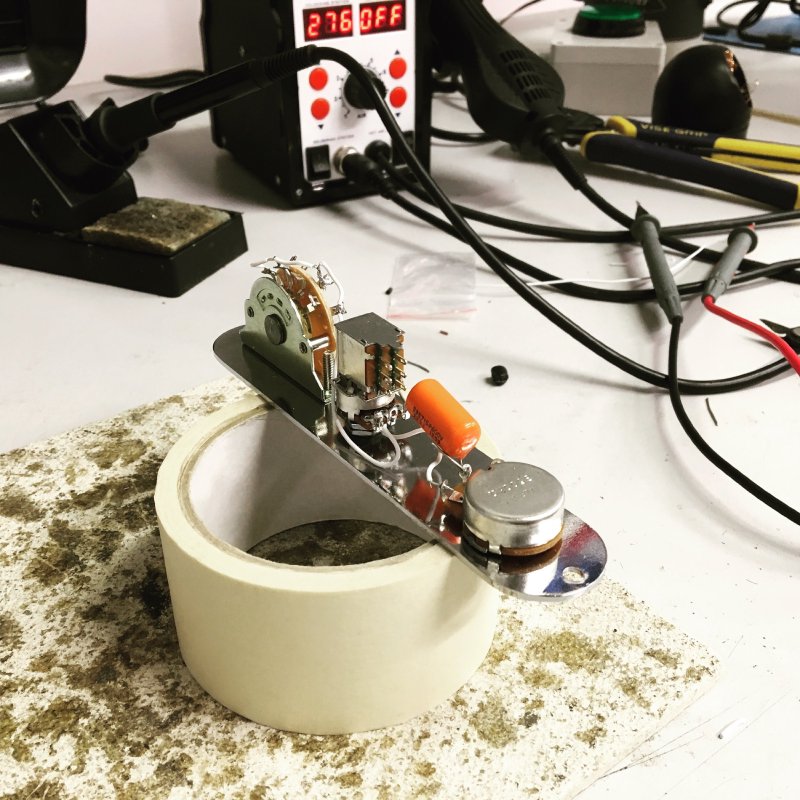
For those of you who have never needed to know about the insides of pickups, let me explain: a single coil pickup is just that: a long coil of wire wrapped around a set of magnetic poles, one under each string. As the strings vibrate this induces a current in the coil of wire (a very tiny current, which is why you need an amplifier). The problem with this is that a long coil of wire acts as an antenna to pickup other radio noise, which makes the pickup hum slightly if in a noisy environment. A way of countering that noise (indeed, of bucking the hum) is to have a second coil in the opposite direction that will also pickup the hum inversely and cancel it out. This is what a humbucker is, and why it’s normally twice the size of a regular pickup, as it is literally two pickups. So a humbucker gives a cleaner sound than a single coil pickup, yet you normally see humbuckers used for heavier rock sounds and single coils for cleaner tones, why is that? Well, because you’ve got two coils you now get twice the power output from the humbucker, which will drive the amp heavier, and cause it to distort sooner.
But, one thing clever people spotted after some time was that if you have one pickup that is made of two, can’t you just get it to switch between being treated as both a single coil and a double coiled humbucker, giving your guitar an extra voice? Indeed you can, and it’s now quite a common feature seen on guitars with humbucking pickups. There is a switch that will simply ground the point between the two inner coils cutting one of them out of the circuit on demand. As such, this tele now has 5 sounds rather than 3 just by adding a simple switch! This appeals to me greatly as versatility of an instrument is something I feel very strongly about. Most people have fewer guitars than they’d like, so I want them to be able to get the most out of the ones they do, and even if you have many guitars on stage you want to minimise the amount of changes you need to do in order to get the sound you want.
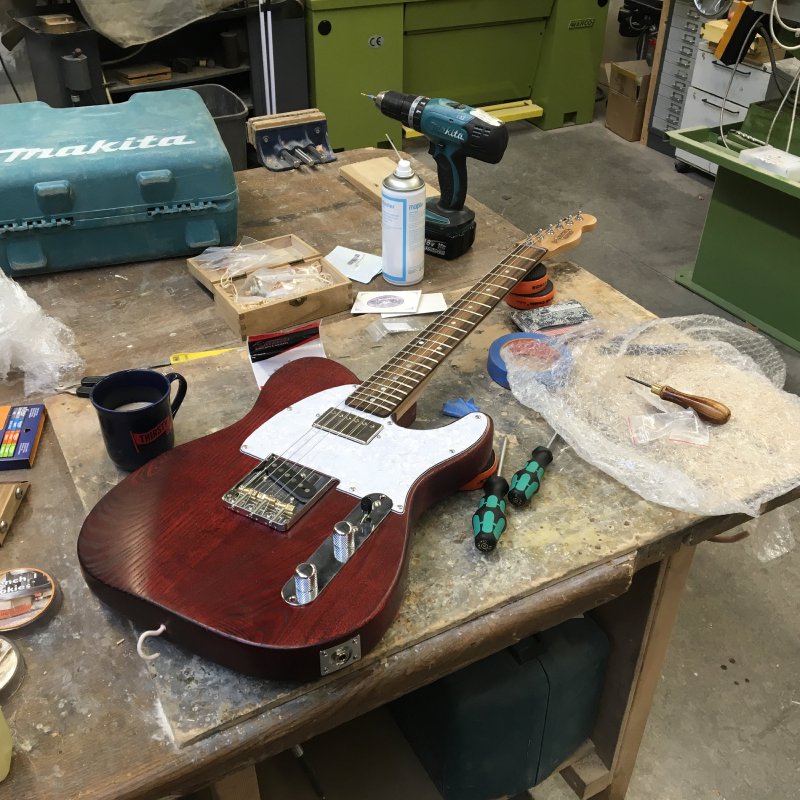
Anyway, guitar #3 has now gone through a week of play testing (the best bit of being a luthier perhaps :) and will have some final fettling this coming week after which I’ll do a video so you can hear how it sounds too.
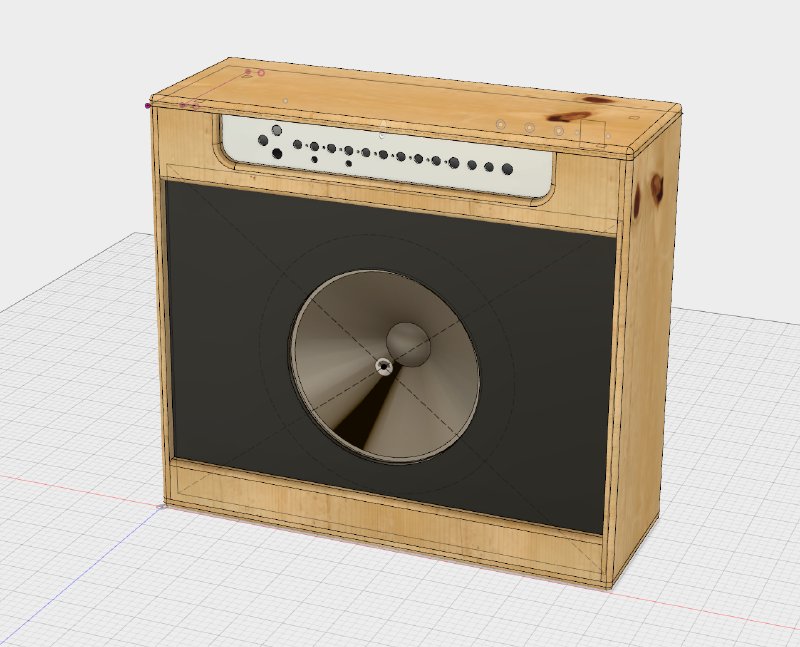
Coming down with a cold meant I put down my soldering irons etc. and turned instead to getting some quality time with Fusion 360 to learn how to make more complex designs, using my amp project as the catalyst for learning. Although I did some simple 3D printing with Fusion a couple of weeks ago, the amp design is a much more complex thing with many parts that will need manufactured, plus other parts that I want to check will fit correctly without interfering with each other.
As part of sharing back progress, here’s some tips for newcomers to Fusion 360 I’ve picked up on building a model like this. Firstly, treat every discrete physical part in your design as a new component in Fusion, not just a series of bodies on a single component (which is the default behaviour). This is just because components are the things that you can then place and orientate relative to each other so that they will automatically update as you iterate your design, where as bodies are considered going together to make a single part and are much more work to adjust later. Getting into the habit of making everything a component as you go along will pay dividends later in the design process.
The next tip is make use of custom parameters to save sizes, such as material thickness, overall sizes and so forth. How this works is you define a paremeter, e.g., one called Material and we set it to 18mm as that’s how thich the plywood we’ll use for the amp will be. Then when building a panel, rather than specifying the wood thickness as 18mm in each place, I can just specify “Material” as the dimension, and it’ll set it to the correct thickness automatically. Even more importantly, if I then decide I want to use wood of a different thickness later, I just change it in the parameters editor and all of my design will update to use the new thickness automatically without me having to change everything manually.
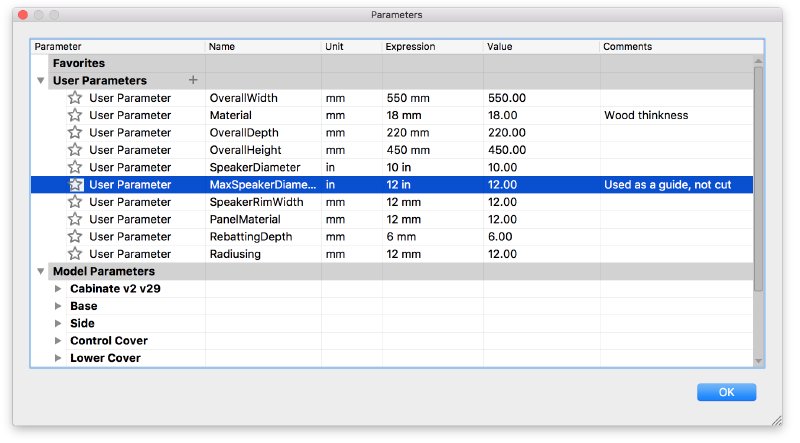
Even better, when specifying dimensions in Fusion you can set it not just to a parameter, but you can use formula based on the parameter, so if you have a side panel that is the overall height of your design but minus the top and bottom panels’ material thickness, you can just write that into the dimension field as a formula and it’ll automatically work out the size for you.
Again, getting into the habit of specifying every number you can as a parameter will pay dividends later, particularly when you come to the final tweaking stage where you want to fiddle with values to check how it impacts your design.
The final tip is to learn to use joints, a feature of Fusion 360 that allows you to define how your components are assembled relative to each other. In the picture of the amp you see here I never specified the positions of the parts using numbers, I just told it that the side panels attach to the base, the lid to the sides, the metal chassis to the lid, and the vacuum tubes to the chassis sockets. It’s really easy and quick to put together that model this way.
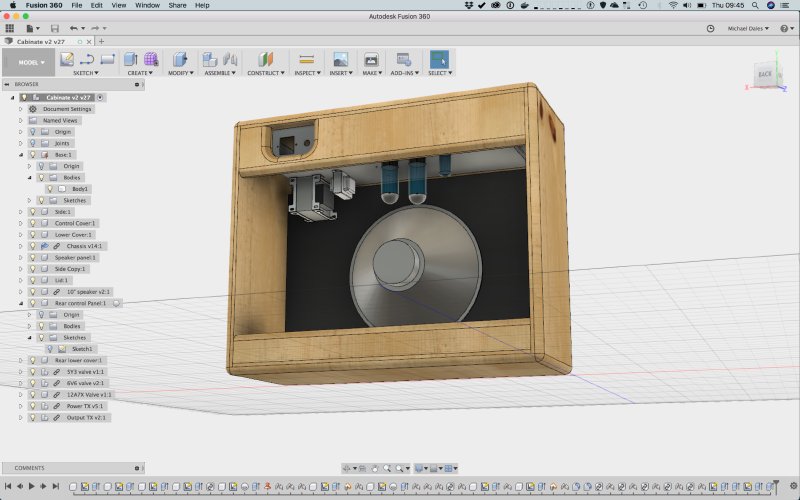
The double whammy of using joints and parameters is that now my design is effectively configurable: I want a bigger speaker, or I want the cabinate a different size, I just change the parameters and the entire design just changes to reflect that. This makes that final design stage where you want to adjust things lots of fun, as you can readily do lots of “what if?” tweaking just by changing the parameters and immediately seeing the results.
To Mr Hillhead, my high school technical drawing teacher, I hope you’re proud that some of what you taught me is still there!
Next up now that I have an amp design I’m happy with is using Fusion to generate the CNC Router controls so that I can cut the panels from a sheet of ply. I really do like the fact that Fusion both for this and 3D printing is an end-to-end tool.