Another week in the shop
2 Dec 2017
Tags: 3d printing, finishing
Once again I’ve had the luxury of being mostly in the shop this week, so again I’ll take this opportunity to write up some of the goings ons.
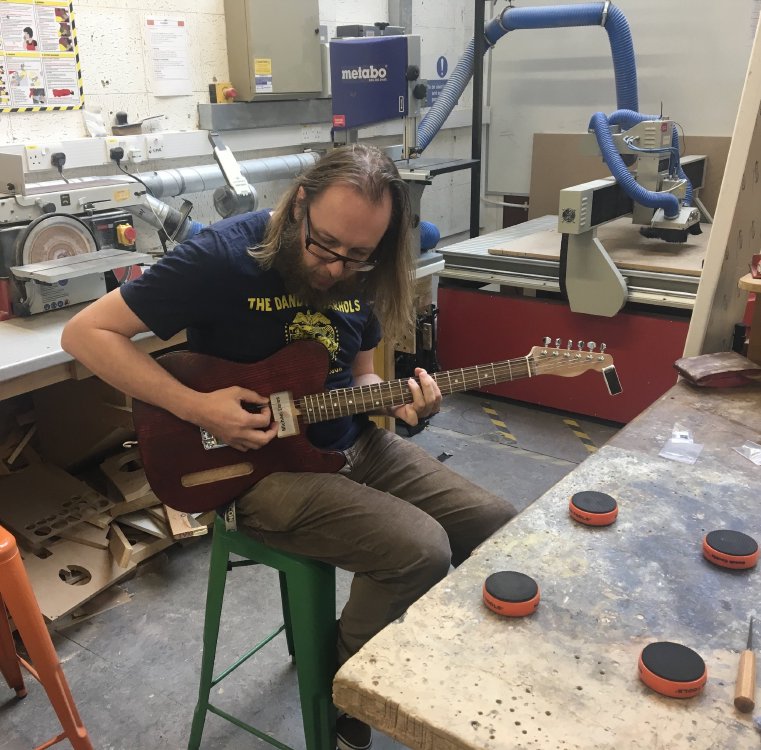
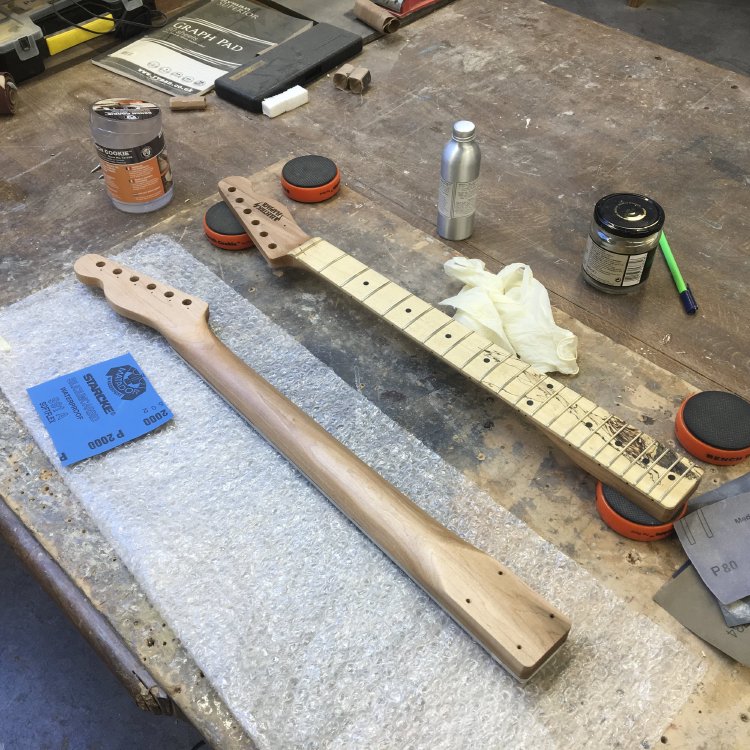
This week guitar wise has been about getting those two necks finished and oiled. Monday was a repeat of the previous monday where I sanded the rosewood neck and finished off the frets so they’re both nicely polished and feel smooth as you run your hand up and down the fretboard. Having then finally got both necks frets happy, I ran them both through setup: stringing both guitars up, checking the action, doing truss rod adjustments and so forth, confusing anyone who came into the workshop room at Makespace to see a bearded hippy playing guitar in there.
This means both necks are now into the stage where I’m oiling them twice a day. For this I’m using the Crimson Guitars finishing oil, which I quite like as a finisher on maple necks. Although people expect maple necks to be lacquered and glossy, I find that half a dozen coats of oil (either the stuff I use or Tru-oil is the other popular choice) leaves the neck with a satin like smooth finish that feels to me much nicer as you slide up and down the neck. Ultimately it’s down to personal preference, and the fact I don’t have a spray booth.
As part of setup, on both guitars I tried out my new nuts that I’ve 3D printed. The nut on a guitar is the bit of bone or bone substitute that sit at the top of the neck near the tuning pegs that guide the strings down the neck. Whilst not the hardest of things to make, I do find shaping and filing the them a bit tedious, and as is probably becoming a running theme in this blog, I like to see if I can remove tedium where possible.
So for fun, and as a way of giving me a project to learn more about designing in 3D and using the different types of 3D printer available to me in Makespace, I designed, prototyped, and produced my own guitar nuts. To do the initial design I used Autodesk Fusion 360, I did a rapid print using an Ultimaker 3D printer to get something I could test fit, iterated through that again, got something I was happy with, and then did a final print using the Form One to get something that is of more production quality than I can get from the Ultimaker. I use the Ultimaker for the test prints as they tak 20 minutes at high resolution vs 90 minutes on the Form One, and have a similar proportional materials cost, with a test print costing 5p on the Ultimaker vs 75p on the Form One. You can see all the stages here:
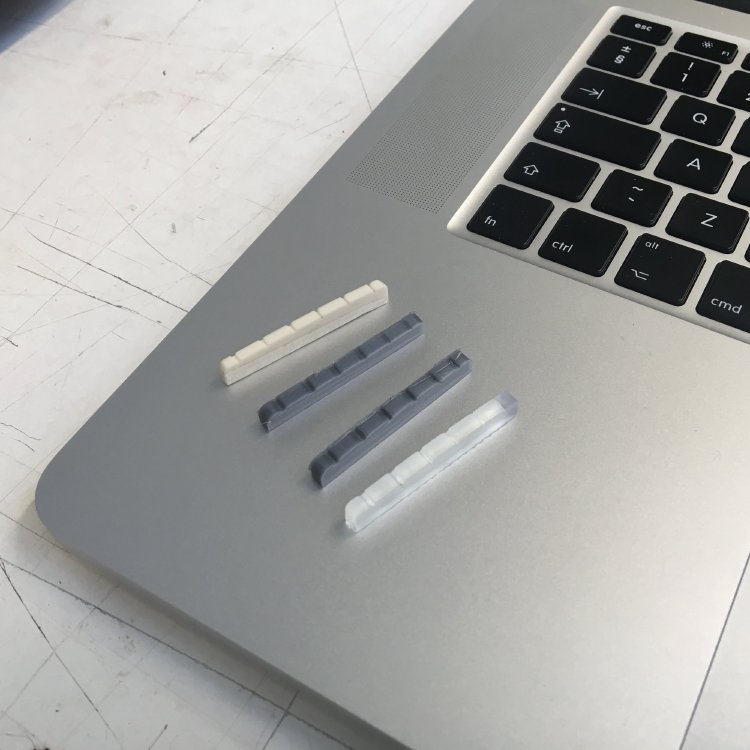
On the left is a bone nut that I filed, then the first prototype which was too flat, the second prototype which had the right radius, and then a final print in resin to get a nicer finish for actually stringing up. Note the string channels are in the design to give me the correct spacing, though I do need to fine tune them with a file, it’s way less work than for the bone nut.
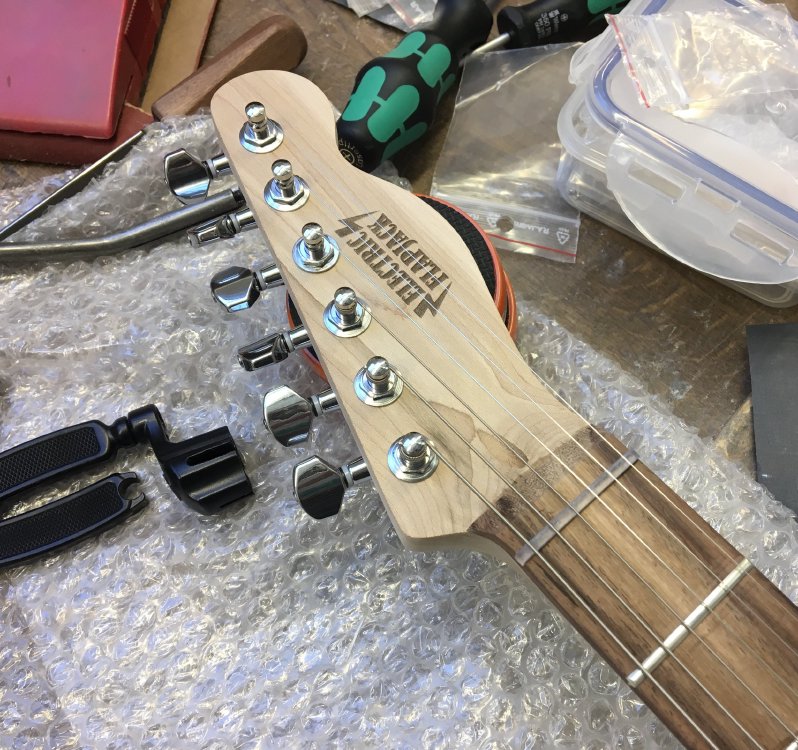
I’ll publish the design files once I’ve got some confidence this actually is sensible. The first resin version I printed was a bit too tall in the end, and the string channels a bit too wide, so I got some buzzing on the lower strings. My main concern with this approach is that although the resin can withstand the stress (at least so far) of being strung up, I’m worried about the strings cutting into the resin over time as the guitar is tuned up and down. So I’m not yet confident to encourage people to take this route, but it’s still an interesting learning experience for me. Here’s a picture of the nut in place: I quite like the clear look as it’s both unusual but not distracting.
The other reason I’ve not published the design files yet is just where to publish them. I could make a public link through Fusion 360, but I can’t see a way to add LICENSE and README type files. I could use Thiniverse, but it’s list of supported files doesn’t include Fusion 360 archives, so I’d have to put up just the STL file, and I’d rather publish the original design as people will need to tweak it to fit their particular neck measurements. I could just use github as I’ve done for software (see below), but I’m not sure that’s a good place for 3D models. If anyone can guide me here, it’d be much appreciated.
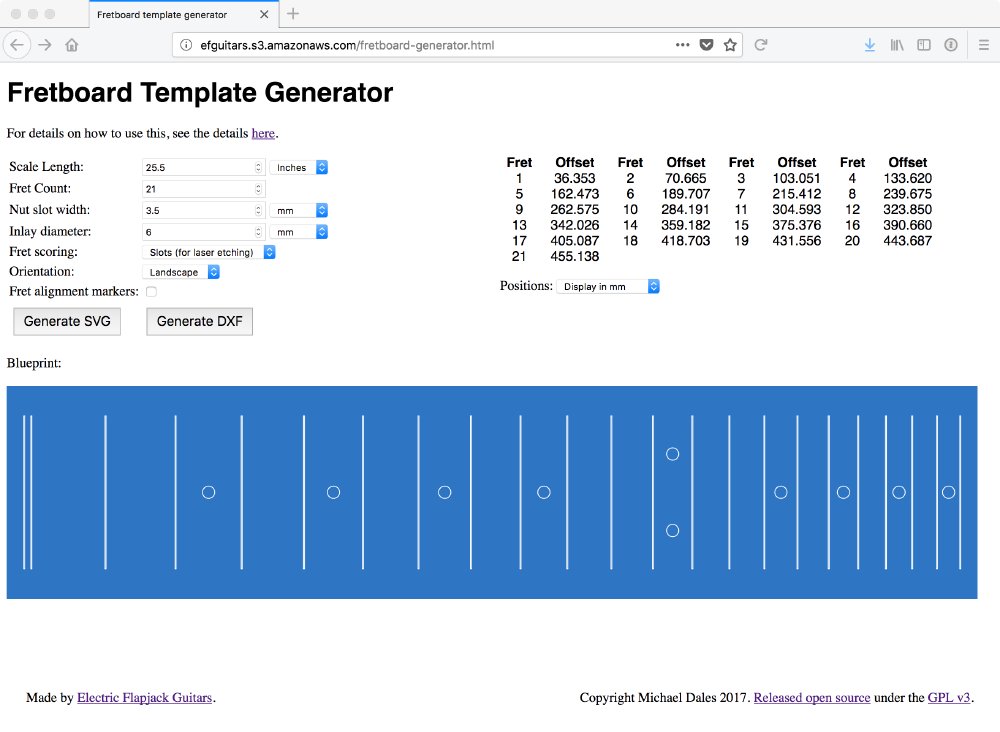
Moving on, I have a tutorial post I want to write about how I use the laser cutters at Makespace to make fretboards, but before I do that I needed a way to ensure other people could readily follow in my footsteps, which will require having a suitably made up fretboard design file. I did this by hand the first time, and I was going to just publish that design file, but I decided it wasn’t that hard to make a tool to generate those files, so I spent a couple of days on that instead.
I made a simple webpage based tool that will generate fretboard design files so you can just enter the details of the neck you want to make, and the page will spit out either an SVG or DXF design file that you can then load into your design tool or CAM software. This was also an excuse to brush off my dusty HTML5 and Javascript which I’ve not had to use in anger for a while. I used MakerJS, which is an open source project from Microsoft that is aimed at making it easy to programatically generate parameterised designs that you can then send to 3D printers, laser cutters and so forth. It’s really quite nice, though lacking in a couple of areas, but if those become an issue then it’s open source so I can just go fix them and contribute it back. My fretboard design generator is also open sourced, and you can play with it here.
Finally, I ordered the parts for my next project piece, a simple 5W 1x10 combo tube amp based on the old Fender Tweed Champ/Princeton circuit. The circuits for these are very simple and well understood, so I thought a good place to learn. However, it’s not just the electronics I want to get back into (I actually did two years of this at Uni, but haven’t touched it in two decades!), I also want to use this to push more into 3D design, modelling the cabinate in Fusion 360 and hopefully generating the tool paths for the CNC router for the panels from that. I imagine that will take a while, so don’t expect this to be done by next week’s post!