First week in the shop of 2018
6 Jan 2018
Happy new year! Looking forward to doing lots more in the shop this year, so let’s get cracking.
I spent a little time earlier in the week getting guitar #4 from hanging on the wall to being an instrument that can be played. The first new thing for me was mounting the soap bar P90 pickups. For those less familiar with pickup designs, P90s are the design Gibson used in the 1940s until the late 1950s when Gibson employee Seth Lover invented the humbucker pickup, the Gibson mainstay ever since. However, for blues and rock the P90 has remained a popular pickup and is still used today.
The P90 typically comes in one of two of packages (referred to as soap bar and dog eared), both of which seemed designed to be clamped straight to the guitar body, rather than a more traditional floating mount that lets you adjust the height of the pickup as you adjust things like strings and bridge heights through the guitar’s life. The soap bar P90 design, which you can see below, is mounted via screws that go through the middle of the pickup and into the guitar body. The problem I hit was how do you mount the pickups so they are adjustable? Typically you want to mount pickups on springs of some sort, as you adjust the screw holding them a sprint compresses/expands to keep the pickup stable at the new position. But for a P90 you’d have to put the springs over some pilot holes, put the pickup on top without the springs falling over, and then put the screws through the pickups and springs into the pilot holes, at the same time as trying to tuck all the wiring out the way neatly. Theoretically possible, but a right royal pain to actually pull off.
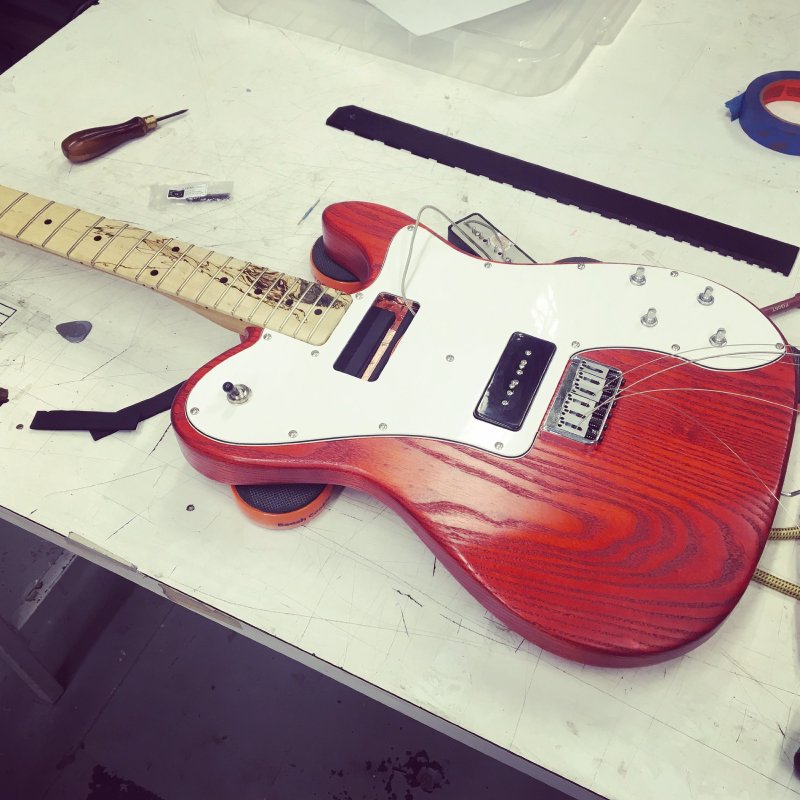
The solution I used in the end was to use several strips of neoprene to create a cushion for the long edges of the bottom of the pickup, leaving a clear space for wiring and the screws. The neoprene will compress nicely as you try and adjust the height by adjusting the screws, and using several thin strips means you can vary the amount of padding readily to suit the maximum height you want. The pickups are now snuggly in place.
The neck of guitar #4, as beautiful as it is with that spalted tamarind fretboard, has been something of a problem. When the fretboard was glued on the maple neck, as the glue set for some reason the entire neck warped into a slight banana shape, leaving the fretboard side concaved. At this point, I could have just scrapped it and started again, but as a learning exercise I went through seeing how much I could fix it, and it never hurts to get more practice at fretting and all the other bits of neck finishing.
The first step I took was when I sanded the radius into the fretboard I sanded it more at either end to level the freboard part somewhat. Between that and truss rod adjustments I could get it mostly level. Having the fretboard roughly level, I then still had the problem that the overall shape is still curved, so the tip of the headstock is higher than it otherwise would be. On it’s own this might not have been a problem, but it was compounded by my trying out locking tuners on this neck, where the string isn’t wound wound multiple times around the peg, it just is clamped at the top of the peg, so sits quite high; which meant the strings didn’t sit firmly in the nut when I strung the guitar up. The solution here was to add a second string tree for the middle strings to pull them down (and having multiple string trees isn’t unheard of anyway). The final recovery was that if I just screwed the neck into the body as is, although I’d straighted the middle, the bit where it joined was still slightly curved, so I had to put a small shim of wood at the back of the neck pocket to get the neck angled level.
All in, it’s recovered to a point where it’s quite playable now, but clearly not an ideal neck, and not something I’d be happy providing to a customer (unless perhaps you’re Jack White, who said he likes guitars for their quirks rather than the absense of quirks :). But, I gained a lot of experience going through the process, and I’d encourage others trying to build guitars (or indeed other things) not to look at something going wrong as the end, but rather turn it into an opportunity to experiment and learn. Even if you can’t save the thing you’re working on, you can still get value out of working with it.
The other main progress this week has been starting to take my amp design out of the virtual world of Fusion 360, and bring it into the physical domain.
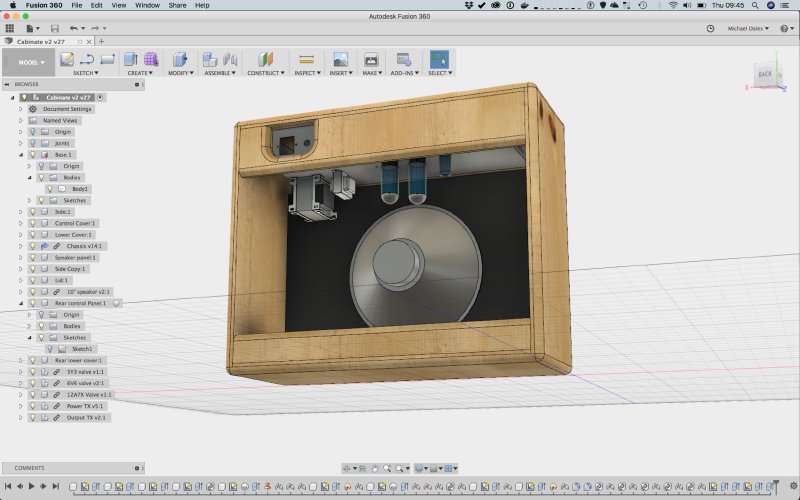
I sound like a broken record here, but one of the things I really love about Fusion 360 is the fact it does an entire end to end workflow in a single tool. Having completed the overall design, I then took the components that make the cabinate and created a new layout in the same design where I laid them out flat within an area defined by a bit of material I expect to cut them from (in this case a 1220x610x18 bit of MDF for my first trial run) I can do this using a copy of each panel that is linked to the original, so that if I tweak my amp design later, my production layout will automatically reflect those changes.
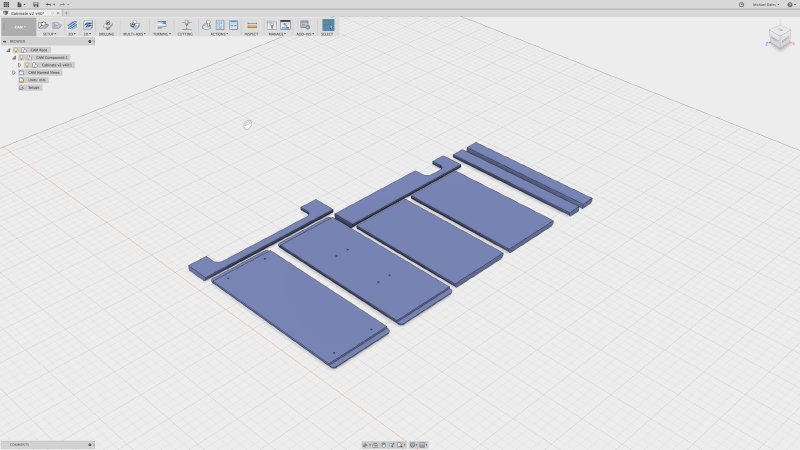
Having done the layout (including iteratting it a few times based on trying to minimise material usage and physical contraints of the machines I have access to), I can then create CAM tool paths for a CNC Router, such as the one we have at Makespace, and work out all the cutting actions necessary to actually cut the wood. Again, this is all linked, so if say I go back and change the radius of the rounding of the edges, the tool paths just need a one click to regenerate with the new values. Having done that I could then export the design ready for cutting, which I spent Thursday afternoon doing.
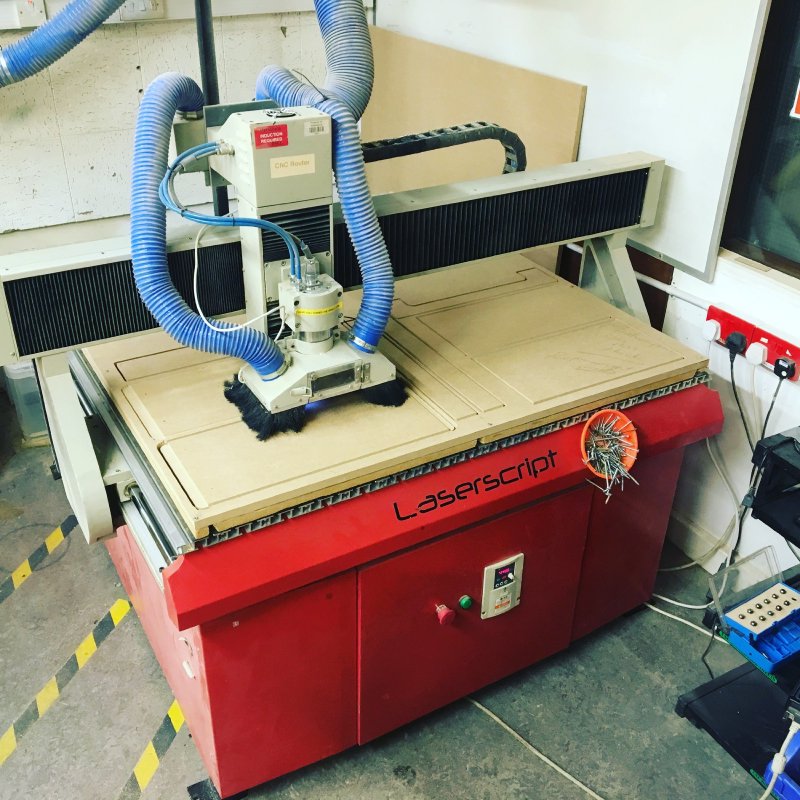
A lot of people assume using a CNC router is a lazy way of doing things, but don’t think that because the machine is doing the cutting I can just forget about it. Firstly as this CNC router isn’t the most advanced, I need to keep cleaning up dust from the grooves it makes etc., so I spend the better part of the three hour cut run chasing the head with a hoover. I also need to watch for where I’ve made mistakes in the toolpath generation: at one point in this run I spotted it starting to do the wrong thing and only because I was watching it was I able to abort that stage, generate some new tool paths and set it going again. Had I not been watching it, I’d have had to start again with new material. It’s also loud and dusty, so by the end of it all you’re quite tired. I don’t expect sympathy for this, as it is still easier than sawing by hand, but for those looking at this and thinking it’s a trivial task, it is still quite involved.
Having cut the panels and checked they all fit as expected, both with themselves and with the metal chassis, they’re now gluing in the workshop, so hopefully a box will be ready next week and I can move on to the electronics.