A week in the shop
20 Nov 2018
This week marks the one year anniversary of my keeping week notes! I was hoping to do something special to mark the occasion, but I’m feeling under the weather right now, so I’ll defer that to another day, and just do a quick (haha) brain dump of the past week. Hopefully more interesting notes will resume when my brain feels less like cotton wool :)
At the end of last week I started staining the body of The Clydesdale offset, and this week I finished it, and now it awaits oiling, which I’ll do at the same time as the neck.
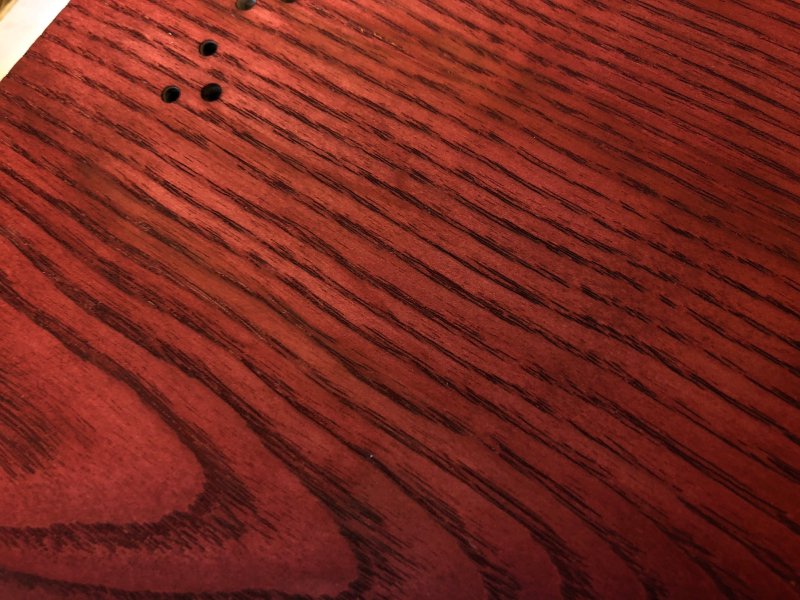
The above is after 3 or 4 coats of stain, and as ever the ash has done a lovely job of soaking up the stain more darkly along the grain, giving it a nice striped effect.
One thing I finally changed on this guitar was how I applied the the stain to make it easier to apply without spending lots of time buffing out stripes from where I’d applied it. When I first watched tutorial videos on applying stain the advice was, with the guitar body facing you so the neck pocket is at the top, start in the middle and work left and right to the edges. The start in the middle bit makes sense, as it stops you creating dribbles down the side which you might do if you apply the stain edge to edge. The left and right bit was meant to make any lines created as you work up the body less obvious, but that wasn’t working for me, I’d end up with bits I’d have to work to buff out, and I wondered what I was doing wrong. It was only now I realise that on the tutorial I watched they had a flame maple cap with wood grain going in that direction, which hides any brush direction marks, and for the ash body I’m using to get the same benefit I need to brush up and down. Basically you need to just follow the grain as you apply the stain.
It’s funny how because there was one obvious truth in the lesson I accepted the rest as gospel without thinking whether it applied to what I was doing. It’s always worth asking why!
I continued the fretwork on the neck for The Clydesdale, getting mostly done but I ran out of 240 grit sandpaper, so it got paused until the nice Amazon delivery person arrives at Makespace with some more.
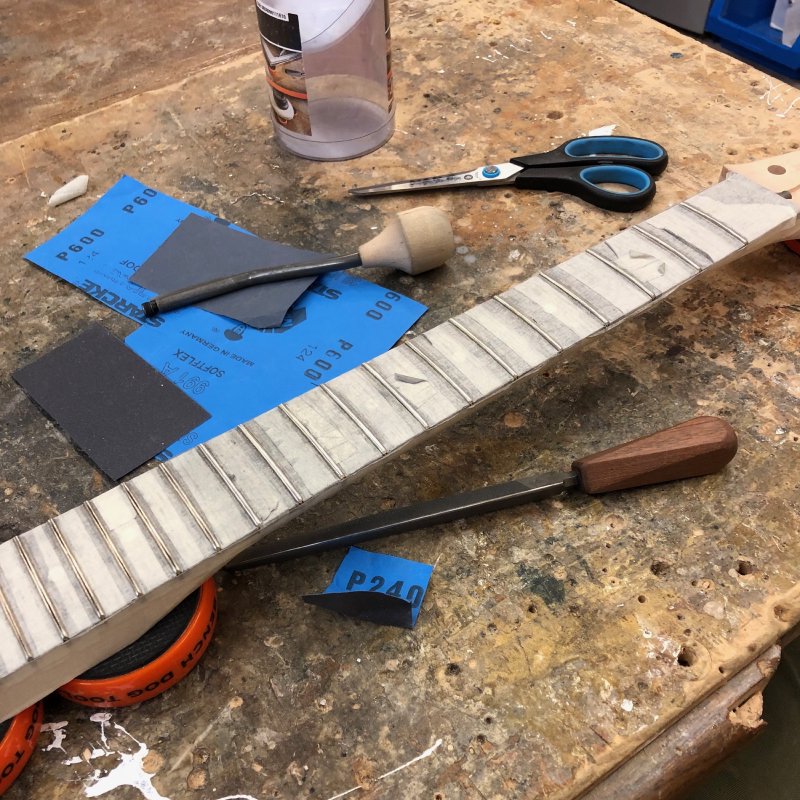
I definitely can feel I’m starting to improve on this process in terms of technique, I just hope at some point I start improving in terms of time it takes me to do a fret job, as it still takes me a couple of days. Part of the problem is managing my attention span - I know that after an hour on any given task my attention starts to wander and it’s best to stop there otherwise I’ll do a shoddy job and need to redo that bit later. Hopefully as my technique improves it’ll become more mechanical.
I spent some time helping improve things at Makespace. Makespace got a little more room earlier this year, which has finally been fitted out for power etc., and thus we have now moved all the metal work machines into the new space, meaning the existing workshop is now dedicated to woodwork. The plan is to make more working space (i.e., bigger workbenches), but it also let us move the CNC Router into a better place, and as a major user of that bit of kit I volunteered to help move it.
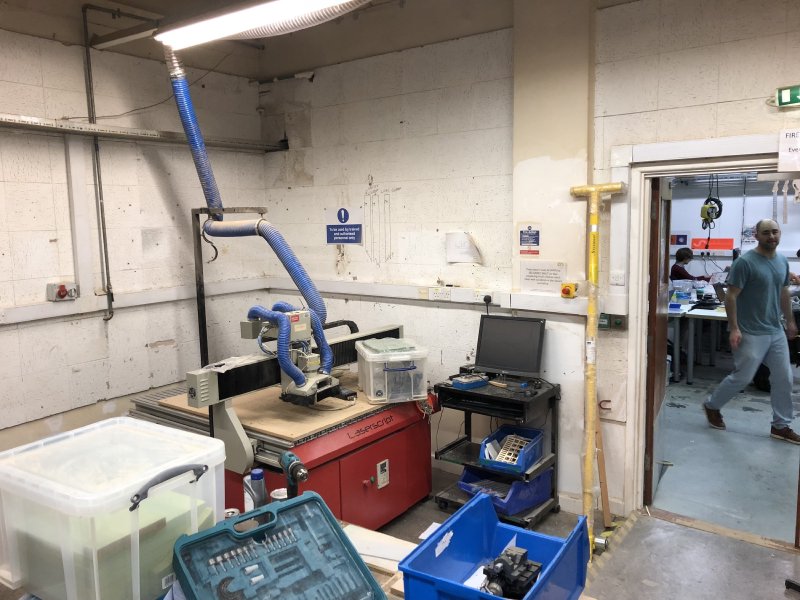
In addition to moving it, with the help of one of the directors, we fitted a new spindle motor to it, which takes us from having a maximum router bit shank size of 1/4” to 1/2”. It doesn’t make a huge difference to a lot of jobs, but it does mean that for facing off material I can go from a 1” bit to a 2” bit, which will halve the time it takes me to face off material, which is particularly useful given Makespace doesn’t yet have a thicknesser, and doing multiple facing off passes is a way I often work around this.
The final bit of Makespace admin was I’m now a trainer on the CNC Router, so I’ve started bringing more people into the fold. This is good, as CNC Routing is a nice way to make a lot of things, but at the same time I’m trying to back it up with more training and general tutelage on the hand held plunge router we have, as I think a lot of people could be using that rather than the more visually obvious CNC machine. This is also to make me learn more about that tool, as I’m convinced I could be building more things quicker if I got used to not relying on the CNC Router for everything.
The second Fusion 360 show and tell night I’ve organised at Makespace was quite a success also, we got over 20 people attending, and 3 great talks and lots of discussion.
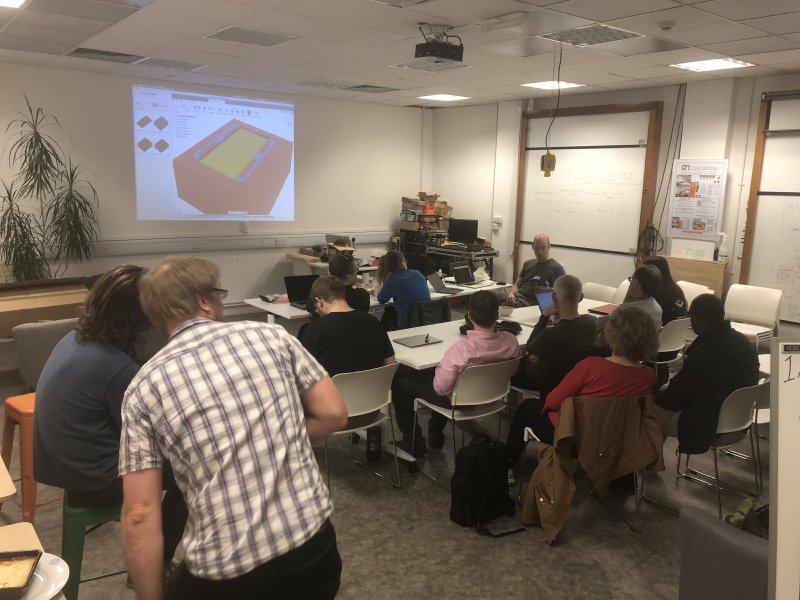
Again, this is another thing I’ve organised mostly as way for me to learn more by creating a forum for people to share the great stuff they’ve been building, and the fact that lots of other Makespace members learn more is a wonderful coincidence :)
I did some trial coats of using grain filler on some off cut ash, something I’ve never used before. The plain is to grain fill the body for the recovery offset I’m building and then paint it rather than stain and oil it as I’d normally do. The main lesson here is that the filler I have works, but it’s way too pungent to use in the Makespace workshop due to lack of adequate ventilation there. I suspect I’ll need to find a way to do it outside of Makespace and then a well ventilated place for it to dry.
No pictures for this as given how pungent it was I didn’t want to delay getting it done to take pictures :) But basically the filler I’m using comes as a goo which I applied using a bunch of credit card shaped blanks I bought to scrape it into the grain. I then left it 24 hours to dry and sanded it back and you can see it’s filled the grain nicely.
In some fun guitar playing I got myself a cheap tremolo pedal, the Mooer Trelicopter. I ended up with this by being tempted to try and make a Leslie Speaker Cabinet at some point, to looking at digital pedals that do the same thing, and realising I didn’t know what I’d do with such a sound, and then deciding the closest thing I could find that was cheap and used by people who’s tone I liked was the Trelicopter pedal. It’s been fun having something else on my board that adds a little movement to the sound I make (along side the reverb pedal I have). I mostly play at home alone, so effects like this fill out your sound and give it more texture. To try and demonstrate this I did a quick video of layering different effects to get a sound when playing Gimmie Shelter by the Stones:
I’d held off getting a tremolo pedal for a while as I didn’t have a specific use for it, but it’s definitely a fun pedal to have to hand for the odd specific song like this and in general as a texture thing, so I happily recommend the Trelicopter if you want to give it a go and see where inspiration takes you.
It’s been interesting also rebuilding my board, as I’m definitely at the stage where I have enough pedals that even with them all off, the fact that my signal is going through all these pedals is changing the sound of my guitar, and I have to compensate for that in how I set my amp up and in the tone control the reverb pedal which is effectively always on. I can see now why people move to switcher based systems which take pedals out the signal path when not in use.
It also reminded me again how unhappy I am with the design of the pedal board I have, which is very nice, but just doesn’t let me route cables in a way that seems to make sense with the pedals I have. At some point I need to design my own :)