A brief interlude in the shop
Published 6 Nov 2018
I managed a couple of days in the workshop this last week, as pressure on contracting work let up briefly, however having just limited time in the workshop is highlighting that just getting a day in the workshop doesn’t mean I get a day to work the workshop, and I need to better manage my time whilst there. I do most of my guitar building in Makespace, which is a community workshop, and in general that community aspect is a wonderful thing. But being in that community means I have certain responsibilities and commitments to help the workshop run smoothly, and whilst none of these are particularly onerous, they do break up the day in a way that makes it hard to do long jobs if I’m not careful. For example, this Friday I went in and I had one client meeting to squeeze in for half an hour in the morning and a training session on workshop kit to run in the afternoon for a couple of hours, this fragmented the day enough that I didn’t get time to do the fretwork I’d intended to do that day, which means things spill into next week or consume my weekend.
In computing there’s a term called “context switch overhead”, which means that you can’t just swap from doing task A to task B without some level of wasted time as you pack away task A and get started for task B, which is just as important to humans as it is for computers. Even just someone coming and asking you a question when you’re concentrating can cause you to have to do two context switches and spoil your flow, which is why in the community workshop we have a orange lanyard system as a way that politely says “do not disturb”. Whilst I like to try and help people at Makespace as much as I can, I suspect at times I should learn to pick up that orange lanyard.
Most of my time in the workshop has been on the next for The Clydesdale, the first of my commissioned offsets I’m building. The last time I was in the workshop I managed to get the neck carved and sanded, but I wasn’t quite happy with the feel in my hand, so I took a second pass at it and now it feels just as I want. The birds eye maple is also coming up pretty nice: at times I think I prefer a simpler look to maple, but this one I’m really pleased with now.
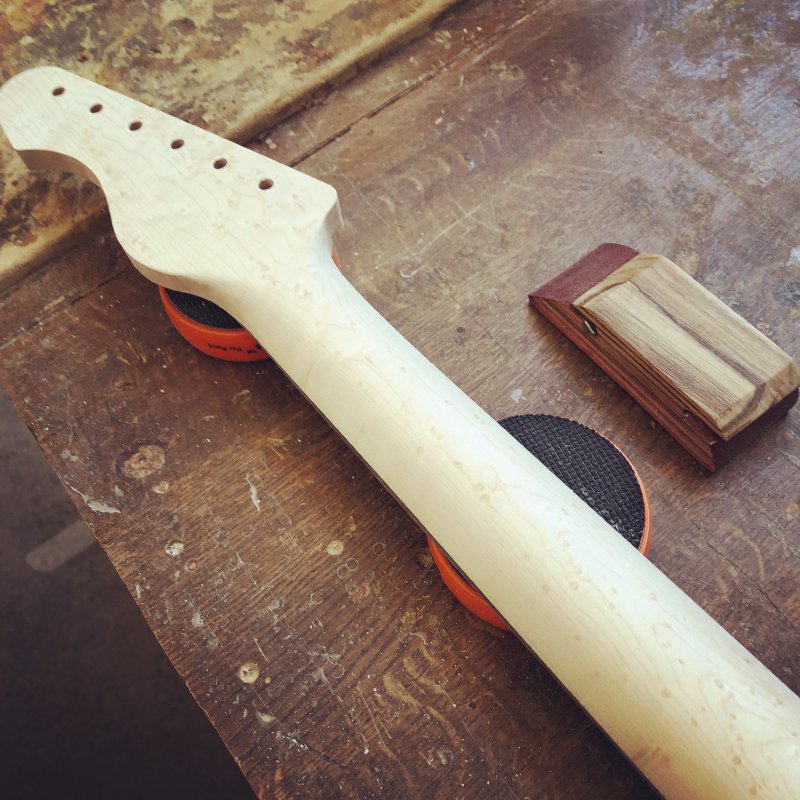
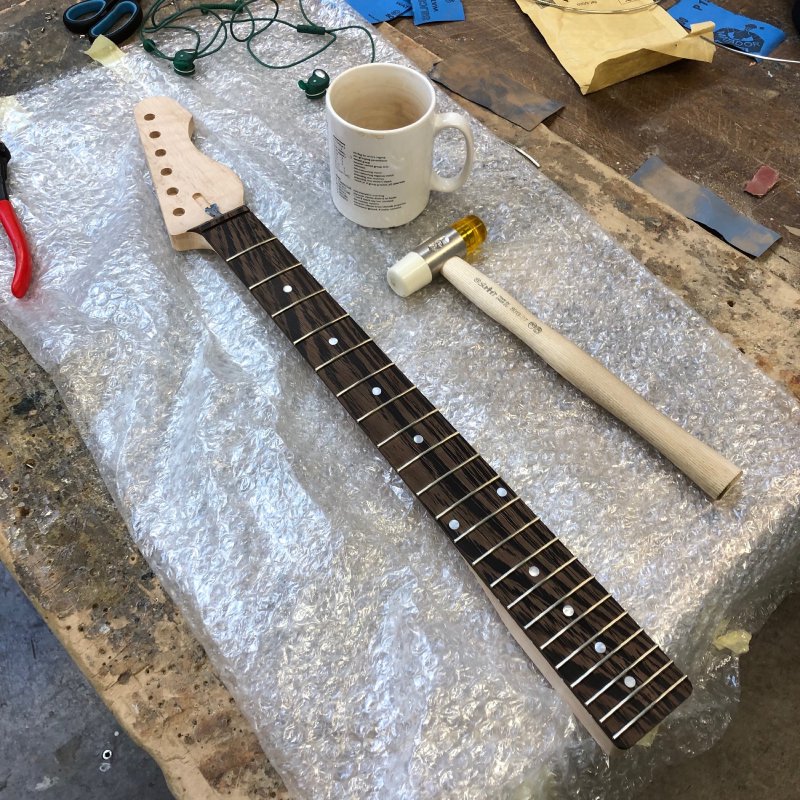
With the neck carve done I did a final pass on the fretboard to sand it smooth and ensure all the slots were to the correct level ready for the frets to go on.

Fretting is appropriately named, given it is one of the more stressful parts of a build, at least for a new builder like me. This is my sixth fret job so far, and I’ve not yet found my routine. It’s in part here where doing guitars at low volumes is not good, as by the time the next one comes around you have to relearn all that you did last time. I actually did my 5th fret job a couple of months ago on the neck for the recovery offset, but that feels like an age ago. Perhaps I should just make a batch of necks at some point in the near future just to do it repeatedly and build up some sort of muscle memory for the process.
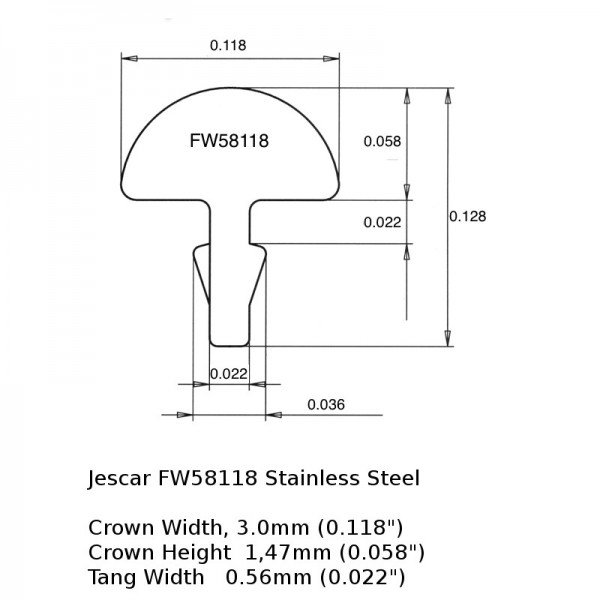
Frets in a guitar, much to most people’s surprise comes as a length of wire, which you cut into short strips. The cross section of the wire has a sort of mushroom shape: there’s the bit you normally see on top of the fretboard, called the crown, which has a half circle shape, and then a bit sticking down, called the tang, which will go into the slot on the fretboard. The tang has some teeth on it to help it grip in the slot. Here’s a random picture of some fretwire from the people I buy mine from to help make it more clear:
Depending on the width of your slot vs the width of the tang you may or may not need to use glue to help the fret stay home. My aim is to avoid using glue if I can, as using glue will make life harder for the person who in future years needs to replace the frets as they wear down. But it’s not a hard rule: when working with wood you can’t be sure of how it’s going to behave and as such hard rules need to be more flexible, so if necessary I will use a little glue to make sure the frets stay home, but only if required.
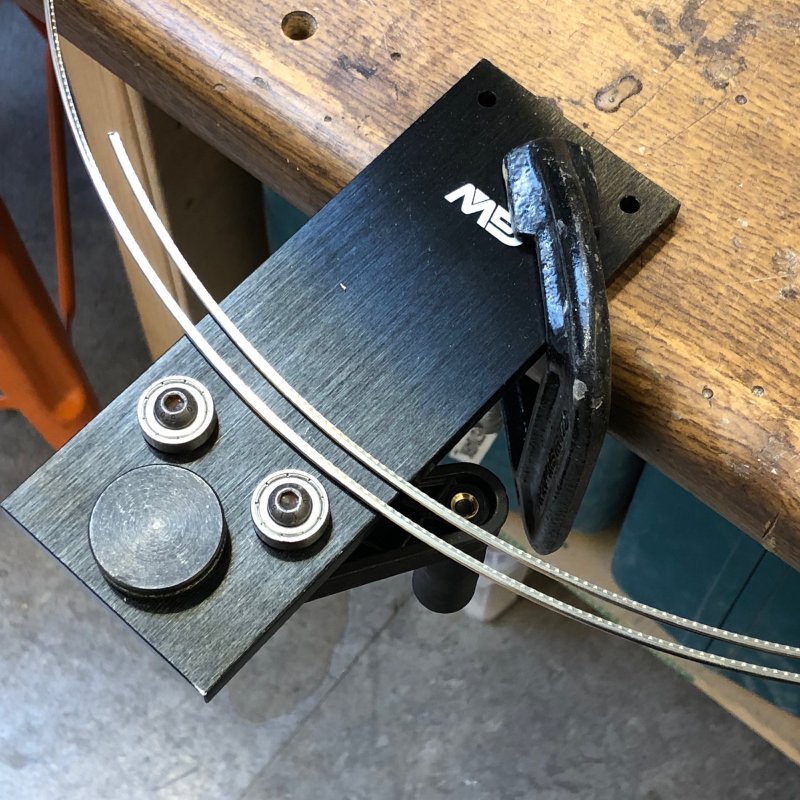
Before you cut the fret wire into strips, you want to put a slight over-radius on it. Your fretboard itself isn’t flat, the ones I make have a 9.5” radius on them for instance, and to make it easier for the frets to be hammered in without jumping out you want to give your fret wire a radius that is slightly tighter than the board. If you have it with a bigger radius then as you hit it in at one end then the other end will see-saw out and it’ll be much harder to get home. If you over radius it slightly you can get the two sides home before securing the middle of the fret, which makes things easier (note easier, not easy :). To put the radius onto the fret wire you need one of these fret bending tools:
The main thing that I struggled with this time was I over bent the fret wire when I did the previous fret job. All my fretboards at the moment are the same 9.5” radius, so to save time and storage space, I did the radiusing of the fret wire in a single go. I didn’t struggle with that fret job much, but there the fretboard was made of maple rather than wenge, and maple is a much easier wood to work with. I’m really growing to dislike wenge as a wood to work with, due to the fact thet the density of the two colours in it are very different, so you have some very hard bits of wood and very soft bits of wood mixed in. When cutting the fret slots this can cause your saw to jump out the slot if you’re not careful (which risks scratching the fretboard surface), and here when putting the frets in you have bits which accept the fret readily and bits that don’t want to take it at all.
As I mentioned, when I did the maple fretboard last time, the fact I’d made the fret over-radiused by quite a bit didn’t matter too much, as the wood made the fret insertion relatively easy anyway. But here where the darker bits of wenge are much less forgiving it was taking much more work to get the frets home anyway, and the fact I put in more curve to defeat than I needed just compounded the issue. In the end I just threw out the already radiuses fretwire and got a new batch (which luckily I had to hand) and made it only just more than the fretboard radius.
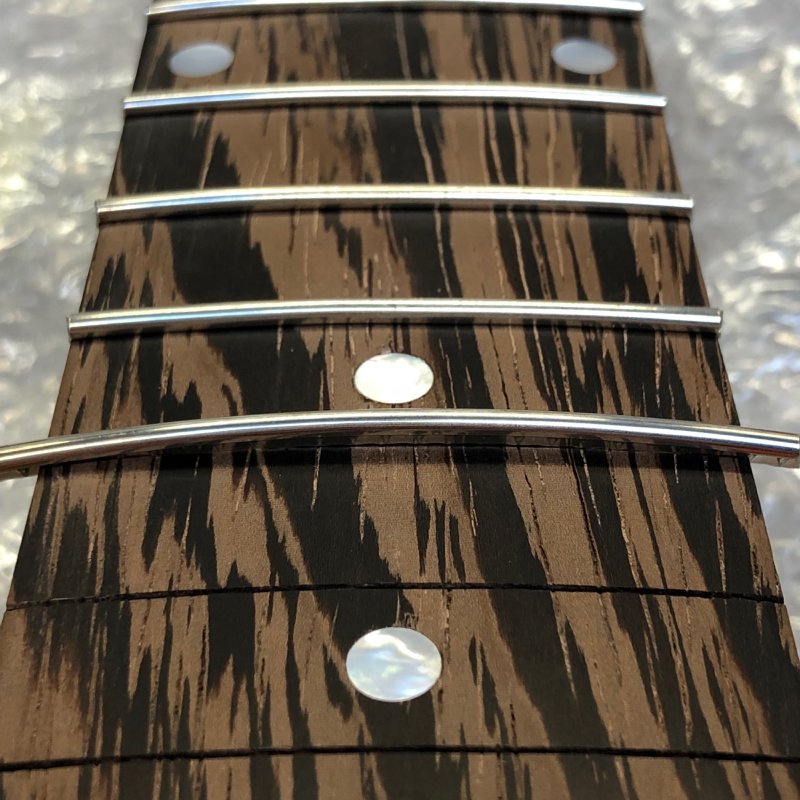
Here you can see that it’s just in at both sides and only just out of the slot in the middle. Before I had a millimetre or so of daylight there.
Once I’d made the switch, things progressed more smoothly, though I’d not say easy, but certainly easier, and after about three hours I had all the frets home:
One other tip I’d pass on here - this time I trimmed the edges as I went along rather than doing them all at the end, and that is worth doing. If you do them all at the end it’s hard to get your cutters in on the more closely spaced frets, and it also makes it easier to do the final tapping home of the frets on teh edge without risk of hitting the extruded bit and bending it.
I still unfortunately haven’t finished here. One of the frets in the middle where the wood is softer on the left side isn’t home right - down to the fact it was one of the overly radiused set and the soft wood isn’t gripping it, so I’m going to remove that fret and put in a new one, and potentially add glue to secure it properly.
Like I say, you can see why it’s called fret work.
The other thing I did was prep the recovery offset’s body for the first coat of grain filler, sanding it up to 400 grit all over. I ran out of time to actually apply any filler last week, but hopefully I’ll get time in the near future to do that. I should actually start doing the stain on The Clydesdale too, which is going to be a dark deep red similar to The Red Rocker tele I made last year.