A week in the shop
Published 3 Dec 2018
At the end of last week I’d finished levelling and polishing the frets on The Clydesdale offset, leaving me to “just” etch the headstock and then oil the neck.
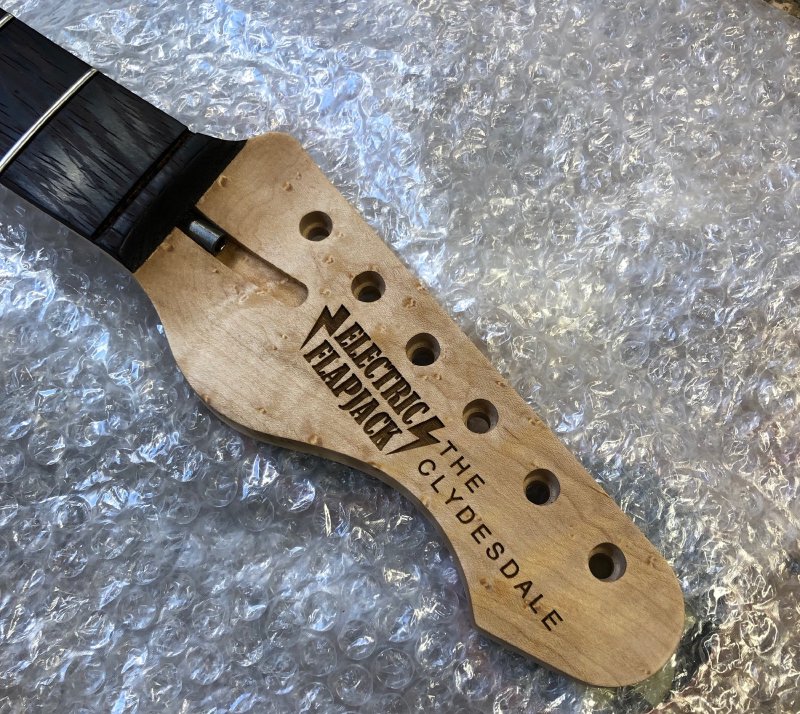
For the headstock rather than just have the normal Electric Flapjack logo, this guitar is also having its name etched their. When the customer ordered this guitar I’d told him I’d be happy to laser etch something custom on the headstock (or body), and when he decided to name the guitar “The Clydesdale” it seemed a natural addition to the headstock (the name stems from the customer’s hometown of Glasgow being on the River Clyde, and the Clydesdale is a type of horse, fitting for a guitar derived from a Fender Mustang).
I sent the customer some mock ups of how it might look with various combinations, and he came back with a rough idea of what he wanted along these lines:
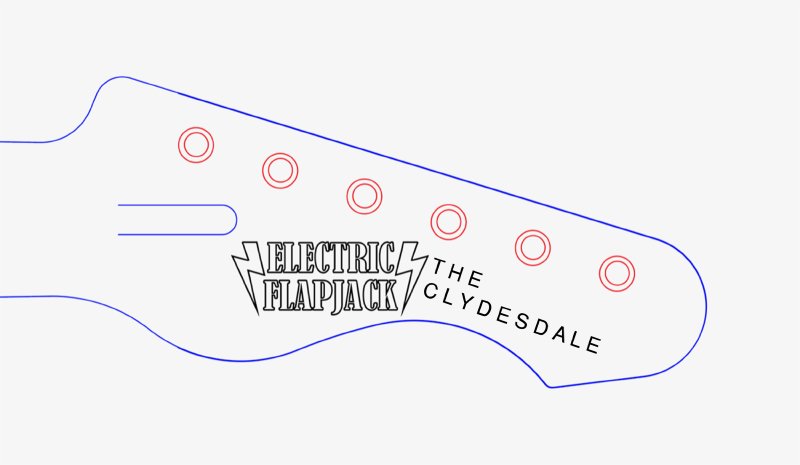
Nothing too complicated, but it had the one downside that it doesn’t leave much room for a string tree. But rather than change the customer’s contribution, I simply made a tweak to move the Electric Flapjack logo around to match the name text which frees up some space around the nut end of the headstock for a string tree. Having done that I then sent a rendering of what that might look like back to the customer for approval: once the etching is done that’s it, so I just wanted to be sure he was happy with how it would all look.
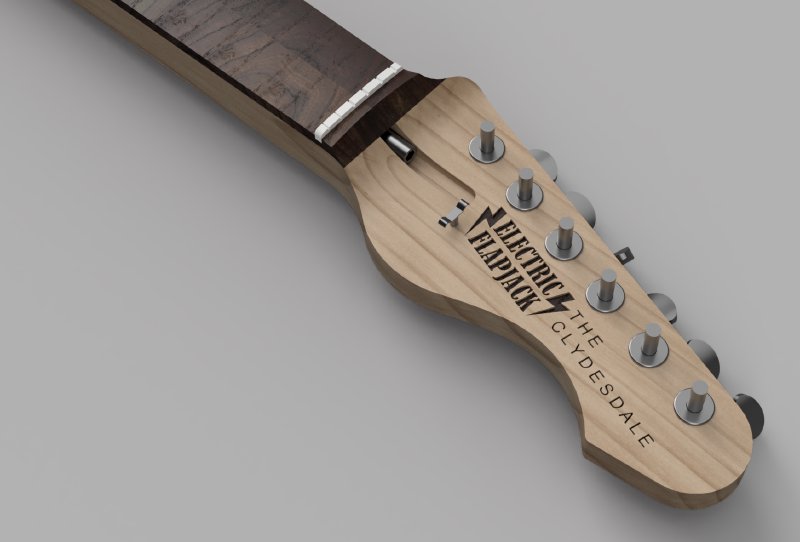
He was indeed happy with this, so then I went and did the scary bit and set about etching the design into the headstock. I also had the neck from the recovery offset that needed a logo adding to it’s headstock, so I decided to do the same angled Electric Flapjack logo on that one, which gave me an excuse to double check alignment before doing it on the customer’s neck.
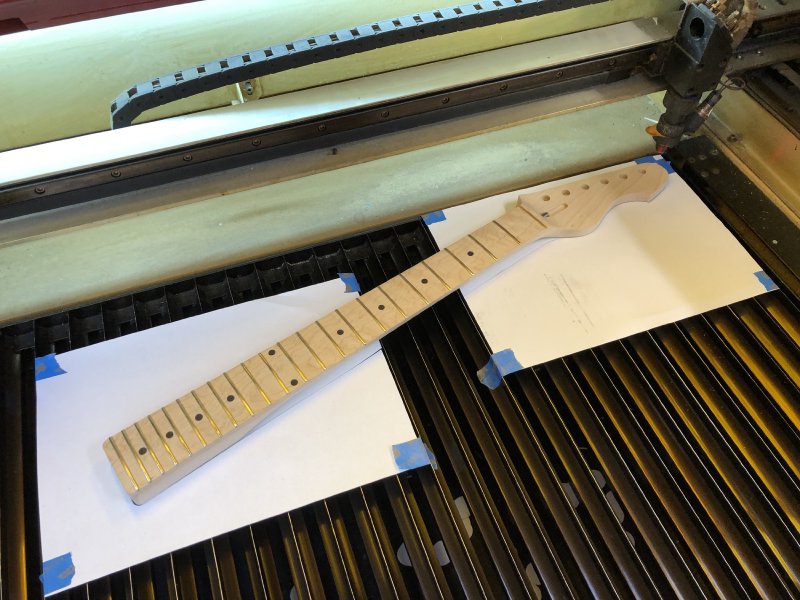
As ever, each bit of wood is different, and the strength of the laser cutters over time will vary, when I cut the neck I made sure to save the offcuts for this moment. Using these offcuts lets me calibrate the design and check how it’ll look before committing (measure, measure, cut!). One thing I realised on my test cuts was that the logo didn’t quite look right when rendered at an angle relative to the laser bed, but looked nicer when the laser cutter’s natural motion aligned with the text. Normally I’d just lay the neck so it matched the direction of the cutter, but given the results seemed slightly less good when text is drawn at an angle, I simply rotated everything around and put the neck on the bed at an angle instead.
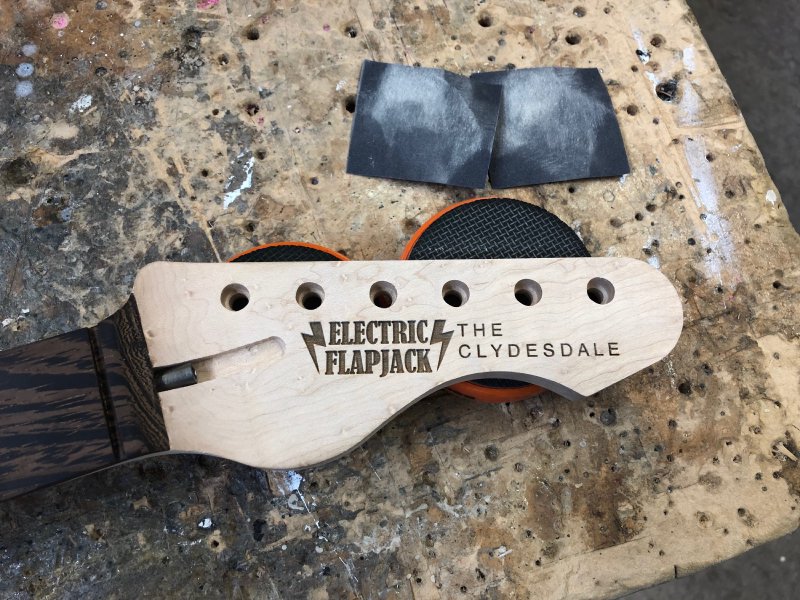
Once I was happy with both these things, there was a nervous few minutes, and voila, one nicely etched headstock.
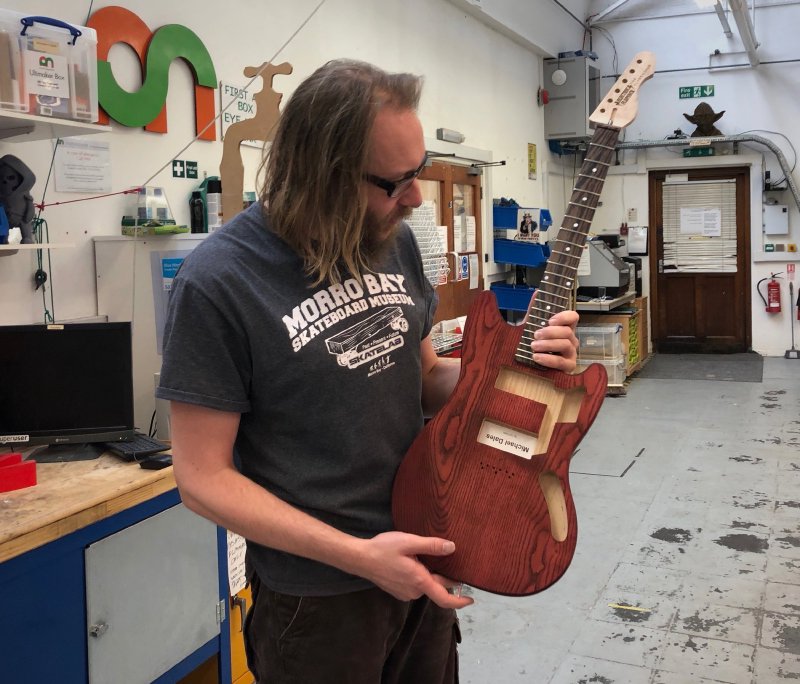
The etching of the headstock marked the end of physical production for The Clydesdale (modulo drill holes for later assembly). The body had already had its coats of crimson stain the week before, so it was starting to look like a guitar ready for finishing.
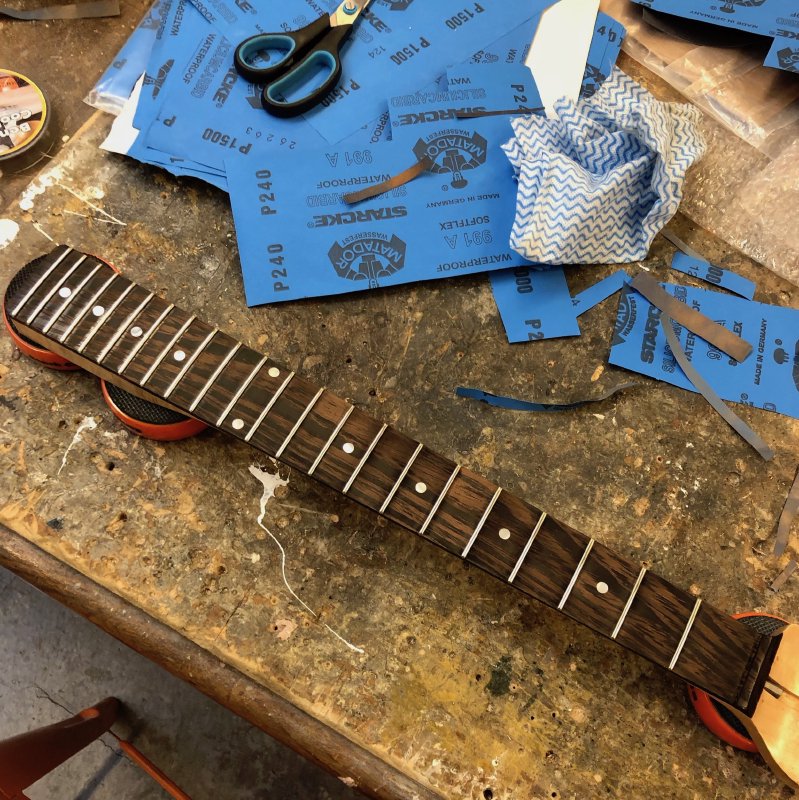
As I discovered when making the prototype offset, which also had a wenge neck, wenge works best when finished more like maple (oiled for coating) compared to rosewood (oiled for absorption): if you apply a fingerboard oil as you would with rosewood you lose all the two tone colour of the wenge.
The process for oiling is simple enough: apply a coat all over each part, then you go back after a few minutes and wipe off any excess that the wood hasn’t sucked in, leave it to dry a day, and then give it a quick rub down with a high grit sandpaper (I’m using 2000 grit for this) to get a nice smooth finish before applying again.
The maple neck has blown me away now that oil has been applied. Before oiling it was nice, but a fairly flat looking bit of wood; after oiling the wood came to life with a lot of depth depending on how the light plays in it. I posted a video to instagram (which I can’t embed here, but you can go see it here), but for comparison compare the headstock here to the photo above.
It has so much more definition now, and the light reflection move beautifully as you move around the neck relative to the light source.
Whilst I was bowled over by the maple, once again the wenge provide to be my nemesis. The first couple of coats went on okay, but the third coat seemed to dry with blotches on it, despite my wiping away the excess. It did look like some had seeped out from under the frets, or it could have come out of the natural figuring in the wood. Whatever the cause, it wasn’t a finish I found acceptable. Thus, my Sunday was lost to sanding down the entire fretboard again (between the now installed frets) to get it back to an even state all over, followed by working my way back up through the sandpaper grits to get a smooth finish once more, re-polishing the frets as they’d been inevitably scuffed during the sanding process, and then finally another coat of oil applied to the fretboard.
This time I was very fastidious about removing excess oil, and checking back after a short while to remove any that had seeped out from behind the frets (which it had done again, but this time I caught it). The first wenge fretboard wasn’t so much trouble, so I’m not sure why this one has played up so, but it is just adding to my general acceptance that wenge is a better wood than I am a woodworker, and for now I need to find alternatives for future builds.
I’m going to be taking a short trip to Rotterdam this week (my other half is at a conference there, and having never been before I’m going to tag along), so my aim is to get the oil finished before then so it can have a week to cure before I move on to assembly.
Last week I talked a bit about my pedalboard design, and how I was looking for quotes for fabrication of the metal parts. I’ve had one quote back, one request for more detailed drawings (which I generated and sent - I knew that O-Grade in Technical Drawing would come in handy one day…), and one not respond. The quote I had back was acceptable, but that place doesn’t do painting/powder coating, so I’m just trying to get one more quote from somewhere that does before I pull the trigger.
In the mean time I laser cut a plywood mock up of the top surface to check that my modelling of the pedals in CAD matched reality:
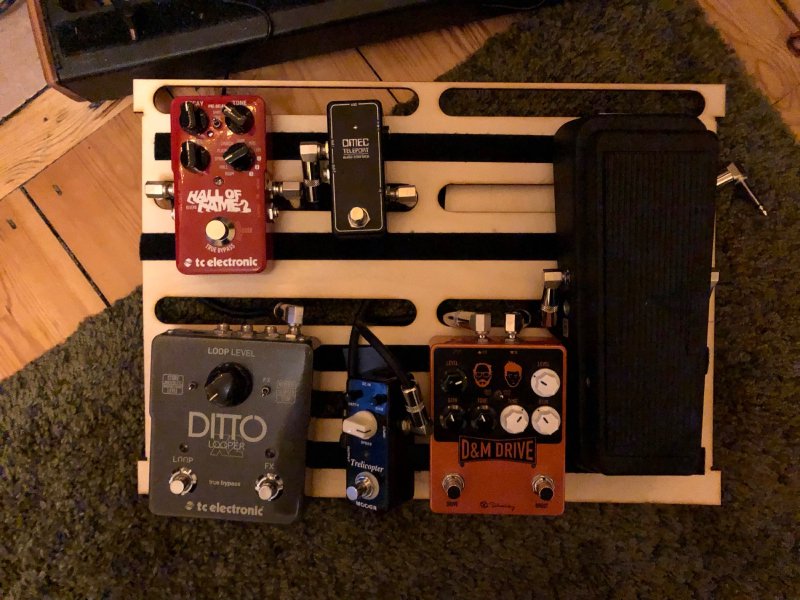
Turns out 3mm ply is quite flexible when you put pedals on it like this, so not an ideal test material, but it was enough to convince me that my tweaked design makes cable routing much easier than on my current board.
Final bit for the week was I learned how to turn wood on a lathe, which was interesting (and fun). Wood turning is much more free form than metal turning was (at least on the kit that Makespace has), being more hands on material, so it’s clearly a skill to be mastered. But if anyone needs plectrum bowls, let me know: I’m sure that’ll be the hot product for 2019 ;)