A week in the shop
18 Feb 2018
Week notes time again: some more work on the amp, a new programmable pedal arrives, and exciting news on new builds!
Last week I said I hoped to make more progress on the amp electronics, and I managed to move that forward, though I did hit a small snag that meant I didn’t finish soldering it this week.
The first step this week was to review my circuit drawing, which maps out all the electronic components and how they connect, and verify I had everything I needed. I did this once before and it led to me realising I had the wrong type of transformer. This time I went through and managed to connect everything up as expected.
Having convinced myself that I had everything I needed, the next stage was to make the turret board. In modern electronics you’d have a PCB, but old valve amplifiers everything is wired on small metal turrets mounter in a slab of insulating material. I’m always looking for ways to do things I’ve not tried before, so I decided to try making a turret board by hand.
When drawing the circuit on paper I did so to try and arrange things in a logical way so that it would be easy to lay out when it came to board construction: as few overlapping bits as possible, ensuring logical groupings of components so that the wiring off the board to other parts would be simple, etc. To make the turret board layout I fired up Adobe Illustrator, created a rectangle that matched the size of my bit of insulating board, marked on where the mount holes needed to be for when mounting it to the chassis, and the started to work out where my turrets would go.
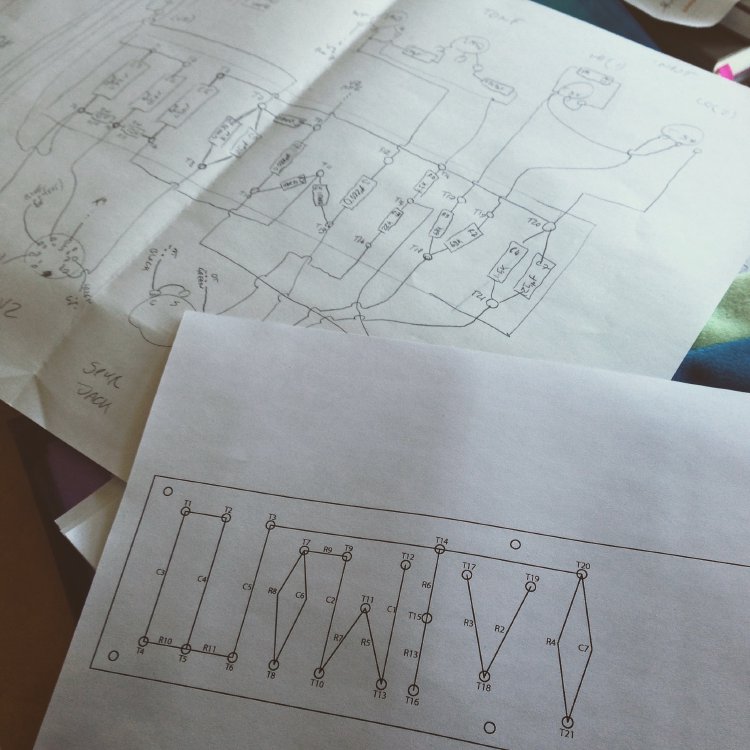
This took a few iterations: I’d print out the layout to scale, lay out the components, and make sure that everything fit. It’s a bit of a balancing act: for smaller components like resistors you don’t want the turrets more than say 50mm apart, as otherwise the resistor won’t actually link between the turrets. However, the very large capacitors used in the voltage rectifier circuit are almost that size themselves, so you just need to try a few times until you’re happy.
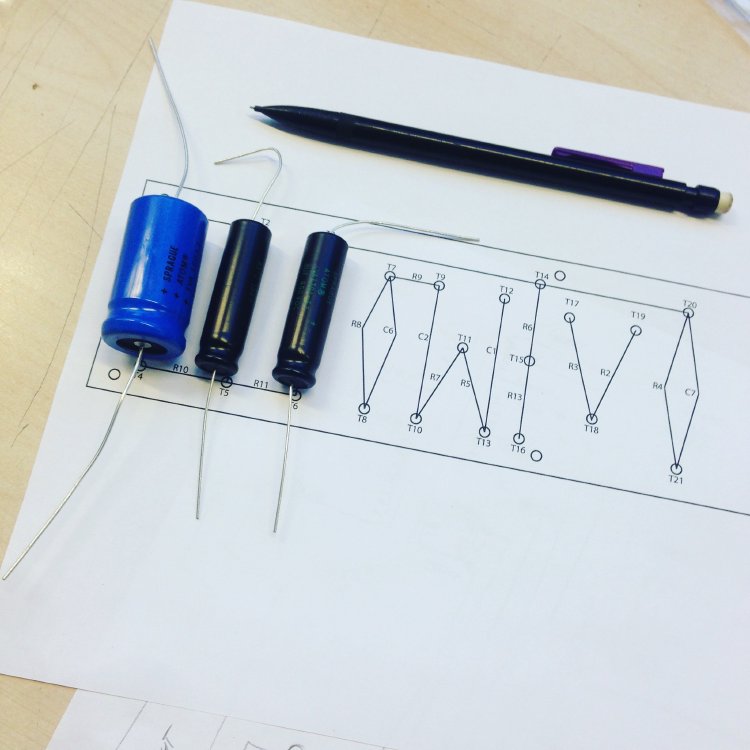
As several people pointed out, those are some scary big capacitors here, so if you try this yourself do be careful. Large capacitors like this can store a lot of energy, potentially fatal amounts. Before touching these I used a multimeter to ensure that they were not charged up and safe to handle.
After about three iterations I was happy with the layout, so I then took my print out, taped it onto my insulating board, and just drilled out holes for the turrets on the pillar drill. After that I used a special bit and a hammer to flare out the back of the turrets to mount them on the board. In the end you have something nice and regular and securely turretted.
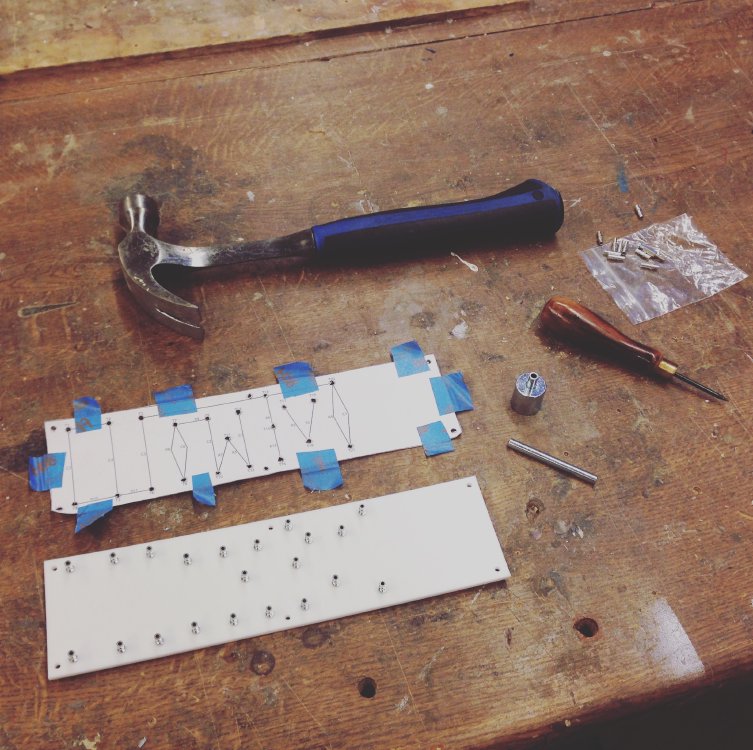
That done I then went to solder the components on, but this is where I hit a snag. A mistake I made when first soldering was assuming I was just heating the solder to melting point and then applying the melted solder to whatever it was I wanted to join. However, what you really need to do is heat both the thing you want to join and the solder, so that the solder has time to join properly before it solidifies again. But if the thing you want to join has a lot of metal then it’ll take a lot more energy to heat up than just a small pin or bit of wire. When I sat down to solder the above board I quickly discovered it was with the turrets: the basic soldering station I was using didn’t provide enough heat, so I was forced to park this until I could get a better rated iron. A friend has provided, so I’ll return to this next week.
I did also mount nice chrome corners on the amp cabinate to give it some extra protection from knocks, which now makes it fully complete, and looks awesome. But it’s all for nothing until I get these electronics done.
The amp I’m building is based on an old Fender Champ/Princeton design from the 1950s, as I want to keep my first amp build as simple as possible; as such it won’t have built in reverb, which I really like in my current amp. To compensate for that, I looked at reverb effect pedals, but in the end decided this was an excuse to get the programmable OWL effects pedal I mentioned a few weeks ago.
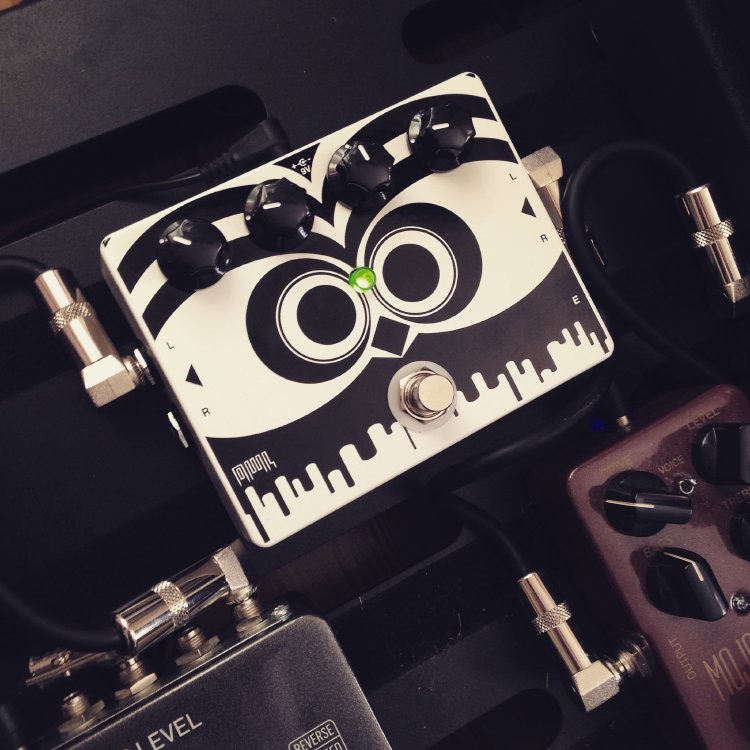
Although I’ve not had time to program it, I have had a play with some of the sample effects patches, and there is quite a nice reverb in there which I’ve started using in lieu of the reverb in my current practice amp. Really pleased with the samples, so hopefully this will enable me to make some nice sounding effects myself once I have come free time.
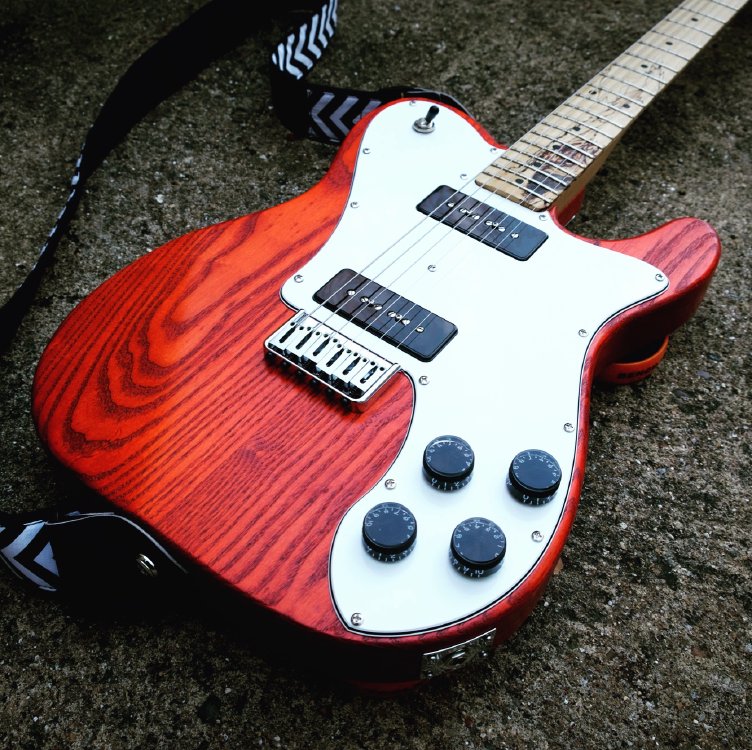
As a guitar builder, it’s also handy to occasionally play the things. Late last year I joined a Blues Jam group, which is great fun. Usually I take along my first guitar build, but I decided to try out the recent Blues Deluxe build in anger, and I’m over the moon with how it performs. As much as I like that first guitar I made, the sound of the House of Tone P90s in the new guitar when played at volume are just amazing: cleans when you need them, and add a little overdrive and they do that blues thing really well. Also the ergonomics worked as I hoped, not just the comfort carves, but also the hipshot style bridge is really comfy when you want to anchor your picking hand for some rhythm parts. So not just a great looking guitar, but also a great playing guitar!
The week before last I announced my prototype series one: I wanted to try out a new production flow and so offered to make a pair of pretty much at cost guitars to make it more fun. I’m delighted to say that I’ve had people show interest, and am currently specing out two custom guitars for people.
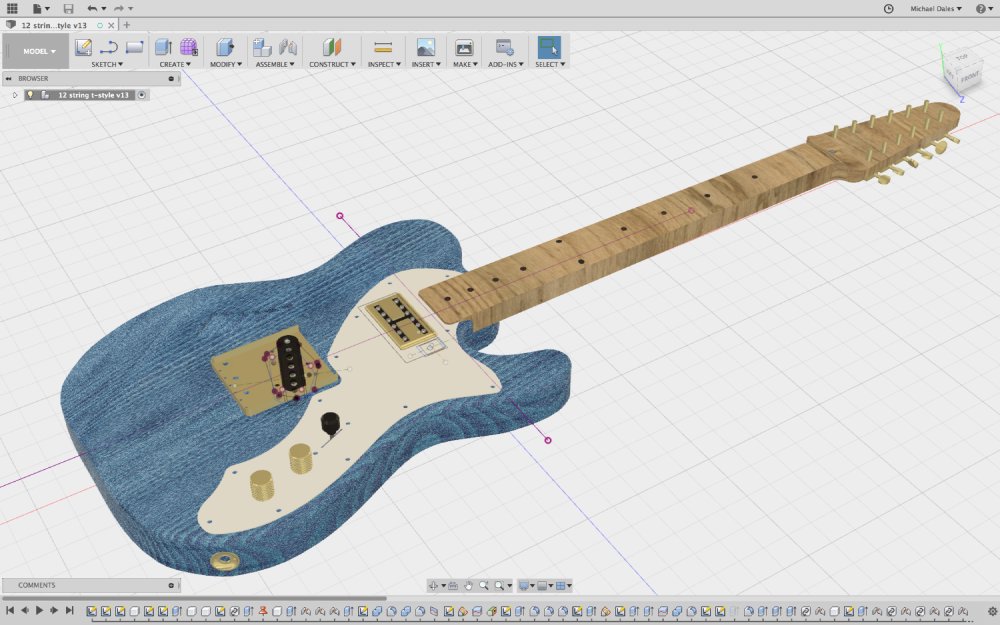
The thing about offering custom builds is obviously people come up with ideas outside what you anticipated, but then that’s the fun of building guitars for people: new ideas that make you come up with new solutions and learn new things. In this case, one of the prototypes will be a thinline t-style (inline with what I was aiming to build), but a 12 string rather than a 6 string (not a thing I’d considered), and the second one will be an mustang style offset rather than a t-style (an m-style?). Though neither are what I set out to make exactly, I’m super excited about both builds: I really like Fender offsets (and even Gibson ones like the Firebird), so having an excuse to build one is great, and I’ve never really played a 12 string, so I now have an excuse to learn about something different there too.
Having got the requests early in the week and spoken to both prospective clients about what they wanted, I’ve been flat out for the last few days building rough drafts in Fusion 360 so I can make sure I understand what the clients want, after which I can nail down the spec and construction, get a proper price quote, and assuming they’re happy, get building!
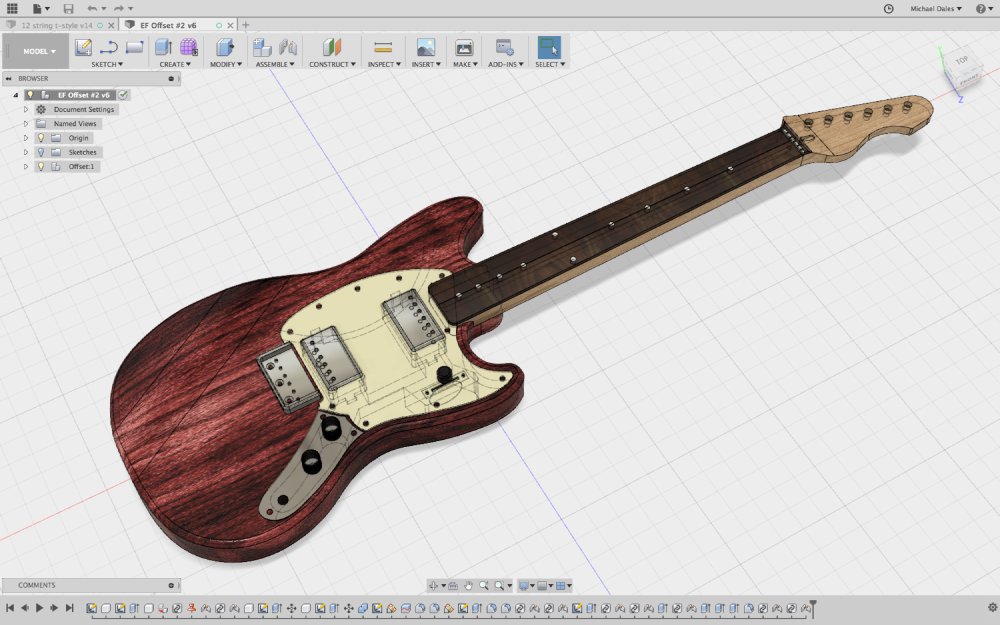
This is where the power of tools like Fusion 360 really shine: I can create a model that both visually communicates where the project is going to the customer and at the same time this is the design that’ll be used to do the CAM side of things when we start production. Really is quite powerful.
Now that I know I’m on the right track I can spec out the component lists in detail and get a price estimate. Expect to see lots more details of these builds as they progress!