A week in Fusion
21 May 2018
Those following these posts will know about the ongoing saga of the CNC router issues I’ve been having. Whilst I’m hoping that the fine people at Makespace will get things up and running again in the near future, and having ordered in more wood to replace the bits I lost the other week trying to build guitar #5, I’m now contemplating going slightly old school on this one, albeit reluctantly.
Not all luthiers are lucky enough to have CNC router access like I do, and so how do they make guitars? The typical way is using a set of templates and using an hand router to run around the edges of those. For a body you typically need at least two templates: one without and one with the neck pocket on, and then potentially more depending on what your internal cavities are for wiring. So I sat down this week and designed the templates in Fusion 360 based off Guitar #5, the first of the commissioned offsets I’m building.
I initially though perhaps I could just make the templates using CAM tool paths from the existing body shape, like so:
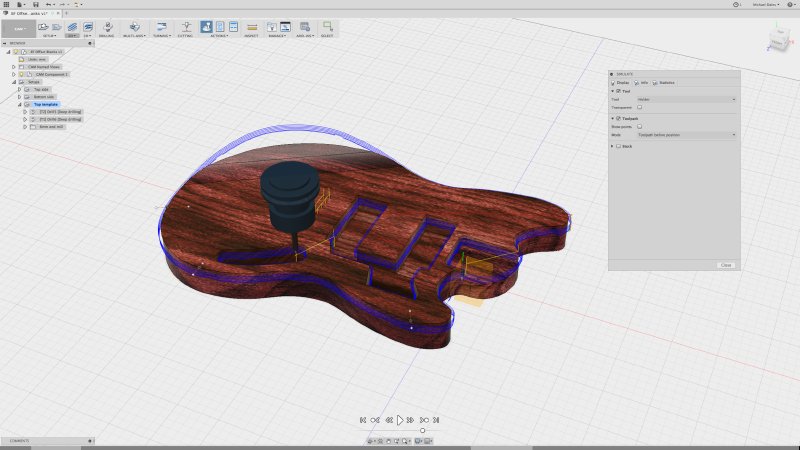
Just running those tool paths at the thickness of my template material (either 12mm or 18mm MDF) then I’d get a template without having to create yet another thing in my design I need to make sure keeps up to date as the design evolves.
Unfortunately Fusion really doesn’t understand what I’m trying to do here, and so will get upset if you specify a template material thicker than some of the cavities (e.g., 18mm template but a 16mm neck pocket), and you can’t make a single template this way that has features from the back and front of the body readily as Fusion thinks they’re too far apart. So I quickly abandoned this approach on the grounds it’s never good when you’re fighting Fusion in the long run, and instead I went back to my design, and created a new top level component called templates, and then for each template I just used the sketches from all my existing guitar components to extrude the template outline and then cut out the bits I need. In the end I have three templates:
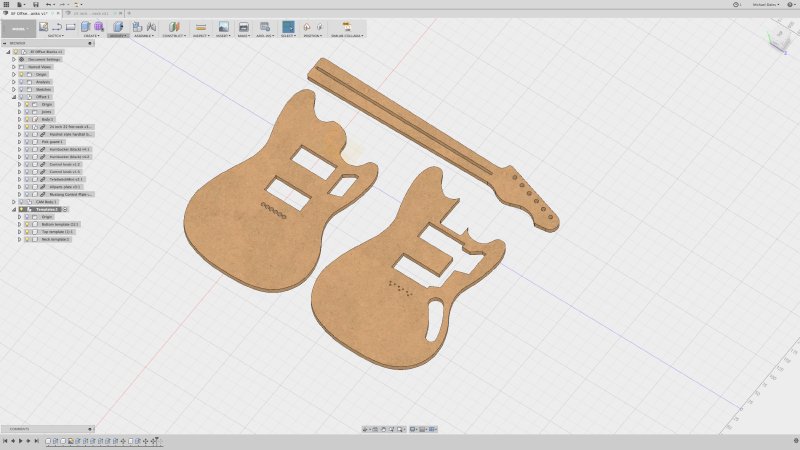
Whilst I don’t trust the CNC router at Makespace for expensive wood, I am happy to use cheaper MDF to make templates like this on the router and accept the occasional lost bit of MDF. That’s much more acceptable than say an expensive bit of birds eye maple that will be used on the neck for this guitar.
So, what will be the hard bits doing it this way? Firstly, getting the string ferrules all aligned properly will be interesting. On guitar #1 I did them freehand on the pillar drill, and whilst they look fine at a glance, on close inspection you can see they’re not perfect: a CNC machine gets you that precision where it matters, even if you are only using it to rough out. A template should be good enough as a guide, but I’ll do some experiments first on scarp to be sure. Also, I suspect for the neck truss rod I’m going to have to build a jig rather than use the template, which is fine if you’re making lots of, but a jig per guitar will start to get tedious very quickly.
Anyway, I’ll keep an eye on the CNC router repair process at Makespace, but for now I’ll start by making the body with templates. In addition to the wood to replace that list I have bought some extra wood to let me test this method.
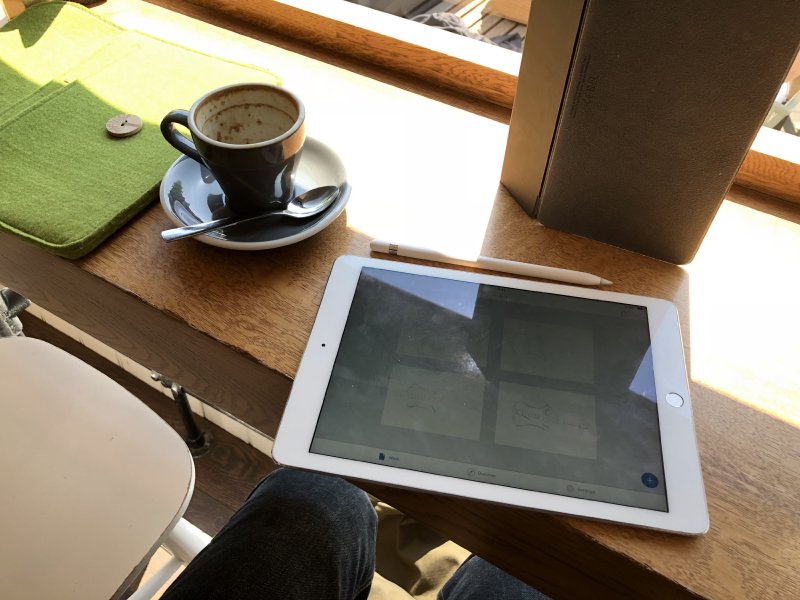
In addition to making the templates for guitar #5, I also spent a bit of time experimenting with a custom guitar design of my own. Whilst I have no problem building guitars that are my own take on existing designs, it’s also interesting to see how I could make my own designs that satisfy some of my own desires for what should be in a great guitar. I started out just by sitting down over coffee one morning and sketching out a series of possible guitar shapes.
In these designs and the iterations in Fusion 360 that followed, there are multiple things going through my head. I had some specific design goals in terms of physical characteristics of the guitar I wanted. An example of that is how symmetric can I make a guitar and still have it work as a gigging instrument? I know quite a few lefties who either play or would like to play, and whilst I could readily make a left handed model if someone asked, I don’t really have the funds to just have a left handed demo guitar sitting around given how infrequently it would get played, which is sad. Another example is I’d want it to have ergonomic cutaways, but then now do you do an arm carve on a symmetric guitar? Is that going to work?
Alongside these constraints there’s obviously a lot of guitars out there that I like the designs of and I deliberately let some of those design cues from what I consider great guitars guide me here. I’m not experienced enough in guitar to yet pull off something radical like the lovely Music Man St Vincent and pull it off, so I’m deliberately taking a more traditional set of inspirations and then mixing it with my own constraints.
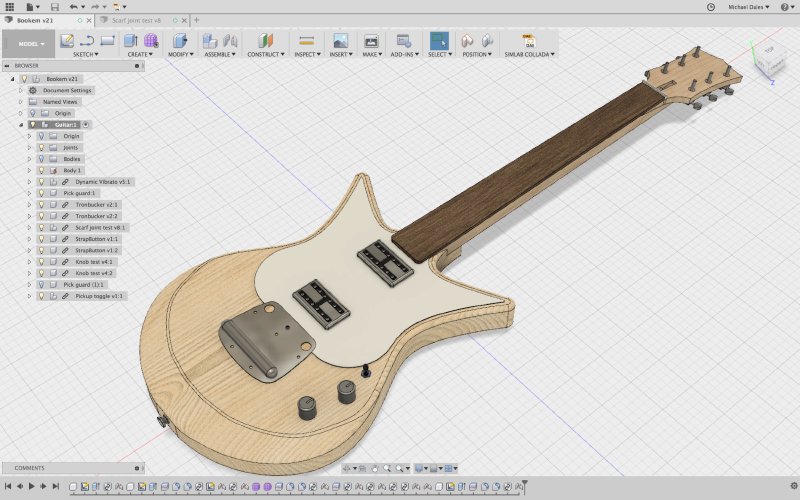
The above is my first attempt at following through on some of this, it’s not perfect, but I’m reasonably happy with it for a first pass at a guitar unique to Electric Flapjack Guitars. This is not yet complete, but it’s had several iterations with feedback from friends.
You can see the curved lower section is a radial arm curve, which is somewhere between the traditional one sided arm carve you’d find on a Fender and a arch top style guitar. It’s not perfect, but designing this has forced me into a whole new area of 3D design using free-form meshes that I’m still trying to get my head around, so it’s a bit rough, but you get the idea.
The controls ended up being asymmetric to follow the ergonomics of the reach of a right handed player, and would need to be swapped for a left handed build. But on a demo guitar at least it’d be playable with a quick restring for a leftie, and that’s at least a good improvement on the models I’ve made to date.
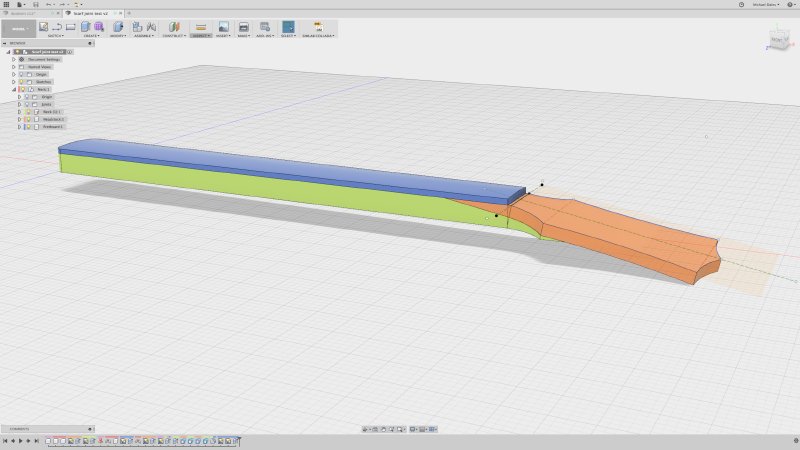
At the suggestion of a friends that the single sided headstock design I’ve been using on new builds didn’t work on such a symmetric body, I’ve made a quick mock up of a symmetric angled headstock. This also took me away from techniques I was familiar with (which is good), and I did some research on how to make those. There’s several techniques to making an angled headstock, but here I’ve built it as a scarf joint, which makes it somewhat easier to machine and wastes less material.
Let me know what you think of the design. I still need to finish off the internals for this, but still it was a good learning experience. I really did try to make it symmetrical entirely to start with, but at that point you realise that between the control locations and things like the output jack location, you end up making a guitar that is going to be compromised for everyone, and given a guitar typically has one owner, that doesn’t make sense; but it was a fun challenge pushing it as far as I could. Some people have managed this, for example the wonderful guitars made by Millimetric Guitars, but for me I still think the controls aren’t ideal for gigging when you’re using volume to push an amp in and out of overdrive (but that also reflects the kind of music I like to play, and probably isn’t an issue in other genres).
To complete the week with my head stuck in Fusion 360, I gave another run of my introduction to making things with Fusion 360 at Makespace, explaining how to get started with Fusion and how to then target the kit at Makespace (the laser cutters, the CNC router, and the 3D printers). The best thing was that at the end of the lesson of of the attendees immediately went into the workshop and fabricated the thing we’d designed in the class, which is possibly the best feedback as to whether the lesson is useful I could have :)