A week in the shop
3 Jun 2018
This week I made progress on the prototype offset some more, found a potential alternative CNC router option to help me move forward on my backlog, and played around a bit in both Fusion 360 and with some DSP code.
One of the things that I’m embarrassed to say took me a while to get used to was the idea that wood isn’t perfect. I come from the world of electronics and software, and whilst you can argue that software is often far from perfect, from an engineering perspective it does at least let you generate pristine things. So it took me a little while to get used to the idea that I couldn’t just reject a bit of wood because of some tiny flaw; if I did that I’d have no wood to work with. You have to work with these flaws and find a way to hide or embrace them.
The first thing to do is when you get your wood is be selective about which bits you keep and which bits you cut out: can you, for instance, position a knot in the wood such that it’ll end up where the pickups or neck pocket will go and you’ll route it away? But even after that, you can still be taken by surprise as you peel away the layers of the wood as you guitar progresses, you’ll often find hidden features that you didn’t expect. On the fretboard for the prototype offset I’m finishing up at the moment I found this hole as I trimmed the board flush with the neck profile, where some insect has buried its way into the tree.
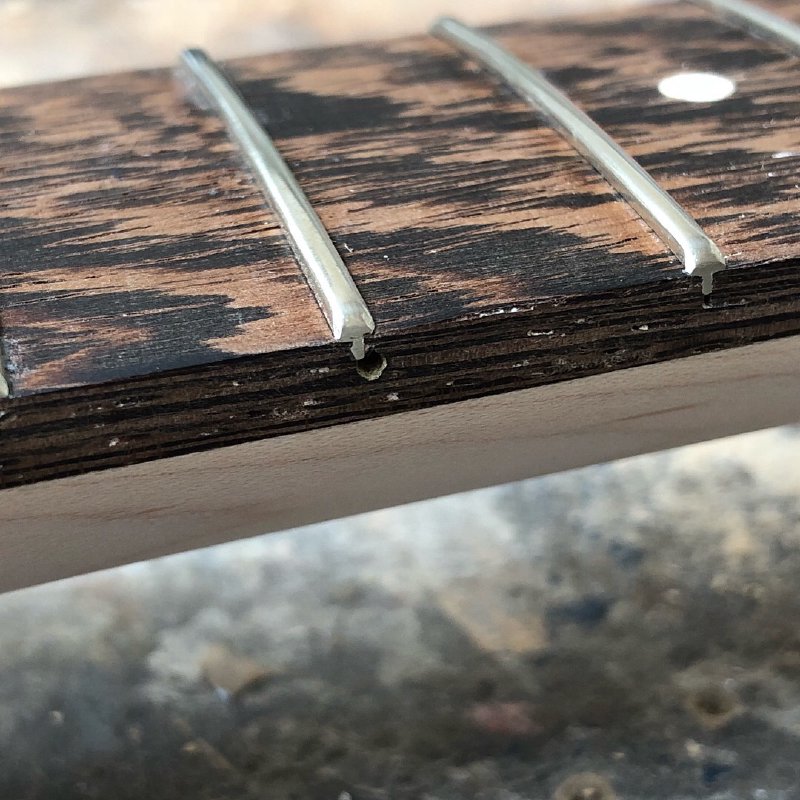
Thankfully, it turns out that fixing small things like this is relatively easy. All you need is some wood glue, and some sawdust from the wood in question: either from as you process the piece hold on to some, or from an off cut that you held onto for this circumstance (which is what I did here). You can just mix the sawdust until you get a fairly viscous paste (like a cement) that you then pack into and over the hole.
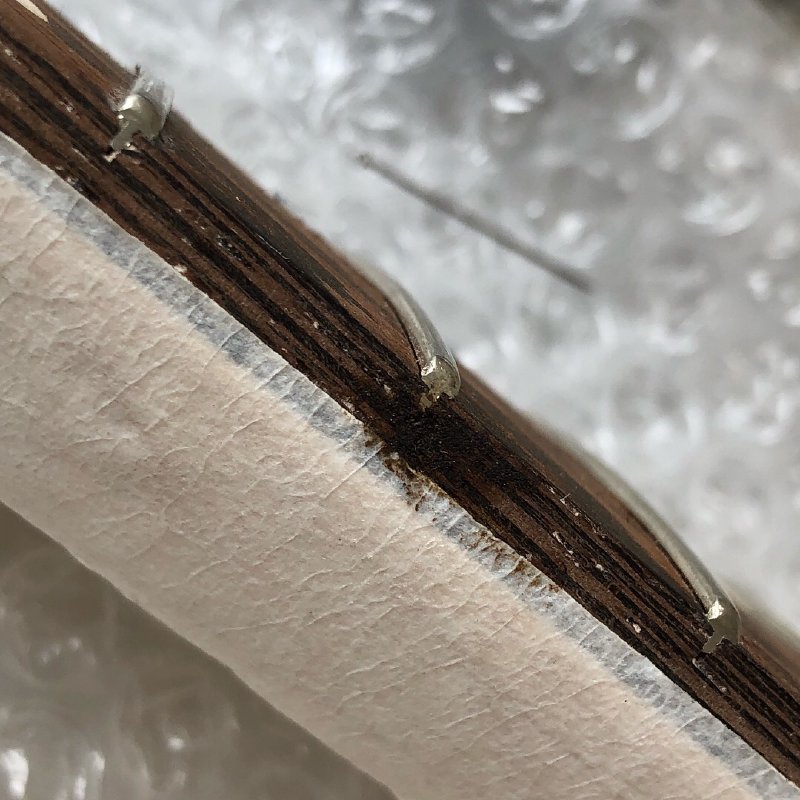
Leave that to dry overnight, and then you can sand it back flush with the rest of the wood.
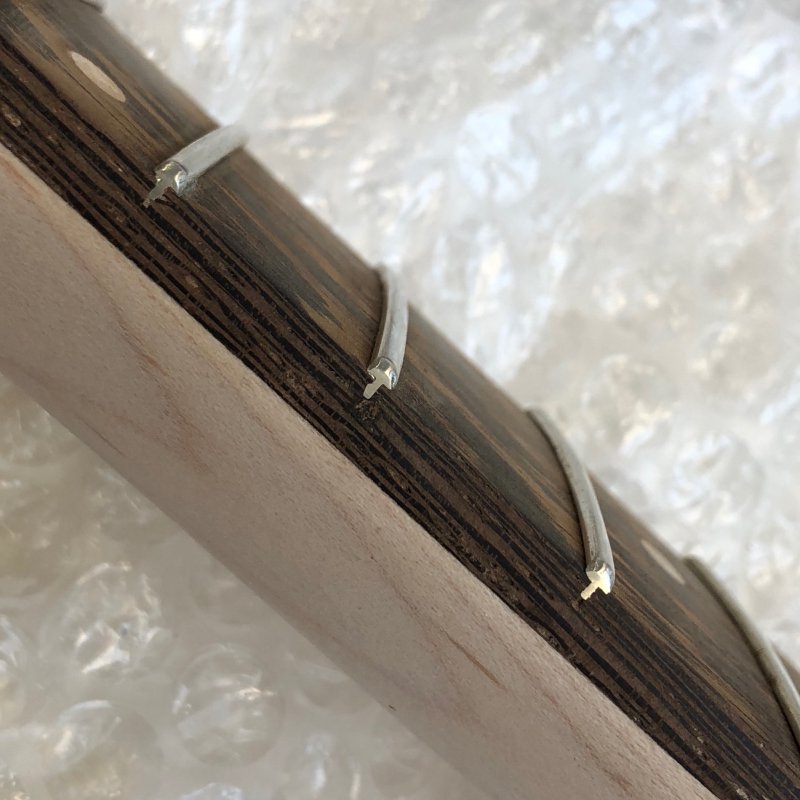
You’ll still notice a mark there if it you go looking for it, but no more so than any other bit of figuring in the wood, and once oiled you’ll hardly see it. You can see more details on how to do this in this video from Crimson Guitars. This was my first go at this sort of repair, and I’m quite pleased with the results.
In general this week has been slowly applying finishing to the neck and body of the prototype. This is a mildly frustratingly slow stage where you apply a coat of stain or oil once or twice a day and there’s not much else you can do. I started the staining at the end of last week, and I was using a yellow stain, which after half a dozen coats has gone a wonderfully deep orange peel/sunset orange. It’s not what I expected it to do, but I’m still rather pleased with the results so far. This here is a stop motion of me applying the first coat:
I’m now four coats of oil in, with two more to go.
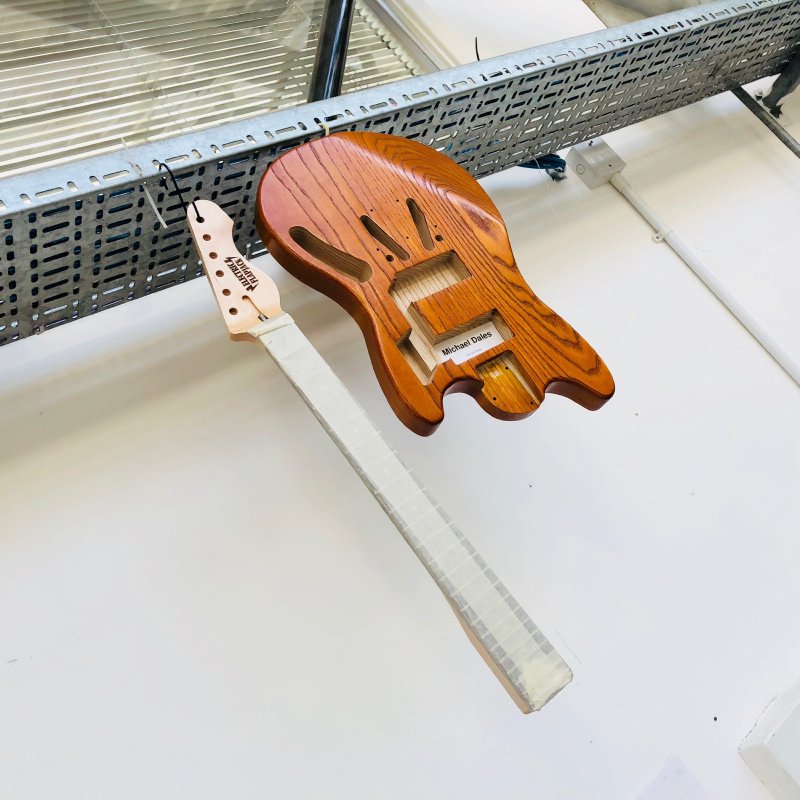
Once the final two coats are done, I’ll leave it for a week to properly dry, and then I can cut the pick guard and wire it up.
Speaking of pick guards, I realised that my plan to laser cut the guard wasn’t going to work. Although it’s been great for prototyping, all the plastic suppliers I’ve found for traditional scratch pick guard material supply them in PVC or other such plastics that I can’t laser cut in the workshop I use due to the toxins they would emit. So instead I’ll brave using the CNC router for this instead.
Speaking of CNC routers, in a bit of a breakthrough, I’ve actually found another CNC router I can try using. Regular readers are probably sick of this by now, but to recap: I’ve always made guitars using the CNC router at Makespace to rough out the bodies and ensure things like string holes are perfectly positioned. Unfortunately this year the router has started to go senile, and has twice destroyed bits I was working on, costing me both time and money. More distressingly it’s put me quite a bit behind schedule on a pair of commissions I’ve had. Whilst the CNC router at Makespace will get fixed eventually, that doesn’t help me in the near term: it being a community workshop means this process will take a little bit of time.
I was just about to start making the new guitars with a template technique rather than CNCing, when I was connected with the people up at DoES Liverpool, another community workshop that serves the Merseyside area. They’ve just got a new CNC router installed, and given I’ll be up in Liverpool for MakeFest at the end of June I plan to stay on for a few days to visit DoES and see if their machine will help me get these builds back on track. For me it’s a way to get back in motion, and for DoES it’ll be useful for them to have someone experienced with CNC routing show them what is possible with their new bit of kit. Very excited about this!
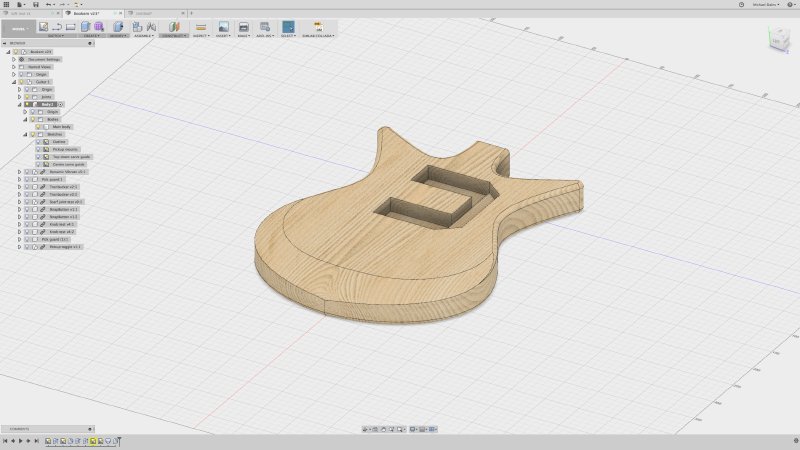
I revisited the guitar design I was working on a couple of weeks back a bit this week, trying out some new techniques to design the arm carve on the symmetrical guitar I was designing a few weeks ago.
Last time I played with this I tried to model the arm carve using a mesh in Fusion, which I found very hard to work with for this kind of application. A friend of mine, the very talented Tom Armitage, who has also dabbled in Fusion 360 quite a bit, suggested I tried using a technique called lofting, where you can get Fusion to generate shapes based from a set of intermediary sketches, and it can do those shapes following a defined curve. You can see a prototype version I did below: here I sweet between two small arced corners and a larger one in the middle, following the edge of the disk.
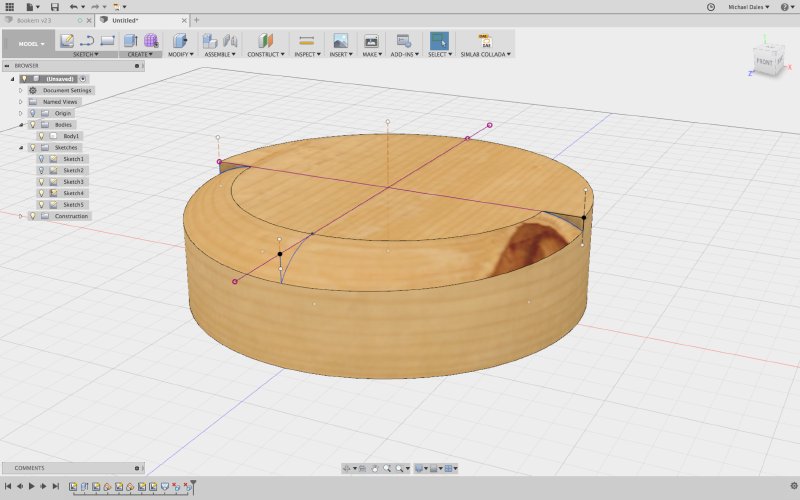
Now if you look back at the picture of the guitar body in Fusion above, you can see how I did the same thing on the guitar, just using points for the ends rather than corners. Really pleased with this technique. I’m still not sure about this guitar design overall, but it’d be nice to get it completed so I can then move on to something else, and the experience with this one will help with future designs.
One thing I’m fascinated by is trying to understand where the sounds I like come from and how I can, through a combination of guitar design choices, amp design choices and effects pedal choices get the sound I have in my head to come out of the speaker. To help with this I’ve been leveraging some of my other skills, and I coded up some simple audio filtering software for my iPad to let me tweak my guitar signal.
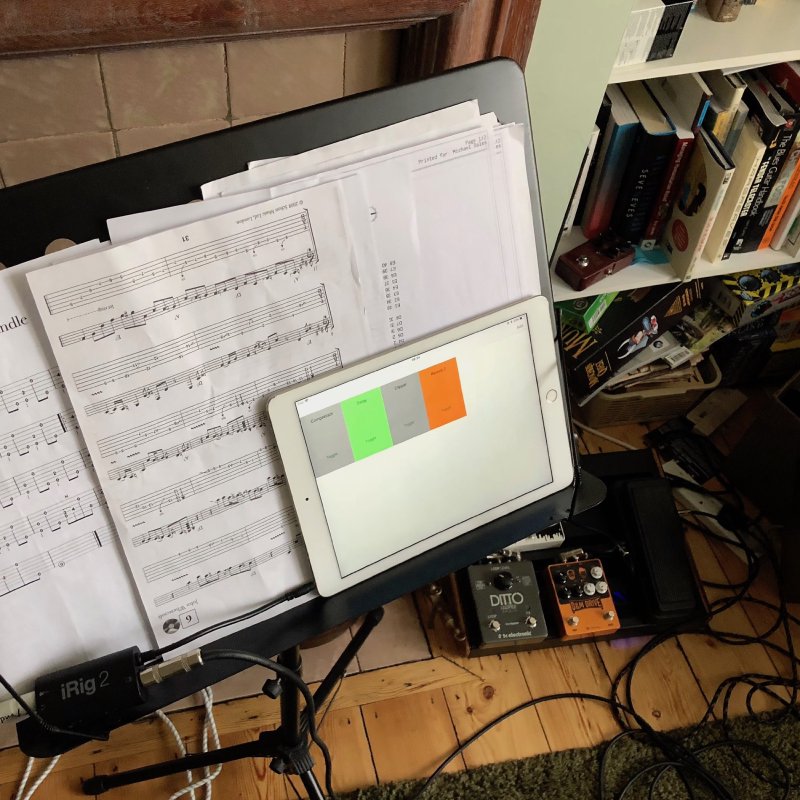
Whilst I watch things like That Pedal Show where they try to explain how things impact your sound, there’s nothing like experiencing yourself. Whilst I could make some silly and whacky sounds with my little bit of software, by far the most interesting was just playing with low and high pass filters and EQ effects. If you’ve never ran your guitar through an EQ unit, I highly recommend you do so, as it’s amazing what impact on the character of the sound from your existing setup that can have. If you want a guide to help you get started then I can recommend reading these notes by a sound engineer on how different EQ ranges impact different instruments, but again I’d say just go play with it, as I’m fairly sure you’ll be amazed what you can do with it.