A week in the shop
Published 21 Jan 2019
There was no direct guitar progress this week, with the CNC Router still out of bounds for guitar work. We did fix the USB port failure on the current adapter so it is back in operation, but it’s on the old control electronics so I refuse to put material on it at the moment that I can’t afford to replace, and after two failed attempts to cut a pick guard on that, I’m not going to throw good money after bad.
As a result I concentrated on mostly contract work this last week to let me get ahead of that so that when the CNC router does get it’s new brain I’m ready to take advantage of it.
So, progress on that new brain. Two replacement CNC Controllers have now arrived: the DM500, a new pendant style controller, and the Masso, a more advanced unit that has lots of bells and whistles, but still has the advantage of not being a PC. Adrian, one of the Makespace directors (with minimal help from me in the form of switch pressing occasionally) wired up the first of the new controllers to our test jig (shown below with the old Grbl controller we tested initially).
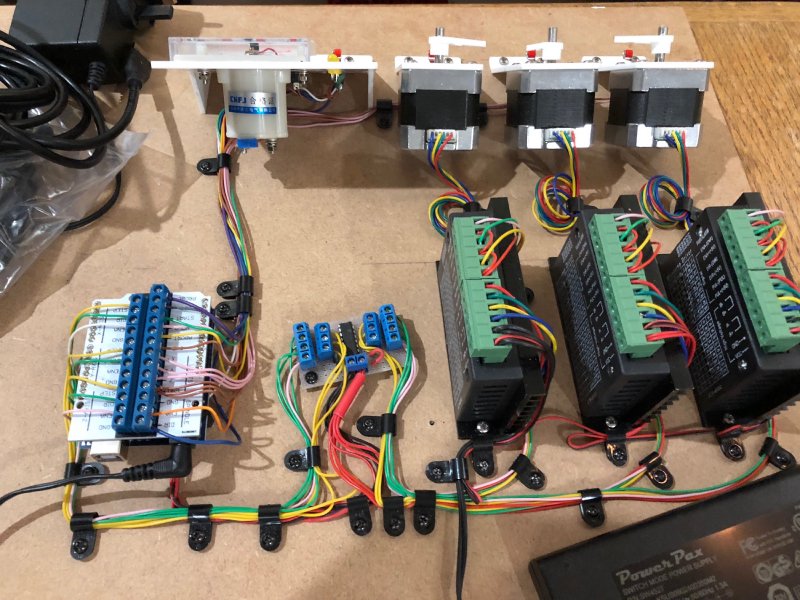
Whilst I like the idea of a controller with lots of bells and whistles, in the context of Makespace that’s not necessarily optimal. Whilst there’s a small set of users like myself who are pushing to the more advanced end of what can be done, there’s many more users for whom this is their first bit of industrial control kit, and as such whatever solution we get for Makespace has to be robust and easy to comprehend. becoming a trainer on the CNC Router has been quite an eye-opener in terms of what the Makespace requirements are - it has to just work more than it needs to let you control things to the nth degree (no matter my personal opinions on it). At the same time though, we do have some minimum feature requirements, such as the ability to do 3D surfaces, not just 2.5D as per some solution (e.g., the Instructables X-Carve). Thus we’re starting testing with the simpler of the two controllers, the DM500, which I hope to start software testing on today.
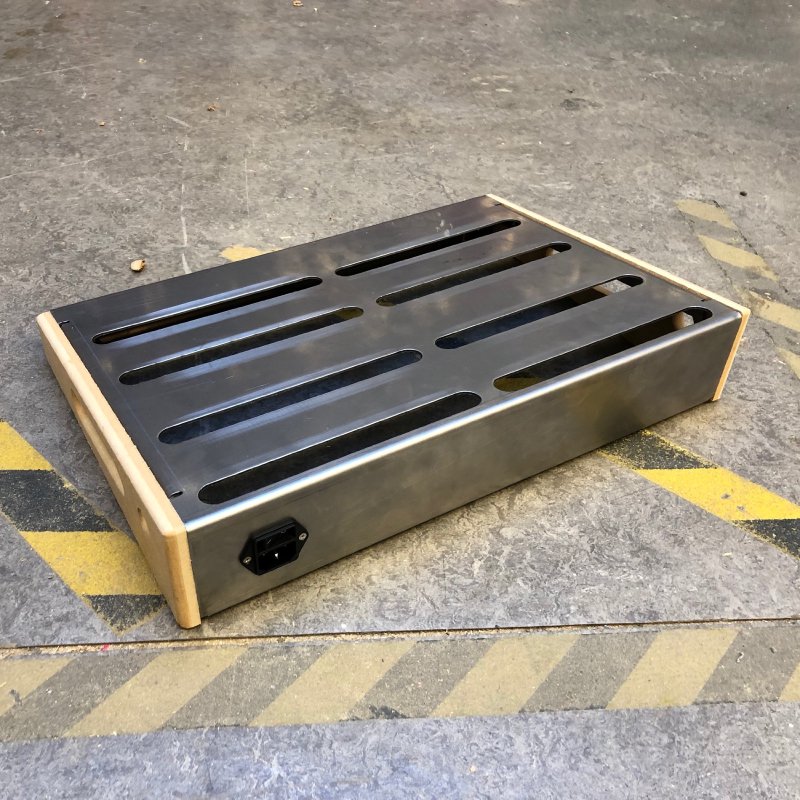
In early December I wrote a bit about my side project to make myself a new pedal board. This was partly to fix something that bugged me about my current pedal board, and partly to move me out of my comfort zone in terms of making things and make learn a new skill. The design centred around a folded bit of metal onto which the pedals would attach, along with some nice wood end-caps designed to make it look nice for a home or studio setting.
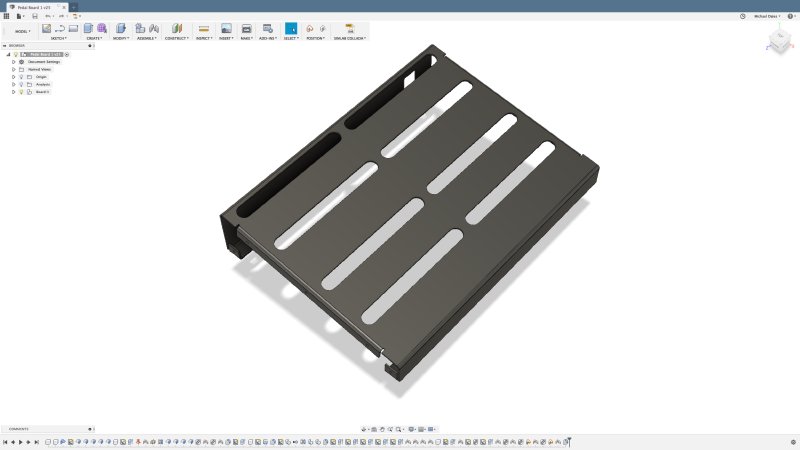
Having designed the metal work, and consulted with a couple of friends who had done this sort of thing before (many thanks to Mark, Rob, and Adrian!) I commissioned a local firm to build me a one off prototype, and the metal work finally came back:
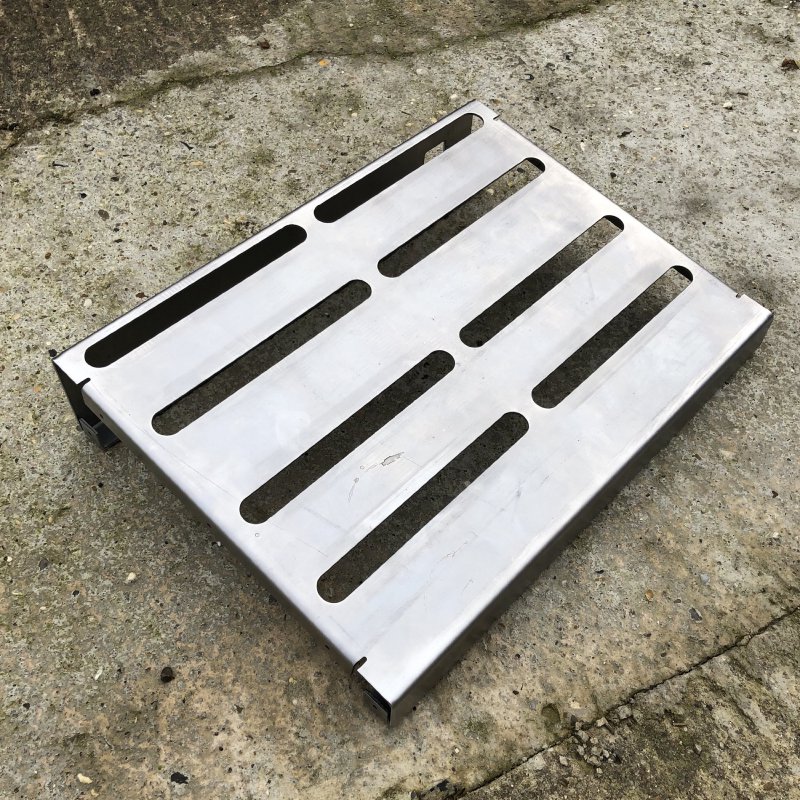
When this turned up, I was very excited to see how close what I got was to my design: it’s one thing to design an object, it’s another thing for it to be actually manufacturable. I might have designed the radiuses too tight to be folded, or relied on tolerances that were not feasible etc.
Initial impressions were that it looked very much like the design I sent them, but the question is whether it’d mate with the other parts needed to make the entire thing. The main interaction points are the wooden end-caps, and in the rear is a power socket that just passes through to an internal kettle connector, so you can mount your pedal power block under the board but still have an accessible on/off switch on the outside. There are also rubber feed I ordered and the undersides were designed to fit those.
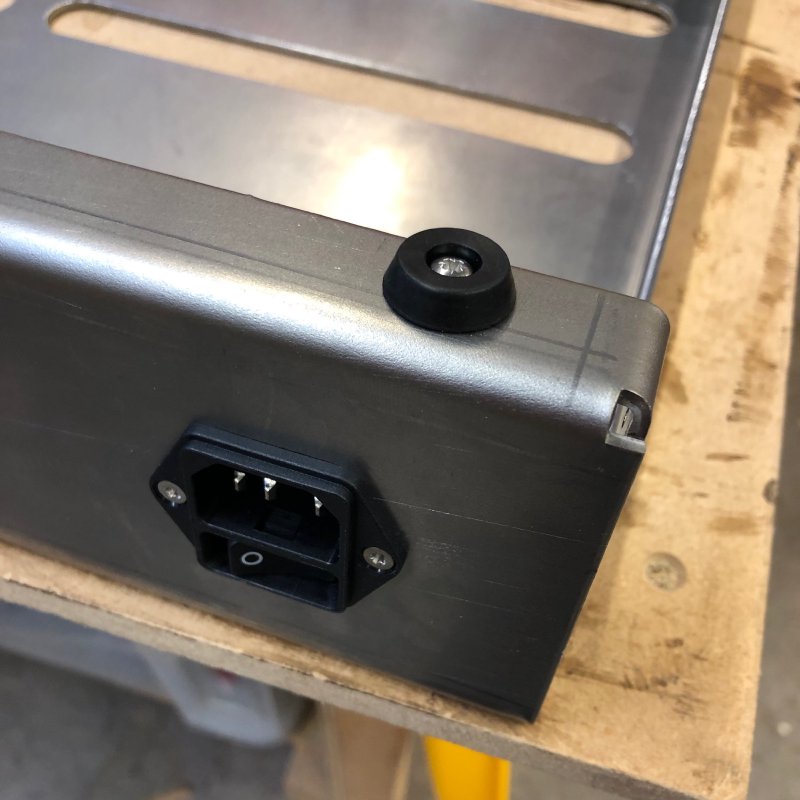
As you can see in the above picture, the power socket and the feet mount perfectly, and the board sits nice and level with the feat on. Very pleased with this. I then cut some mock end caps out of MDF just to see how those would work (demonstrating that our current CNC Router controller knows when I’m using cheap material, as it let these ones cut without incident). With those on it looks the business:
Not bad for a first go at designing with folded metal!
However, although it looks the business, there’s a few things the prototype indicated I need to tweak. The main one is that the front fold isn’t quite perfect, and so having the end-caps perfectly flush with the metal doesn’t work aesthetically, as they highlight the slight variance. I’m informed that folded metal like this is never absolutely perfect, and you have to allow for little variations like this - sometimes with a mallet ;) However, here I’ll try to adjust the design of the end-caps to make this acceptable in the design. There’s also a few machine marks I’d like to see if I can get removed at the production place, as although I can file them out, I want the production place to also powder coat them before shipping them to me for the planned production run. Before I respin the end-caps I’ll get the guitar cable jacks wired in and pedals mounted so I can check for any other niggles by actually using it.
But for all those niggles, I consider this Achievement Unlocked! I’ve never fabricated things in metal before, and this turned out better than I had any reasonable right to expect for my first go. This opens up the door for other things down the line: for example, if I wanted to make more amps I can now make my own chassis to match my design rather than (as I did last time) building my design around an existing chassis which changed the vision I had quite substantially.
I did find a little time to keep plugging away with my trying to re-learn electronics. I’ve been struggling to get my IO-expander chips to play ball, but didn’t get very far due to my push on contract work. I did however make some strip boards for the relays I want to use with my pedal switcher, as they don’t mount on the breadboard directly.