A week in and out the shop
Published 21 Oct 2019
Tags: blues deluxe, laser-cutting, oggcamp, tuners
I’m currently just over the mid-point of two weeks of madness: last week was a frantic run up to Oggcamp, trying to get a guitar ready to demo there, and the event itself, and this week is very busy due to non-guitar-but-bill-paying events. I look forward to some level of sanity returning in November.
But for now we have a lot to get through: challenges in hardware parts fit together, running a stand at Oggcamp, a look at some guitar-like instruments that enable those who can’t play a traditional instrument to still be creative and play guitar like-music, and finally a video-podcast recommendation. Let’s get cracking.
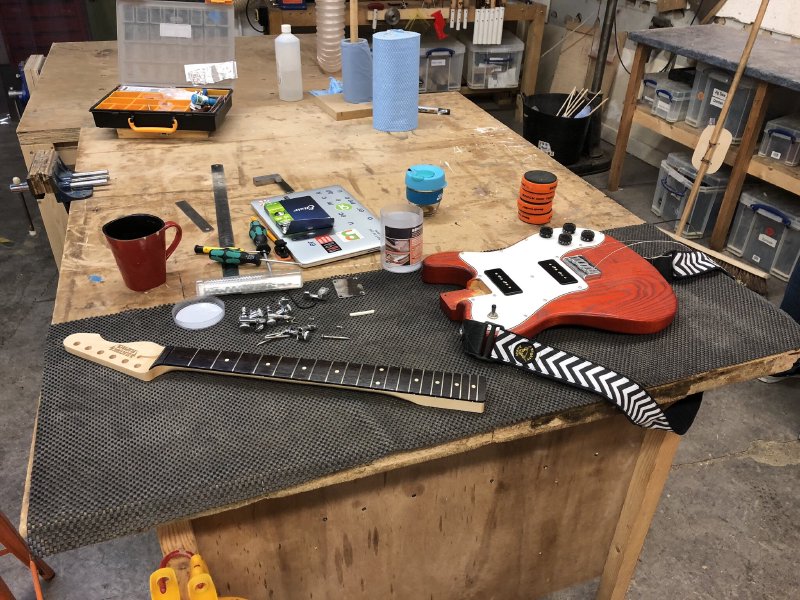
With Oggcamp at the end of the week I decided I wanted to get the new neck for my old Tele Deluxe based build (named The Blues Deluxe, despite being orange) completed so that it could be my demo guitar for the event. The motivation to ensure I could use this guitar was twofold: firstly, given Oggcamp is not a primarily musical audience I wanted a more mainstream styled guitar to demo (as opposed to a Mustang based model I’ve been using for demos of late); secondly it was just to give me a deadline to get this neck finished and shipped so I have one fewer projects on the go.
Last week the neck entered the finishing cycle, so my aim at the start of the week was just getting the headstock hardware installed so that I could string it, leave it for a few days to bed in, before doing a proper setup prior to heading up to Manchester. At least that was the theory, but it didn’t quite go as smoothly as I had hoped.
The source of my issues stems back a couple of years to when I first made guitars #3 (The Red Rocker) and #4 (this one), when as an experiment I bought some locking tuners for these guitars. Locking tuners are designed to make your tuning more stable and changing strings faster by using a pin inside the tuner to grip the string (locking it in place, hence the name) rather than using friction to hold the string in place on the post as vintage and traditional tuners do (which is kinda insane if you think about it, given each string is under between 15 and 20 kgs of tension). These specific locking tuners caused me two unanticipated issues I had to overcome this week.
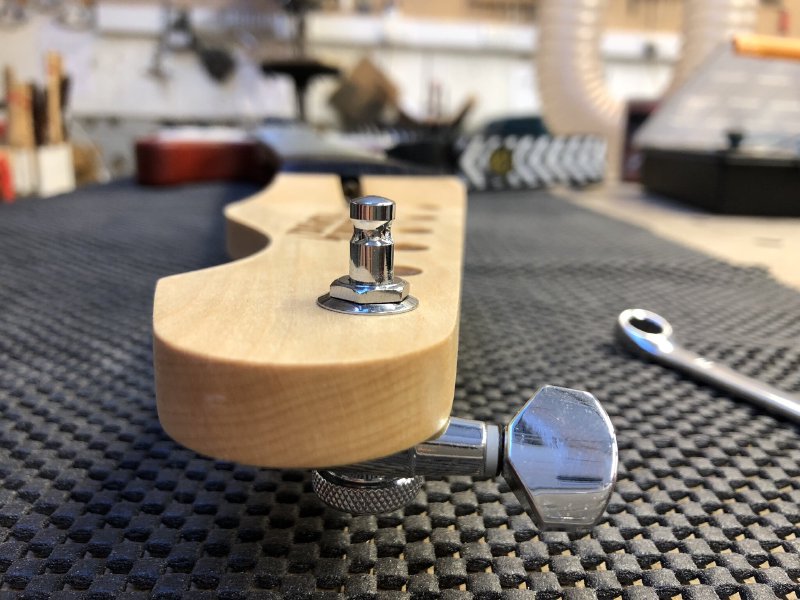
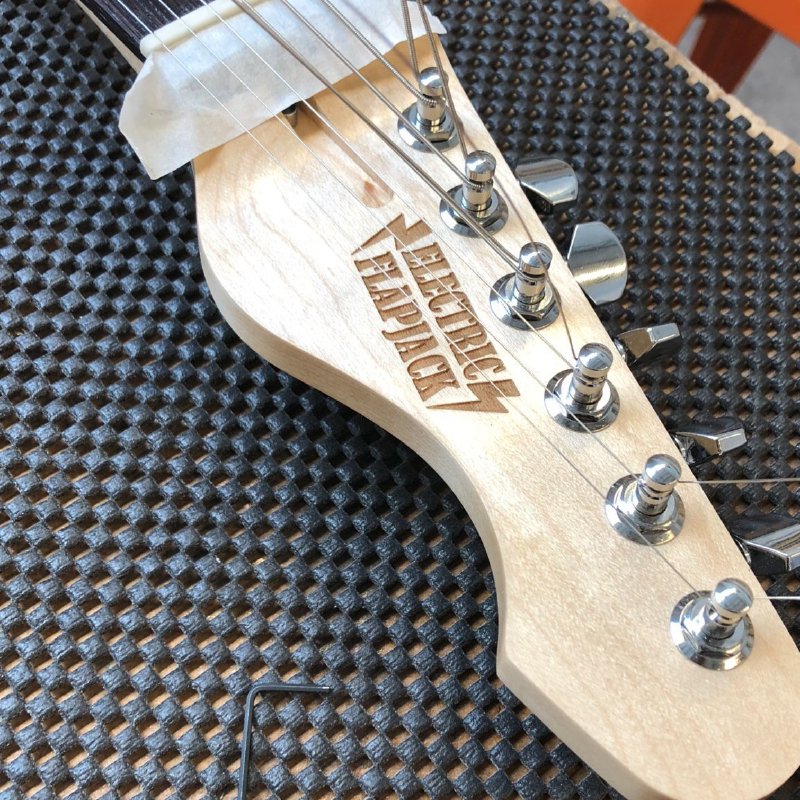
The first issue appeared when I went to install the tuners: they just wouldn’t let me tighten them:
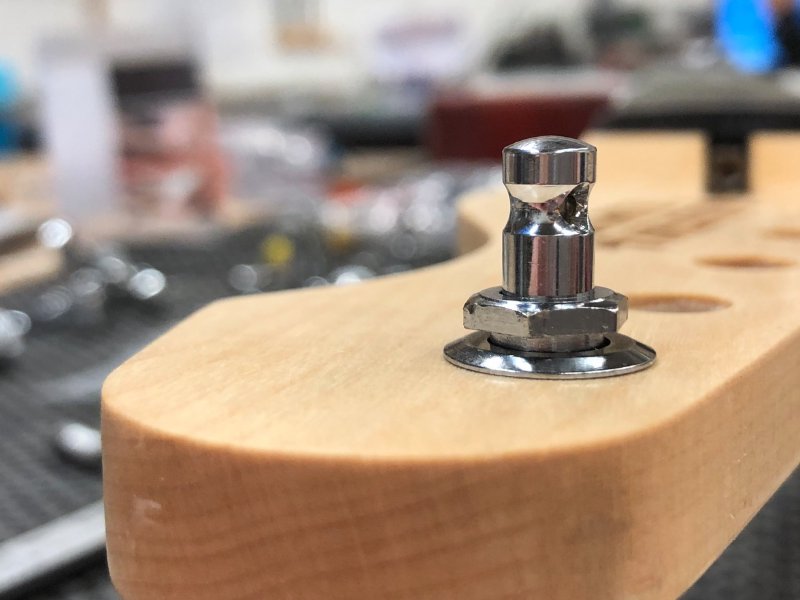
In the above picture you can see that the that the hollow bolt that slips over the main tuning post and screws into the base has about 1mm of space between it and the washer, and I couldn’t tighten this down any further: it just didn’t fit.
I often say that the majority of issues in guitar building can be traced to not applying the mantra “measure, measure, cut”, and this is no exception. I’d just assumed the tuners would fit, as I’ve not had an issue with tuners fitting before.
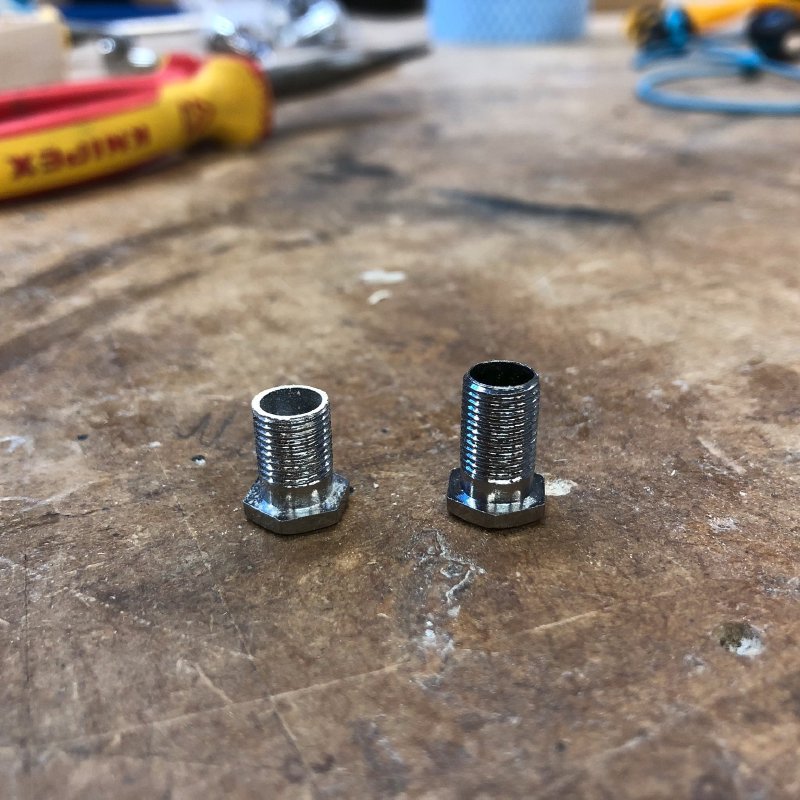
Here you can see the actual parts that make up the tuner:
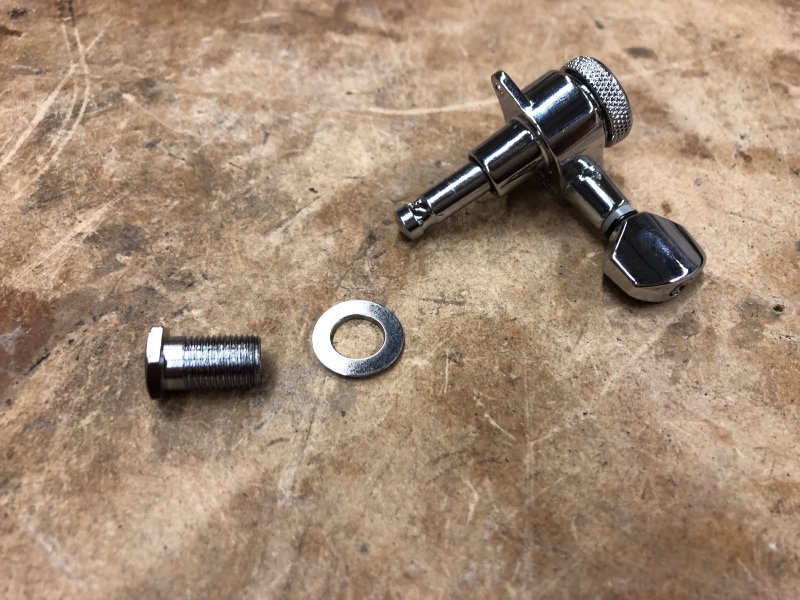
We have that hollow bolt on the left, a washer, and then the main tuner mechanism with the post vanishing into a sleeve which has a thread on the inside to accept the bolt. Screwing the bolt into that sleeve will clamp the entire mechanism in place on the headstock helping secure it. Unfortunately my headstocks are 12mm thick and these particular tuners just couldn’t go that thin.
For the guitars i’ve built in the last year or so, basically since I took to using my own CAD designs, all the headstocks have been 12mm thick, but for these I’ve been using vintage style tuners that don’t use a hollow bolt clamp mechanism like this, so it’s not been an issue. It’s only because I’ve switched to modern 135 style tuners on newer builds (which is also what I used on guitars #3 and #4) that this is an issue.
Whilst I could just use different tuners, I decided to see if I could shorten the hollow bolt on these by a millimeter or so first, as it’s a shame to waste things unnecessarily. I chatted with some other Makespace members about my options here for shortening the bolt, and in the end it seemed the simplest way was just to sand them down.
To help make sure I took off just the right amount I made myself a jig. My first jig consisted on a series of posts that I milled into some scrap wood I found, the idea being I could mount the bolts here and sand them down until they no longer protruded from the jig:
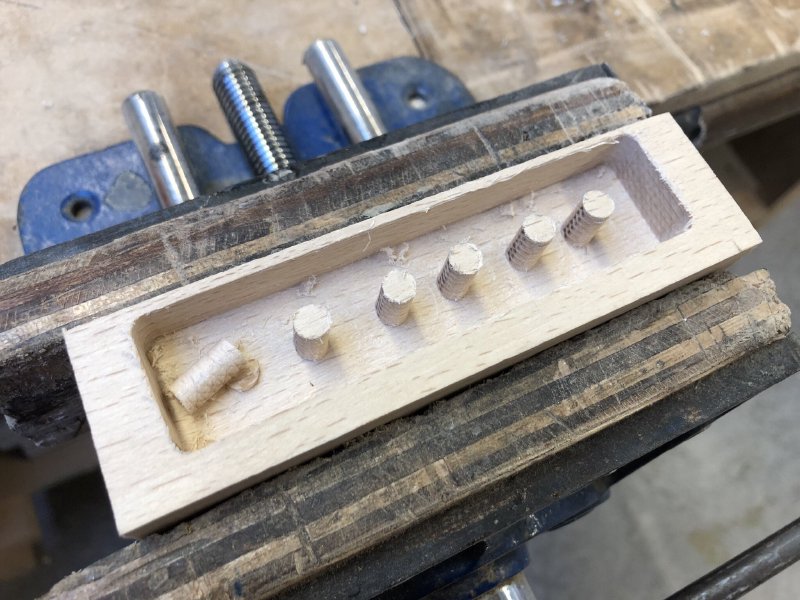
Unfortunately, as the picture shows, the posts on the jigs just were too weak and snapped as I was cleaning up the milling. Instead, I moved to the inverse, just drilling a hole of the right diameter to mount the bolt in a bit of wood the same thickness as I needed the bolt to be:
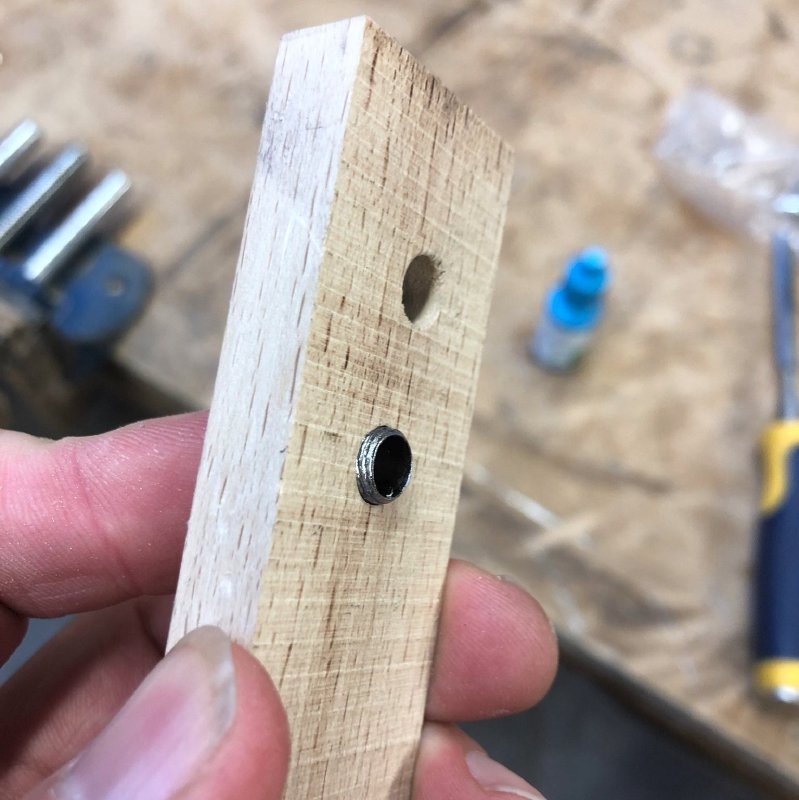
I then sanded the end here using a disk sander until it was flush with the wood. Be very careful when you do this, as the metal gets extremely hot almost instantly, enough to burn your hand. I recommend wearing some workshop style leather gloves or such when doing this. But the end result was a nicely shortened bolt:
This then enabled me to get the tuners mounted on the headstock, which then let me string up the guitar.
Success! At least briefly: this modification unfortunately lead to a second issue.
In hindsight, the second problem should have been obvious (and indeed maybe you already saw this one coming and have been shouting at the blog all this time), but in making the bolt smaller, I’ve effectively moved the top of the tuning peg higher than it was designed to go. On a regular tuner this probably wouldn’t be much of an issue, but with locking tuners it was particularly bad, as they have a higher string exit point that regular tuners.
In the above picture you can see that with a locking tuner the string doesn’t end up wrapped around the post multiple times as it would on a traditional or vintage tuner, it just enters the hole in the post, gets clamped inside the post by a pin, and from there it then just takes between half a turn and a full turn to get it in tune. Whilst this is what makes the locking tuners good for stability in tuning (there’s less wound string to expand over time) and quick to set up, it means that the string itself leaves the post at a much higher point than it otherwise would, which in turns means there’s less down angle on the string at the nut.
And because I’ve just made these tuners effectively another millimetre or so higher, they just did not pull the strings down enough to stop the string buzzing when played: the string is almost floating on the nut rather than being held down in it. My modification to make these tuners fit worked, but it left me in a place where the tuners just weren’t suitable. What was it I said eariler about “measure, measure, cut” again?
To be fair, even without my changes to make these tuners work beyond their expected bounds this is a risk anyway, which is why better quality locking tuners will come with staggered posts, the posts getting smaller as you move away from the nut, to give you a better down angle across all strings. These particular tuners being more affordable don’t have that (I bought them very early on in my career before I understood anything about locking tuners).
Another solution to this issue would be to use multiple string trees on the headstock to pull down all the strings, but unfortunately the headstock logo gets in the way of this. This is clearly the mark of hubris, plastering my own logo over the headstock getting in the way of things I could use to make these tuners work.
Whilst it’s normal to have a string tree that pulls down the higher two strings, in this situation I’d need a second one ideally to pull down the middle two strings, and where I’ve put my logo kinda scuppers that. Doh!
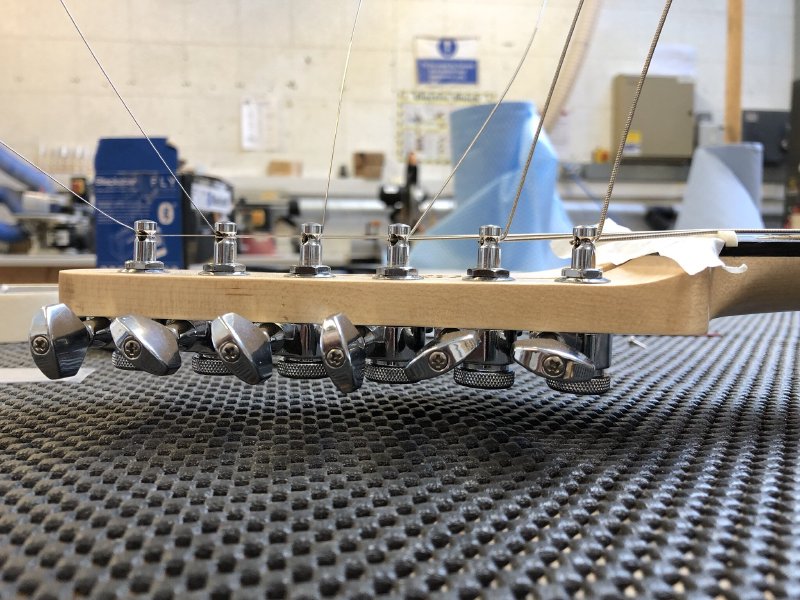
Thus, in the end, given I was getting low on time, I did just swap the locking tuners out for some more conventional Gotoh ones. Although the post heights on the two sets of tuners are almost the same, as you can hopefully make out from this picture, because the string is wrapped around the post several times the string is pulled down much more than it otherwise would be:
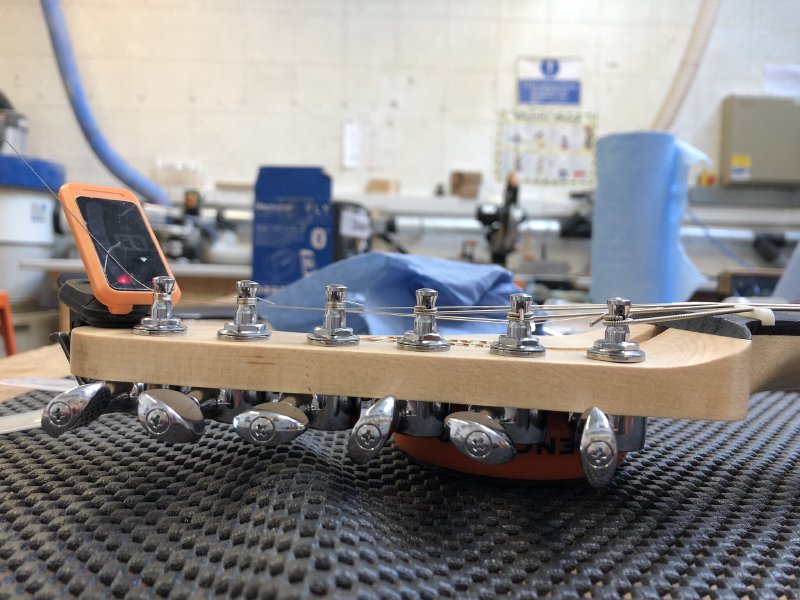
At this point I’d also added a string tree, so the higher two strings are pulled down even more acutely. So, problem solved, but a lot more messing around than I intended!
With the tuners in place I was finally able to string up the guitar with its new neck, after which I left it a day to let the neck adjust to being under tension.
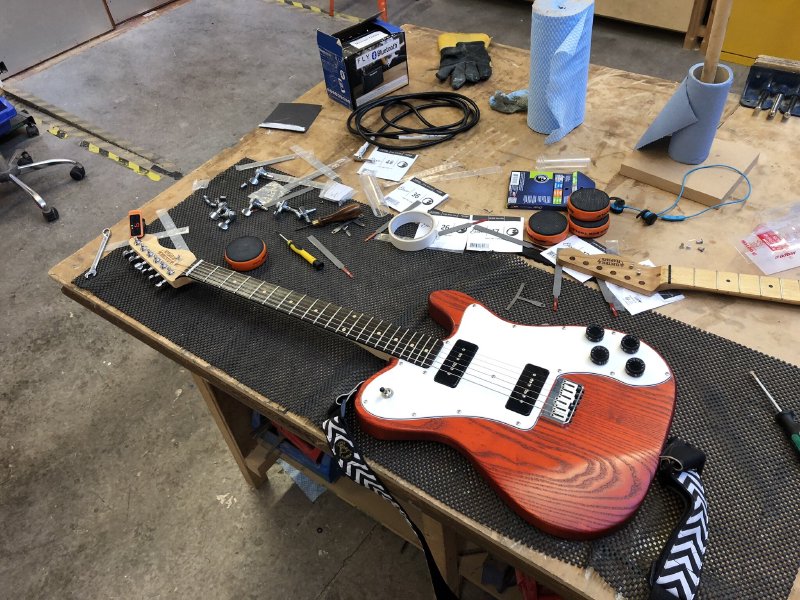
I then came back and did a proper setup: setting the bridge saddles, adjusting the truss rod, and filing the nut. I’m pleased to say that the new neck works much better than the one it replaced, with the action now being much lower and the neck itself having a better fret setup. The old neck was being replaced as it warped whilst I was working on it, meaning the action was quite high and that I had to abuse the fret heights to try and compensate for some of the bowing. The guitar plays much better now, and I was able to use it as the demo guitar at Oggcamp.
It’s not perfect though - it definitely could do with the fretboard edges being rolled over a little more, something that only became apparent once I could actually play it. Unfortunately I just didn’t have time to make that adjustment last week, so I’ll try fix that in the near future. But for now, it plays, and I’m very happy with how it does.
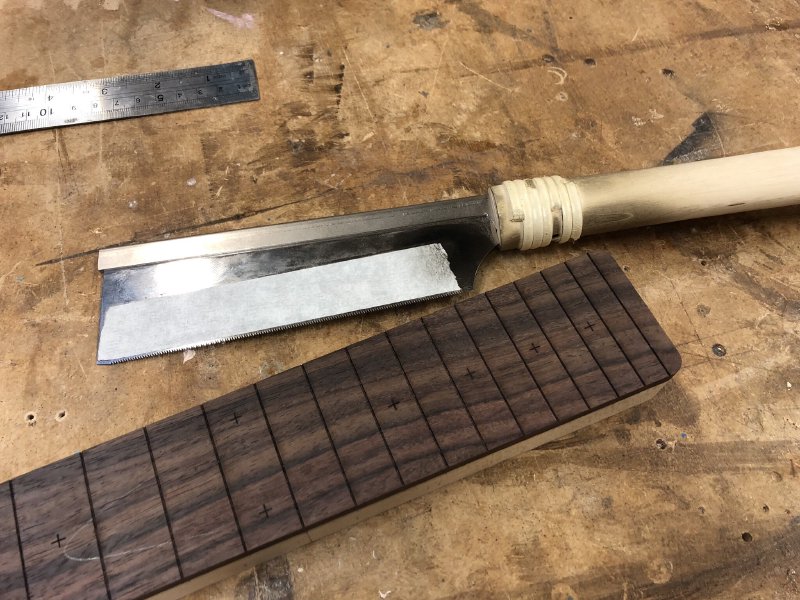
I did do some work on the neck for the mustang style commission #10, though not as much as I’d hoped due to the above messing around with tuners. The first task was to run the neck through the laser cutter. First to do the headstock logo, and then secondly to mark out the fret and inlay positions:
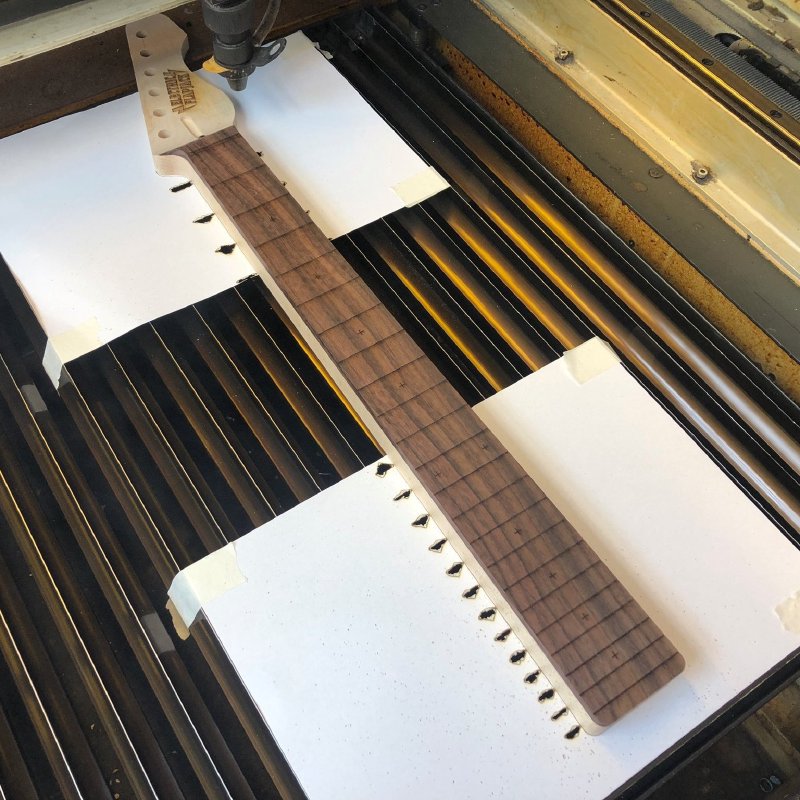
Having marked out the frets I then also cut them to the initial depth with my fret saw. Having recently done this task on a wenge fretboard (the above neck) and a purpleheart fretboard it was very nice to do this on some indian rosewood which is much easier to work with.
This done I then flipped the neck over and marked it up for hand carving. I took a lot of pictures here so I can do a proper post about my process here, so that if you want to hand carve a neck you can see how I do it (and it means the notes will be more accessible for me).
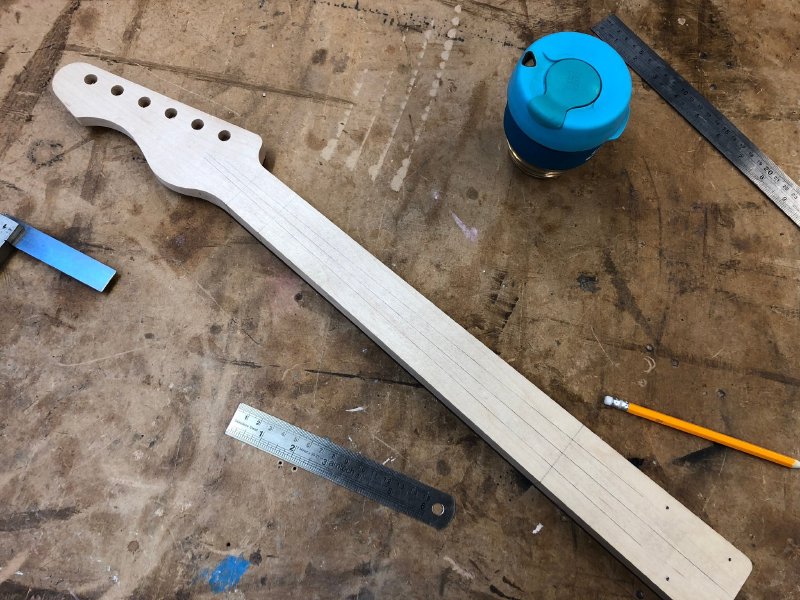
Alas the truculent tuners stole my time, so carving this neck is deferred to next week.
The one other thing I did in the workshop was 3D print a new fret-press jig, after I destroyed the last one in use (as posted a couple of weeks ago).
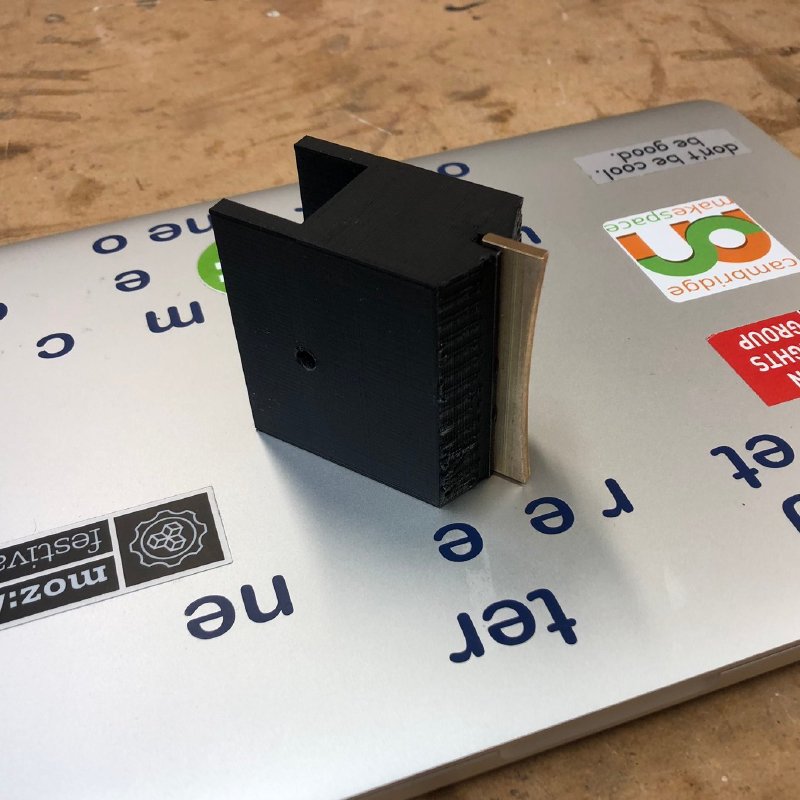
This time I’ve used significantly more infill, so it’ll be interesting to see how well this one takes the pressure. I still think I want to just buy a proper pre-made jig, but right now I’m short on time so given I had the design already for this, and we know the design itself works, it seemed silly not to just try make a stronger one to try out.
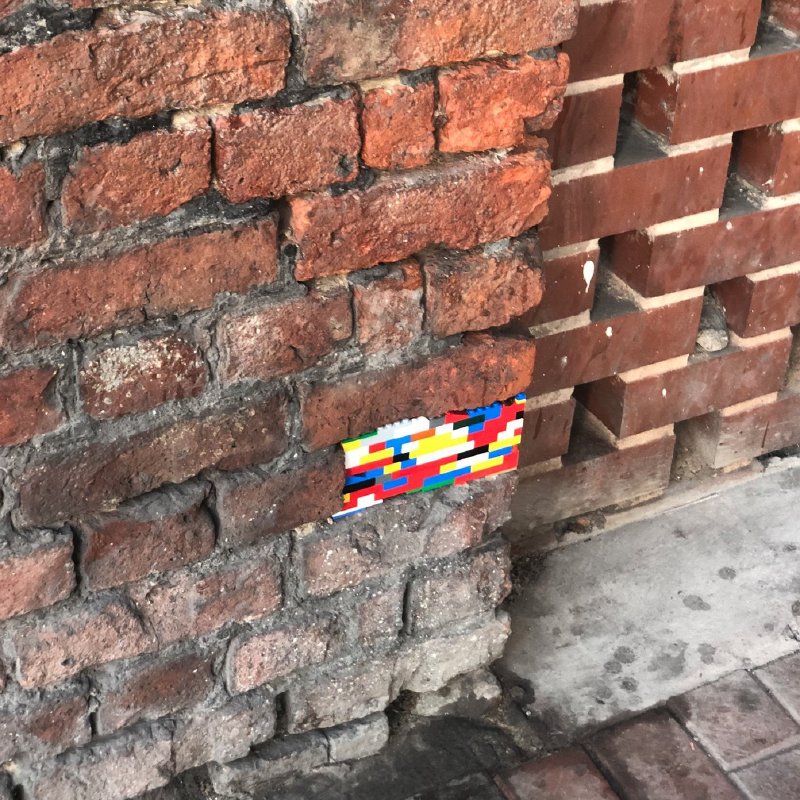
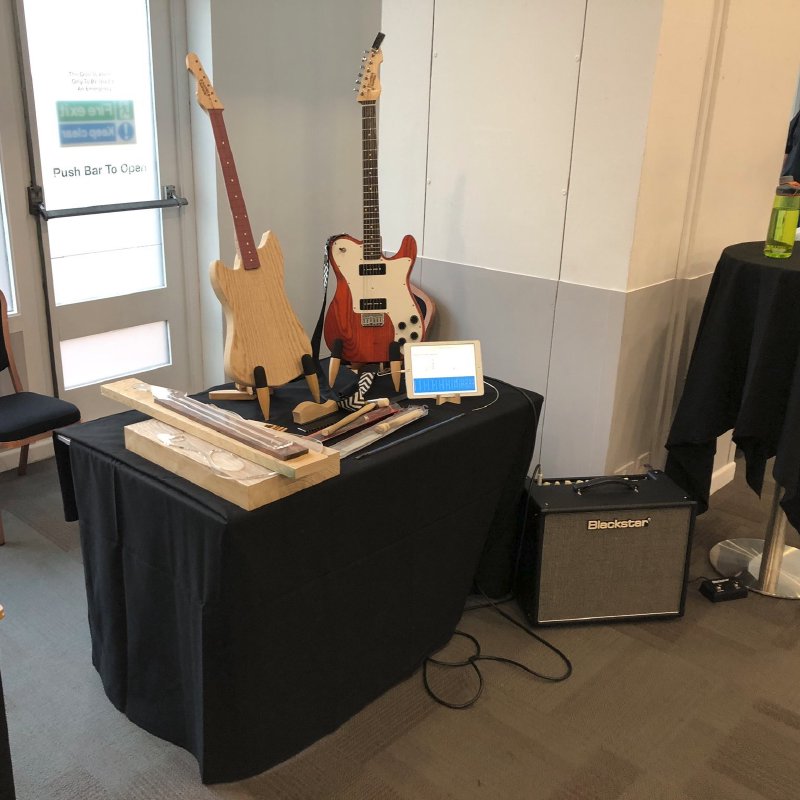
With the week almost up, I filled my car with all the guitar building things I could, along with the finished re-necked Blues Deluxe guitar, my 20 watt Blackstar demo amp, and dashed up to Manchester for Oggcamp 2019, or Oggcamp 10, depending on how you like to do your counting. Embarrassingly this is only the second time I’ve been to Manchester, and as with last time I had very little chance to see the city itself. I can confirm you can find a nice coffee and EV charge points, so I assume the rest of it is equally awesome. They also have a thing about bees, which adorned every surface in the city, and the repair buildings with lego, so what’s not to like?
Whilst I’d never been to Oggcamp before, I knew it by reputation to be a free and open source software conference primarily: so whilst I was flattered that I’d be invited to be an exhibitor, I wasn’t sure how I’d fit in. I knew that I can lay some claim to open source credentials thanks to my open sourced fretboard generator, but would a bunch of software people really be that interested in seeing a table covered in piles of wood?
I turns out, I didn’t need to worry. I was kept busy talking to all manner of folk over the two days Oggcamp ran, with a mix of people interested in this unusual application of open-source software, to those interested in how guitars are made, to those who were just guitar fans and wanted to either have a go on the guitar I’d brought or just talk music. A particular shout out to Matthew Croughan from DoES Liverpool who did some amazing John Mayer covers:

In the quieter moments I also just provided background music :)
It was a great weekend, and I’m grateful for everyone who stopped by - you all made the trip worth it!
A special shout out to Steve Upton, who’s a former Makespace member, who realised I didn’t have a support person with me and ferried me sandwiches and teas at appropriate times. The Maker community is great. Thanks also to Dan Lynch for inviting me and Caroline Keep who managed getting the exhibitors set up.
A second plus for me about Oggcamp was it helped me sync up with what is becoming for me a second maker community I can participate in. Whilst I am honoured to be part of the Cambridge Makespace community, being in different maker communities provides different perspectives on things, so I consider myself fortunate that between regular visits to DoES, Liverpool Makefest and now Oggcamp I’m getting to feel like part of a second set of makers in that northern England region. Maintaining these connections alone would have made the trip worthwhile.
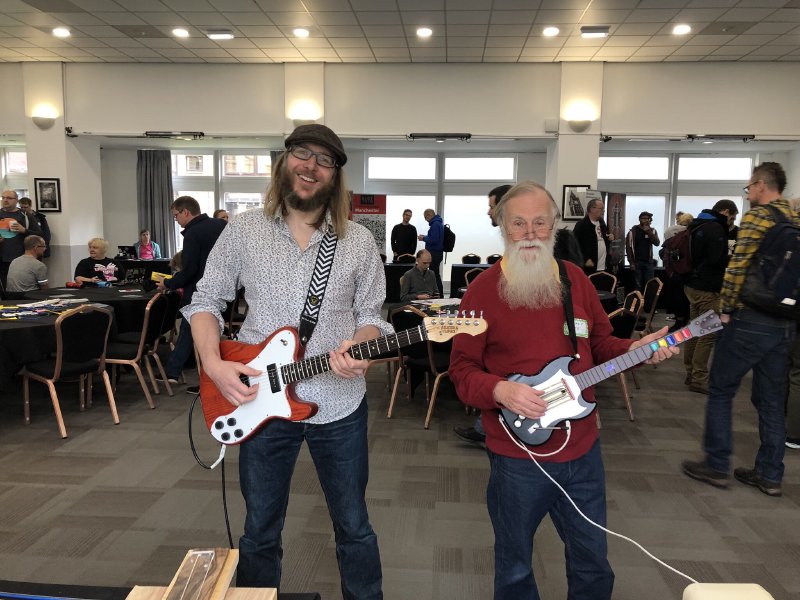
One nice bit of planning at Oggcamp was I was set up next to Mike Cook, aka Grumpy Mike (a name he gave himself I hasten to add!), who did a bunch of digital guitar-like instruments that used digital electronics to emulate a variety of guitar and bass sounds.
Whilst Mike’s work may have the aesthetics of a toy, it belies a much more meaningful intent. Whilst I often sprout the general wisdom that “anyone can play guitar”, that assumes that you are capable of the required physical dexterity, and that is not something everyone is fortunate to have. Mike’s instruments look to address this in different ways.
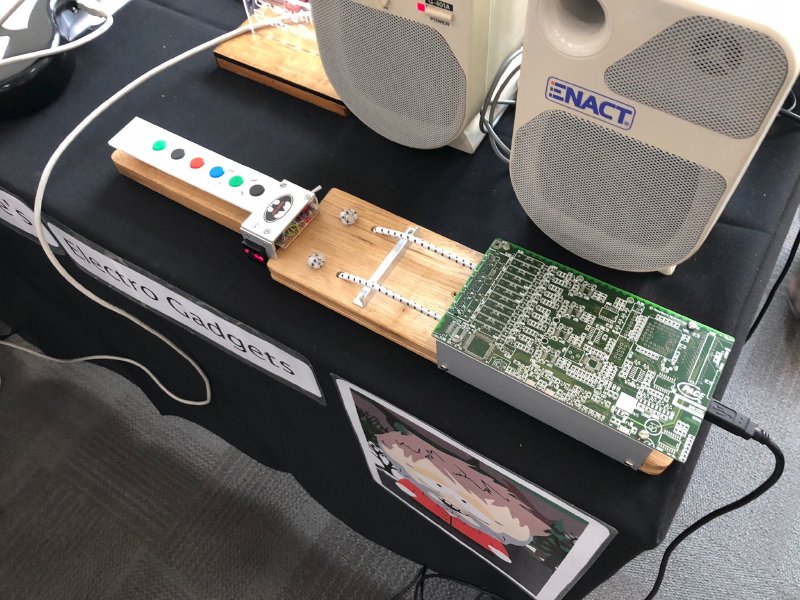
The instrument above that looks like a small cricket bat with some electronics on it and two bungee chords was made to help a bass player who suffered reduced finger dexterity in his later years. Hidden inside the electronics are two movement sensors that detect when the bungee chords are plucked, which will then generate midi notes. You select what notes the two strings will generate by setting it to a particular key, and then using the buttons on the neck to select a note in the scale of that key. The second string is just a fixed offset from the first string as it would be on an actual instrument as if you barred it when playing. Whilst it doesn’t look like much you can readily play a good bass line on it, and thus enabling someone with reduced physical mobility the ability to play with similar affordances to the traditional version of the instrument.
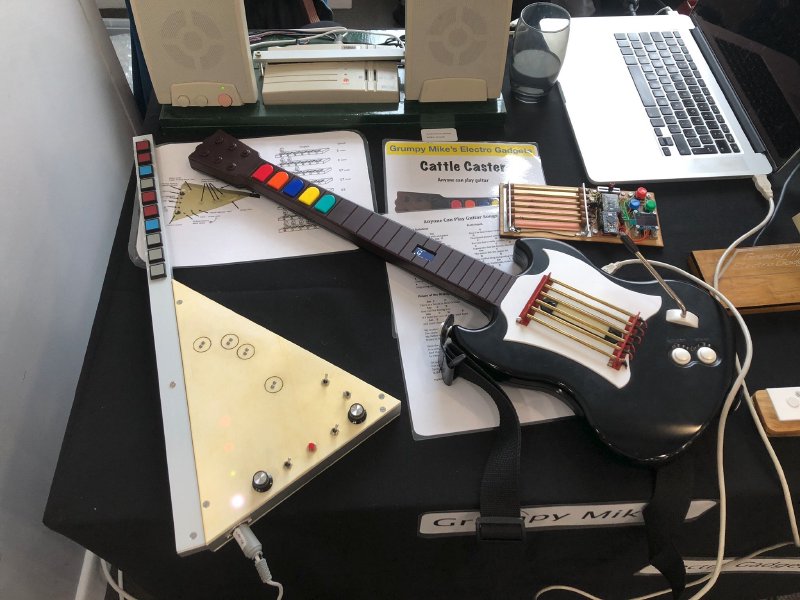
Mike’s other instruments were slightly more automated versions of a guitar. The one built from a guitar hero controller would let you string strings in scale similarly selected to the bass using buttons. Though rather than picking a particular key yourself it was programmed to know about particular songs, so it would pick appropriate chords for you as you pressed the buttons rather than having to get you select from all possible chords on such a simple interface. Mike had put quite a bit of thought into how the touch sensitive brass rods that simulated the strings worked, allowing quite a range of nuance to the performance.
The triangular instrument had a different interface again, this time just having a light sensor that you covered to trigger automated arpeggios in the chord you selected from the buttons on the neck. It’s a lot of automation, but then for someone with no ability to play strings in a traditional form this is an amazing instrument.
Unfortunately most of these are one off pieces Mike’s been asked to make for people, so there’s not much information on line about this. But if you are interested in making these things yourself Mike has a book on the topic you can get.
It was great to see these instruments and understand them beyond their appearance as toys as properly liberating instruments for those unable to operate a more traditional guitar. Mike and I even managed a little jam or two between chatting to people. It was great to have our stands next to each other as they provided two takes on the same topic, making each stand more interesting as a result.
Finally a shout out here to a friend of mine who’s been doing a different take on this trying to document their journey business that I is part of what I do here. I feel I don’t know Matt hugely well, but I’m aware he’s been trying his hand at stand up comedy this last couple of years, which has to be a tough gig to get in to, but is his passion.
He’s recently started something called Project 10, where he’s doing a video each week doing an honest take on how he’s progressed that week: how many mics did he do? how many new jokes? now many times has he bombed? It’s a refreshingly honest and bare take on someone pursing his passion.
The videos are generally relatively short, and you’re not going to find a guide on how to be a comic here, but you will just find someone pushing through and reflecting and planning, with a subtle infectious enthusiasm. It’s not something that will change your life (probably), but I find it useful to know others are going through the same set of mental questions we all do when we follow passion projects like these, so I’m grateful to Matt for sharing.