A productive week in the shop
11 Feb 2019
Last week The Clydesdale offset build finally came together, which has made me very relieved/happy.
At the end of last week I’d put it all together and strung it up to discover that the neck was sitting a bit too high and I needed to route out a bit of material from the neck pocket to compensate. It turned out that wasn’t the only thing that needed tweaking: when I sat down to prep for routing out the neck pocket a little to lower the neck, I noticed that the low E string was particularly buzzy, and upon closer inspection I discovered that one of the frets had shifted over time to sit proud at the low one end, which resulted in buzzing for any note played behind it. Wood shifts over time, so although frustrating, this is something that just happens occasionally and has to be accepted and dealt with. Thus before I could adjust the neck I first had to fix the errant fret, as nothing I did on the neck position would fix that problem, and I’d not be able to tell how well the neck was positioned with the fret causing issues.
I tried my best to reseat it without removing it, but in the end I couldn’t get it set correctly, and even if I did I was worried it might unset again, thus in the end I bit the bullet and re-did the fret from scratch. I taped up the neck to protect the fretboard, carefully pulled out the rest of the fret, and then put in place a new one. This replacement fret sat in much better and held fast. But now I have one fret that is higher than all the others, so it was time to file it down level and reshape it to match.
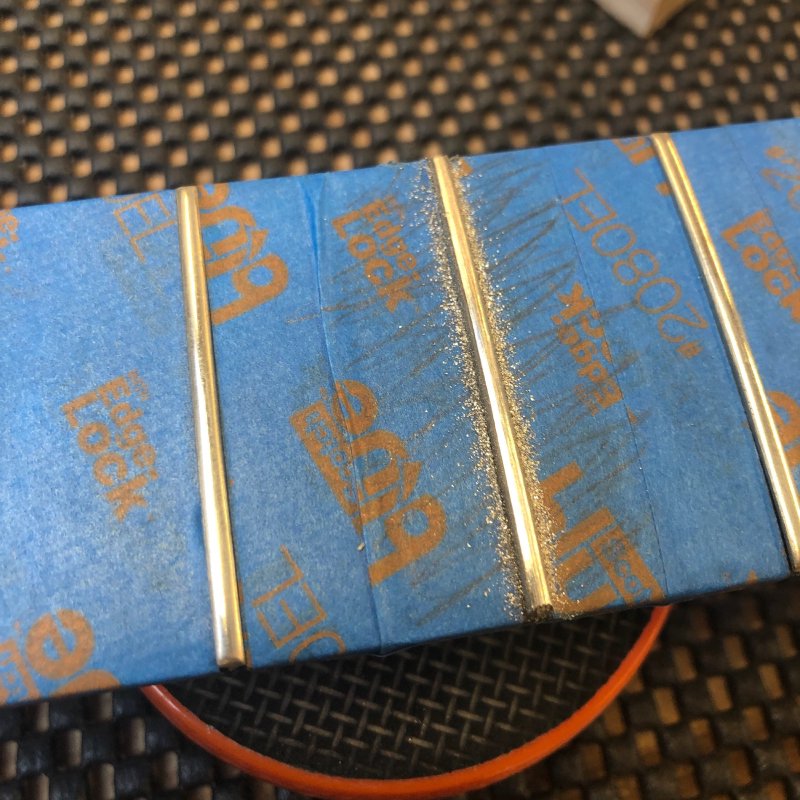
Filing down one fret without damaging the others is slow work, but after an hour or two of filing, measuring, filing, measuring etc. I got the replacement fret down to the right level and polished it so it looks just like the others and you’d not know it was treated special. With all the frets back in place, next it was time to lower the neck pocket on the body.
Taking material away is obviously easier than adding material back, but because the body on The Clydesdale has been stained and oiled to finish it I needed to take care not to scratch the now beautifully surface. The tool to remove the material for a task like this is a hand router with a following bit - that’s a bit with a bearing the same radius as the cutter, so I can just move the hand router within the pocket to remove material from the bottom, and the bearing will stop me eating into the side walls of the new pocket. But a hand router has a large flat base that it uses to keep itself stable that slides around the top surface of the thing you’re working on, and that’s where scratches might occur. To counter this I used a combination of cleaning cloths and a small jig made from ply to sit atop the body and protect it, and the result looks a little like something from an operating theatre:
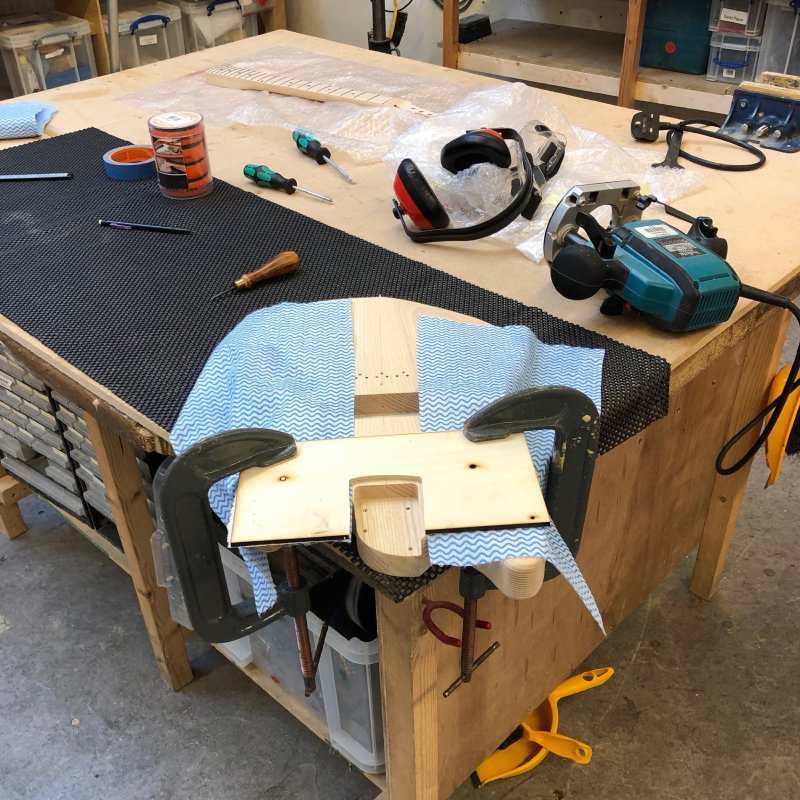
I actually still had the original body for the The Clydesdale that the CNC Router ruined sitting around, and above that’s what I’m using as a quick practice run. It had the same neck pocket depth so needed the same treatment anyway. After I was happy I’d got my technique down on the test body, I repeated the process on The Clydesdale itself. Here you can see the results:
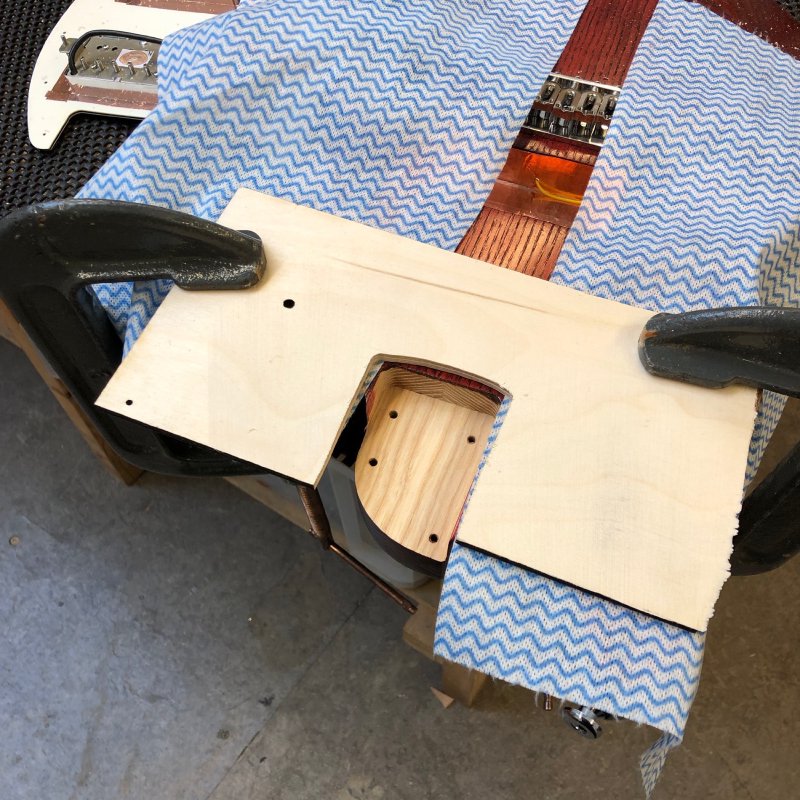
Before I got to the workshop I checked the neck heights on my other guitars to work out what my target height would be. My tele’s have the fretboard about 5 to 6mm proud of the pick guard, and The Clydesdale was at 7.4mm, so all I needed to remove was 1.5mm to get it in line, which I can do easily in a single pass. I was worried that I might need to touch up the finish on the edge of the neck pocket where I’d removed material, but as you can see there’s a beautiful clean line; I only had to remove a sliver of material here, and my router bit was nice and sharp, so it gave a nice clean cut.
Once done I then strung up the guitar once more, and everything was much happier. A day of stressful work, but all worth it.
The following day I sat and started the setup. Jamie of Swannell Guitars, who stopped by the workshop briefly this week, gave me the sage advice that I should spend a lot longer on setup than you think is required, as it’s the setup that really defines how a guitar feels to the player. So I put on it a set of strings I’m familiar with (so I’d understand how the guitar felt, rather than using the strings the customer wanted straight away where i’d be less able to tell) and spent the afternoon filing the nut, tweaking the bridge height, getting the intonation set. By the end of the afternoon the instrument was really starting to make me forget all the woes of the last year, as it became something that was lovely to play.
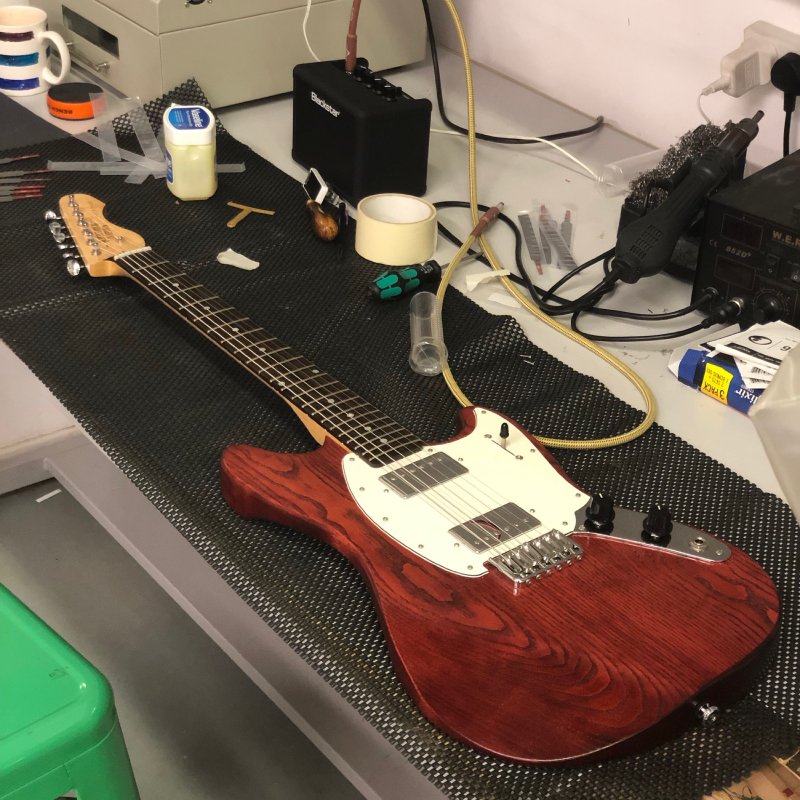
It’s not quite done: obviously I now have to put on the strings the customer wants, which are of a heavier gauge and thus will require the setup to be tweaked a little more. But once that’s done, it’ll be up to Glasgow with this guitar to hand it over!
I set up my pedalboard prototype now that I have the replacement PSU, and it’s looking great, even in it’s somewhat sketchy unfinished-metal-and-MDF-end-caps sort of way:
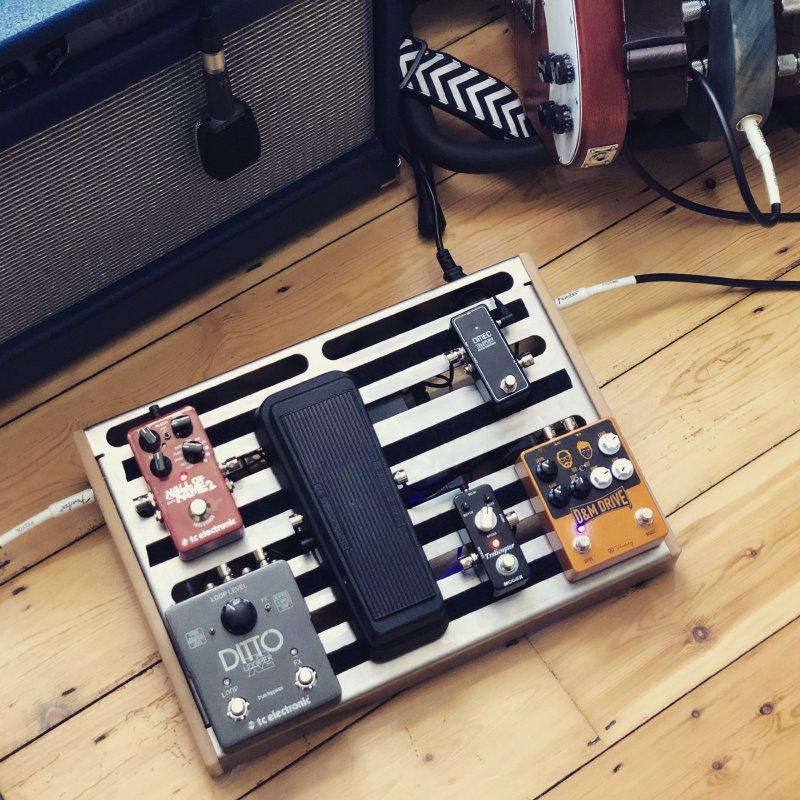
The positioning of the cable routing slots in the top surface fits perfect (as it should do given I measured it all out), and at the same time I upgrading my cables to use custom length patch leads, there’s so much more room on the board than before. On my old board I’d have been able to get just one more small profile pedal on, but here there’s quite a bit of space if I were to squish all the pedals together.
The rest of the routing works well too: you have power, going in the top, and guitar in and out for the entire board on the sides, so it’s easy to pick up and move around. Not visible here are the slots in the sides that are there to make it easier to pick up whilst keeping the top side free of handles that would block pedal placement. All in all it’s what I hoped from the design.
I’ll live with this for a week to check it stands up to abuse: for example, the wah is deliberately in the middle of the board currently where there’s the least support to check it doesn’t give. Once I’m happy I’ll go back to the metalwork manufacturers and review the finishing issues I had with this one and start deciding whether I do another prototype or perhaps even move onto a small small production run. The idea is that for the production run the metal will be powder coated black, and the end caps will be made from some pretty figured wood to make it something that you’d be happy to live with in the studio or your living room. That said, I actually like the bare metal look - what do you think?
I also found a little time to get the electronics on my pedal switcher to the point where I have all the components in place and validated that they work end-to-end.
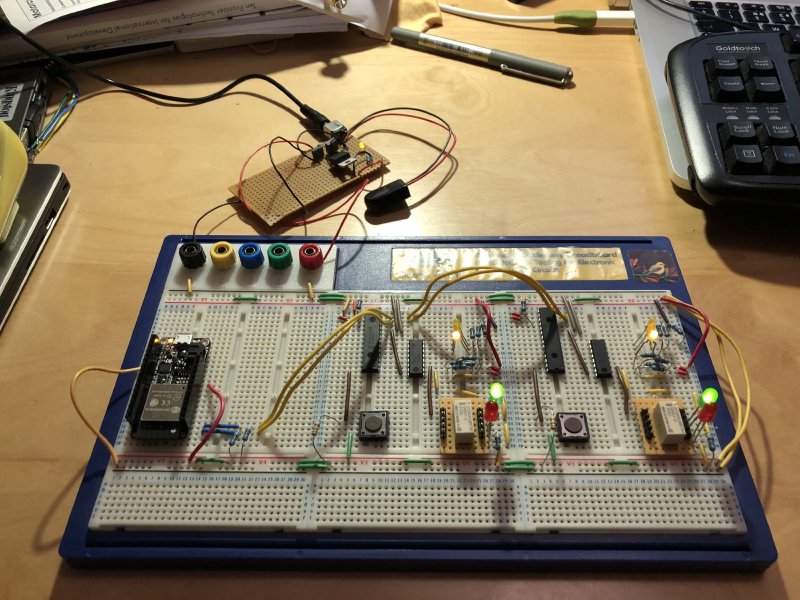
The last stage was to add the relays that would control the audio signal path, which you can see here as the little white boxes on the veroboard, one on the bottom right and another in the middle. Here they’re just wired up to red and green LEDs, but that’s enough to let me see them switch as expected. The kind of relay I’m using is a latched relay which should save on power draw, but also requires more thought to wire up than just hooking it up to GPIOs on an embedded controller. I’m still quite slow at relearning electronics, but I seem to have managed to get these working with a little educated guess work :)
I also have just off the top in that picture a power supply board that let’s me run everything off a standard 9V centre negative power supply as you would an effect pedal. This means that my switcher can use whatever power setup you have for your pedals already, rather than needing its own.
Next steps for this are to figure out how I’ll assemble it into a boxed thing with connectors so that I can order those bits and build a functional prototype.