A couple of days in the shop
8 Apr 2019
I took another crack at joining these two body blank halves again by hand, using my now nicely sharpened No 7 jointing plane, rather than bugging my friend to using his jointing machine. In theory using a well set up plane should be a relatively quick process, but there’s definitely a knack to it that takes time to learn. I started by doing some youtube scouring and found this video which was quite good at explaining the technique required.
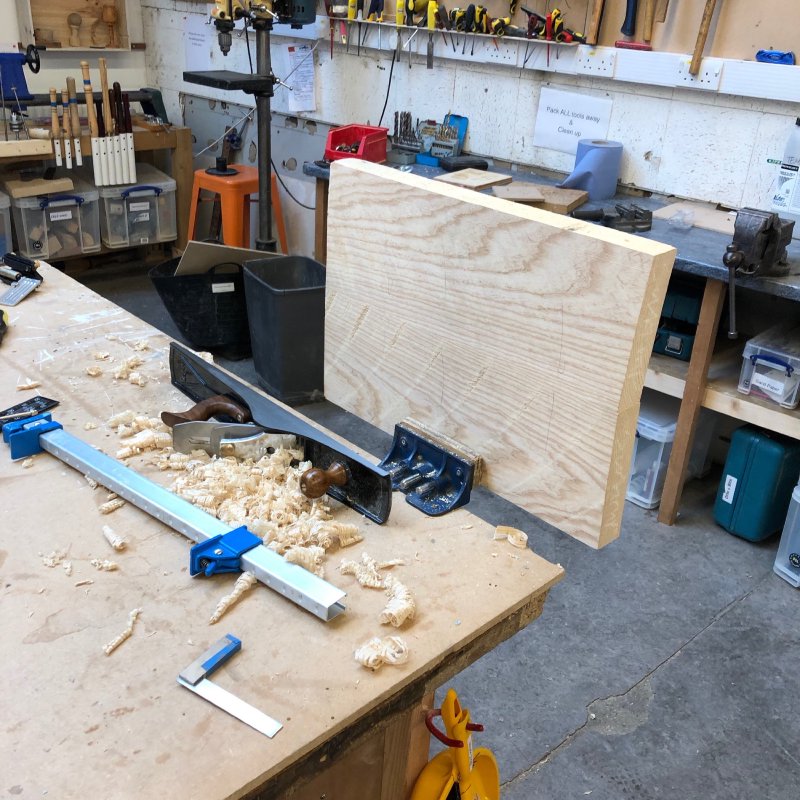
One thing I’ve done here is made my life hard by not having faced or thicknesses the planks, so I don’t have a nice flat reference plane on the front of each bit by which to check the side is consistent using a set square. Makespace doesn’t have a thicknesses (yet, I’m trying to get that fixed), so I have to use the CNC Router to thickness wood which is quite slow, and thus I wanted to hold off doing that until I’d jointed the two halves. However, I think that essentially turned out to be a false economy of time. A lesson for next time.
Still, a bit of persistence, and regular checking that the blade was sharp, and ensuring I took care around the development of a slight convex-ing of the edge in its middle as per the linked video, I got there in the end, and got the two parts glued and clamped down in sash clamps.
Getting to this stage has been much slower than the last time I did this, but that’s because using my friend’s jointing machine has ruined me: it’s amazing how invisible the seam can be on a joint if you take care to get the edges near perfect and you can even roughly align the grain. The last couple of guitars people have had to double check when I explain the body isn’t a single piece of wood, which is quite a satisfying outcome. Getting there with a hand plane is totally doable, but I just need to practice more.
The other thing I need is to look into getting my hand plane ground true. I’m not sure where I’ll do that, but I know that the bottom of my no 7 has a slight drive at the nose and a slight rise at the rear, which makes using it to check how true I am impossible using the plane, even if it’s not hampering my ability to get a straight edge with the plane itself. I bought a semi-cheap plane, as a good plane is a lot of money, and when I bought the plane I wasn’t sure how much I’d use it. But if you’re trying to do precision work, then it’s worth investing in ones as you end up paying for it in time later. I suspect give the person-hours I’ve put into setting this plane up, and the cost of getting it ground, it’d have been cheaper to start with a better plane.
Body blank gluing, I then turned to the next stage for the body, which is making the template to get the body cut out. Rather than use the CNC Router, I’m trying to challenge myself to make this guitar without using the CNC Router where possible, and that means templates and a hand router. I found some nice clear 6mm acrylic, and I set about making the template.
Normally, because I’ve made templates on the CNC Router using MDF, I’d model the template in Fusion 360 as a full 3D model and then setup the machining paths etc. to cut it there. However, using a laser cutter I took a different approach, as I realised that using clear acrylic let me do some other tricks. Although I started going down the template modelling path, in the end I just created a sketch layer into which I projected all the important features, importantly including reference lines such as the centre line and where the pickups etc. will be.
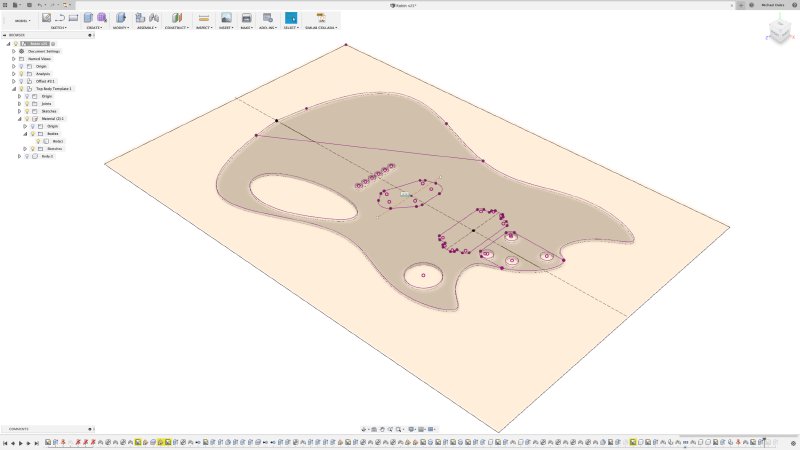
This I then exported as a DXF from the sketch itself, moved it via Adobe Illustrator just to covert the DXF generated by Fusion 360 into the subset that our laser cutter software will understand, and then I used the laser cutter not only to cut holes in the acrylic, but I also etched the important reference lines into it too, so when I’m lining up the template on the wood I can use those lines for either alignment with the joint or to know where I’ll be cutting out holes so I can hide any features I don’t like in the wood behind say the pickups. I also made sure to etch it in reverse, so that the marks will be against the wood rather than floating a few mm over it which might lead to errors due to parallax.
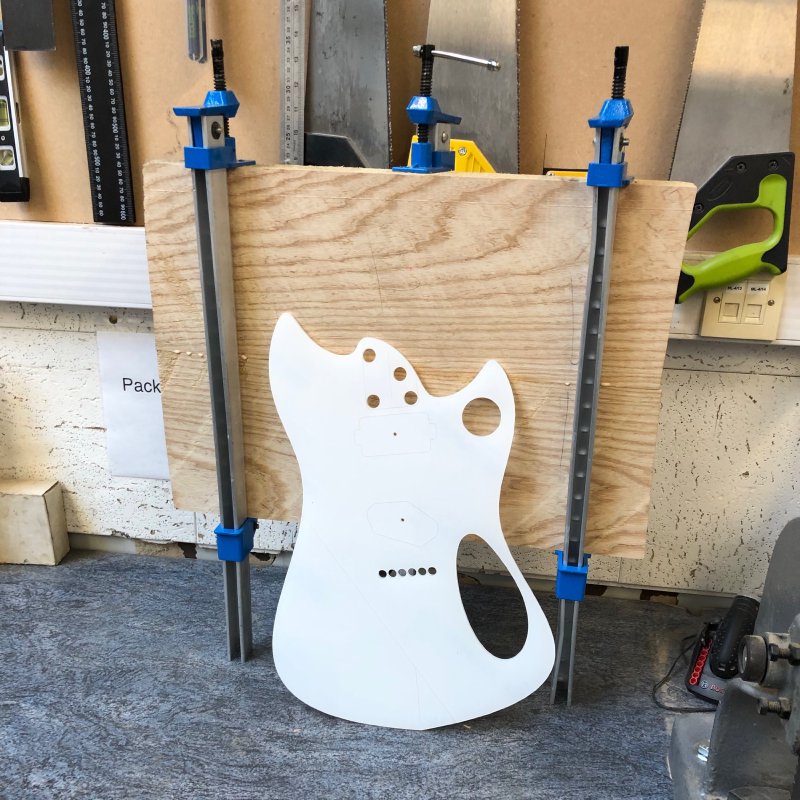
I didn’t get time to take a nicer picture, in the above you have the clear template with its protective anti-scratch film on it, but if you squint closely you can just make out the marks where the neck pocket and pickups will be. I’ll try get some pictures of using the guides as I cut out the body.
I’ve already written about it on this blog, but for those that only read the week notes: my brother’s band IKARI released their debut album this week, Shapes & Sounds. I’ve been listening to it regularly since, and it’s very well executed: I’m very proud of the IKARI lads. And obviously I’m also a little bit proud as it means there’s an album out there with one of my guitars on it :)

Anyway, you can go find the words I’ve already written on the topic here, and you can just go listen to it here.
I still need to make that pick guard for the Recovery Offset, but I really was limited on time this week, so didn’t yet get around to that. In my current anti-CNC Router mood I’m tempted to laser cut the pick guard, however there is the issue that the laser cutter can’t do chamfered edges, and I do think that makes quite a big difference. However, my friend Matt pointed out that you can use a scraper on acrylic and such quite nicely to put a chamfer on plastic, so I gave that a try.
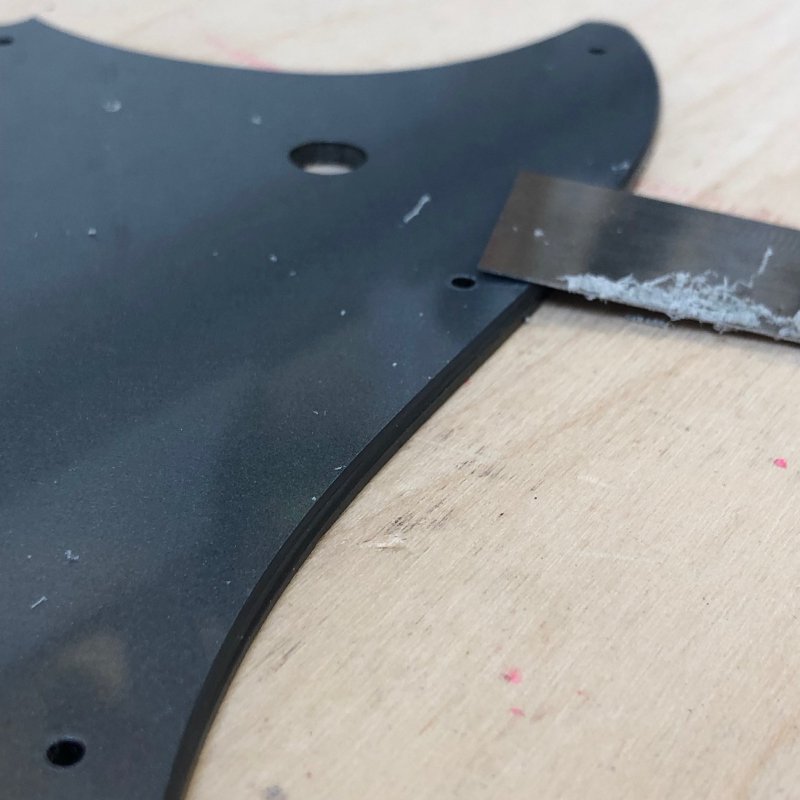
The technique works really quite well, albeit quite slowly. It doesn’t (at least with my technique) give the same nice crisp edge you get with a machined chamfer, but a slightly more organic chamfer which is quite nice. I finished it off with a bit of the old 2000 grit, lest Graeme reads this and think I’m saved ;)
I had a 3D printer failure yet again, this time right at the end of a 14 hour print. I post this mostly because people tend to assume that with things like 3D printers that it’s a bit of an effort free process, but I’d say I get around 1/3 to 1/2 of prints fail using the Makespace Ultimakers. Thankfully most of them fail early on, which saves on both time and money (as I have to pay for failed print material),.
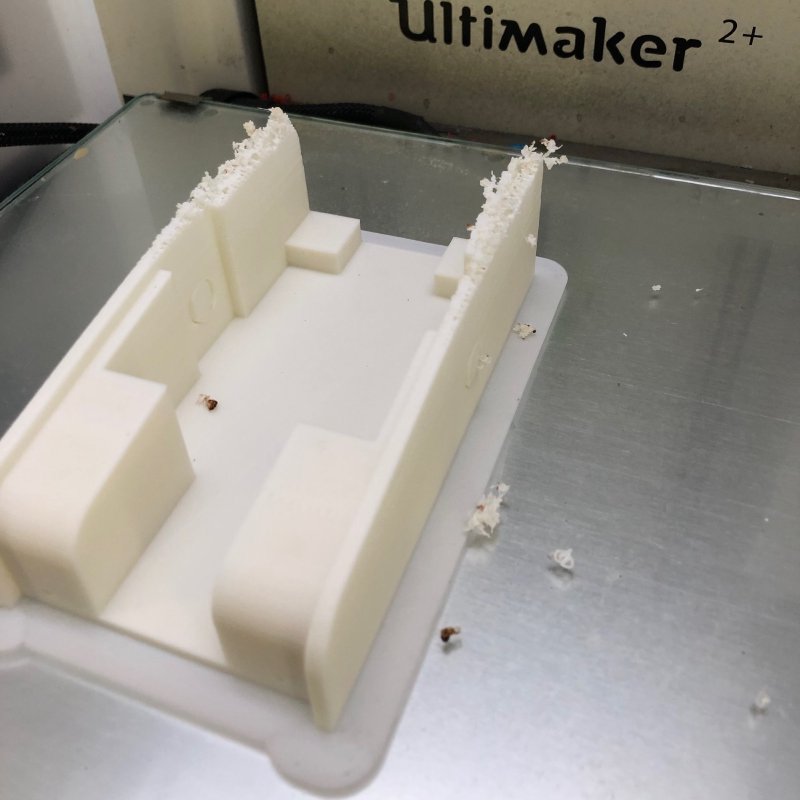
The failure here is that at some point the material stopped feeding. Usually this is because the material has snagged on the spool (the spool system is not very well designed), but I looked at the back of the machine and there was clearly still play in the material so I’m at a loss as to why it has snagged. I’ve had issues with feeding over quite a few prints of late, which is getting frustrating.
In Ultimaker’s defence here I should also point out that given these printers live in a shared space they get an awful lot of use and probably not all of it by people who take proper care and attention when they use it, so I can’t vouch for whether this is normal or not for these machines.
This print was meant to be an exhibit piece for the Makespace display cabinets, so not a critical loss to my todo list, but if it’d been something I needed for a client at short notice this kind of failure would be ultimately untenable. So off the back of this I did look into could I get someone else to print it for me, but commercial services like Shapeways are quite costly in comparison, like almost 500% more costly (not allowing for my time obviously), so even though I now detest using the Ultimakers due to their dice-roll like nature, it’s still the most economical way for me to get case like this fabricated by a long run, and I just have to plan around their poor performance and I can’t assume a quick turn around is possible.
Obviously, it could just be me that’s holding it wrong, but my attempts to engage people on this at Makespace hasn’t been very rewarding; to be fair, I know as an equipment owner at Makespace that there’s only so many hours in the day, and requests like mine are probably behind the users who seem to be trying to destroy the machines with their prints. I’d love to hear from any readers with more experience if those failure rates (using white ABS if anyone is interested) are expected, and if not any tips around ensuring prints work would be appreciated.