A week in the shop
2 Jun 2019
Tags: metalwork, pickups, thicknesser, training, wirign
Having completed the initial stringing up of the Recovery Offset last week, and leaving it under tension for the better part of a week (in part due to my repeatedly forgetting to bring my clip-on tuner to the workshop several days running; I really need two of these so I can leave on in the workshop all the time), I set about seeing how the guitar has settled in. I was worried that the neck pocket might need lowering a little, but after doing further setup on the guitar (finishing the nut filing, setting up the bridge properly to get the intonation right) then it all seemed okay.

Once I was happy with the setup (at least without playing it more), I turned my attention to the electronics. As with the last offset I made that had traditional mustang style single coils (the Bronco pickups from the ever excellent House of Tone pickups) I’ve gone for a 4 position rotary pickup selector, which gives the player the ability to chose between the bridge and neck pickups individually, and then both in series or in parallel. The pickups are wound in opposite directions, so you get hum-cancelling properties when both pickups are in play.
Given I’d used this wiring configuration before I thought I’d just go back to my notes and find the wiring diagram I used last time. Alas, it turned out my “notes” were a photo of a picture I’d draw by hand at some point, which is usable but not ideal.
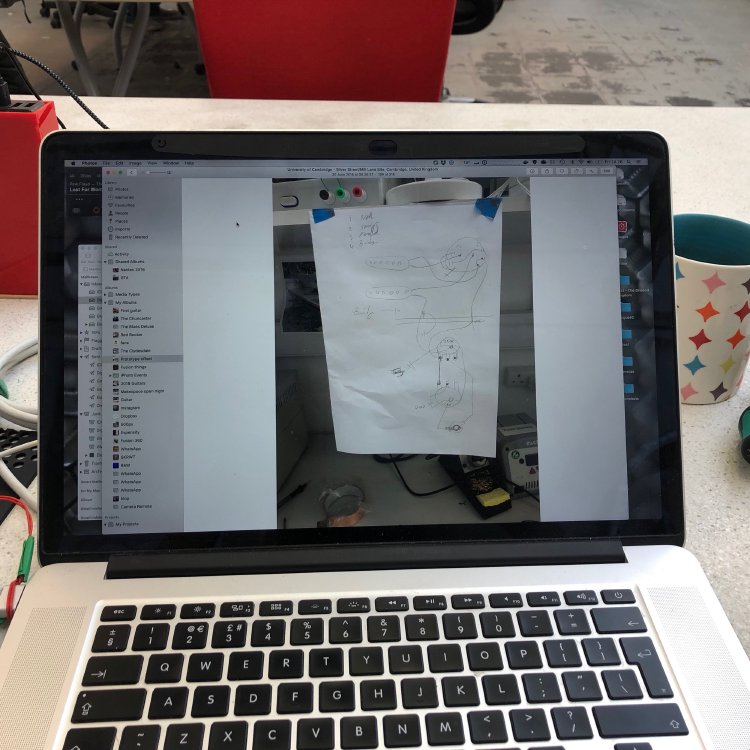
I need to do better at this! I’d like to publish then on this website, at least for anything where I’m not using a traditional layout that can be found on the hugely useful Seymour Duncan wiring guides page. But for this week the photo of my notes had to do. So, out I was with the soldering iron, and a little while later everything was good.
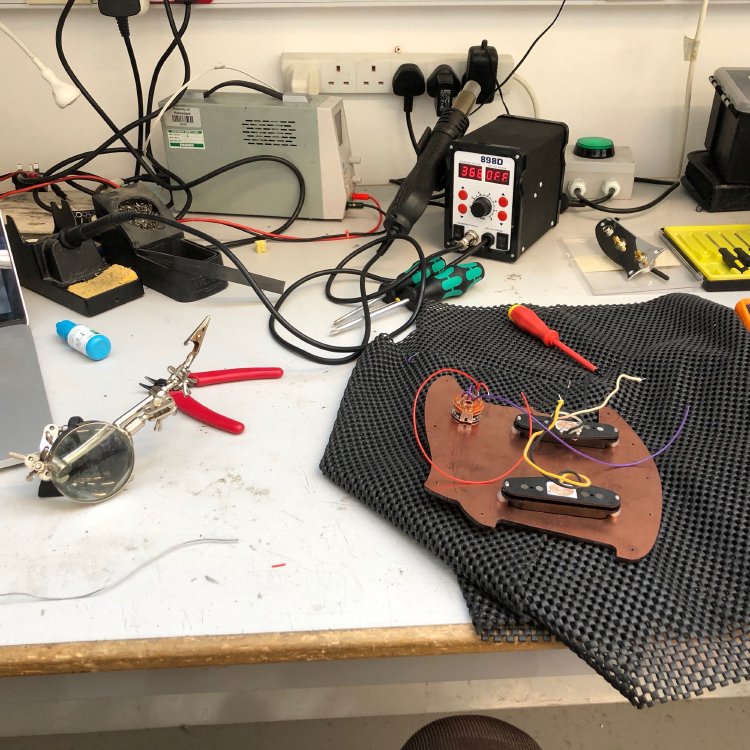
This was probably the first guitar I’ve soldered up where everything both worked first time and fit in nice and neatly. I guess that’s a little bit of experience starting to set in (about time :). All that remains now is to get the strap buttons on then I can give it a proper test session. I’m glad this guitar has come together in time for Liverpool Makefest at the end of the month, where it’ll be my demo guitar this year.
I was hoping to get started on the cigar box guitar this week, but the bit of wood I shaped up last week ended up getting a knock on it, right where I wanted the fretboard to join. Annoying, as this means I need to plane off the top layer of the wood again. This caused me to finally decide that enough was enough, and that a planer thicknesser isn’t a luxury in a wood workshop, but an essential if you’re doing anything beyond making panels from ply or MDF.
For those less familiar with this item, a planer thicknesser is a machine into which you can feed in planks of wood and it’ll shave off the top layer, letting you take then down to the right thickness. When making anything out of timer a thicknesser is the right way to get wood to the correct thickness. Until now in Makespace I’d had to either hand thickness things use a hand plane (a lot slower and less accurate) or the CNC Router (a lot slower and I don’t trust our CNC Router that much). Alternatively I’ve used a friend’s thicknesser in return for beer or such, but that’s also slow in a different way, as I need to wait until they’re available.
But right now I want to be making progress, and I see this as pretty much an essential tool to guitar building, so it’s time I got myself sorted with one.
I had a chat with one of the directors at Makespace, the community workshop I use, and asked whether if I bought a thicknesser I could use it in the workshop there, but as the discussion progressed, and it was clear this tool has uses beyond just my own, then we shifted to the idea of Makespace having a thicknesser and I would be the owner - doing the risk assessment, making sure it kept in good order and training people who would like to use it.
This is a good outcome for me, and I think for Makespace. Thanks to the effort several of us have been making to get the woodworking part of the Makespace workshop into a better shape we now have quite a few people building furniture, so it’s not just me that will benefit, there’ll be a bunch of people who can immediately take advantage of this.
So, we ordered a Metabo DH330, and hopefully it’ll turn up in the next couple of days and I can get cutting some wood down to size!
As part of trying to get more skilled, I also took a step over to the metalwork side of the workshop, and got trained on the metal mill that Makespace has (as pictured here with Jim being shown the ropes of this particular machine):
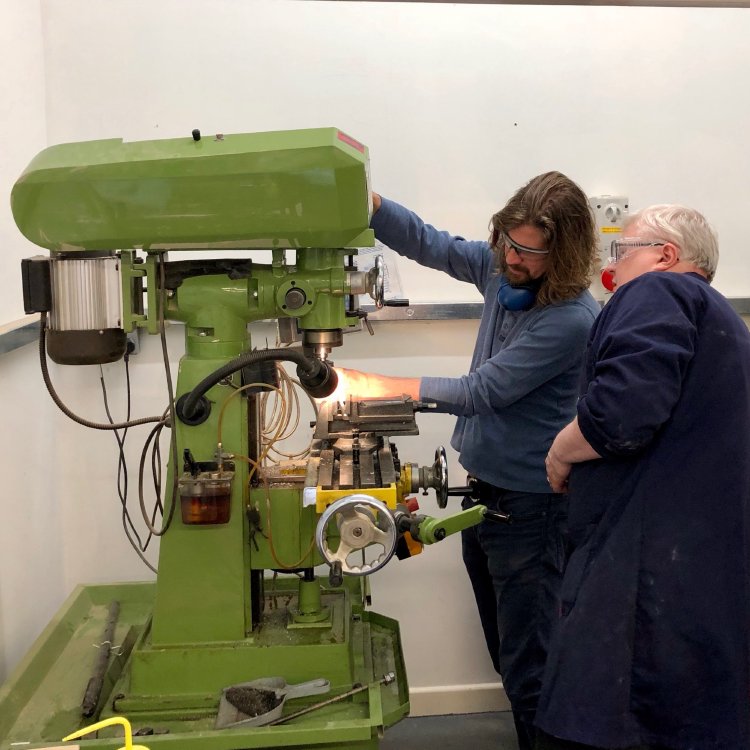
Although it looks quite technical, it’s actually quite a basic machine that lets you move the metal around in three axis by hand, though quite precisely thanks to a digital positing readout. But it doesn’t have any automatic feed, so you can’t do any particularly complicated shapes: you’re limited to making straight edge cuts or drilling out material. As an example of these, I made a mild steel die:
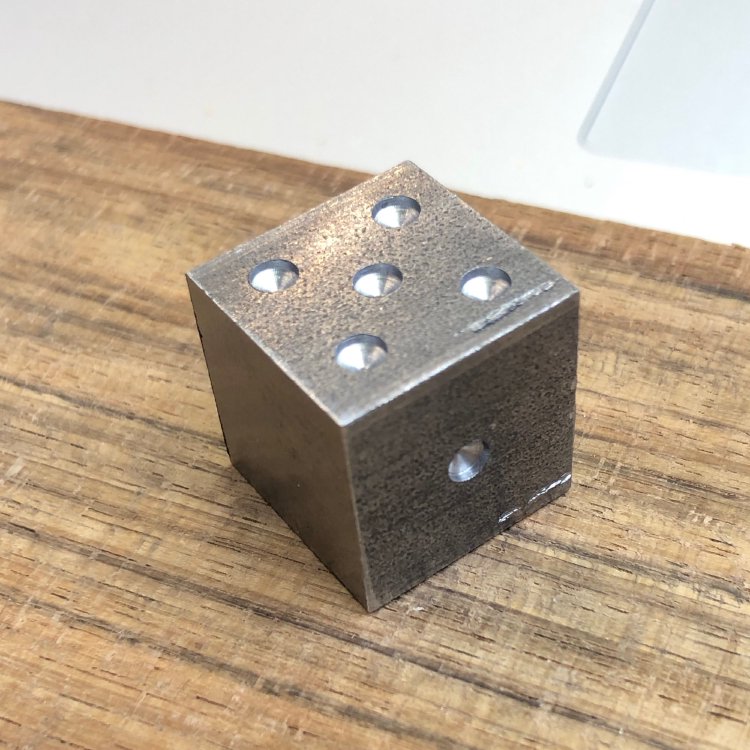
I’ll have to do more research to see if I’m wrong about not being able to produce curves this way, but as it stands given it’s limitations, I suspect it’s going to be less useful to me than what I’d hoped. I thought I might be making my own pickup surrounds or bridges or such, but those require that I can precisely machine curves, and given the stated limitations I don’t think I’d be able to make anything that was up to the standard that I’d want to match what I can do in wood.
Still, learning is always a good thing, and I’m sure it’ll come in unexpectedly useful at some point.