A week of brief moments in the shop
15 Jul 2019
I was mostly heads down catching up on contract work last week, so didn’t get any time dedicated to luthiery last week except a burst at the weekend. However, I decided to go with some industrial headphones and work out of the desk space in the community workshop I use, so when I needed a break from software I could move the guitars forward. This was enough to let me draw a line under two near complete projects and move another two early stage projects forward a little. So don’t worry if you can’t spend all your time working on the thing you’re passionate about, just try and find a way to make any small moments in the week you can find productive if you can and you can move things slowly forward.
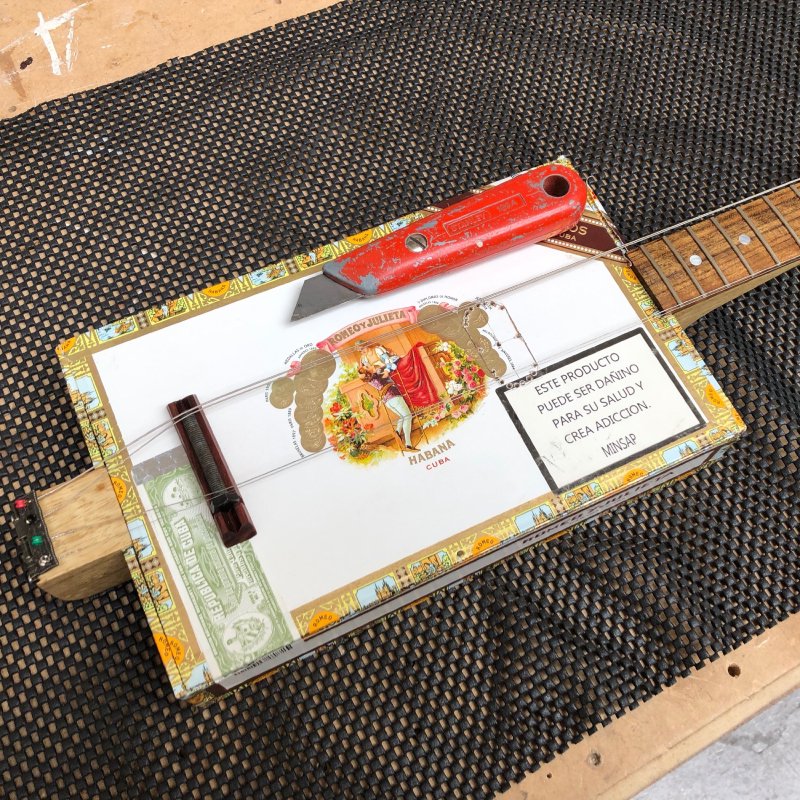
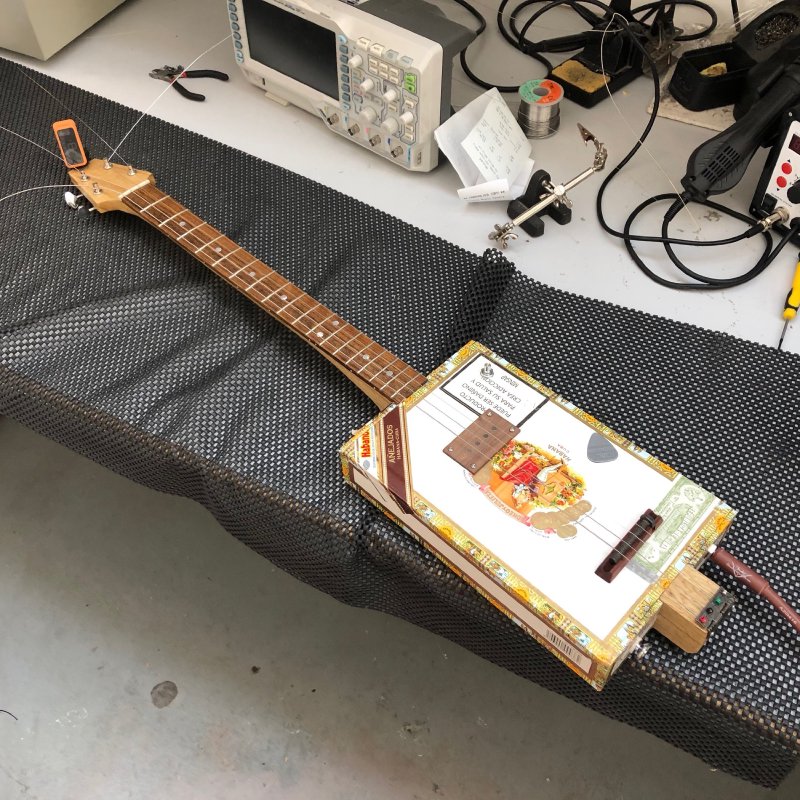
The main thing I moved forward in terms of time was the cigar box guitar, which is now complete. When I took it up to Liverpool Makefest it played acoustically, but I’d not had time to get either the electronics in place or strengthen the box so it’ll cope with being on a guitar strap and having a cable hanging out the side.
The first task was to finish cutting a hole in the lid of the cigar box to let me put the pickup in place, which I started a while ago but didn’t finish.
I forget why, but at some point I’d convinced myself the lid was made from cardboard (not uncommon), but as I cut through I realised the upper surface is cardboard, but the rest of the lid is the same light ply that’s used to make the rest of the box. This explains why the guitar is more resonant than I expected it to be! Had I known it was a wood lid I might have been tempted to make it more of an acoustic guitar with a sound hole, but by this point I was already on my way to making it electric so I kept with the plan.
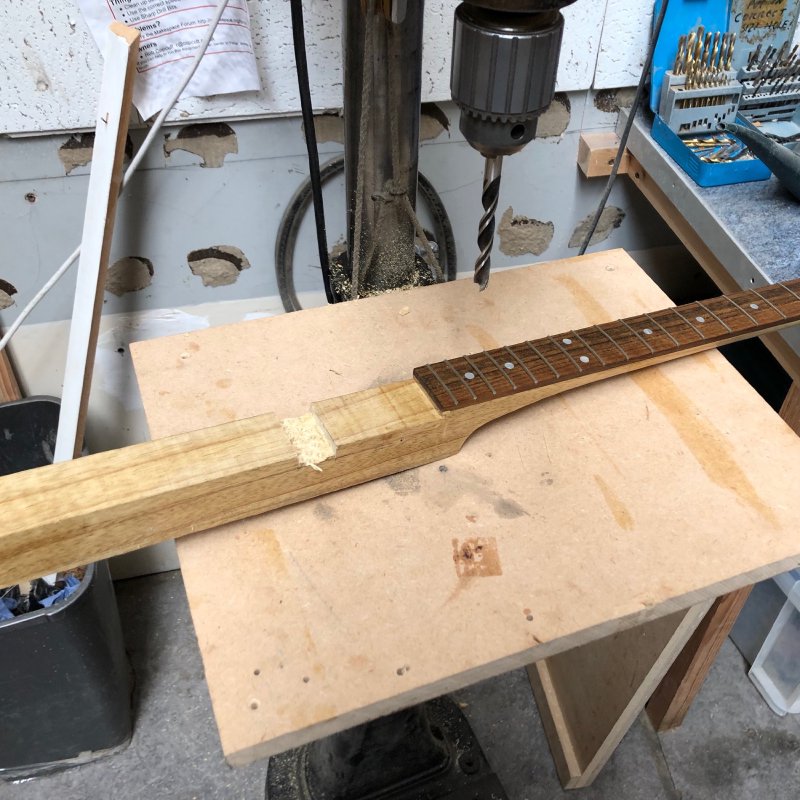
Once the hole in the lid was made, I also needed to remove material from the main body of the guitar, the stick of wood that runs the entire length. I marked this out in pencil using the hole in the lid, cut the sides down with a saw, and then removed most of the material with the pillar drill, finishing it off with a chisel. It doesn’t need to be pretty being inside the guitar :)
This done I was then able to mount the pickup, which I bought from Coney Customs. I need to give it a light oil at some point, but it fits the look of the guitar quite well, and it sounds great.
Pickup in, my next break filling task was to add support to the cigar box. Because I’ve cut holes in the sides to let me run the main guitar neck through, the sides were very flimsy, only being anchored on two sides and not being the strongest of woods. I wanted to anchor the strap buttons to the box, and have the cable jack in one side too, and there was no way the now weakened sides would cope with this.
There are many ways I could do this, but I was saved from procrastination by not having much time. In an ideal world I like the idea of being able to take the guitar apart should I need to fix anything, but in practice that wasn’t a very practical option, so whilst I opted to screw the cigar box and neck together, I used wood glue to add in the support wood between the body and the neck, effectively joining everything together as one.
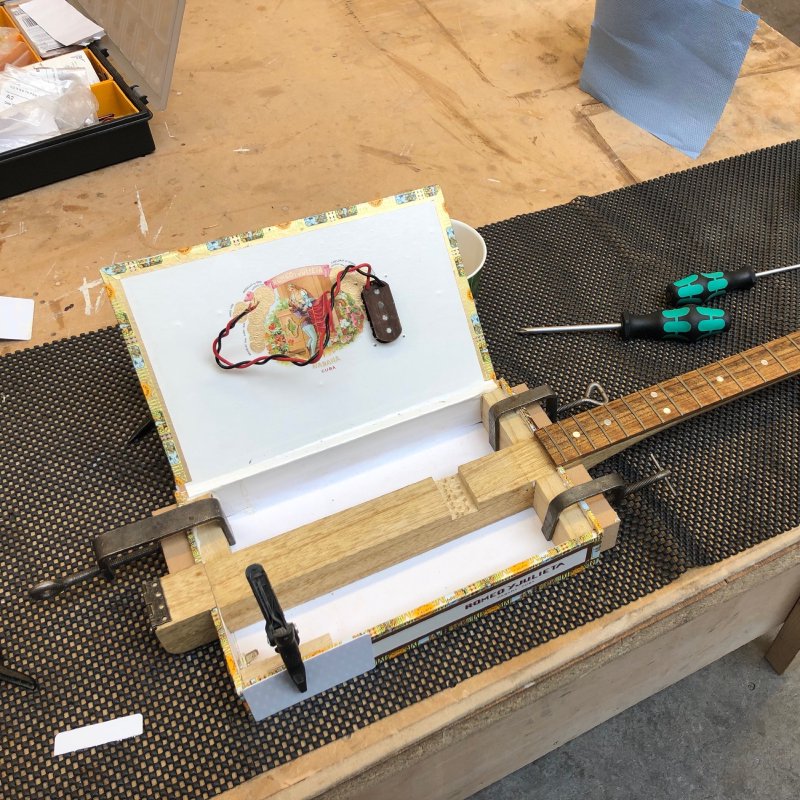
Because of the angles involved getting clamps in and the limited number of clamps of the right size I had, it took me two days to get everything glued:
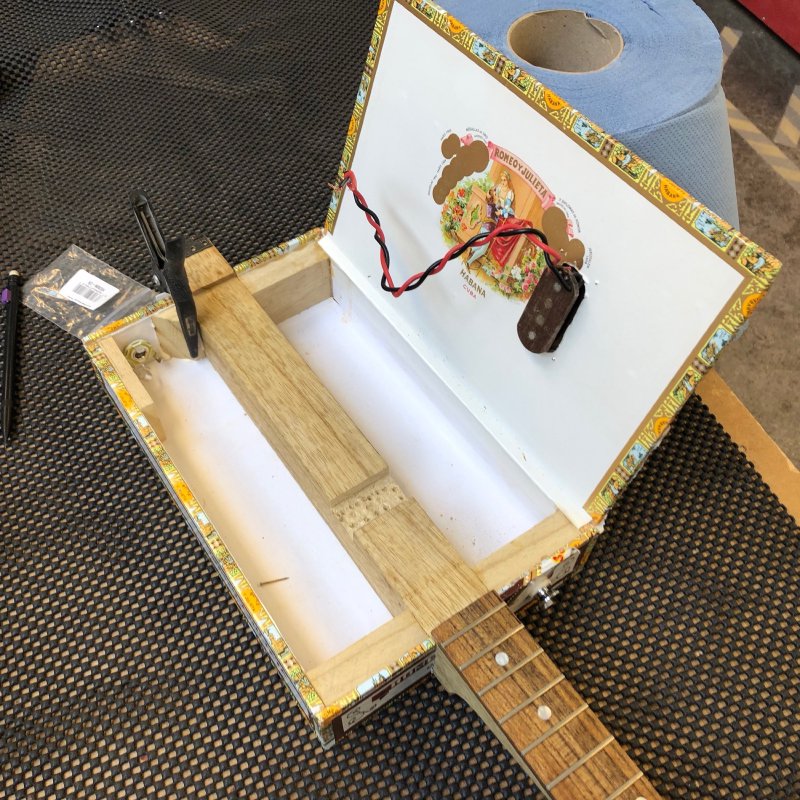
But once set, the box is now suitably sturdy to stand up to being used, and it hasn’t damped the acoustic quality of the box any, I assume because I’ve not impeded the lid movement any more than I already was.
The final little task to complete the cigar box guitar was to get the electronics soldered up. I kept it simple as suits the nature of this instrument: one pickup, one volume control, and then the jack. The main thing I realised late was that the wiring would have been a lot simpler had I put the jack on the lid, rather than in the side of the box, as then all the electronics would have been on one surface. Still, here’s a lot more room to manoeuvre here than in most guitars I’ve worked on, so it wasn’t the end of the world.
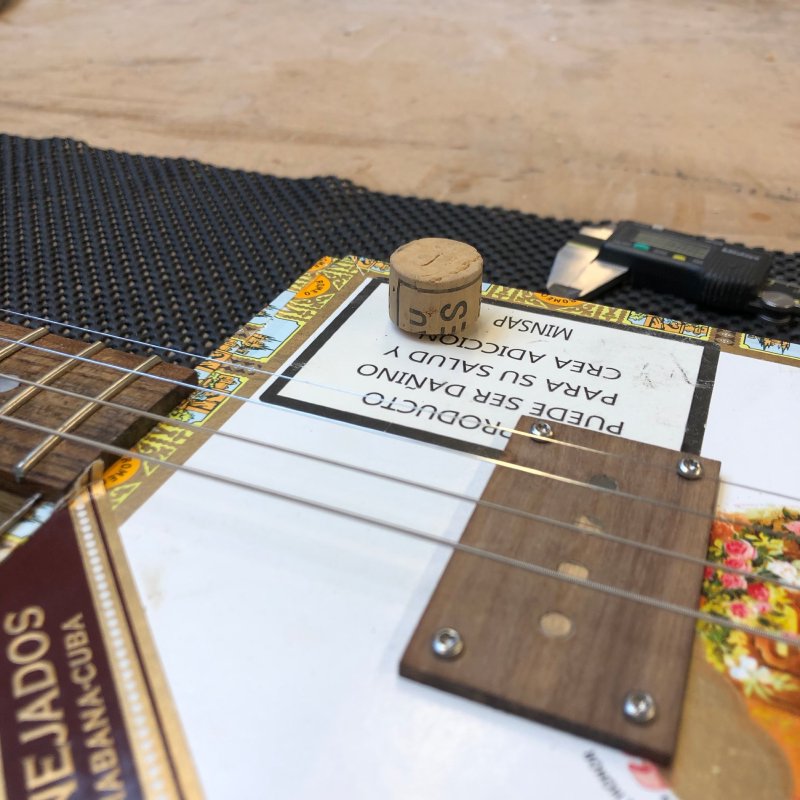
To keep with home made feel of the guitar, I made the knob for the volume dial out of a wine cork:
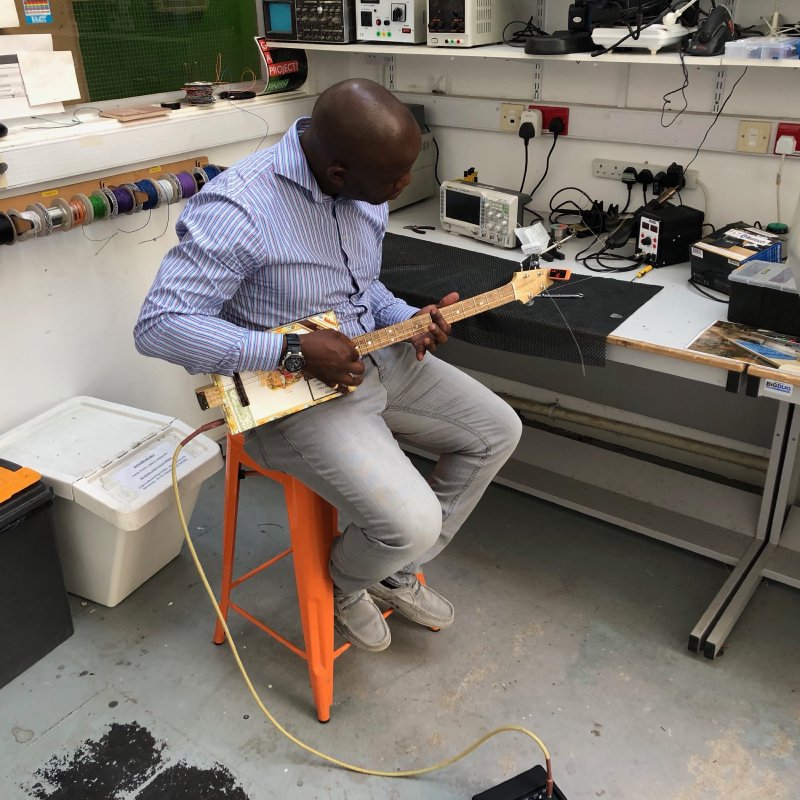
And that’s it - I string the guitar back up, and it plays great. I’ll do a demo video at some point, but it sounds surprisingly professional for such a rustic little instrument. Fellow Makespace member Zi was around, who’s taken my previous guitars for spin, and this one was no exception - it was great to hear it in action.
I have it tuned to open-G currently, GDGD, so it makes a great slide instrument for my very limited slide ability. On my todo list for the near future is get my guitar teacher to teach me some slide licks!
I did one last tweak to the Phoenix Offset, which is now up for sale! I realised that I’d not aligned the pickup selector pot quite right, and so I fixed that little detail, and thus I’m now happy for someone to take the instrument away and play it.
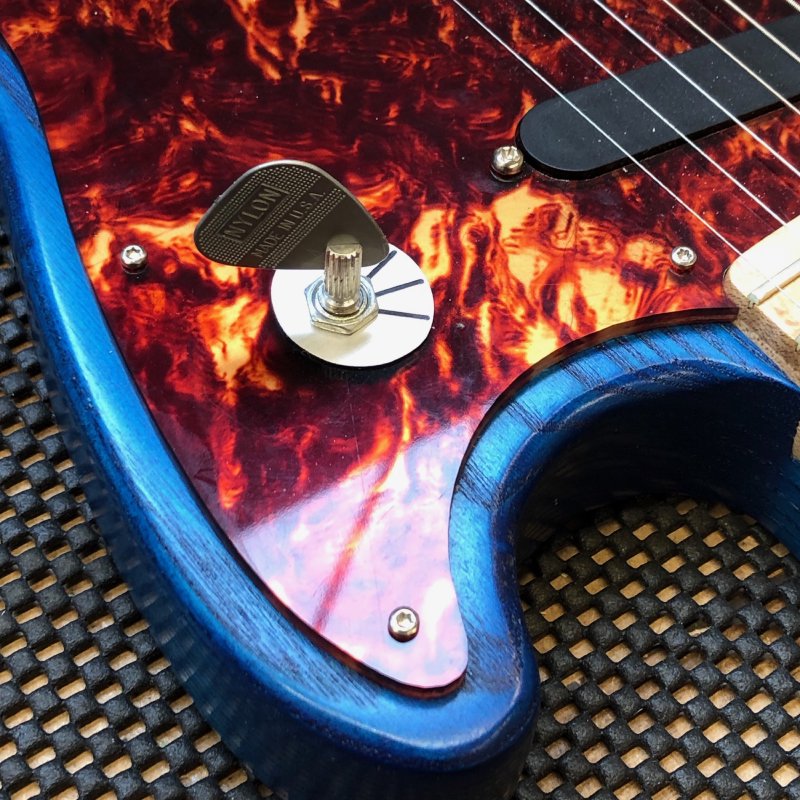
Don’t worry: I put the proper control knob back on afterwards! A plectrum makes a nice temporary substute, as the rotary switches are not easy to turn just using the shaft itself, but I don’t think that’s a good long term look :)
This guitar has been a lot of work, and if you’ve ready through all these week notes you’ll know it’s had a difficult history, but all of this makes it an instrument I’m really proud of as a result.
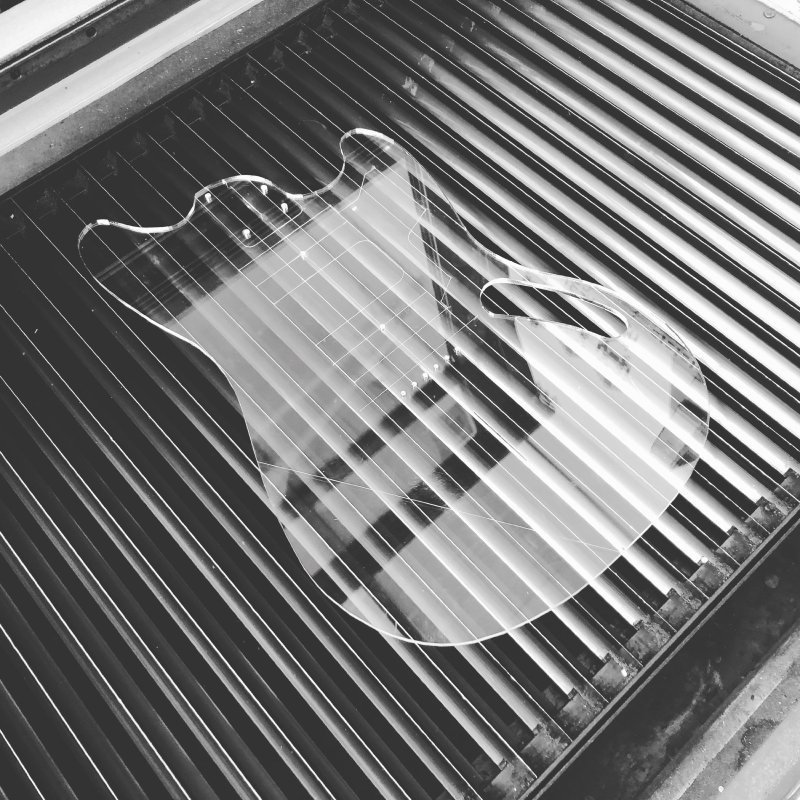
For the new commission I found a moment to make the template for the body. I do have some older MDF mustang-style templates, but now I’ve learned the trick of using clear acrylic to make templates that I can see through to help me line everything up, I can’t go back to MDF, so I made a fresh initial template on the laser cutter.
The final thing for the week was to laser etch the fretboard for the Corvette guitar. I’m using purpleheart wood for this, which I’ve not used before, but I was pleased to note that despite it having a reputation for being tough, I had no problem etching in the saw guides into the wood, or indeed on sawing the slot on my test piece.
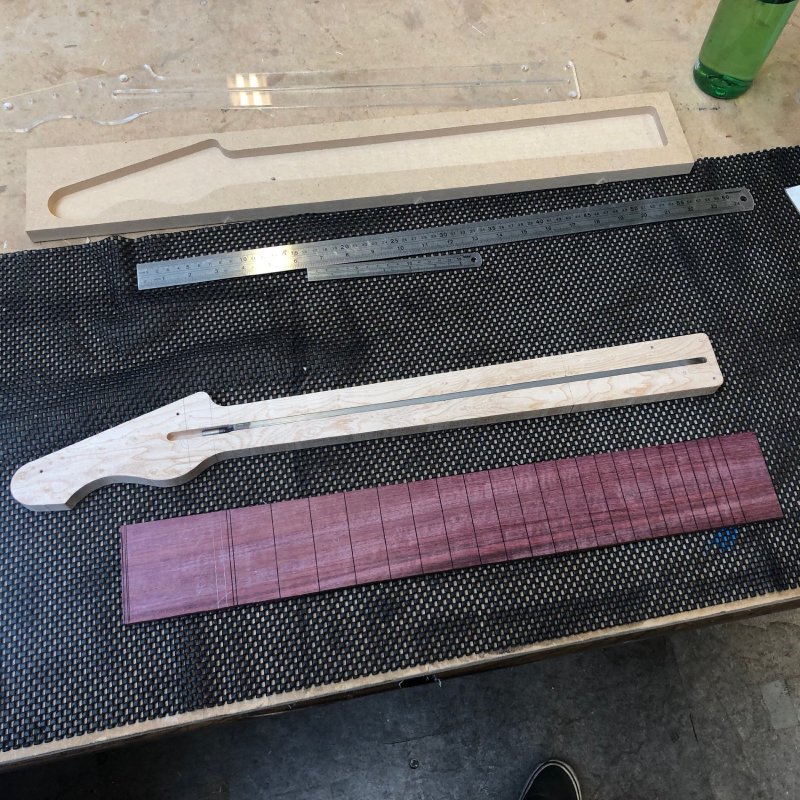
The purpleheart looks lovely, though that colour will darken brown over time, and indeed when it’s oiled it’ll go darker purple too. I had a look at how one can try to preserve that colour (there’s one useful guide here), but I think within the bounds of what treatments I can practically use on the fretboard, it’s going to fade over time. However, I’ve made peace with that: everything changes over time, and as this instrument ages it’ll mature into something other than it started out as, just as the musician playing it will change over time too as they abilities grow and tastes change.