A week in the shop
12 Jun 2022
Tags: 3d printing, älgen, delfin, templates, thingiverse
As I was wrapping up the draft of this week’s post, I got an email that makes the time this blog takes worth it. Richard Moore had been looking to make a pickup routing template, and found the design for one I posted on the blog last year whilst I was building the Corvette guitar. Richard was able to take the design I’d made, which I laser-cut in acrylic, and convert it to a 3D printable STL model to suit how he makes templates, and better yet he shared it for all the world to use on Thingiverse!
Mostly I feel bad that Richard had to use the bitmap image I took of the template rather than say the vector based version I myself used for the laser-cutter. In future if posting template designs I’ll try add a link to the DXF file to save people the extra work; I must confess I’d not imagined anyone would want to re-use my template designs, but I’m glad they were of use to someone, and better yet he did a better job than I did of re-sharing his design :)
Occasionally people wonder where I find the time to make these week notes, but emails like Richard’s easily justify the effort it takes. The guitar building community is very generous with its knowledge and expertise, so I’m glad that I’m able to return that favour.
3D Prints Review
On the topic of 3D prints, let’s start this week with a quick follow up on the batch of prints that were delivered last week just before I ran off to EMFCamp. Like a child on xmas I was very keen to check out the fit.
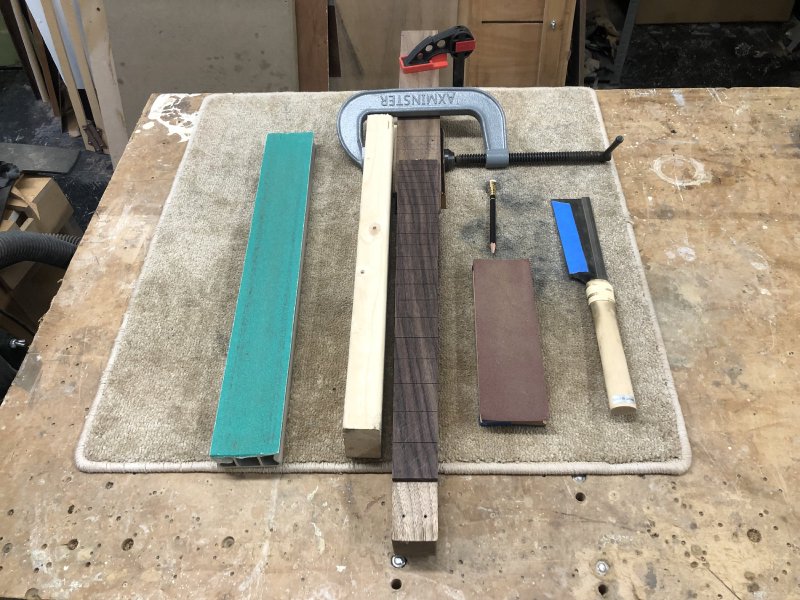
For the headstock for Älgen there’s not much I can do with it at this point, given where the guitar is (see below), but it was nice to put it together with all the steps on the way thus far, in this sort of Abbey Road line up:
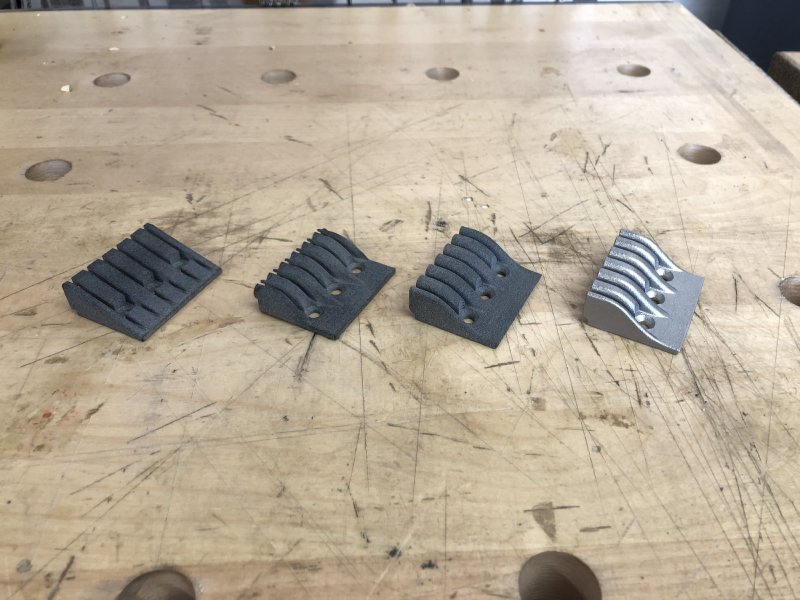
If I ever do another one I’ll definitely tweak it slightly: workshop-mate Jamie spotted that on the places on the inside where there are natural right-angle edges (because that’s what CAD does when left to its own devices) there’s a little bit of burring. I doubt it’ll be an issue on string wear and tear, as the strings shouldn’t be rubbing on those points, but it’s easy enough to add a few more fillets for the next iteration (apologies for lack of picture, I forgot to get one whilst in the shop, but hopefully you get the idea).
Next up was the bridge for the other guitar build, the Delfin, I have in progress. With the Corvette build last year I ended up fashioning the bridge base plate from wood after the oneI bought turned out to be warped and no-one wanted to replace it - annoying at the time, but it lead to a much nicer looking guitar I think:
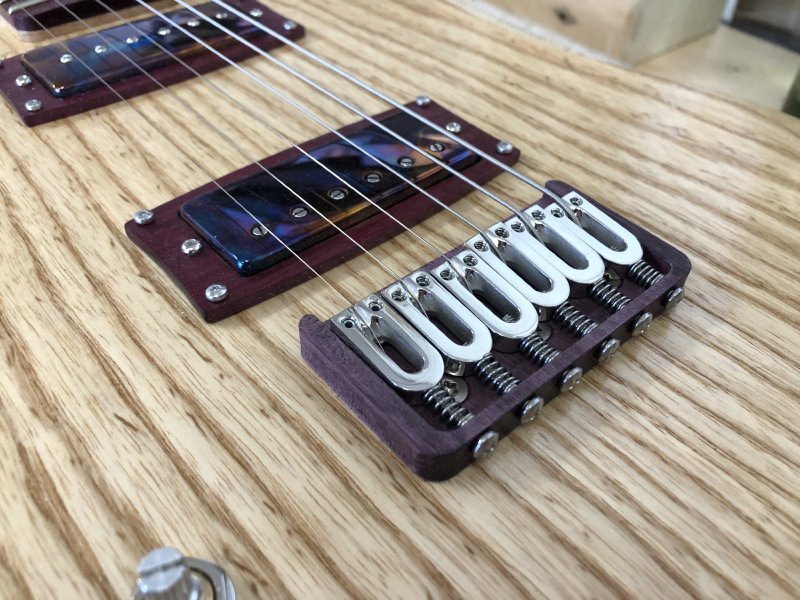
The wooden version was quite awkward to make, as the tolerances on the rear wall where the saddles attach to the plate are quite tight, and it took a lot of manual fettling on what is quite a thin part to get to a place where the saddles could move to the position they needed to be (and be adjustable for intonation). With the 3D print version, I was able to take all that learning and apply it to this design, so when it came to fitting the saddles to my own bridge-plate design everything worked well:
As I noted last week, this one has a couple of unusual features which are enabled by 3D printing it: firstly the rear wall isn’t flat, it’s angled to match the angle the saddles will roughly be at, and secondly the saddle mount holes are at the same radius the fretboard will be. I do have a slight nagging concern that doing both of these has lead to the saddles being more raised than I’d like, but we’ll see when we get it strung up on the guitar.
Finally, there is the pickup selector switch, which has worked sufficiently well that I think for the Delfin build I’ll actually return to using a rotary pickup selector again, after drifting away from that idea for a while.
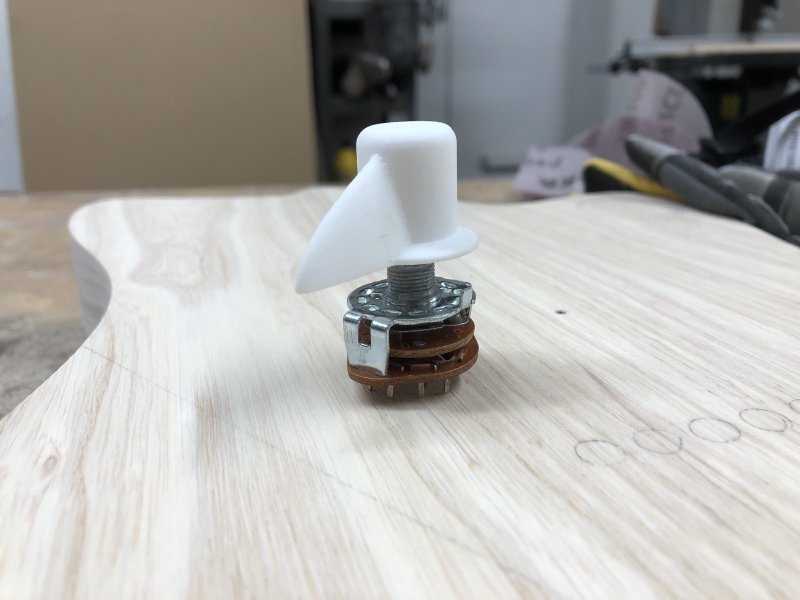
Not only does the sintered nylon version fit well on the switching mechanism, I also went through the process of tapping the hole for a grub screw on the back:
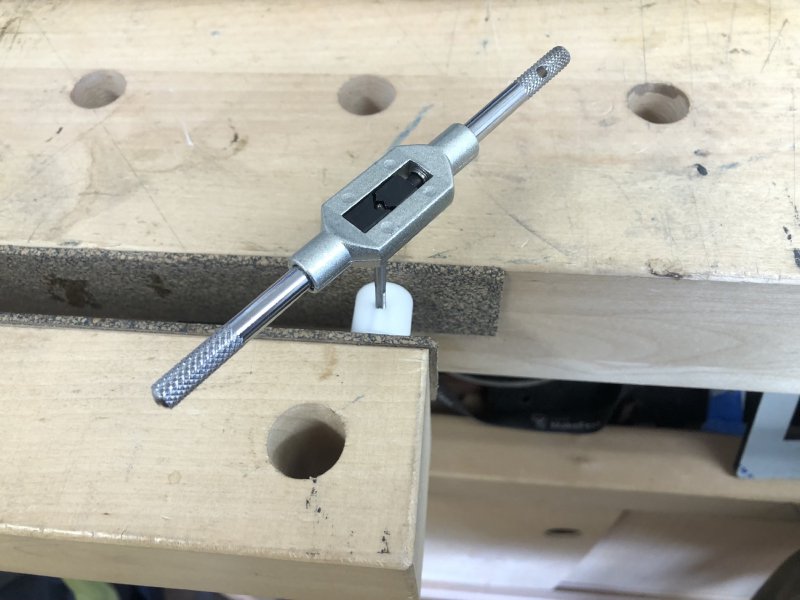
And that fitted well:
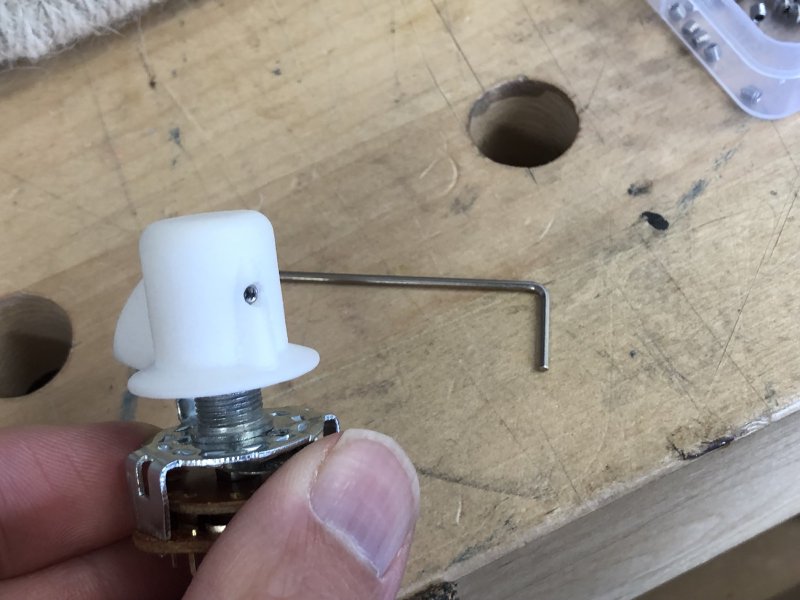
The knob is printed with a toothed texture inside to match the shaft on the selector, so in theory shouldn’t need the grub screw, but with the previous FormOne resin prints I found that the teeth didn’t last well alone, and so added the grub screw to give it more grip. I’m pleased enough that I’m going to go back and tweak the design for the Delfin to let me fit the rotary selector in the cavity that I originally designed for a smaller switch.
Älgen
I’m always a bit nervous about discussing Älgen with people, as everyone sees the design and assumes that construction is a done thing, and the the hard part was the wacky 3D printing bit; whereas I’ve now lived with the obviously wacky bit (at least in CAD form) for so long that that aspect of it no longer seems weird, and what makes me nervous is whether it’ll come together as an actual instrument that’s good to play - whilst people’s enthusiasm is appreciated, to me this is all for nothing if at the end of it I don’t have a musical instrument that someone can make music with.
This week, for the first time, I started to feel like I was working on a musical instrument rather than an art or modelling exercise: all down to adding a fretboard to it. It’s still a long way from done, but the moment I started working on the fretboard suddenly this project was back into familiar guitar building territory, and my brain re-filed this as a musical instrument, and now I feel much more comfortable about talking about the project as an instrument. Brains are weird, as it’s still a long way from done and there’s still unusual bits that I need to deal with, but there you go.
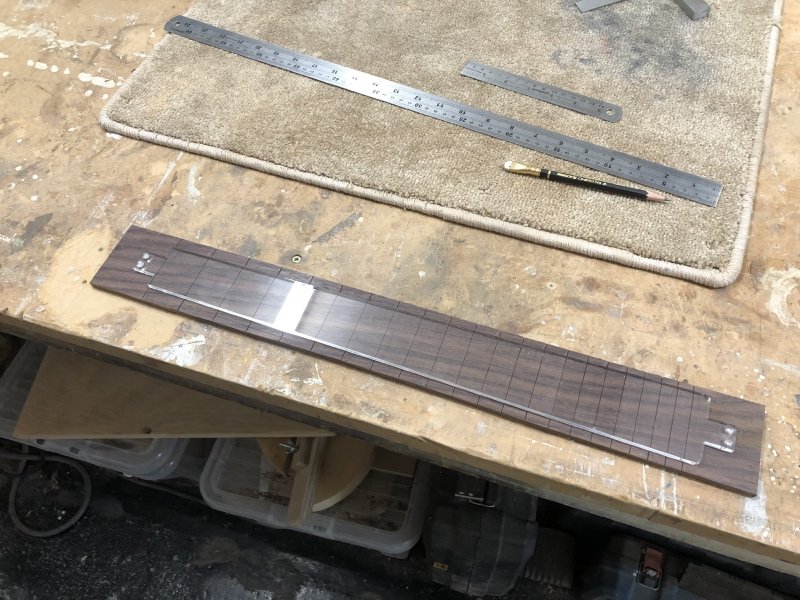
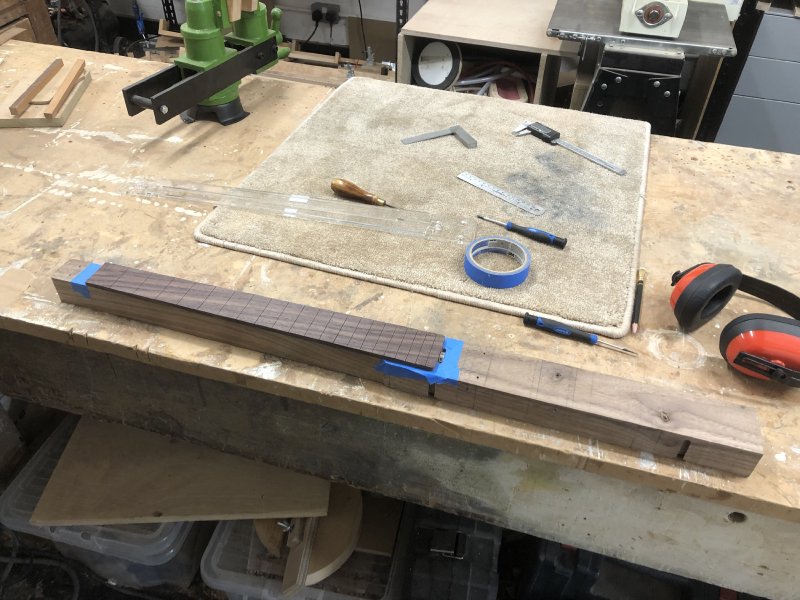
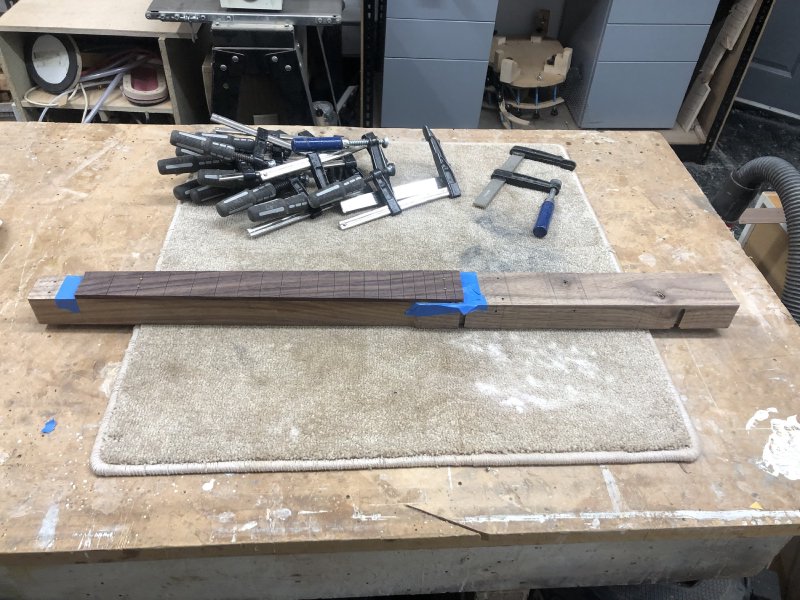
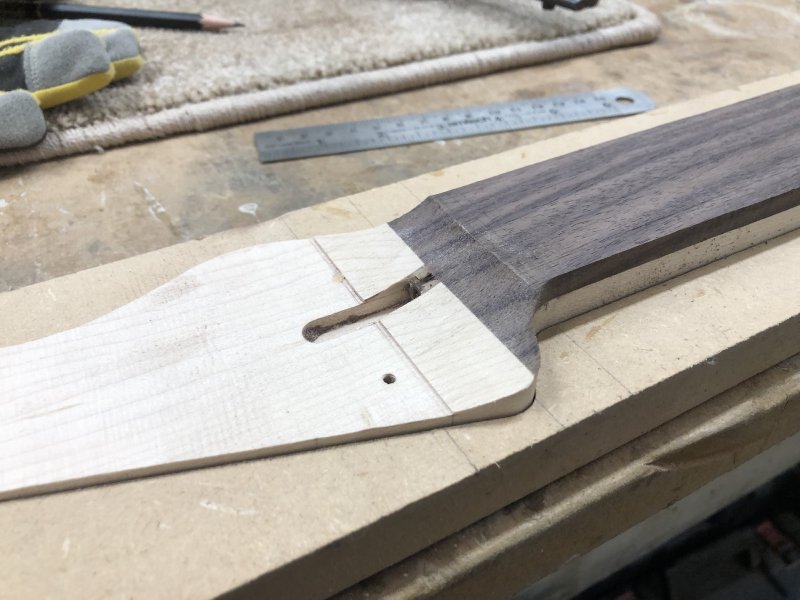
Last time I was in the workshop I’d cut the fretslots into the rosewood blank, and so the next task was to get that blank to be the correct shape. As I noted back then, I’d not normally work this way: I’d usually glue the unshaped fretboard blank to the neck first, then trim it to fit the neck, and then slot it. However, because of the design of Älgen which has the fretboard over the wider body part (you’ll see what I mean in lower pictures), I can’t do things that way around.
So, the first task is to mount the template, being careful to get it as close to perpendicular to the slots as I can:
With hindsight I regret not etching on this template the fret positions, which would have made this task a lot easier - a thing to note for next time. Although I was using screws to hold the template in place whilst cutting, I first had to hold it with masking-tape to ensure it didn’t move around whilst doing pilot holes for the mounts etc.
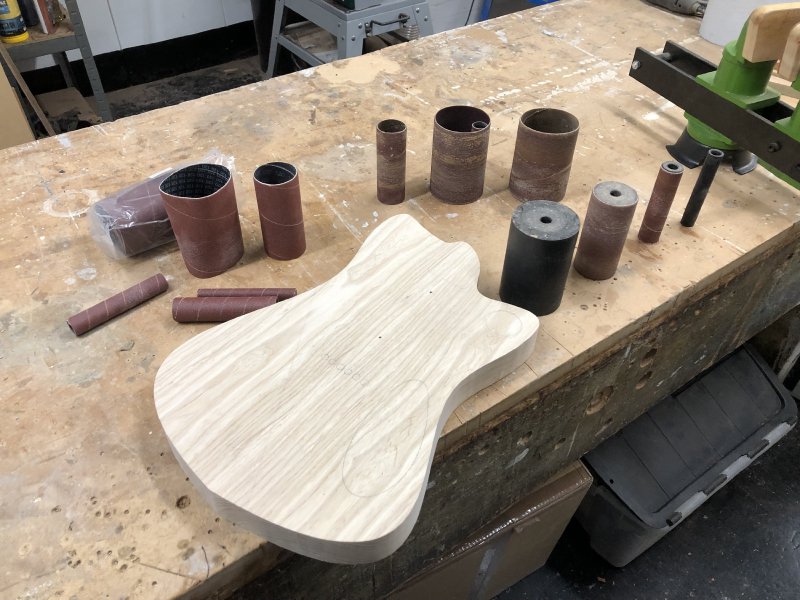
That done, it was then onto the bandsaw to trim most the excess off, then the table router to get the sides flush, before a return to the bandsaw to trim off the top and tail where I’d mounted the template. At the end of this I had a fretboard that matched the body in size:
I kinda regret that picture, as it looks done, but we’re still to glue it at this stage!
The fretboard is also a hair wider, achieved by adding tape along the edges before putting it through the table router. I was worried that the laser-cutter kerf meant that the template might be a fraction smaller than I wanted it, so this was just to play it safe.
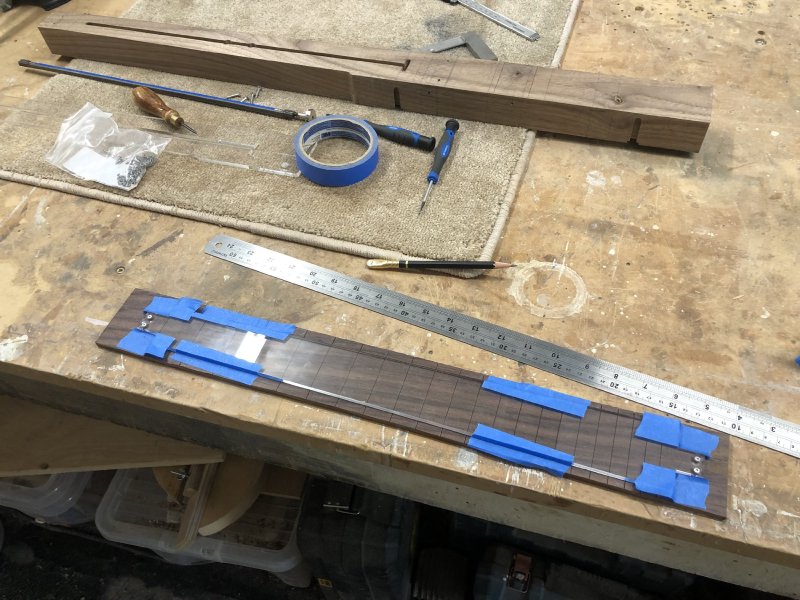
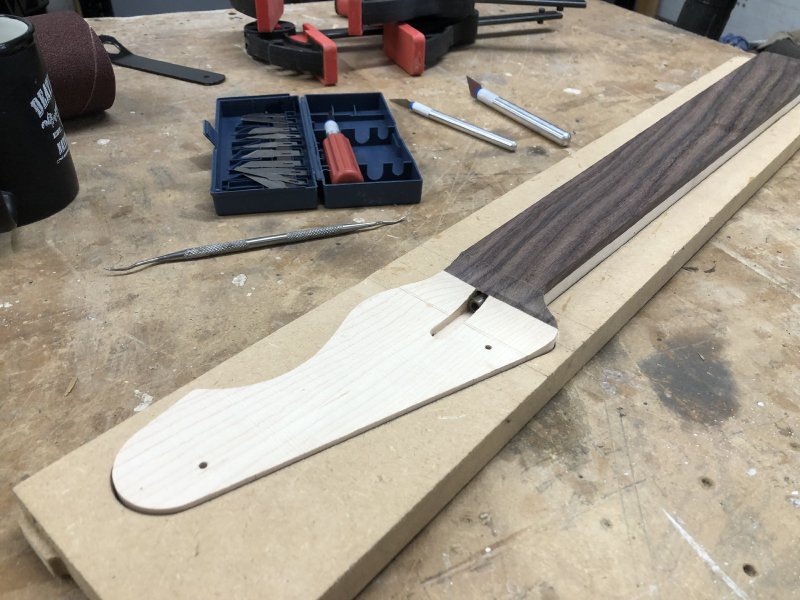
You can see that in a rare break from tradition I’m using masking-tape here to actually mask things! Normally when gluing the fretboard on I don’t worry about excess glue as I’m going to be working those edges anyway, but here I wanted to try and keep the bits I’ve masked up as free of glue as I can (I can remove the glue, but less glue in the first place means less cleaning up).
The main challenge with gluing a pre-slotted fretboard is one of movement as you clamp things down: wet wood-glue is slippery stuff, and clamps will tend to cause the board to slide as you tighten them down. I have managed to get away with it in the past, but I’ve also had to run one neck through the thicknesses to remove the fret-slot guides I’d laser etched on which ended up wonky, so not ideal.
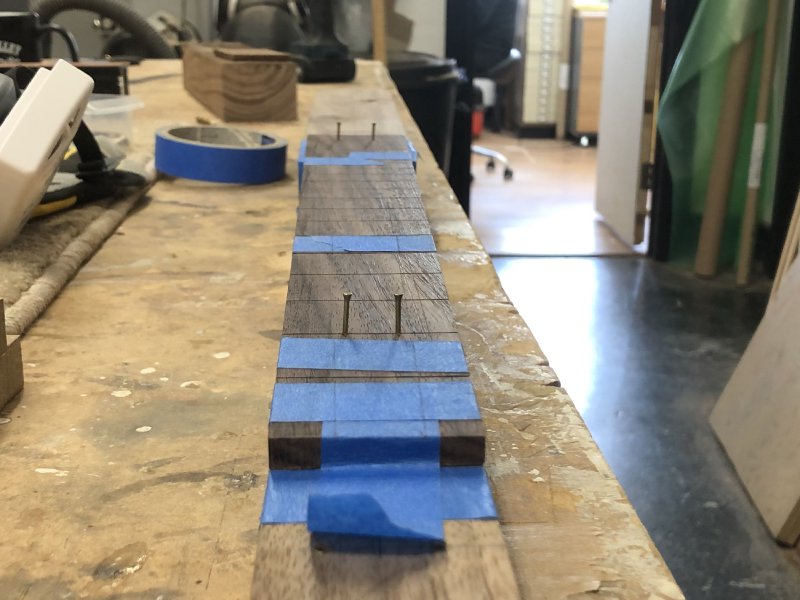
The technique that I’d never tried before that both my workshop-mates recommended was pinning the fretboard when gluing it. To do this you drill some small holes where the fretslots are, and use pins to locate the fretboard whilst it’s gluing. The pins are narrower than the frets, so there should be no visible trace of this process once complete.
So I very carefully drilled some small holes and fitted the pins in preparation:
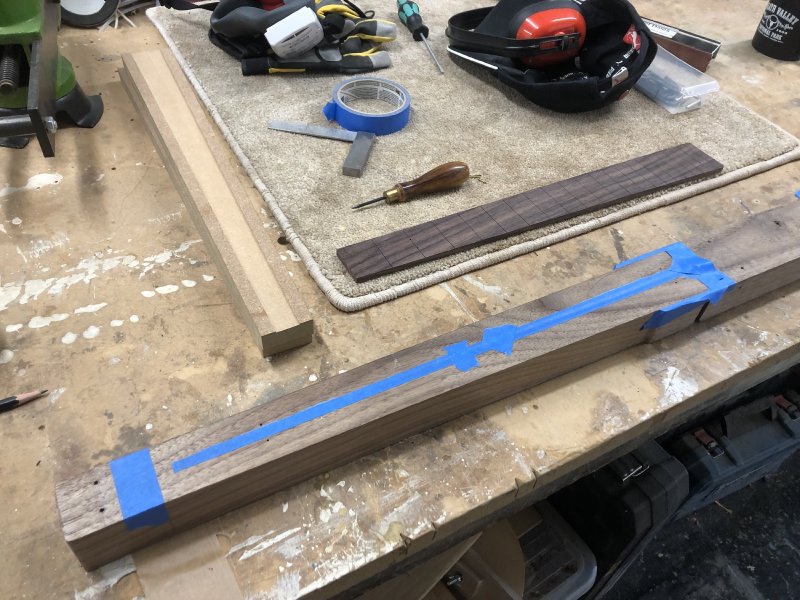
With the pins set up, I could then prep the neck for gluing, masking off the truss-rod whilst I apply the glue:
Mostly this picture is to show you how the pins have gone through into the main part of the neck, as there’s no time to take pictures once I start gluing, and you can’t see the pins any more once I’m all clamped up:
You’ll note in the background of a couple of these pics the off-cuts from both the body and fretboard that I used for testing the pinning before I did it on the real thing: it’s always worth keeping those spare bits about for when you’re about to try a new technique like this.
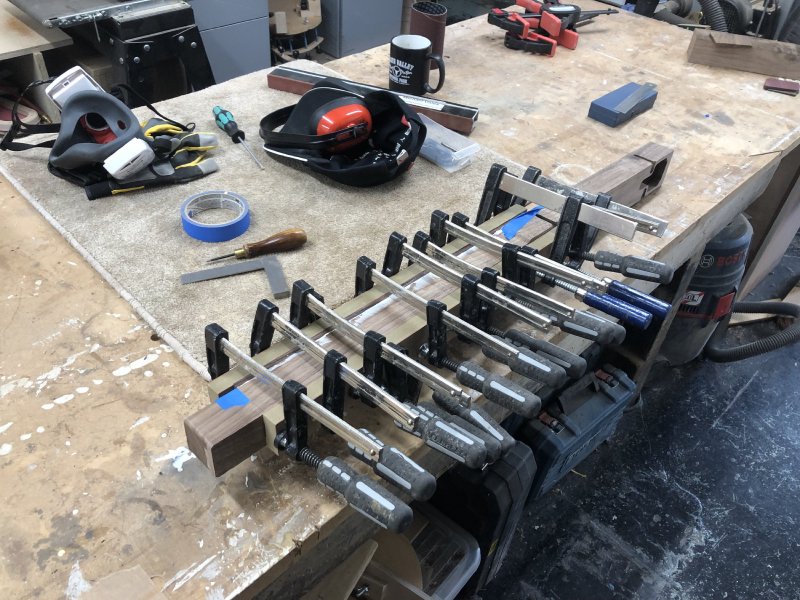
Twenty-four hours later and the clamps come off:
The masking-tape certainly helped, but there was a bit of careful work with a razor-blade and chisel to carefully get remove the tape and glue around the two ends:
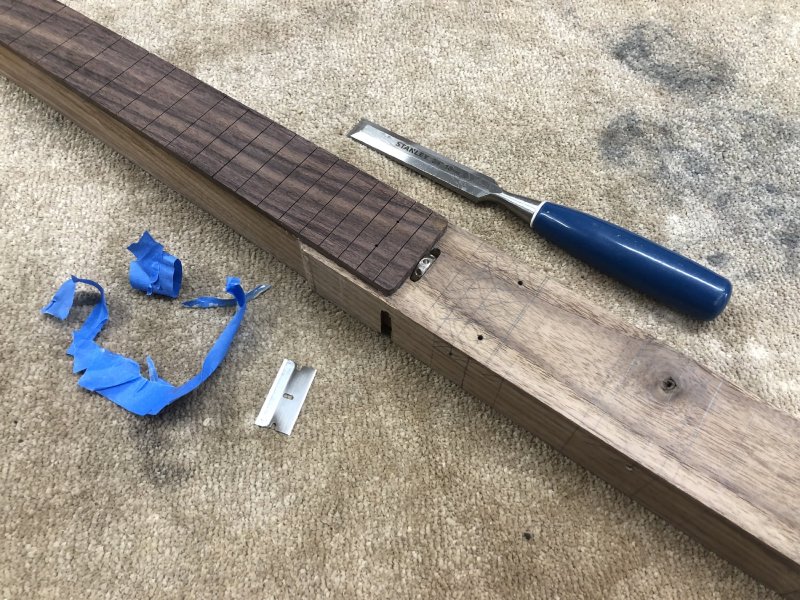
With everything tidied up and pins removed (carefully, so as to avoid tear-out on the rosewood) we have a nicely aligned fretboard - success!
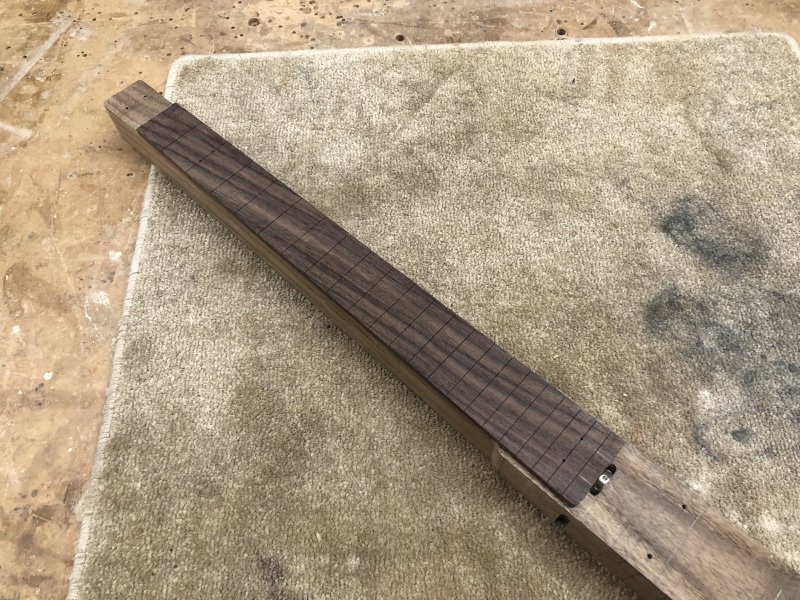
Assuming the frets do obscure the holes down the line then I’m definitely a fan of pinning: a relatively easy technique that seems quite effective. The nice thing is that even if there are issues with the pinning holes down the line, darker woods are easier to fill and patch, so I’m not that worried about the holes regardless.
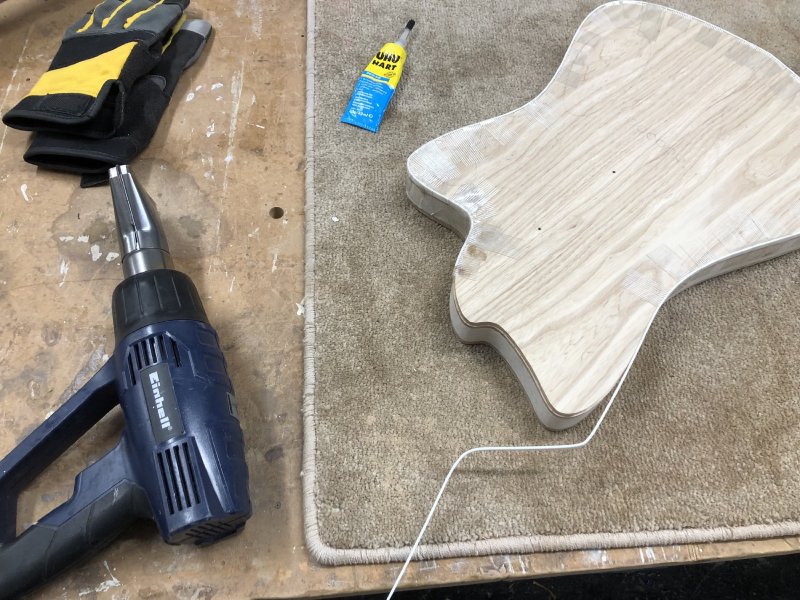
At this stage, I did feel it was time to check how the guitar is shaping up visually, so here it is with the wings on and the major components laid on top:
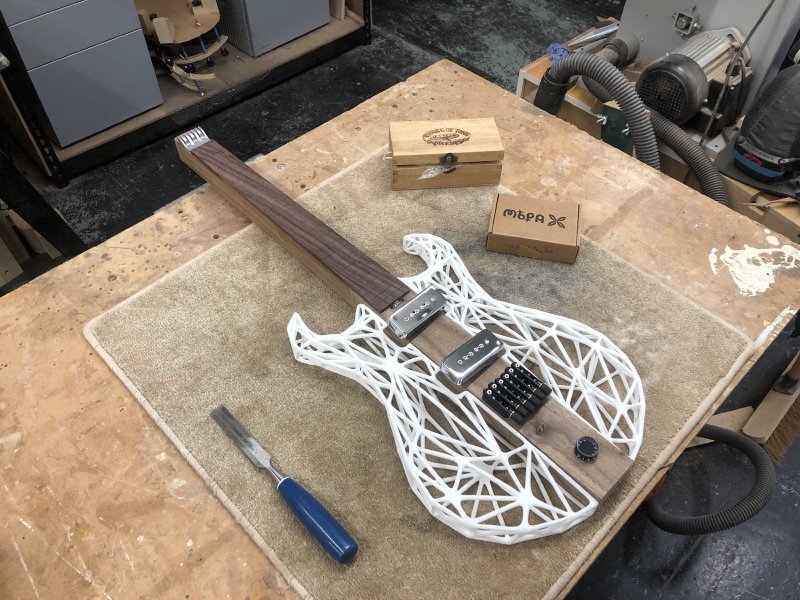
Everything seems to look good in place currently. It’s important to do this mock-up stage as you go on, as some times what looked good in CAD doesn’t look so good in reality; with the Corvette build last year originally I was going to go for a tele-bridge and full sized pickups, which looked okay on the screen, but when I laid out the parts on the body it just looked weird, and so I revised it to use mini-humbuckers and a hard-tail bridge.
Anyway, no revisions here, other than I’ll not use that particular volume control, which doesn’t really fit, but it was the only one I had to hand. For the final guitar I’ll probably/predictably 3D print something and get it slightly wider and less tall.
Finally I got started with sanding the radius into the fretboard:
For a regular neck I have a jig that I clamp things in to give me a reference edge when sanding, but here I had to improvise a bit. For those wondering, the pencil is to let me mark the board to see where I’ve sanded and the saw is to let me periodically reset the depth of the fret slots as the radius eats into them.
Alas I didn’t get this finished this week: I’m sure future Michael will be grateful for the task next week 😛
Delfin
The guitar that I called C2 for the last couple of months still needs a name, and for now I’m calling it Delfin to see how that name sits with me. Delfin is Swedish for ”Dolphin”, and this guitar has a surf vibe to it a bit, so it kinda made sense given its sibling guitar is also a Swedish animal name. I’m not sure this name will stick, but you have to try these things out :)
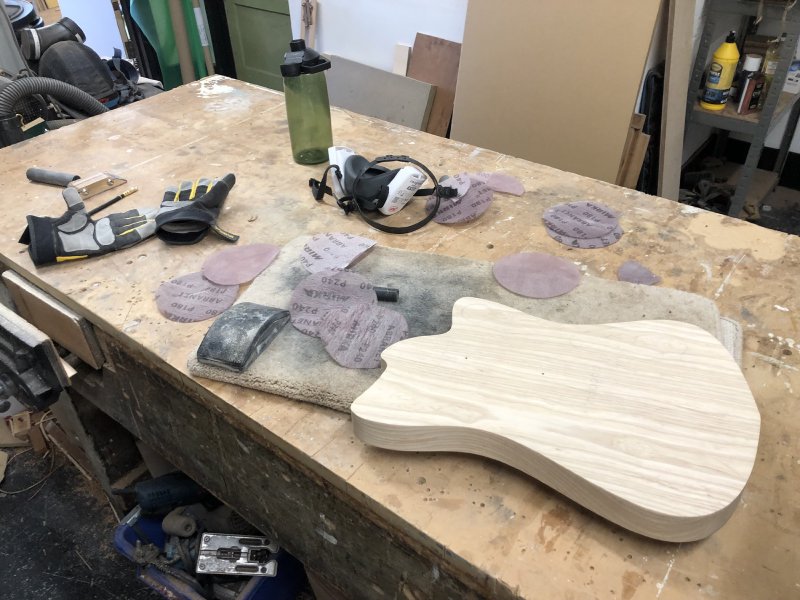
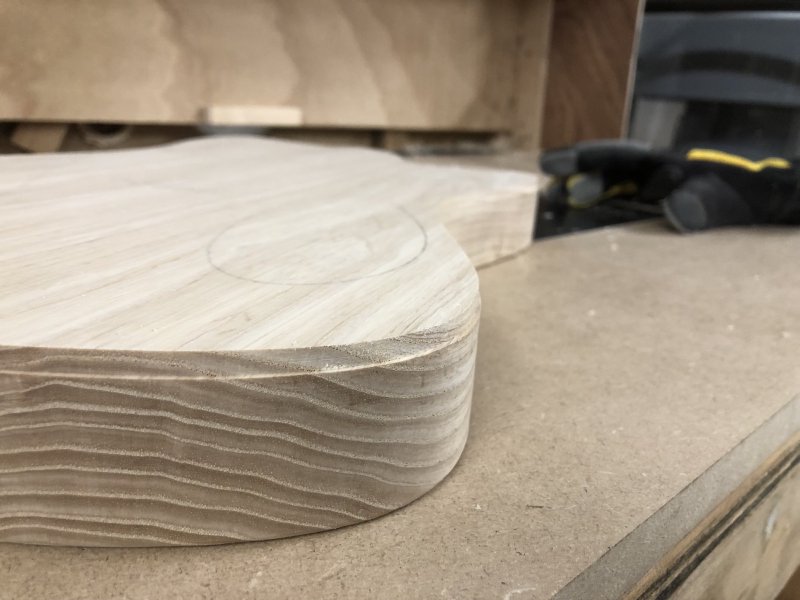
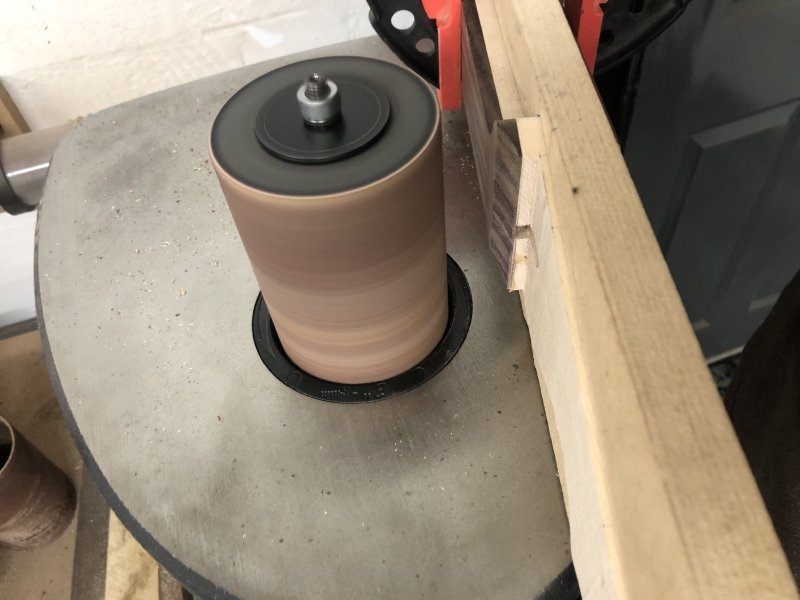
This week started out with a lot of sanding, as I tried to fix the mistake I’d made with the original somewhat low-poly template leaving the sides of the body with curves that didn’t feel flowing. First it was on the spindle-sander, working with various grit sleeves:
But that didn’t work for this particular job: it’s too hard to control the feed of the body against the sander to remove peaks, and I also found that the vertical oscillation of the sander wasn’t enough on the end-grain to stop it leaving marks. Thus it was back to hard graft instead:
One trick that workshop-mate Matt taught me was to use spindle-sander rubber mounts to wrap your sanding material around to help with sanding the curved surfaces where a conventional flat sanding block won’t do (Matt has stocked the workshop with a spare set just for this purpose).
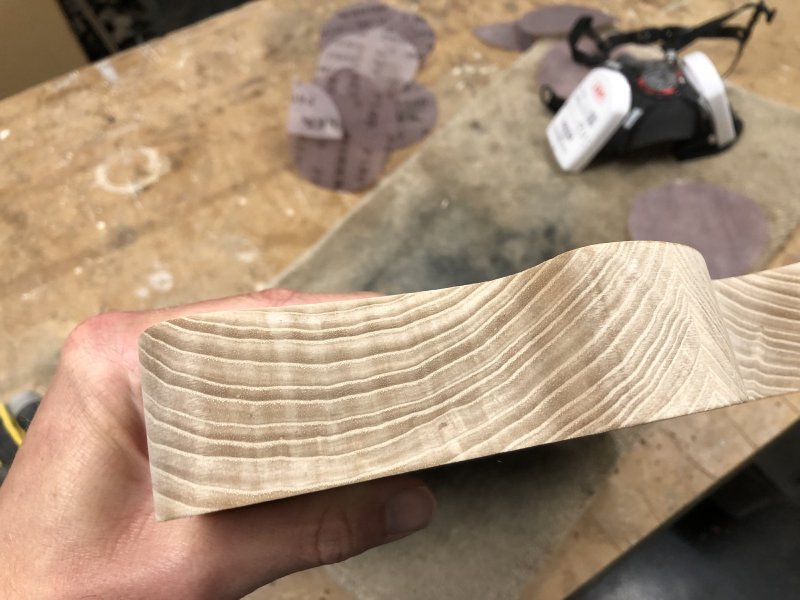
Here you can see the kind of thing I’m trying to remove - the were all these tiny troughs in the side that you couldn’t see normally, but you could feel to touch (here sanding has made them more visible).
A few hours of sanding later, and they were all gone. Slow progress, but although the body edge won’t impact how it plays, a guitar needs to feel good in the hand to be an instrument that inspires you to play it.

That pic was during the process, so you can still see some there, but I kept at it until they were all gone. It’s a good workout if nothing else.
Once sanding was done, it was over to the table-router to trim the binding channel, and whilst I was there I rounded over the back edge also. So first the round over bit:
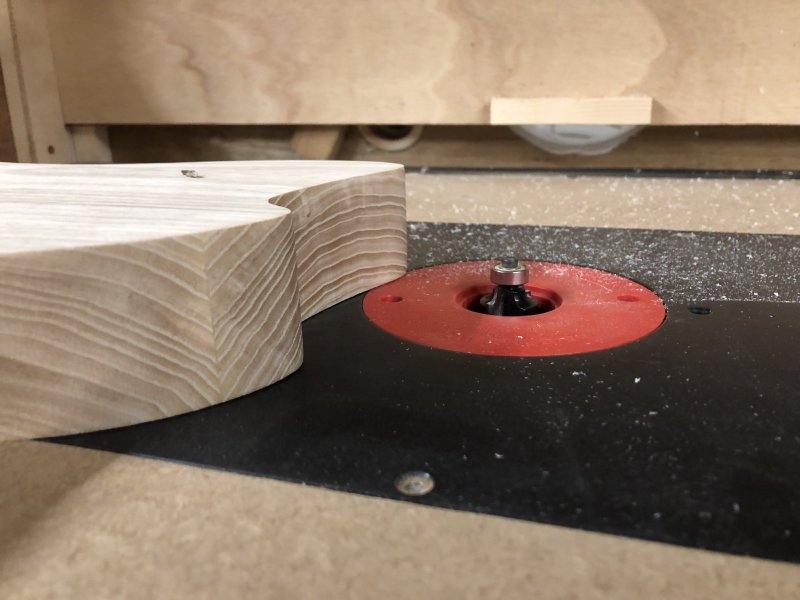
Which gives me a nice smooth feeling edge on the back of the guitar. For all previous guitars I’ve done this for both the front and the back of the guitar, but not this time - this time we’re going to bind the front of the guitar to give it amore distinctive visual outline.
The binding channel is cut with a square bit with a recessed guide-bearing:

This leaves me with a shelf into which to glue the binding:
This done, it’s time to fill that channel in:
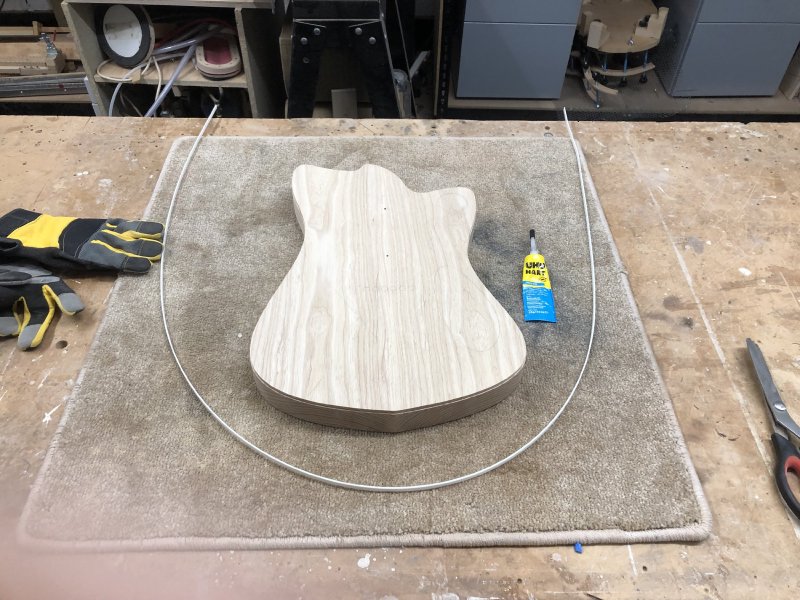
Do you like the finger in shot in that image? You’d never guess that my main non-guitar hobby is photography would you? :)
I have to confess, at this point I started to regret my decision to give binding a first go on this particular build, given I was hoping to have this guitar as a show piece (both literally for Liverpool Makefest in a few weeks, and more general for future guitar shows), I probably should have just gone for a round-over on the front of the guitar like I did on the rear, but it’s a bit late for that kind of thinking now!
Matt kindly gave me a crash course in how to apply binding, and onwards we go:
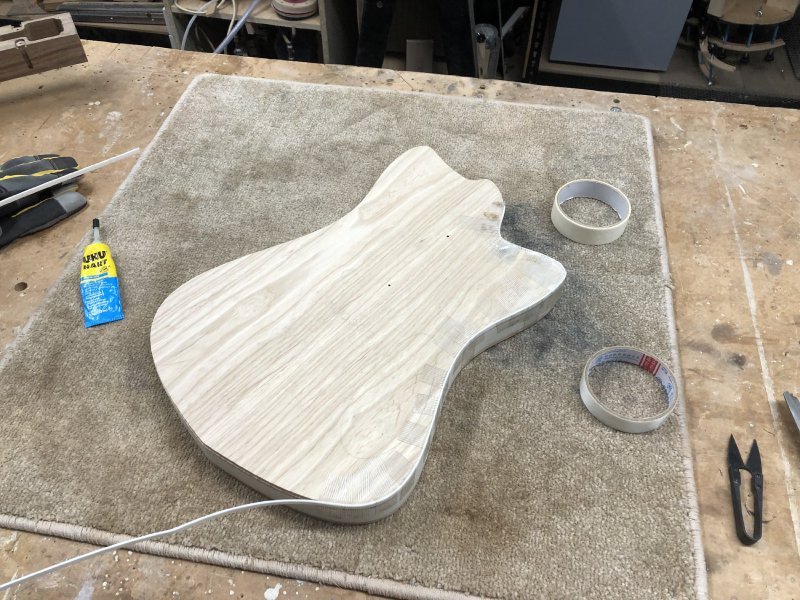
For the gentle curves the binding will just follow the body well enough, but for the tighter bends I used a heat-gun to re-shape the binding to fit better:
I’ve no real sense of how well or not this is going to work, because the reinforced tape that is being used to clamp the binding down kinda hides everything, so fingers crossed. My main fear is gaps between the binding and body, but I suspect if that’s the case I can try filling those gaps with glue and sawdust - the top will be stained eventually so it just needs to not be glaring that it’s patched. But, if the worst comes to the worst then I can always paint the guitar rather than stain it :)
This now needs to sit for 48 hours, so it’ll be next week before I see the results.
Finally, just when you thought there couldn’t be more sanding, we turn our attention to the Delfin’s neck. The first job was to round over the headstock transition on the spindle-sander:
This revealed a bit of a mistake I’d made when gluing it, an oversight caused by it being a while since I’d made a neck: I’d forgotten to put a bit of masking-tape over the area where the truss-rod adjuster is to stop glue getting in there - and thus glue had gotten in there:
Thus I got to relive my dental hygienist visit from earlier in the week, but this time it was me carefully attacking things with pointy tools as I had to laboriously remove the hardened excess glue - at least this’ll teach me not to forget to mask the truss-rod cavity next time.
I got rid of most of it, but paused as you can see I still have a bit of sanding to do to get things fully flush, and so only then will I be able to see all the glue I need to get at.
The next task was to drill the holes for the tuners:
A quick trip to the pillar drill:
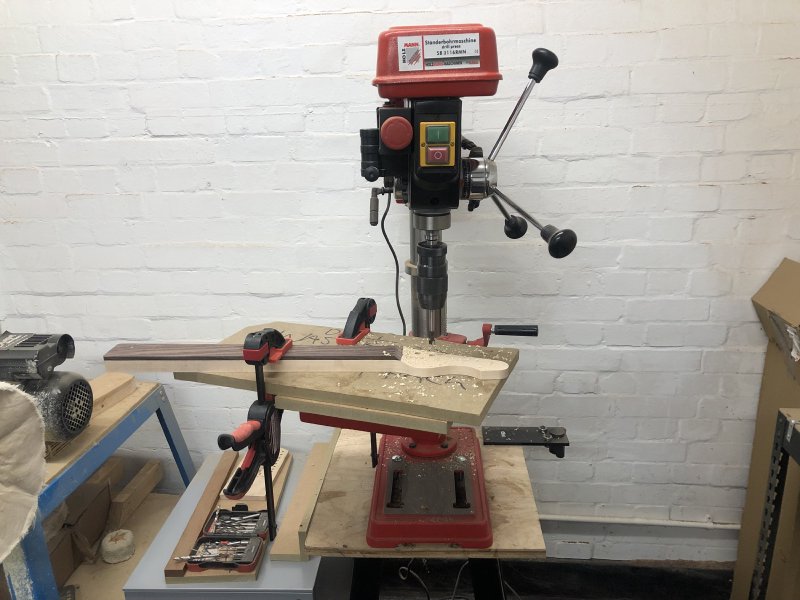
And we’re left with a suitable set of holes for the tuners to mount in:
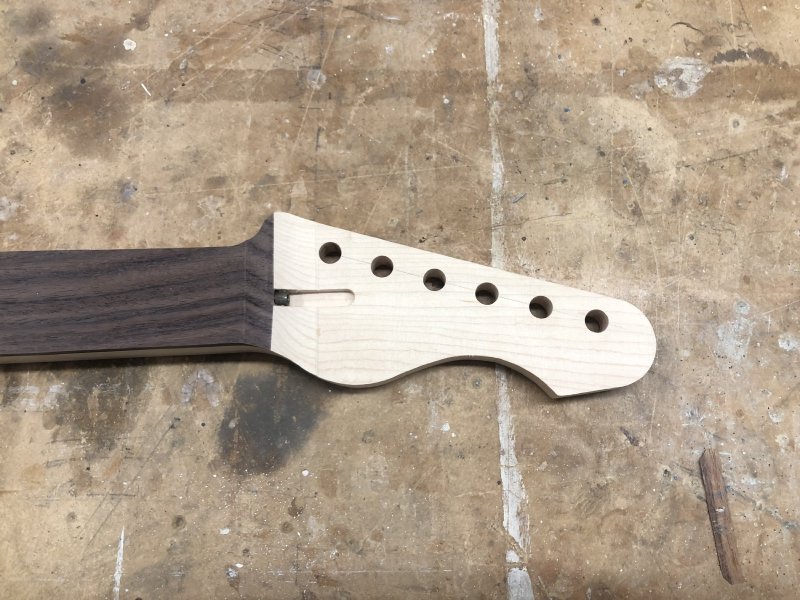
As with several tasks this week I found myself cursing the grain pattern, as it makes the holes (to my eyes at least) not look straight, but I checked with a ruler and they are!
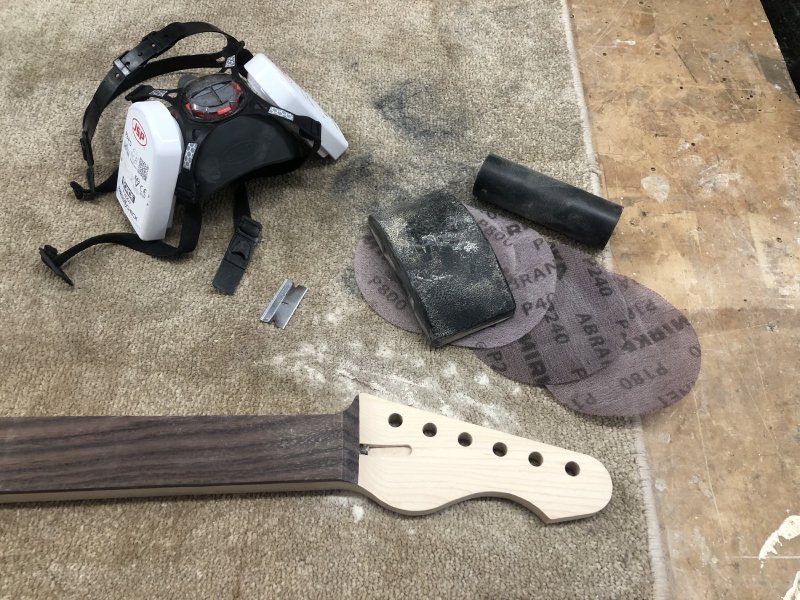
Tuner holes made, it was now time to sand out the last of the machine marks on the headstock not only is there the last of the headstock transition to finish, but in general there’s marks all across the face from where I cut it with the bandsaw originally. I did this last batch of sanding by hand; in the past I’ve done this with a random-orbital sander, but since I accidentally ruined a neck once by over sanding with one of those, I now do this by hand too:
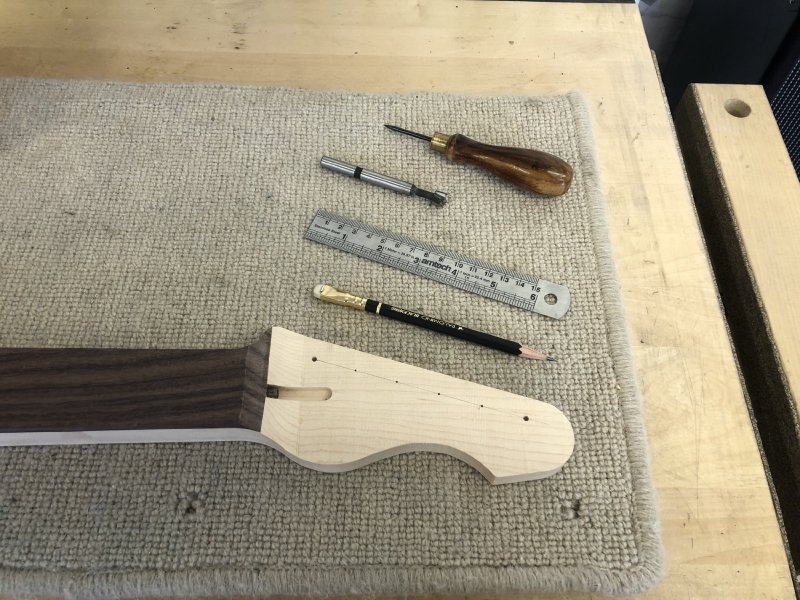
A close inspection after showed that there was still some glue that needed to be removed from the truss-rod channel, so out came the sharp and pointy things
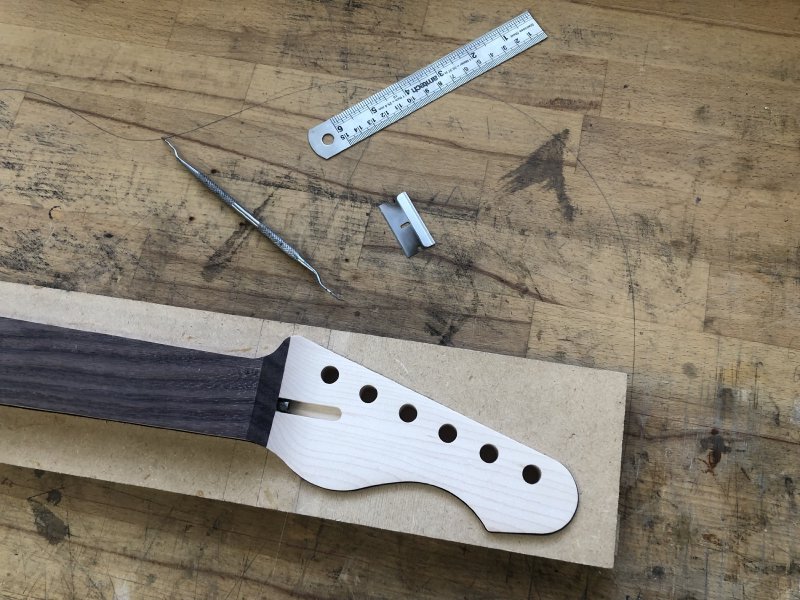
The ruler was there to let me put it down over the headstock to protect the wood at the end of the truss-rod access channel from the razor-blade, which is longer than said slot, so I was worried about accidentally cutting into it.
In the end I got rid of as much as I could; it’s not perfect, but it’s quite a tight slot to get tools in to. My hope is that I’ve removed enough that once the neck is oiled you’ll not notice it (particularly as that part is also going to be in shadow most of the time).
And that’s it for another week. I have a bunch of CAD I need to do in the coming week to make templates for the Delfin build: one for the string ferrule block on the back, and another for the larger switch cavity I’ll need now. I also need to design a few control knobs for both guitars so I can get them 3D printed - though I double those will now arrive in time for the show. Still, we’re getting there 🤞