A Week Out the Shop
26 Feb 2023
Tags: archtop, bhm, cad, delfin, fusion 360, rendering, templates, verkstaden
This has been a CAD heavy week, as being under the weather forced me to stop procrastinating on a bunch of outstanding CAD issues that had been building up. Whilst it’s never as much fun as being in the workshop, it’s important to take time occasionally to stoke the fires that fuel the workshop time, and to that end I’ve been re-assessing the builds I have in the pipeline to make sure I know where I’m going, and doing a respin on the dreaded jig-of-doom.
Sherwood “Woody” Phifer
In this series of posts for black history month I’ve tried to pick people reflect different things to me: someone who I knew of but felt should be more broadly appreciated for creating rock and roll (Sister Rosetta Tharpe), someone who has has influenced my guitar playing style (Grant Green), and then someone who I didn’t know about previously that was groundbreaking to early guitar playing (Memphis Minnie). But there’s been an elephant in the room that I want to address in this last week of black history month: these are all players, and this blog is about building instruments, so where are the black luthiers that we should be learning about and celebrating?
I’ve struggled with this one: the famous names in electric guitar history, Leo Fender, Ted McArty, Paul Bigsby, up to modern big builders like Paul Reed Smith, do not paint a particularly diverse picture (neither do I for that matter). I spent some time digging through wikipedia that turned up some interesting people, but none that would be right for this little segment I’ve been trying to do. But rather than take the lazy way out of falling back on the long list of players that I could call upon, I decided instead just to roll with it: a negative result is still a result as the saying goes, and the lack of diversity in this profession is something important to reflect upon.
Still, I did find someone to celebrate, an amazing archtop guitar builder based in New York, Sherwood “Woody” Phifer. Whilst he’s a contemporary builder, he first set up shop in the year I was born, and I’m no spring chicken, so I feel that’s a career worth celebrating. I’m particularly taken with Sherwood’s guitars, as building an arch-top has long been an ambition of mine to make one day, and it’s nice to see someone who is not only building some wonderful instruments, but is also doing something different with the form. You can see Sherwood here run through some of his guitars in this interview:
One of the things that stood out to me when reading the Phifer Guitars website was how he takes pride in making all the small parts on the guitar as much as the more obvious larger parts: the knobs, the truss-rod cover, and so forth are all made by him, which is an approach I’m trying to take more now, making my own pickup rings, and 3D printing things like the knobs and the bridge-plate with my own designs.
You can see one of Sherwood’s instruments in action here, being put through its paces by the late Ronnie Jordan in 2002:
For a story of Sherwood’s carrier, you can read this Rolling Stone article, in which he touches lightly on the challenges of being black and trying to get started in this industry, and there’s also this article in Acoustic Guitar magazine which touches a little on his design ethos, though I’d love to know more.
There are more black luthiers out there than just Sherwood Phifer, but there certainly feels to me that there’s proportionally fewer black luthiers out there than black players, and certainly going back into the history of the electric guitar. If you have anyone who’s work I’ve missed that I should be celebrating, please let me know - this little run has turned from being me attempting to highlight those I knew about into trying to learn more myself.
Build recap
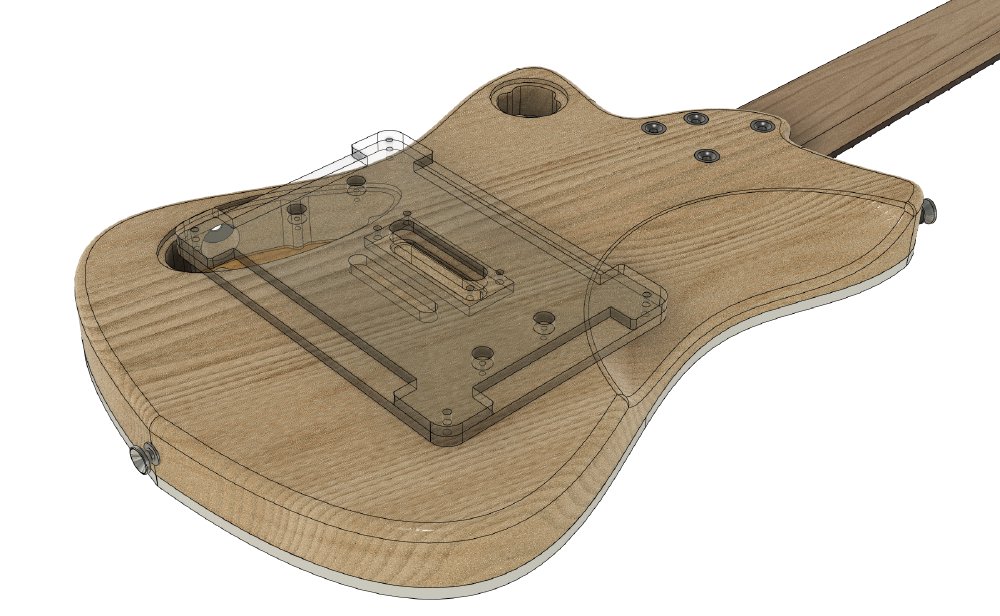
I have four guitar builds on the go right now, and whilst I’ve been stuck at home I wanted to take stock of what it is I’m currently building. In particularly there’s two builds that I’ve been nudging along that I started a good while ago and lost focus on, and I wanted to set a proper direction for those builds, particularly the other two are well on their way, so I’ll turn my attention more to those in the near future. I’m a visual person, and so to help me do this I set about rendering the guitars (more on the how of which down below), and playing with configurations until I was happy.
I have a love/hate relationship with rendering. It’s useful to have some vision of what’s going as a builder, and it’s essential when having a conversation with a client about their build, but I’m weary of how easy it is to make a pretty mockup versus doing the actual building, which is why you don’t tend to see many renders in this blog: pretty pictures do not lead to a good guitar.
The remaining mustang
A long time ago, back in phase one of my guitar building career, when I was building a bunch of mustang style guitars, a friend of mine asked for one, he was happy to pay for it, and specced out a build. But foolishly I never took a deposit, because he was a friend. I ordered the parts, got to work, but the build stalled as, to be frank, I lost confidence in myself for a while, and because there wasn’t any deposit, it felt easier to just keep putting this off, and then the pandemic hit, and so here I am with this last of the mustang’s still waiting to be finished. The lesson I guess is that deposits work both ways: by not taking one I thought I was being a good friend, but in fact I was being a bad builder, as I unintentionally let myself off the hook.
But fast forward to today, and I’d like to get this guitar finished. I have the body already made, it’s a super-light bit of swamp ash with some lovely figuring in it, I have the pickups that were made to my friend’s spec, it just needs a neck and the rest of the spec figured out. The original intent was that it was going to be chambered, but when we got this super-light ash my friend said we should just roll with that and make it a solid-body, and he wanted a natural finish rather than the original sonic-blue painted version he had speced. Since then I’d never really sat down and worked out what this guitar will be. Now I have a vision for it:
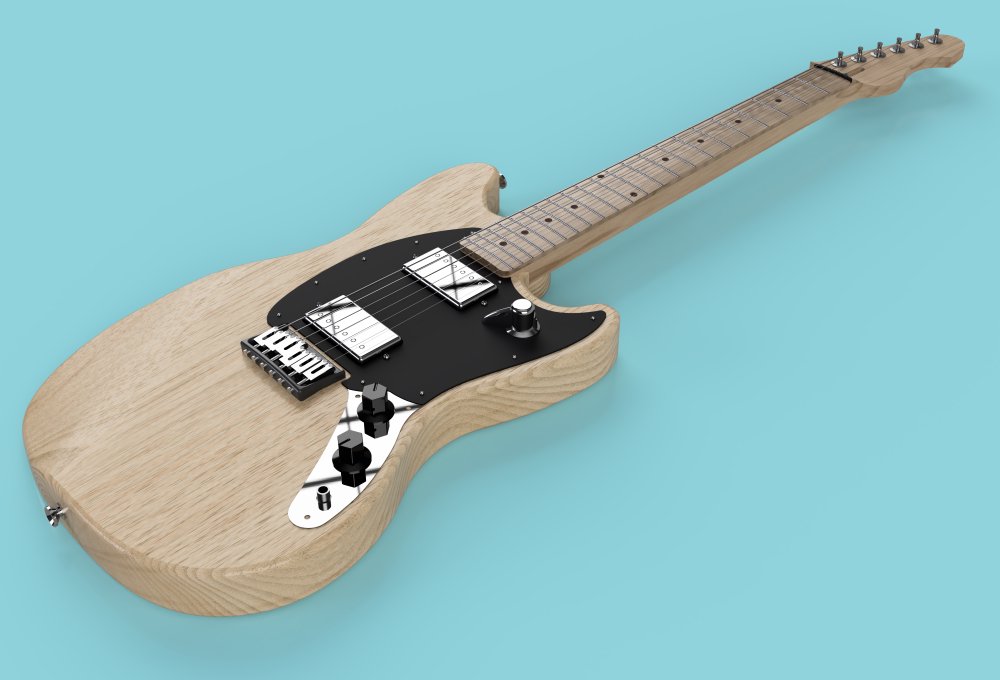
I took inspiration for this from the original Blackguard Telecaster, the first mass produced solid body guitar. Originally I was going to use a rosewood fretboard, but I felt the natural body needed a darker pickguard, and then that in turn implies a lighter neck. I already have some nice birds-eye maple for the neck, so I’m about to order a matching bit of wood for the fretboard. The fretboard will be a matt black, rather than glossy, to contrast more with the chrome parts of the guitar. The original pick-guards were made from garolite, but I’ve found some 1.5mm matt acrylic that I hope will do the job.
The upside to the delay on this one is that the things that caused me to lose confidence I’ve got passed, thanks to my time spent working around other professional luthiers, and this one will use my 3D printed bridge and controls, so won’t just be a straight clone, all of which makes me excited to have this one last mustang to bridge the gap between that first phase of my building career and where I am today. I need to concentrate on getting Älgen and Delfin builds finished first, but I’m excited to have a follow on planned now.
Verkstaden
I was doing a little work on this guitar last month, but again I didn’t really have the vision for this guitar pinned down, just some vague ideas, so again I’ve gone through and done a full visualisation for it:
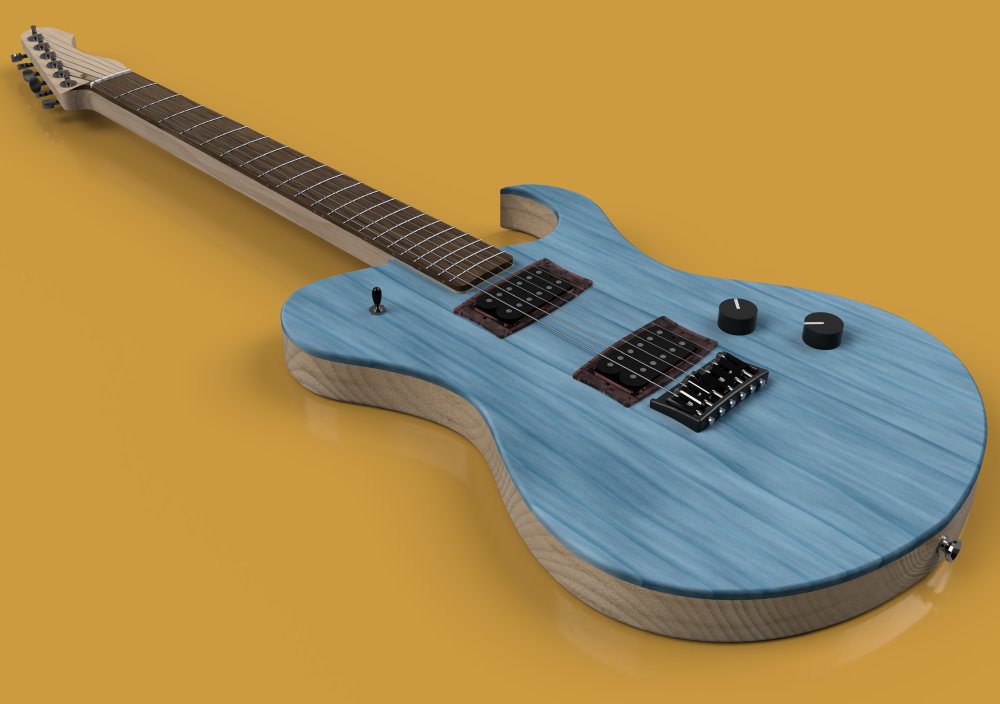
This body has a maple cap on top of a poplar body, so I think it’d be interesting to try just staining the top side and leaving the back natural, though the poplar is so soft it might be better painted to give it some protection.
Rendering in Fusion 360
Besides the dislike for rendering I mentioned earlier, about them feeling like a way to kid yourself you’re building guitars, the other reason is that it’s really quite hard to get a good quality render. In general if you just hop over to Fusion 360’s render tab and hit go, you’ll end up with something that is okay, but not great, and given I want these to be things that inspire clients, I want them to be great and not just okay.
I actually had to put considerable effort into the above images to get them as good as they are, and they’re still quite clearly amateur efforts as rendering goes. The inspiration to up my game when I went back to look at the renders I did for Älgen:
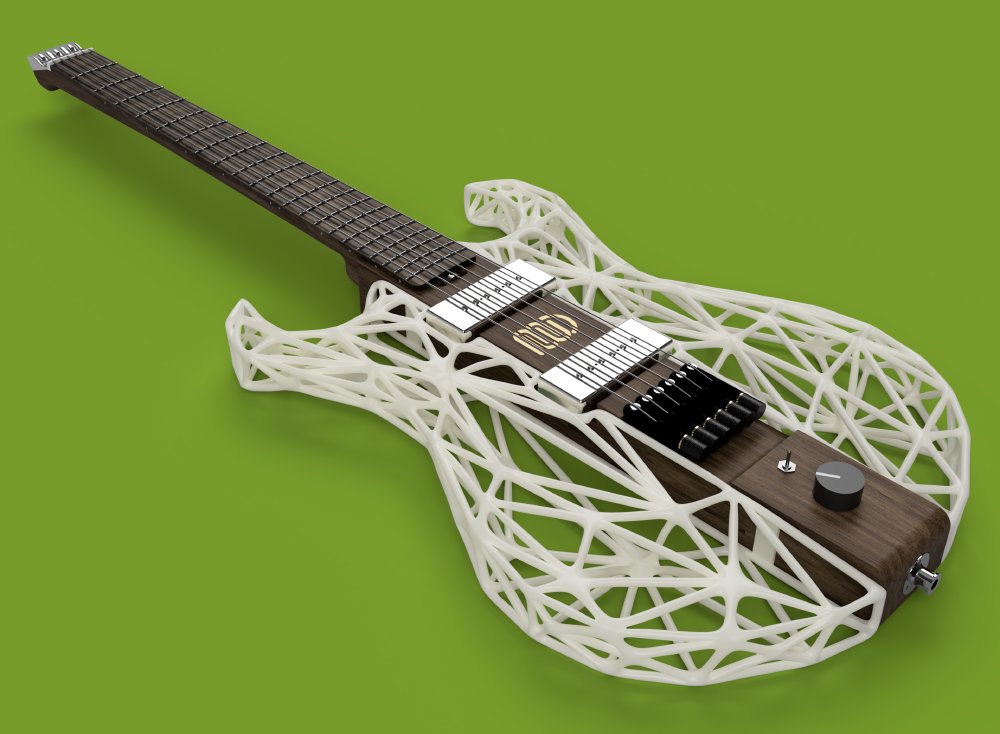
Because Älgen was such a new thing, unlike previous builds where I’d accepted cruddy renders as they were based off existing guitars, and my imagination could fill in the gaps more easily, I’d put more effort in here, guided by my friend Jonathan, who does rendering semi-professionally. Before Älgen I never bothered with detailing parts I wasn’t going to build myself: there were no strings, no frets, and so forth. You’ll note if you look closely in the new renders that the necks aren’t actually rounded - I hand carve that, so why would I invest time in the CAD to model that? Well, with Älgen I did just because I needed to see the vision before I set out on it.
So, having decided I was doing to do renders of the new guitars, I needed to go back to my old design files and up my game, but I find updating old models in Fusion 360 quite tricky - most likely down to how I’m using it rather than the tool, but either way I approach updating old models with a slight sense of weariness. The large and complex models I have for the guitars often have hidden dependancies I don’t quite understand: for example, I wanted to remove the old Electric Flapjack logo from the headstock of my neck model, but that caused the pick-guard to vanish on the mustang model, and I’ve no idea why. Fusion was kind enough to tell me there was some dependancy, but in the hundreds of operations in the model, I’ve no idea what it actually was referring to. I know that I used the neck as a reference to shape the pick-guard, so it sort of makes sense, but why does just removing a logo from the other end of the neck cause things to break in such a fundamental way? I’ve no idea, and little inclination to waste time on it.
I’m embarrassed to say, given that I didn’t want to start these models all over again, I just cheated, and marked the old neck as hidden, and inserted a new copy of the neck that I’d separately updated to have things like frets, side dots, and no headstock logo.
When updating the neck model to put frets in it I took a leaf from workshop-mate Jamie’s recent Fusion 360 work, and I gave in and parametrically modelled the fretboard properly in fusion:
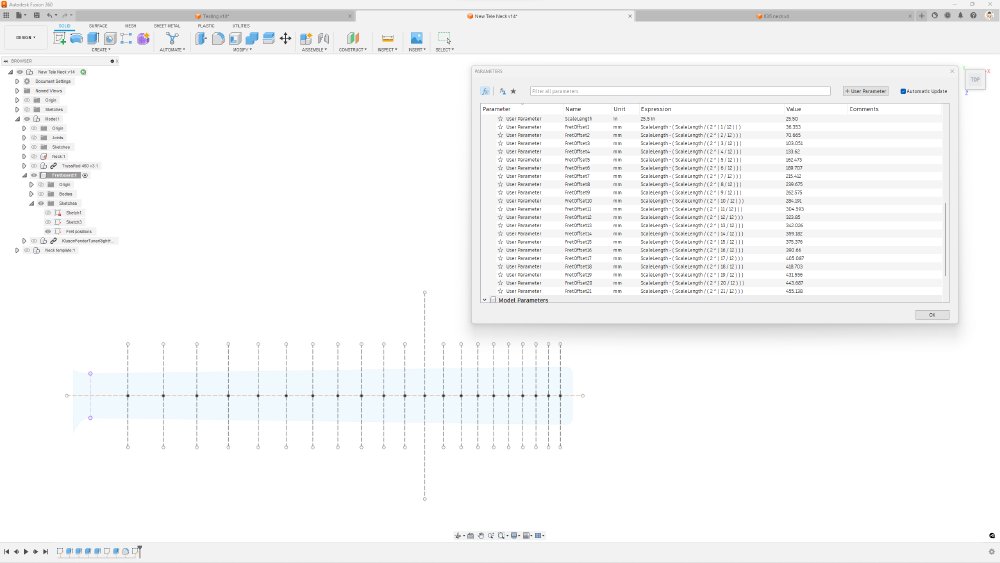
I’d always held off doing this, as I’d already implemented my browser based fretboard-generator, and so would export an SVG from that and import that into Fusion 360, but this is a flawed approach as Fusion 360 messes up the scale on import and you have to resize it. I’ve long resisted doing something clever in Fusion itself as I couldn’t make it a single formula where I’d enter the scale length and number of frets and bam, I’d have everything. I could do that with their embedded Python thing, but that then is a bit close to my day job, and so I’d stuck with my old workflow. Jamie, being more pragmatic than me, as made his own multi-scale fretboard-generator in fusion using a more brute force approach of having specify each fret end with its own formula, but that’s not really that much work, and you just have to do it once. When I saw Jamie had done this and much better it was than my solution, I realised it was time for me to follow suite, and now I have neck models that have frets and inlays derived from the above setup, and everything is much better. I guess the moral is not to hold out for some ideal, and just build something practical and move on.
Anyway, it was a full day of work updating the models, but I’m in a better place for it when I come to build new guitars in the future.
Ferrule Block Template Version III
A month ago I wrote about how I’d tested out the routing template I’d made to let me install the Grainger string ferrule block, concluding that it needed revising to let me better route out the lip on the block. My friend Adan, who also has been known to build string instruments, said recently that he doesn’t mind designing jigs the first time, but he dislikes it when you have to re-design them, and I totally agree (except I don’t much like the first time either): as you have to refine jigs you now making something detailed that isn’t thing you wanted to make in the first place. And the more “clever” they get, the more I have the sense that I’m doing something wrong with my fundamental approach to the given problem. On that note, here’s the current sketch for my third iteration of this particular jig:
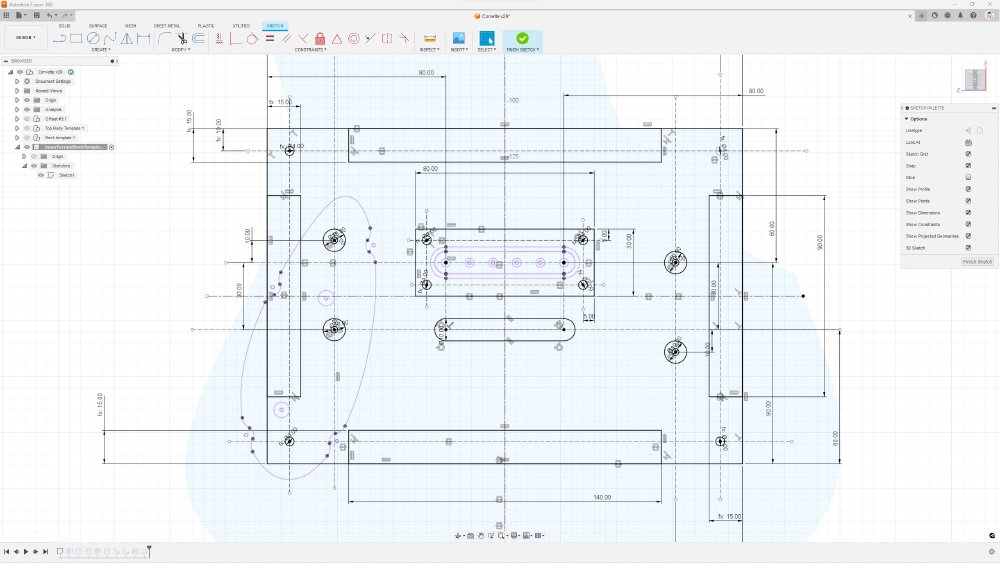
I’m just glad Autodesk don’t charge per constraint. This is one of those sketches where it started out as an asymmetric design, which is now symmetric after many changes, and I wish I’d known that to start with as I’d only have drawn half of it and mirrored it at the end (sage advice I got from Makespace member Phil Candy, who is an actual industrial designer). Anyway, the end result will now be a stacked set of jigs:
In the end I’ve gone with a two layered design, and two optional inserts to help me align and cut things. My main concern, given I knew I’d need a two layered template given the limitations on how thick a piece of acrylic I can cut is, was how to align the top and bottom parts accurately, and I’m going to try to use metal dowel pins for this. Given I’m planning to laser cut this template rather than CNC-route it, kerfing will be a major concern with this, and I suspect it’ll take me a few cuts to dial in the laser-cutter even having adjusted my design to allow for some kerfing.
It all feels very silly and over-engineered, but then the alternative is going back to individual string ferrules and having to hand clean the drilled cavities with sandpaper wrapped around a drill bit, at which point I feel less bad about this craziness. This is actually compliated enough that I do begin to feel like this is one time where a Shaper Origin would actually be the right solution - though I’m not sure how you align the tape up accurately on that. Thankfully I don’t have the kind of budget for one of those until I sell a good few more guitars, so I’m saved from worrying about that.
Still, I am now armed with a bunch of vector files to go laser cut this week, and we can see if this crazy jigsaw puzzle I’ve created actually looks like something that’ll work.