A Week in and Out the Shop
8 Oct 2023
Tags: delfinen, makespace, staining, talks, westfield
Delfinen
I think I’ve repeatedly declared Delfinen as “hole complete”, i.e., I’ve got no more material to remove from the body, and then realised I was mistaken. This week I realised belatedly that I still hadn’t cut the holes for the pickup-selector switch and the volume/tone pots. Minor details, I’m sure you’ll agree 🤦🏼
I was particularly concerned with the pickup selector switch, as there’s not much room for error when drilling that hole, and I know from past experience that aligning drilling in deep pockets on a guitar body is a pain. Thus I needed a way to ensure I’d be dead centre in the cavity, as otherwise the wide rotary-switch I plan on using won’t fit:
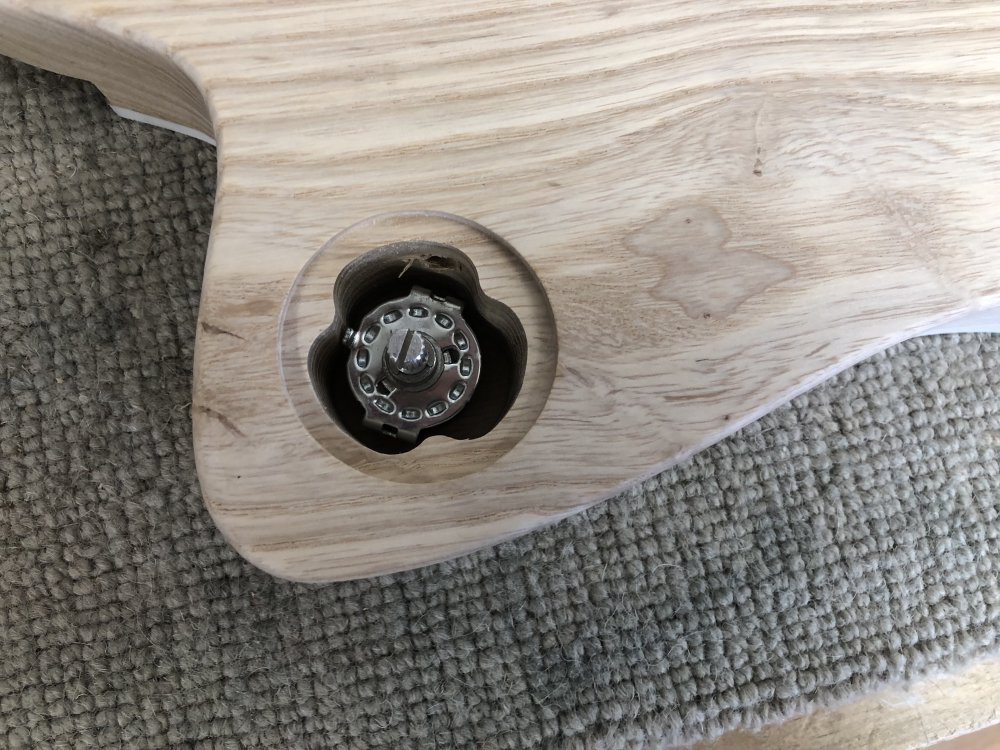
To make this less of a risky operation, I decided to laser-cut some templates to guide me when drilling. I just went to my CAD model, selected the inner-surface of both electronics cavities and made the templates that way. I also, whilst I was at it, did test cavity-covers to check how well the body reflected the CAD model before I made the actual covers in a nicer (aka more expensive) material.
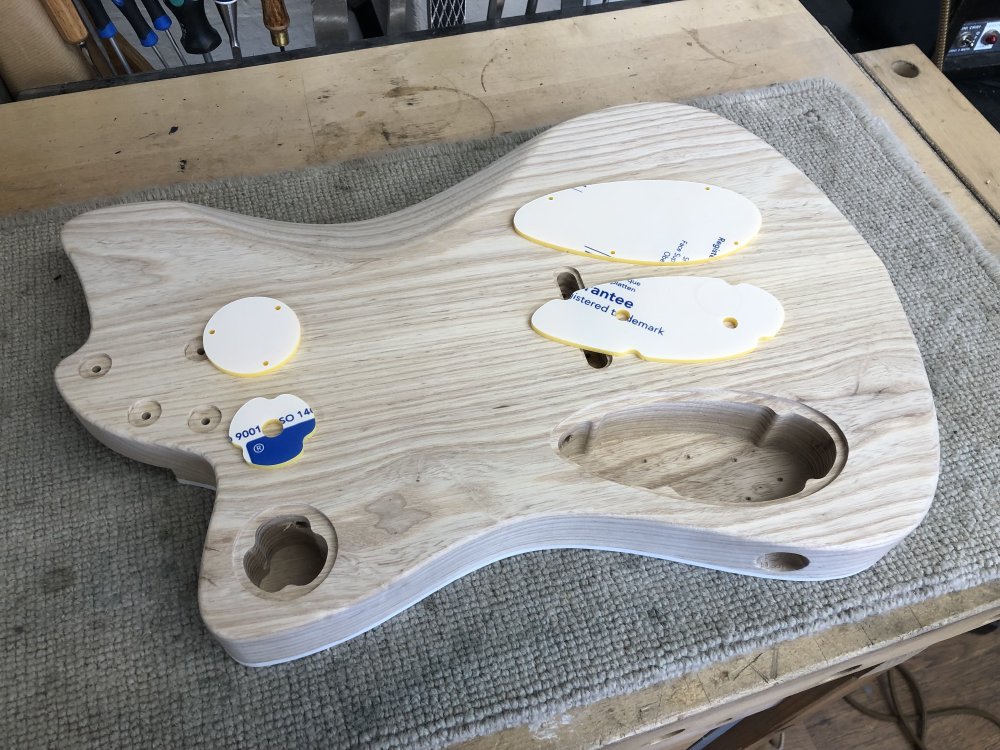
Oddly enough the parts for the main cavity fitted fine, but the parts for the smaller selector switch cavity were notably oversized, as indicated here by the smaller cavity lid not being flush and just sitting over the hole:

I checked the parts against the templates I used (which I also laser-cut!) and yes, the new parts are notably bigger. I suspect this is down to me having two versions of this build: originally it started out as a right-handed version of my Corvette model, before evolving into this more “me” design of Delfinen. Anyway, this is why I did test cuts of the lids! So now I need to go back to my CAD models and find the right one for the pickup selector cavity.
I also realised that for the templates I might want to hollow them out a little: the one for the main cavity fit well, almost too well! It was quite hard to get out again, made easier by the bigger cavity having the jack hole, but I do have visions of it getting stuck at the bottom of the cavity and never coming out, so I’ll tweak that for future revisions.
Whilst I didn’t reach “hole complete”, I didn’t see this as any reason not to get on with the staining of the wood. As I talked about last time, I had my concerns about this process due to the binding, or rather due to the glue used to secure the binding. I also had some concerns about the stain colouring the binding also. But I didn’t feel that there was much I could do further about either of these concerns other than have a go and find out, and so that’s what I did.
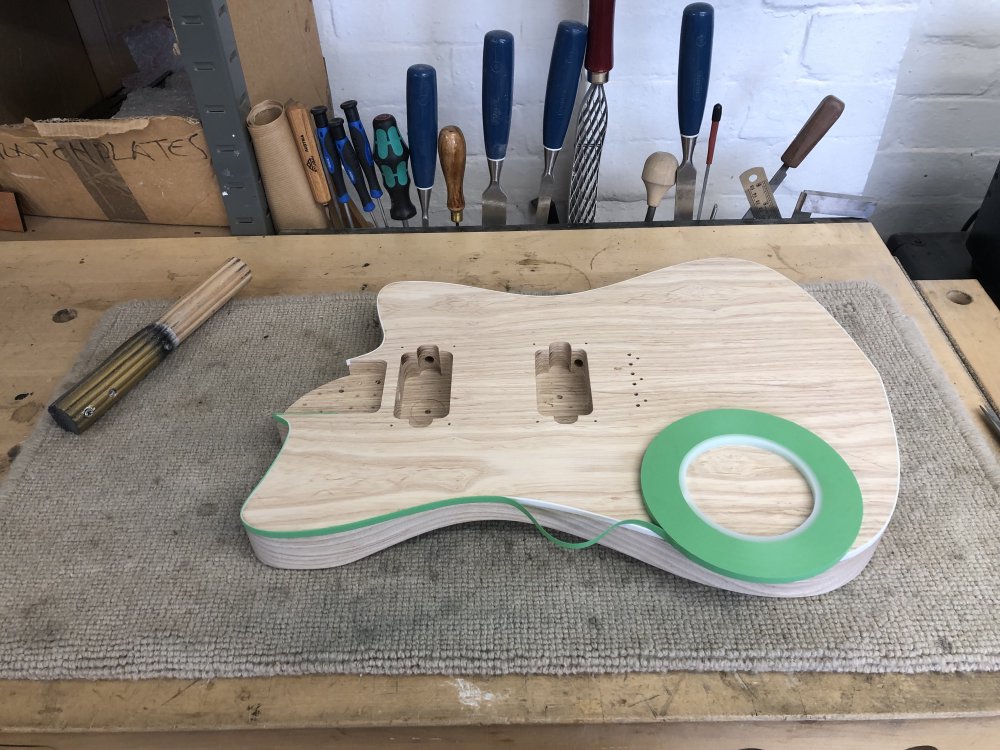
I did know that the wood stain would stain this particular binding material, and whilst I couldn’t stop getting some stain on the binding, particularly on the top surface, I figured I should give myself the best chance possible of minimising that, so I first taped up the binding as if I was going to paint it:
This tape obviously will just cover the side edges, there’s not much I can do to protect the top edge. I just have to hope that a combination of prompt wiping and then careful scraping after will be enough.
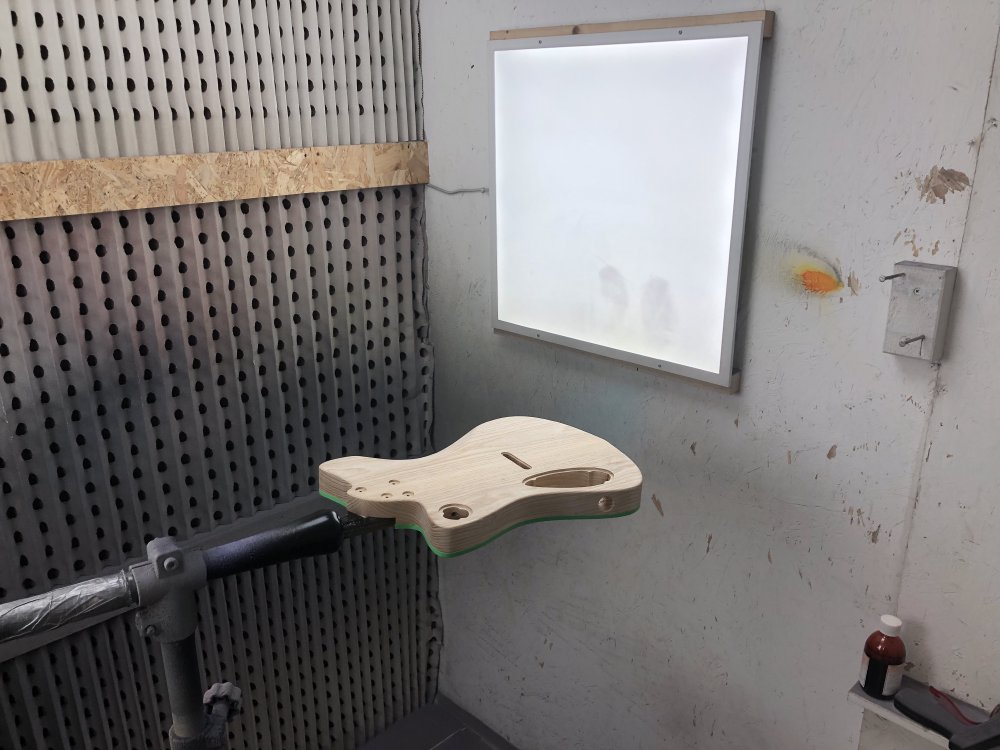
Even though I wasn’t going to be painting this, I opted to go through the staining process the same way I’d paint a guitar body, as the spray-booth has good lighting and we have racks in the workshop for drying painted guitars that I can use to let the wood-stain dry.
Unfortunately the staining was a bit of a disaster, with both my expected possible failures happening, and some fresh new ones I’d not anticipated.
Firstly, as I predicted, where the glue has got into the grain there is some discolouration, It’s not too bad in the areas I was most concerned about, I guess because I had taken time to work those edges more, but the staining revealed a couple of spots where I’d just not noted it before: as I’ve said previously, often you can’t see the glue overspill until you catch it in the correct light, and I found that in the scooped area next to the neck pocket I’d missed some:
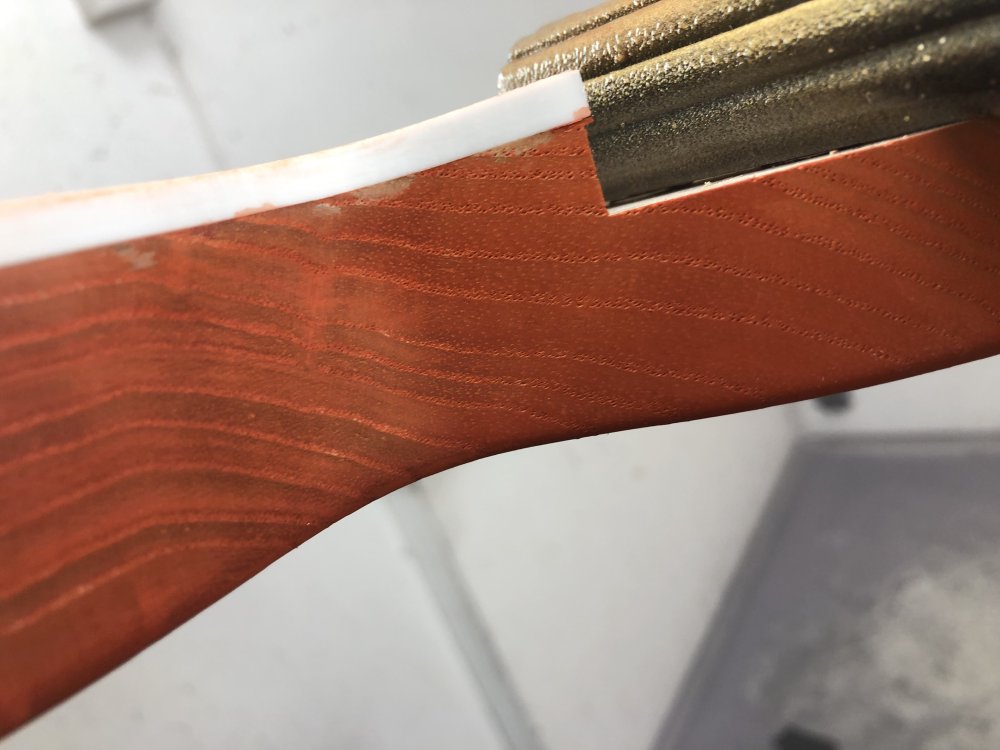
Similar on the top edge where I had to do some corrective work last week you can see it’s failed to take also, which is the worst offender, as there’s no hiding this one:

You can also see in teh photos that the stain has coloured the plastic binding in places despite my attempts to keep it clean via tape and frequent whiting with a clean towel as I worked.
The unanticipated failure was that I didn’t bother to do the usual deep-clean of the booth before staining, on the grounds that I wasn’t going to be running the extractor, and so there shouldn’t be any more dust in there than in the rest of the workshop. This turns out to be not true: it seems that before I went it there was a lot of paint with glitter being sprayed, and so I slowly picked up bits of glitter in the staining process. Thankfully this shouldn’t adhere too strongly and I suspect will come out when I sand back the finish before doing another coat.
At least, if I do another coat, as that’s by no means certain given the glue problems.
I knew when I set out on this that there was a good chance of failure, and so I’m chill that right now I’ve somewhat ruined this guitar body :) I’d rather it wasn’t like this, but it is what it is and I’ve learned something. In particular I’ve learned that the orange stained wood with white plastic binding looks AWESOME :) Ignoring the failures, the look is everything I hoped it would be, so I’m motivated to either fix this, or try it again later with more care taken over the binding process - this was after all my first attempt at binding.
I suspect the first pass will be to sand back the areas with the obvious blotching, to see if I can get it better for next time. If that results in the same failure mode, then I’ll switch to painting this body, and try this colour combo on a future body. If the plastic is too deeply stained, then I’ll have to remove it as best I can and switch to having a round over where it would have been.
If none of that works then it can join the collection of failed builds that I hang on my wall: I thus far have three necks and no bodies in my total failures collection, so there’s room for a first, but there’s a good number of options to explore before I resign myself to that.
The Old Westfield
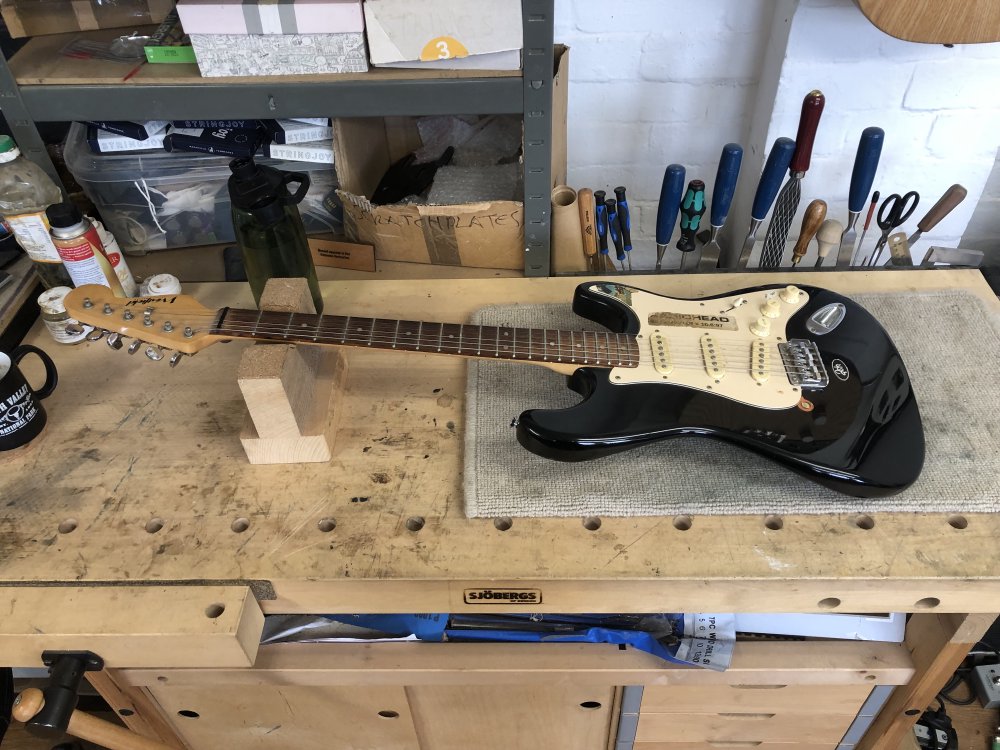
Last week I talked about how whilst up visiting my family I’d picked up the original guitar on which I’d first learned to play, with the intention of getting it back to a working condition. For a thirty year old guitar is now doing bad, but the pots have seized up and the pickup selector switch is very crackly and cranky, so mostly it needs an electronics swap.
Thus it was time to open it up and see what was currently in there so I can order replacement parts. My phone is now full of pictures of each component in there, which I’m sure it enjoys no end.
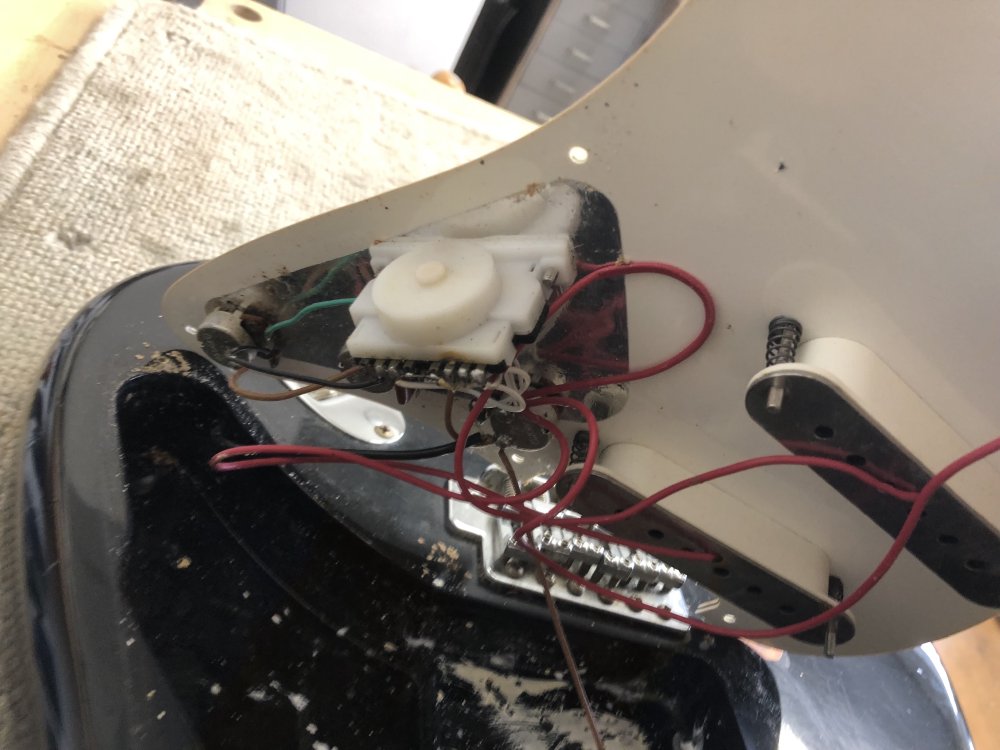
I’m glad I did this before ordering replacement parts, as what I found in there didn’t quite match my expectations. Whilst generally it does follow regular strat wiring, the pots are all 500kΩ, rather than the more traditional 250kΩ pots you’d expect to find on single-coil pickups. The switch is not a traditional switch either, looking a bit more like the ones I’ve used in the past that are easier to wire up - which is fine by me.
When I play tested it the pickups themselves seemed fine, so I shall just order replacement pots and a switch, and swap them out. I’m hoping that I can remove them without damage to the plastic parts, as I’d like to keep the aged look. It’s not obvious from the photos, but the outside is now a well aged yellowed look, and underneath all the plastic is pristine white :)
Makespace CAD Club talk
The other focus of attention this week was I gave a talk to the CAD Club at the local maker-space where I originally started out my guitar building life, Cambridge Makespace.
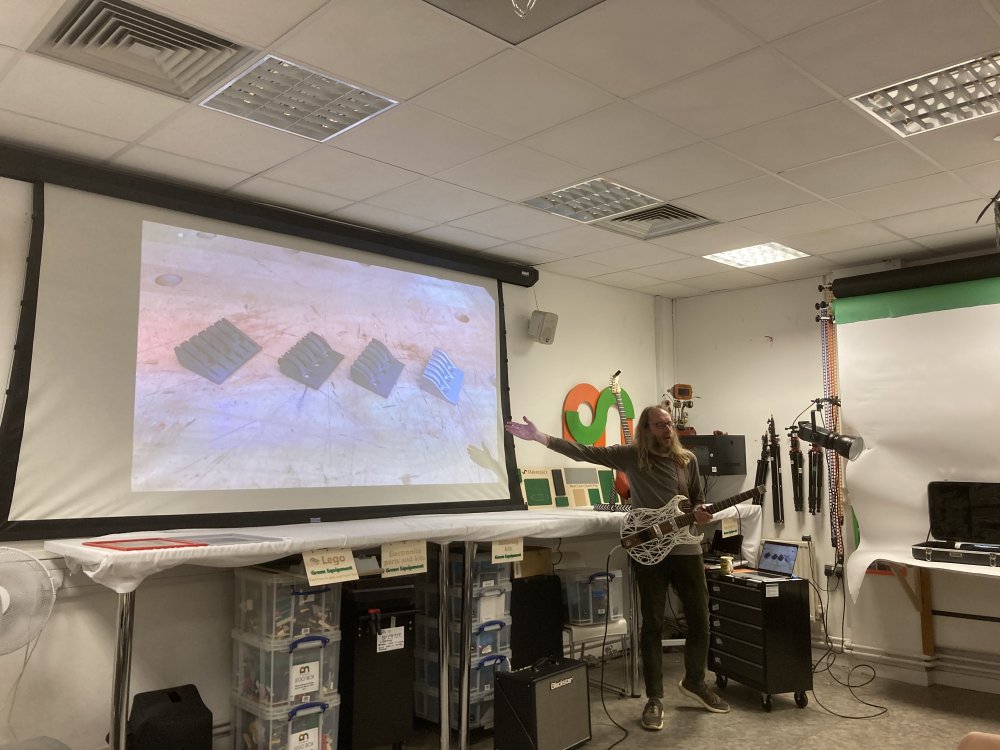
The talk was an extension of the version I gave at OSHCamp a month or so back, looking at my Älgen guitar design, and doing a deep dive on each of the 3D-printed parts: how they were designed, the type of 3D-printing involved, and what worked and what didn’t. I had more time than at OSHCamp, so I was able to go into a bit more detail, and in particular spend some time on the parts I actually printed at Makespace using their Markforged and Form 3 printers.
I was worried it’d be a bit overly long, but afterwards we had plenty of discussion with the audience, and I got a few tips myself from the collective experience of the audience.
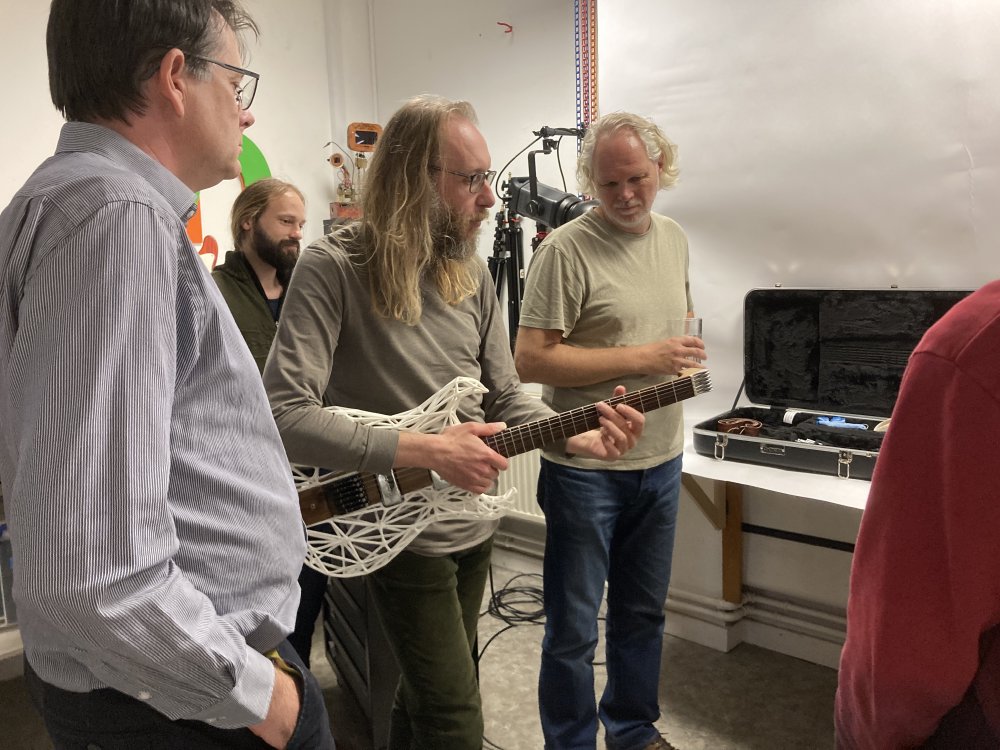
I feel from the above photo that I really missed my calling as a presenter from the late night open university programming you used to get in the UK :)
Anyway, it was worth the time spent on prep, as I had a really good evening and it seems the audience did too. My thanks to Dr Footleg who organised the evening, and to Jonathan for taking the photos!