A week in the shop, in spreadsheets, and in Birmingham
Published 25 Feb 2018
Tags: amp, BoMs, CNC-routing, testing
We’ll start with the bit I suspect any regular readers will be wondering: did the amp get any closer to being finished? Well, yes, it did: in fact, if it wasn’t for a couple of dodgy components, then it’d actually be fully completed.
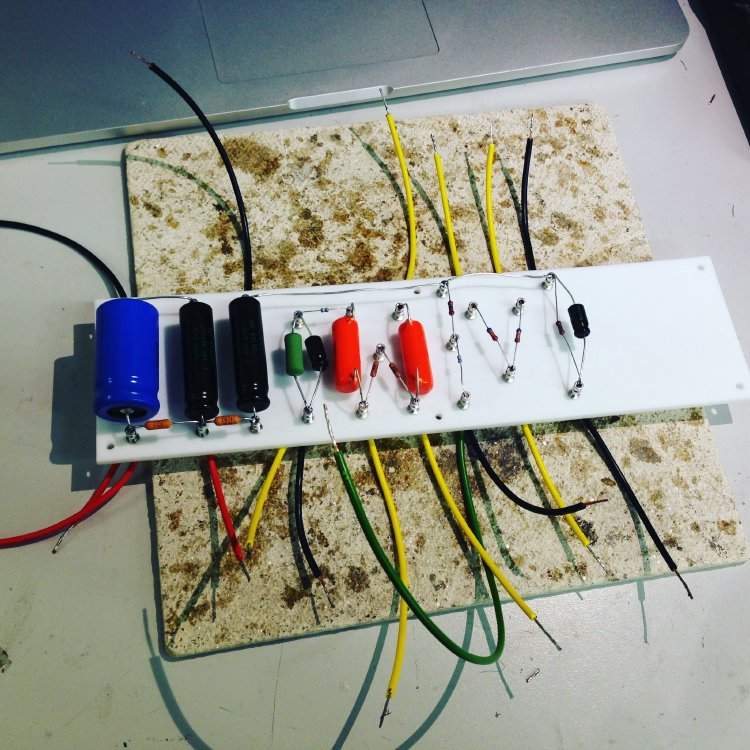
Last week I’d managed to make the turret board ready for assembly, so this week I started by soldering that up first, adding the components on the front and all the connection wires on the back, a task made much easier by the loan of a 100W soldering iron (thanks Rob!).
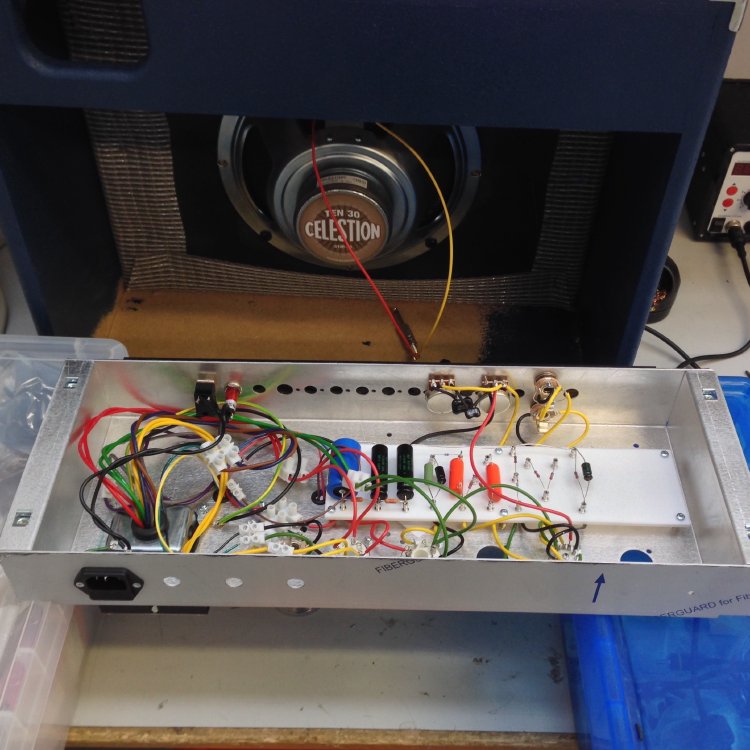
Then I spent a morning cutting wires to length, tinning them, and connecting the board to the chassis and non-turret board components (input and output jacks, volume/tone pots, valve holders, and transformers), and I also wired up the rest of the power side. As someone not practiced at this it took me the better part of 5 hours to get everything attached and in place; this was in part due to lack of soldering practice, but also due to being paranoid and regularly double checking things against my hand drawn schematic and the original reference circuits I’d found online.
Much to the amusement of some of the more experienced analog engineers I know (who kindly helped out with final testing) I used a lot of terminal blocks to connect the transformers up rather than soldering them on directly. This is the software engineer in me I suspect: although it’s left me with a rats nest of wires, the idea is that the expensive components will not be committed (by shortening their leads and soldering them directly) until I know my design works. It’s much easier to shorten the wires once I know I have everything right than it is to extend the cables if I’ve got anything wrong.
Then came testing time. I found some good guides on how to do initial power up testing on an amp (here and here - although I didn’t use this design, it’s close enough), first checking all the grounds, and then testing the powered up amp without tubes, with the rectifier tube only, and then the whole lot. You have to be very careful here, as you are dealing with lethal voltage levels (500V DC across that large blue capacitor). In testing I accidentally shorted to ground at one point and tripped an RCD in Makespace, which took out power to more things than I think anyone expected (i.e., there was more items on the electronics bench circuit than people realised). This caused a bench power isolation box to be procured, and delayed further testing until that arrived.
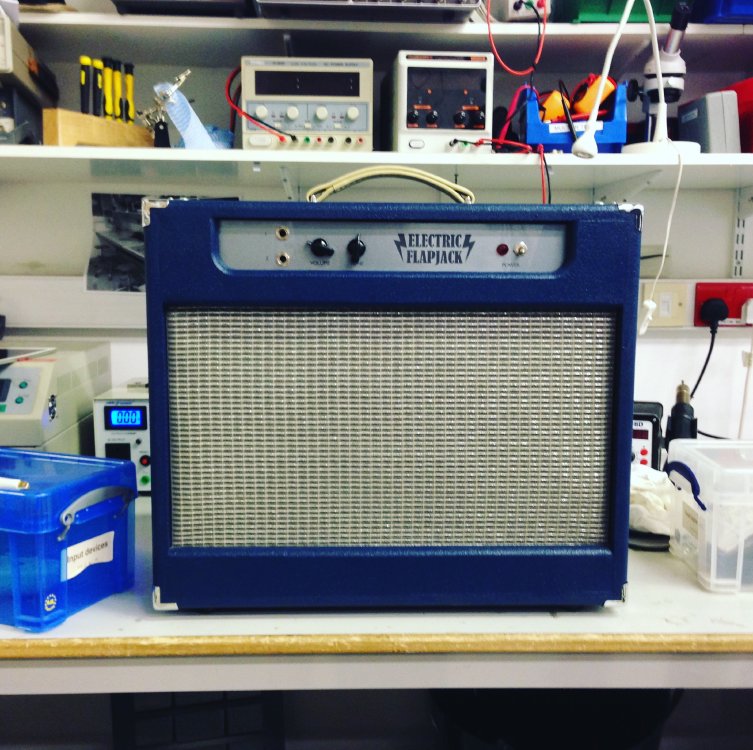
But, late on Friday evening, with the assistance of a couple of more experienced analog engineers (one of the benefits of working in a community workshop) I resumed the testing process, and brought the amp up in various stages until we got to the wonderful point where we plugged in a guitar and made sounds come out the speaker: I’ve now effectively got an entirely self made signal chain!
I can’t consider it finished yet, though. One of the potentiometers used for the volume turned out to be a bit of a dud, so needs replacing, and similarly for the power indicator bulb. I’ve ordered replacements, and once they’re in it’ll actually be finished, and I can make a little demo video.
Still, a great feeling of achievement!
I spent a good chunk of the early part of the week coming up with BoMs for the three guitars I’ve been asked to spec as part of my prototype run, so that I could give a proper price quote to people. It was two guitars last week, but right at the end of the week a good friend asked for one too, so now we’re at potentially three guitars!
Doing the BoM, as I’ve highlighted before, is a really good process. It means you know what you will need, can get a cost estimate, but also here I could send a list of bits to the clients to make sure we both have a matched vision for the guitar. Whilst the renderings help, a list of actual parts also brings out points that each side assumed were going to be done in different ways. By teasing those out early you avoid frustration later.
Now I just need to get final sign off and deposits sorted, then I can get ordering parts!
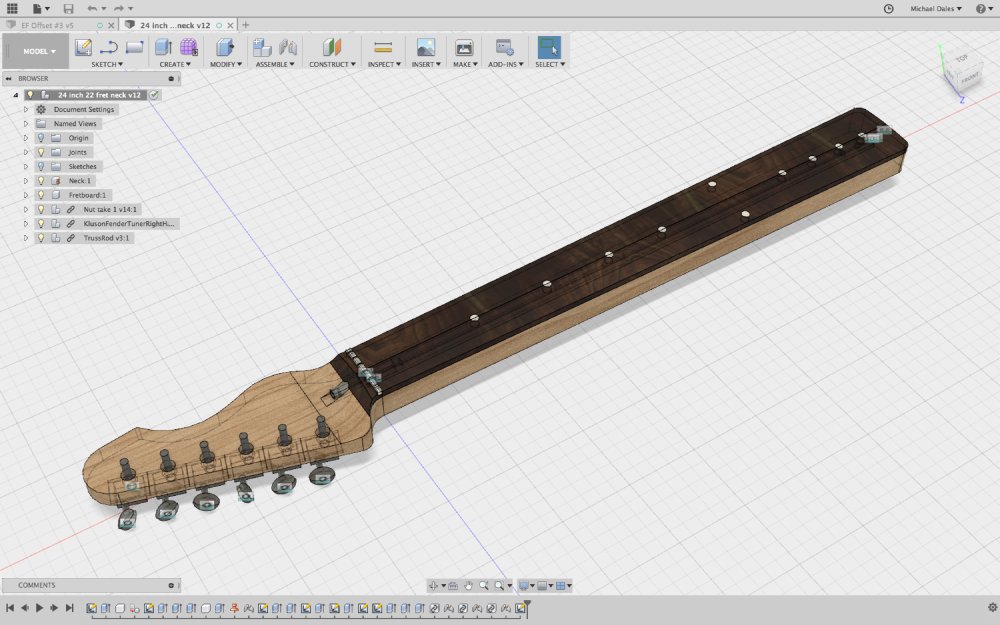
One of the things I want to improve on in the next round of guitars is the neck design. One of the guitars specced has a one piece maple neck which I’ve not built before, and the other two are short scale (24") necks, and that means the truss rod geometries will need tweaking as there’s less room to play with than I’m used to on a 25.5" scale length. Thus I spent a bunch of time trying out various scenarios in Fusion 360 as to how I might fit the truss rod. One of the things I learned from the amp was that just because you can get pieces to fit in CAD doesn’t mean they’ll actually be fit-able in reality, so I’ve been keeping a close eye on how I’d actually assemble bits, which is where the tricky bits are here.
Having done that, I also tried something new for me: 3D machine routing of wood. For all my previous guitars I’ve effectively done 2D cuts on the CNC router and then finished by hand. And whilst I find that process the most satisfying, there are a couple of bits where it doesn’t give me the finish I want (notably the transition from fretboard to headstock), but also for the thinline models I have planned where you have a belly carve, I’ll need to do the roughing with the CNC lest I make a guitar body that looks like swiss cheese. Note that lots of people do the fretboard to headstock curve using a drum sander fine, it’s just that at the community workshop I’m in we don’t have one, so I have to look for what tools we do have that’ll let me do what I want. Similarly we don’t have a planar thicknesser (a machine to let you make a block of wood a particular thickness), but I do have a CNC router and a 1" router bit, which has the same end result.
Anyway, I found a bit of scrap in the workshop and mocked up some suitable curves in Fusion 360 like so:
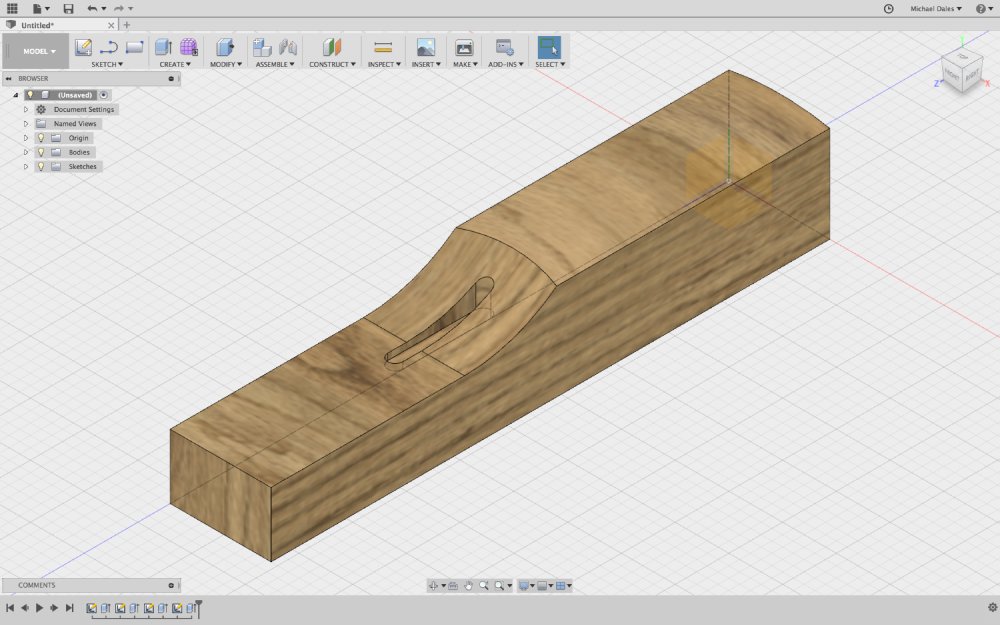
and then after a bit of trying various tolling patterns in the Fusion 360 CAM editor, ran the design through the CNC router and ended up with this:
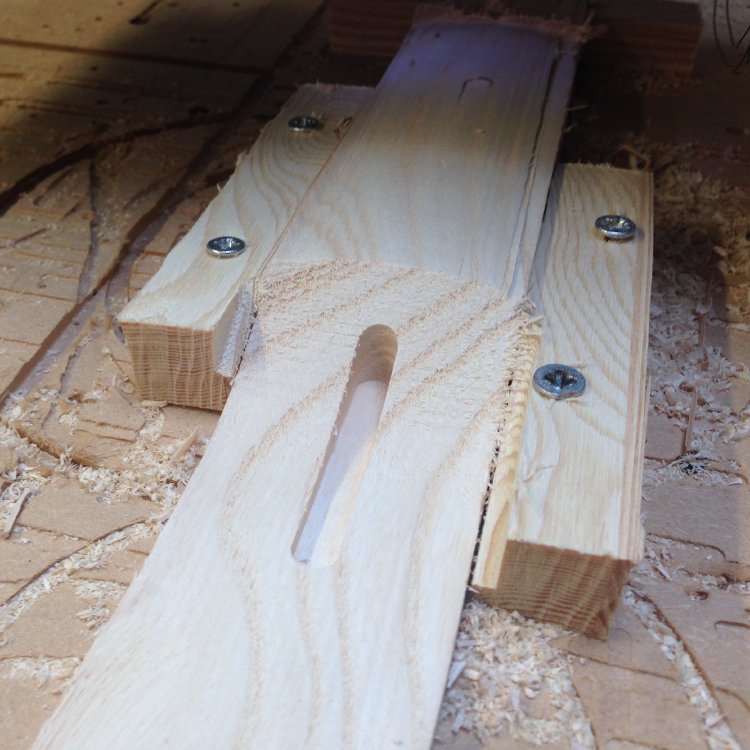
There’s a video on my instagram if you want to see a clip of the CNC Router in action. Overall quite pleased. The curves are a little rough (the rut on the top right was from the scrap rather than an artefact of the routing), but they’ll sand down fine. I used a flat end mill bit rather than a ball end mill bit that I should have used, so that it came out as smooth as it did was pretty good, and now I know this will work I can order one.
I ended the week with a bit of fun: I headed over to The Guitar Show at Birmingham to go and see what was doing - partly to look out for new suppliers of bits for my guitar builds, but also just to go see/hear some awesome bits.
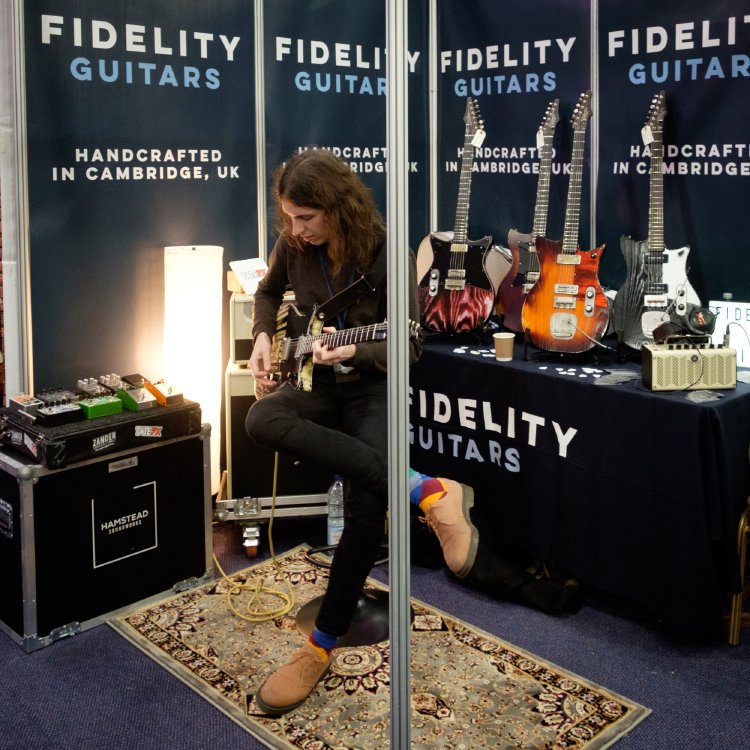
One of the exhibiters there was the ever awesome Fidelity Guitars, a Cambridge based shop making these great models that have a 70s Italian vibe to them (you can see their demo guy Brian playing one of their JB series above). Matt had a nice demo rig, with a Hampstead amp plugged into a bunch of pedals from small UK manufacturers like Zander Circuits, Tate FX, Thorpy FX, and Hampstead as well. I had a good five minutes rocking through the toys. The combination of Matt’s JB model, that Hamstead amp, and Hamstead’s soon to be released Odyssey overdrive pedal was sublime. I’ve played Matt’s guitars before, and they sound amazing, but the Hamstead amp delivered amazing cleans when cranked, and you could get a good dirty blues sound with the Odyssey. As much as I like building and playing my own guitars, it’s always fun to play with other toys :)