A week in the shop
Published 19 Mar 2018
At the end of last week I’d CNC’d out the neck for my offset design, and this week I made the fretboard to go with it. For the current builds I’m trying a new approach to making the necks, in part due to how I want to deal with the headstock to fretboard transition as explained last week. This will hopefully give me nicer results and reduce the risk of mistakes overall, but forced me to try some new approaches.
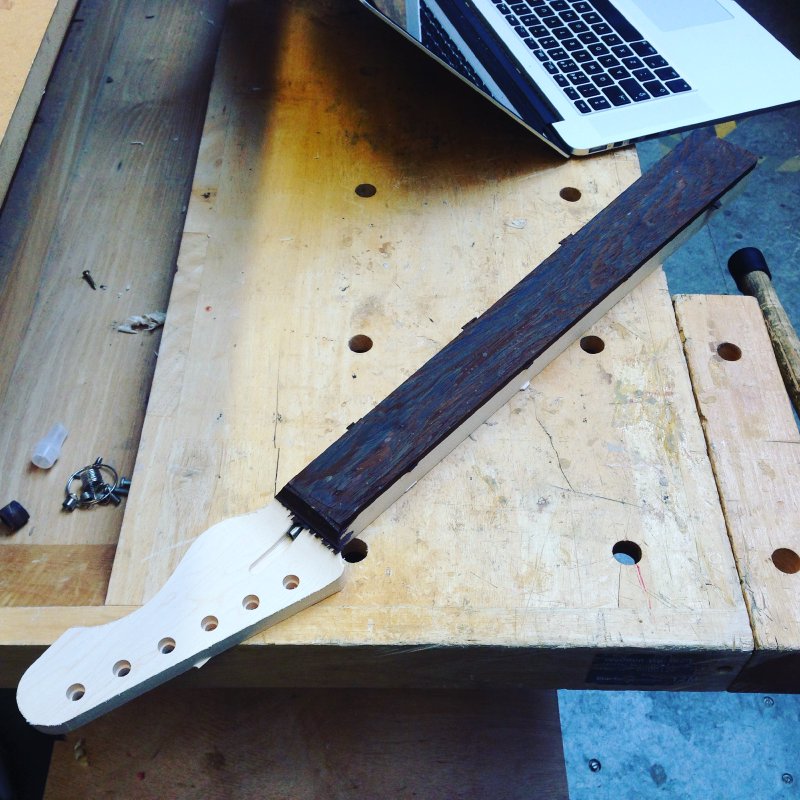
In previous builds, when adding the fretboard to the neck, I glue the fretboard to the neck before I shape it. I marked where the frets are going to be on the board with the laser cutter (as explained here), pencil in the line for the 0th and 12th frets on the the back of the board, and then glue the board on matching it to similar pencil lines for the 0th and 12th frets I’ve made on the neck itself. Once the glue is set I just run around the neck using a hand router with a following bit to make the fretboard flush to the rest of the neck (alas, I just checked my photo album and I don’t have any pics of this bit in progress, sorry).
For the offsets I wanted to try a different approach, whereby I do as much of the fretboard as possible before gluing it to the neck, in part to minimise the risk of wastage if I make a mistake on the fretboard, but also it lets me do a similar trick I did last week on the neck to get the headstock/fretboard transition just right using the CNC router. So my new approach to the entire thing is thus: thickness your fretboard materian (in this case a nice bit of wenge), do the top down outline of the fretboard on the CNC router, along with the headstock transition, laser etch the fret slot guides, saw the fret slots, glue fretboard onto neck.
There’s a bunch of places where this can go wrong. Any time you have to do operations that require alignment on different machines you always have the risk of misalignment when you try to join them up; ideally you’d do everything in one pass on a single machine, but that’s obviously not practical. In the original workflow I had this was only at one point, where I had to line up the fret guides I’d made on the fretboard with the pencil marks on the necks. But even then I’ve made the problem simple as I don’t mind if I get the fretboard a little to one side or the other as it’s only on one axis I need to be matched. In my new workflow I now have two points where I need to align things: firstly when I add the guides to the already shaped fretboard and then secondly when I glue the fretboard to the neck.
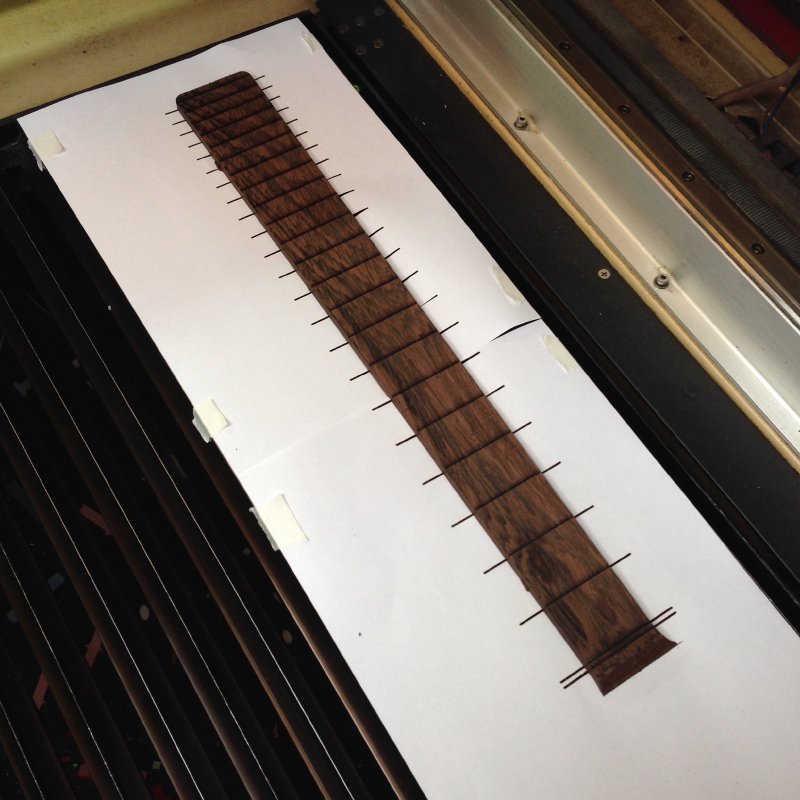
To solve the first one, I came up with a plan whereby I stuck down paper to the laser cutter bed (sticking it means it won’t move during subsequent stages), scored the outline of the sides of the fretboard, placed the fretboard carefully over that, and then (after remembering to adjust the laser focus to allow for the fact the fretboard surface is 6mm higher than the paper) etched the fret slot guides. This actually worked quite well, here you can see the paper outline:

Then here’s the etching in progress:
And here’s the end result:
You may note from the video that I actually ran the etching pass on the paper before I did it on the fretboard: this was a lack of faith that in switching between the outline program and the slot guide program on the cutter it had reset the original correctly. It turned out all was well, but as ever: measure, measure, cut.
Once the guides were etched I then was able to sit down for a quiet hour or so with Live At The Regal on in the workshop and saw each fret slot to the correct depth.

Now I’m ready to glue the slotted fretboard to the neck. This is the second risk point I mentioned above: I have to ensure that when gluing these two together they line up perfectly, and stay lined up. One thing you learn quickly when clamping wood for gluing is that it causes the two parts to move. I’ve done some research on how to prevent this, and I’ll report back next week if that’s successful.
As part of doing the fret slots I finally got around to updating my fret board generation software, which is open source and you can read more about it here. When I first mentioned it here I had an issue with the otherwise perfect Maker.js library, whereby it wouldn’t omit polylines, just individual lines, so I had to have an extra post processing stage on any freboard I generated to turn the slot rectangles into actual rectangles in the eyes of the laser cutter software. Dan Marshall kindly fixed that issue in Maker.js, so now I can just generate my fretboard designs and run them on the laser cutter effortlessly. Thanks Dan!
Other progress on the offsets was a little less visually exciting, but I sat down and worked out the tool paths for the CNC machine to rough out the body. This is reasonably complicated due to the fact I need to CNC from both sides of the material. The trick to doing this is you route out some holes in both the material and the CNC bed to put in metal dowels that let you line the body up perfectly up for the second side (this is called the pin alignment technique). You can see the dowel holes in the picture below in the corners.
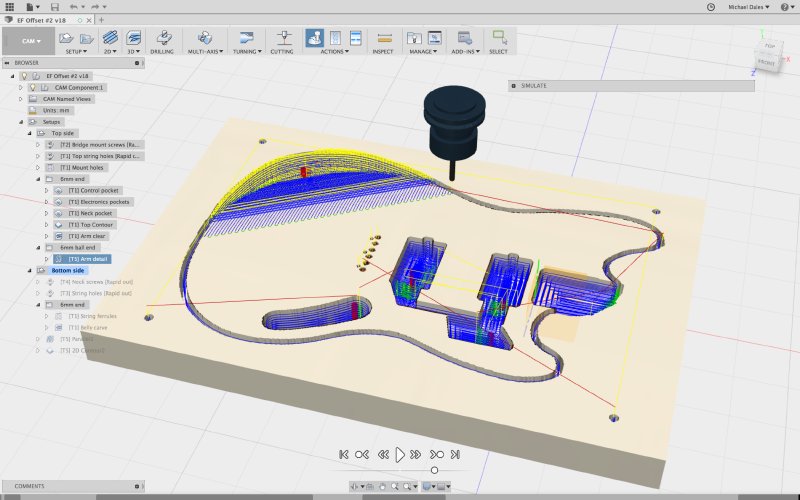
Thankfully it turns out you can get Fusion to generate tool paths for both sides of a model, so at some point this week I’ll give that a go on some foam, and if I’m happy with that I’ll route out the body in the wood I jointed last week.
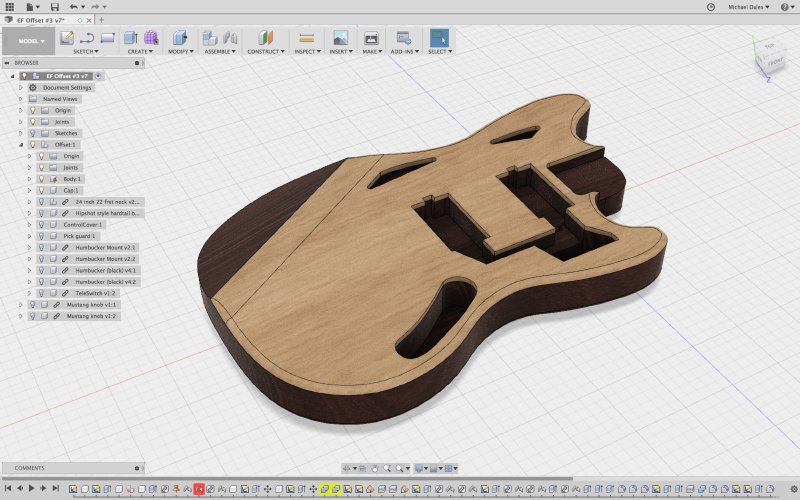
One of the offsets I’m making is a thinline version; for those less familiar with Fender terminiology, that means it’s semi-hollow, with a solid centre block, but cavities in the body to either side. This is achieved by making the body out of two pieces: the main body block, and a cap bit of wood to make the lid. In the picture below I’ve made the two parts different colours to help get the idea across (don’t worry person who ordered guitar #6, it won’t look like this in the end ;)
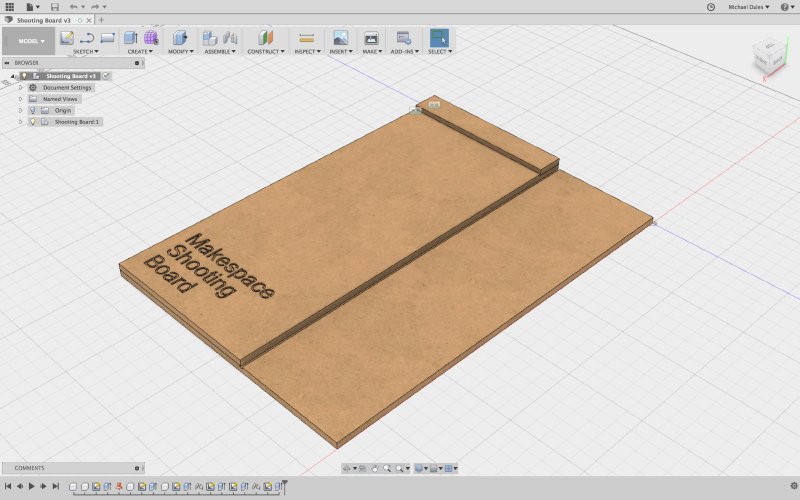
I say two pieces, but technically it’ll be four as the body will be two jointed bits of swamp ash, and the cap will be two jointed bits of 5mm thick maple. I’ve never built a capped guitar before, so I’ve been reading up on that to work out what the fiddly bits are. Firstly, I wanted to know how to joint something as thin as a cap, as the usual tools I have at Makespace didn’t seem ideal for that. After watching some videos (including this really good one by Crimson Guitars) I’m now better educated. Firstly, I’ll need a Shooting Board, which is a fancy name for a jig that’ll let me run my jointing plane along the edge of thin bits of wood. Makespace doesn’t have one of these yet, so I’ll be making one in MDF in the coming days.
Also, I’ll need some better clamps than the chord clamps I currently use, called sash clamps, which will actually make jointing bodies easier I suspect, so they’re on order.
In addition, I was looking at how you can wrap the cap over the arm comfort carve. In the picture above you can see I’ve been lazy and just not put the cap over the comfort carve area at the bottom left of the guitar. In practice I want to bend the cap over that area so you don’t get two different wood styles on the top surface. After watching yet more videos on youtube (YouTube’s 2x playback is very much like Neo’s “I know kung-fu” moment), I can see how to do this by making some small channels on the back of the cap where it has to curve to make it more flexible. You’ll get to see in the coming weeks how that goes.
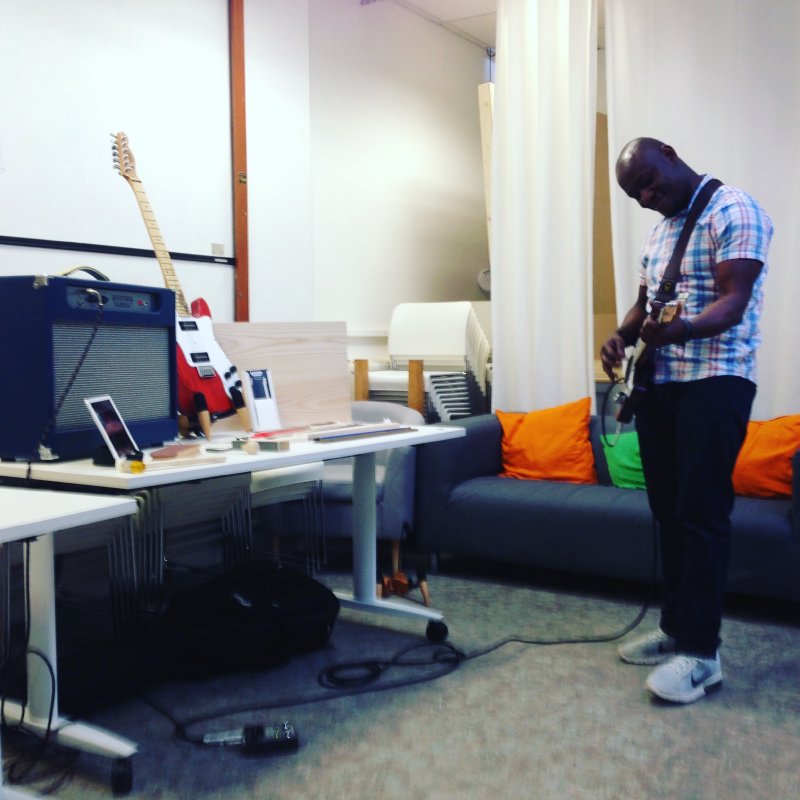
In addition to building guitars I got to show them off this week. Thursday was an open evening at Makespace as part of the Cambridge Science Festival, and then Friday evening was the Makespace 5th birthday party. It was great to see lots of people interested in the guitars and amp, and I got to spend a good chunk of the two evenings providing background blues guitar music when not showing the guitars off. It was also wonderful to see people play the demo guitars: I get a real kick out of seeing people elicit wonderful tones out of the things I built in ways I never can. Thanks to everyone who stopped by and let loose some licks.
However, in the practice of sharing my mistakes as well as my successes in these posts, the evening wasn’t without incident: unfortunately at one point the strap on one of the demo guitars came loose when someone was playing it and the guitar plunged to the floor. Thankfully the person was quick enough to sort of catch it enough that it didn’t hit the ground hard (in fact, it landed on their foot), and in the end there were just a couple of scratches to the surface that have polished out, but boy was I kicking myself for the rest of that evening, which soured an otherwise wonderful event.
Whilst I feel very precious about all the guitars I build, I have to put them in other people’s hands to let them see what I can do if I want people to pay me to build them guitars, and thus I have to accept the risk that accidents will happen. The question then is, how then can I reduce that risk in future? Firstly, I’ve ordered some rubber strap locks. I’ve never used these as I’ve never had a strap failure like this before, but clearly it can happen, so I’ll try and reduce that as much as I can. Secondly, I’ll have a bar stool for people to play on, so they’re sitting down rather than stood up. Again, the fact I didn’t is down to the fact that I stand to when playing, even when at home practicing, but clearly a sat down person is less likely to drop a guitar than a stood up person.
Anyway, hopefully you can learn from my mistakes without having to go through the heartache I did on Friday: I had to put on a brave face for the rest of the evening, but for most of the remainder of that evening I really just wanted to go home and make sure the guitar really was okay. If you have any other tips for avoiding this kind of incident do let me know!