A frustrating week in the shop
Published 24 Mar 2018
This week was mostly in the shop, which is always nice, but has been a week of mostly setbacks unfortunately; but that’s just how it goes some times. So let’s battle through the frustrations together in this week’s catch-up.
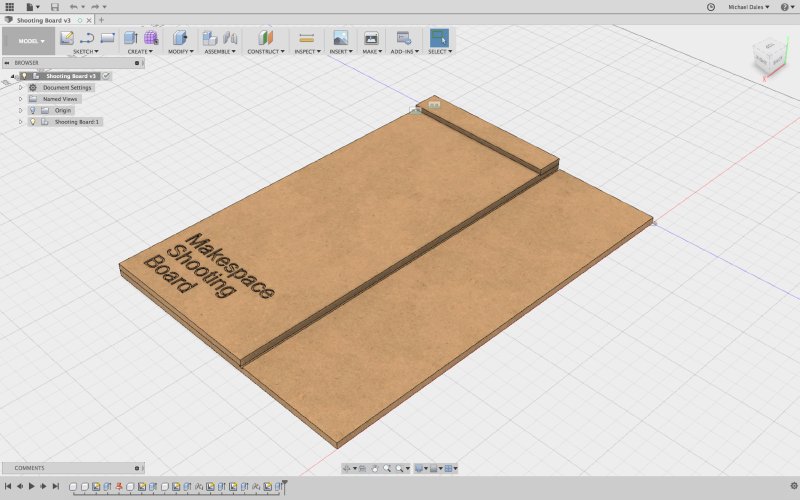
First let’s start with a nice thing that did work out. Last week I shared how I needed a shooting board for doing the straight edges when bookmatching wood for the tops of guitars. I knocked up a shooting board in Fusion 360 last week:
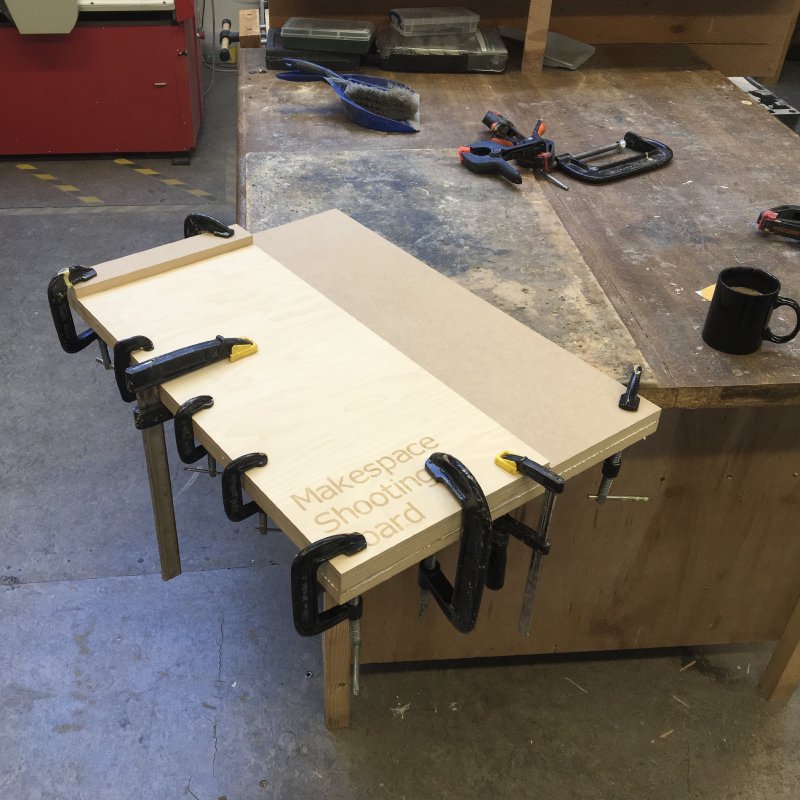
This week I cut the parts out on the CNC router from bits of scrap MDF and ply I found in the workshop, and now Makespace has a nice new shooting board I can use:
It’s quite nice being familiar enough now with Fusion that I can just quickly knock something out like this without much thought. A long time ago a friend gave me the advice in writing software you should pick one text editor and use it for everything, both big and small jobs, so you become a master at your most important tool. Fusion is certainly becoming that way for me. I spotted the workshop scroll saw was missing a simple part (the occasional downside of community workshops), but I quickly modelled up a replacement in Fusion and printed it out on one of the Ultimaker 3D printers we have, and by the end of the day had everything back as it should. That ability to go from idea to implementation like that is a wonderful thing.
It’s also nice to share. So firstly, if you’re at all interested, you can grab the design for the shooting board here. Secondly, if you happen to be a member of Makespace, I’m going to run an workshop on how I use Fusion 360 to target the various bits of kit in the space. I don’t claim to be an expert, but I have produced enough things that I have enough bits of knowledge I can share to help others get started, and then hopefully they’ll make cool things I can learn from too.
Last week I talked a lot about how I was building the next batch of guitar necks compared to how I did it previously, and what might go wrong with the new approach. Unfortunately, I started the week with a failure gluing the fretboard onto the neck, though not the kind of failure I’d anticipated with alignment in last week’s post. When I clamped down the fretboard for gluing I couldn’t get a perfect join between the main part of the neck and the fretboard, leaving an untidy finish along the side of the neck, and because the parts are already the correct size I can’t do much to sand it out without taking too much material away.
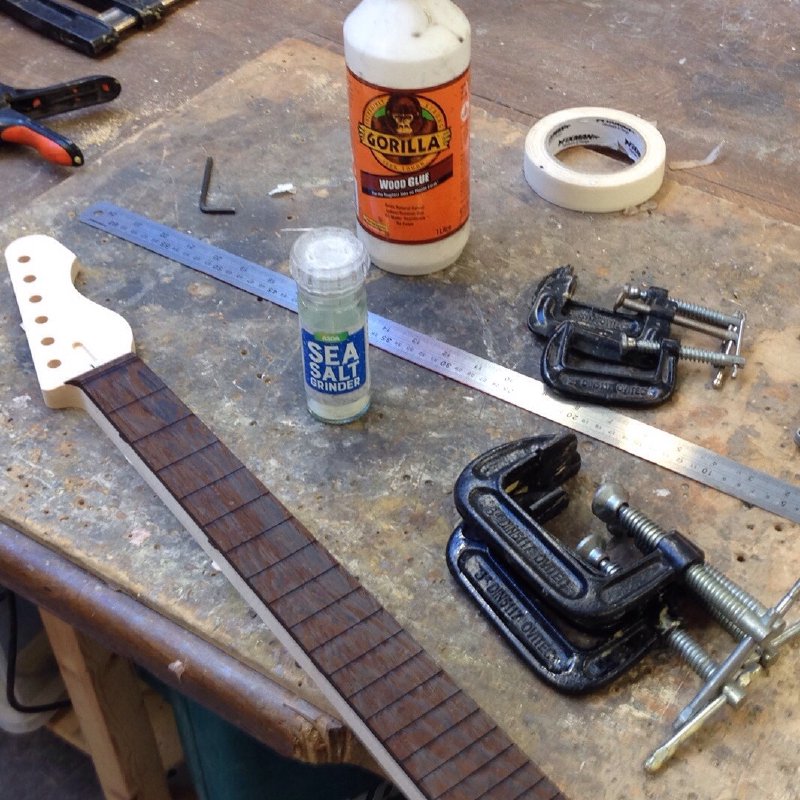
There’s several possible explanations for why I have these unwanted gaps, and I now need to repeat the experiment to work out why. Firstly, I was trying something I’d not tried before as recommended by another luthier to help stop the wood slipping before the glue sets, and I sprinkled a little salt into the glue. The theory here is that the grit of the salt will add friction between the two sides to stop them slipping as you clamp. Certainly following the approach did work in the intended way: between the glue and using temporary clips as I clamped the neck everything remained wonderfully square. However, it could be the salt I used wasn’t ground fine enough and is responsible for the neck and fretboard not joining seamlessly, being high enough crystals still to cause some gaps. I actually think using the clips to hold the board as I clamp it was probably enough to stop unwanted movement whilst clamping anyway, so I’ll probably do as the chap in the video does next time but without the salt.
The other possibility is that I didn’t get the wood flat enough before joining. I used a 1 inch router bit on the CNC router to thickness the wood, but that leaves some ridges in because the router isn’t 100% true, so you have to sand it a little after. It could be that after sanding I’d been a bit too agressive in parts and left the wood not perfectly true. But I did hold the wood together before gluing and it looked okay then, and all the previous necks I’ve made I used this technique and they came out okay.
Either way the end result is I now needed to make another prototype neck. This one isn’t a total loss though: other than the seam between the fretboard and the neck body not being perfect, it lined up fine and is sturdy. So at some point I shall use this as an experimental neck to try applying fretboard binding on, which will hide the bad glue line. I’m fairly sure this is in part why binding became a thing for guitars, in addition to hiding transitions between nice expensive cap wood and cheaper body wood.
On Tuesday, in part a reaction to my neck joint failure, and in part because thicknessing on the CNC machine in Makespace is so very slow, I took up a very kind offer from another Cambridge luthier to let me use his thicknessing machine to level out the next batch of wood stock I had waiting to go: the swamp ash body for guitar #6, another prototype bit of maple to replace the prior neck, and a couple more wenge fingerboards.
I’d never used a thicknesser before, so it was a fun learning experience. It’s basically a machine with a feedbelt into which you insert you wood and it just planes a sliver off the surface each time (as you would with a hand plane, but it has a much wider blade so can cope with wood up to 30cm wide). In the time it takes me to thickness one side of a guitar body on the CNC router at Makespace I’d done all stock I taken to run through the thicknesser! It made quite an impressive pile of dust too.
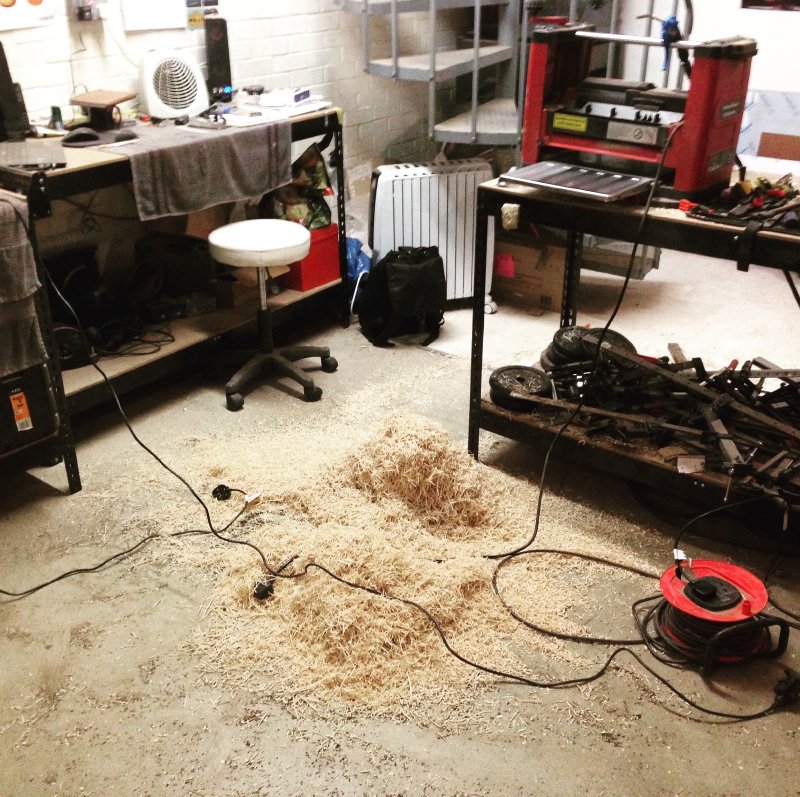
That still took over an hour, and is surprisingly physical work given the machine is doing the hard bit. But such a time saver. I’m now campaigning hard to get Makespace to speed up its plans on getting such a tool!
As a new luthier you won’t always have the right tools for the job, and doing something with what tools you have (in my case a CNC router or a hand plane) is much better than doing nothing. But as you scale up, knowing which tools to get in which order is a good thing. My luthier friend said a proper thicknesser was one of the first things he got as he was scaling up, and you can see why given how much time it saves.
Tuesday afternoon I spent in the practice studio at Rhinocorn Studios, recording some demo footage for the amp.
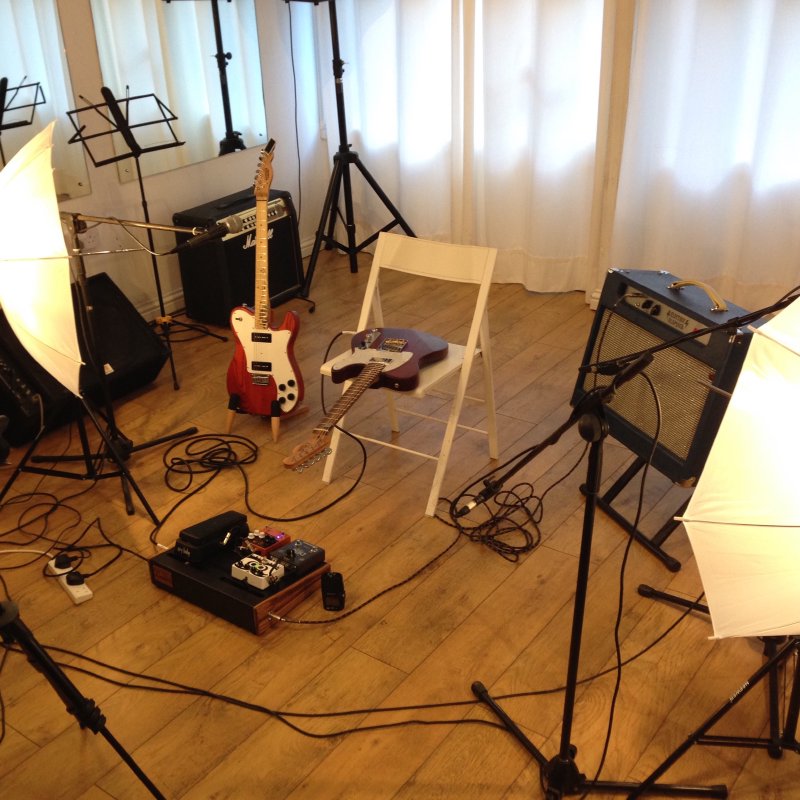
I’m really pleased with the amp, having at long last being able to forget about building it and just play it. It has a wonderful clean sound at low volume, but as you crank it up it distorts nicely. It’s not perfect: if you crank it too much it starts to get a bit flabby with its distortion, which I put down to using a 10" rather than 12" speaker. But this issue is only at volumes I wouldn’t normally use when practicing anyway, so for now it’s okay, and if I do find that an issue I designed the case to be large enough to house as 12" speaker should I want to upgrade in the future.
Tone wise it suits the kind of music I play down to the ground. The session was also an excuse to play with my new Keeley D&M Drive pedal, which I’ll write up a review of at some point, but also worked really well in this context, particularly the boost side of the pedal, which I just love.
Anyway, the footage is all shot, but because I’m behind where I want to be in terms of guitar building right now, I’m not going to edit this video myself. In any startup endeavour, there is always more to do than there are hours in the day, and whilst the temptation is to do everything yourself (particular as a lot of it is interesting/fun), where possible you should focus on the core of what it is you’re trying to achieve and delegate/outsource the rest. In this instance, although I enjoyed editing the last two demo videos, they took a long time to producew, and I’d rather be building guitars right now (particularly given the setbacks this week). So I’ve passed editing responsibility over to my brother Tristan, who in addition to being ace guitarist runs his own video production company that specialises in music and tour videos. He now has the delightful task of going through two hours of video and six hours of audio trying to make it sound like I know how to review an amplifier :)
Wednesday I made it back into the shop, where I glued up the swamp ash body using my newly ordered sash clamps. Previously I’ve been using strap based clamps that Makespace had for clamping large things like guitar bodies, which get the job done but are a bit of a faff. But watching the video last week on gluing bookmatched caps, I discovered the existence of sash clamps, which also are much easier to use for gluing bodies. If you need to joint bodies or caps I highly recommend you get some, and they’re not that expensive, so definitely a worthwhile investment.
This means that the bodies for guitars #5 and #6 are jointed and ready to be cut into actual guitars. However, before I ran my new offset body design on the wood, I found some foam on which to do a test run. Even cheap guitar body blanks cost me £40ish once you factor in postage etc., and good wood blanks cost even more, so I wanted to find a cheaper way to validate my designs before cutting wood. Thankfully, I found a fellow Makespace member who had some insulation foam they wanted rid of, so in exchange for some beers I got myself some nice test material.
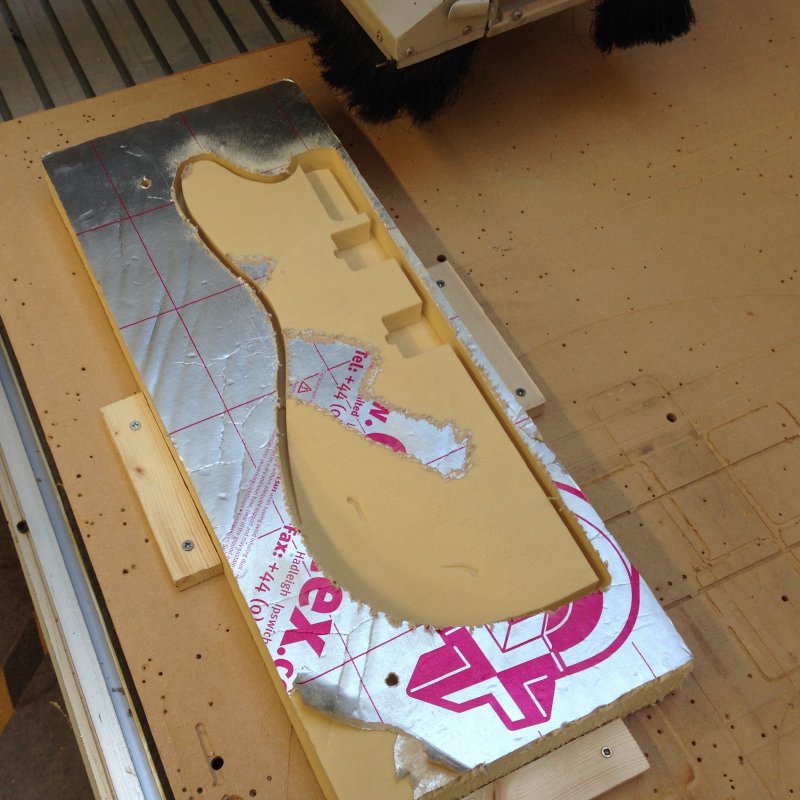
I’m really pleased with how the body shape has come out, the roll off of the arm cutaway is just as I hoped, but it’s much nicer to see if in reality versus on screen. However, this is where my week really took a turn for the worse. You can see above in the cutaway there’s a pair of marks where you’d not expect them: at the time I put this down to some foil from the top of the foam getting caught on the bit (as it has a tendency to do) and artificially extending it briefly, so cutting more than wanted briefly. But in fact this was an indicator things were not well with the CNC machine.
Having done the body, I went onto cutting another neck prototype, something that should have been a trivial job given I’d only just cut the previous one at the end of the last week. After about an hour of carving the neck on the CNC router (doing the headstock details and the headstock/fretboard transition is slow work if you want a good finish), the router was on the final pass to cut the neck outline, separating it out from the rest of the stock, when there was a bang and the entire thing popped off the CNC router. On inspection the CNC router had decided that rather than just trace the outline of the neck on a single level as it was meant too, it wanted to also descend the cutting bit too, at a much higher rate than anything could cope with. This cause a catastrophic failure: the router bit shattered, taking with it a chunk of the neck wood.
I was a bit too flustered at the time to take proper pictures, but the damage to the wood is much worse on the rear: this neck is now scrap, and I’m down a router bit. I effectively lost £50 in parts here between the router bit and the wasted maple. I’m just thankful it wasn’t one of the body blanks I was routing at the time, as that’d have been easily £100 down the drain. In hindsight I should have seen the defect on the foam cut as being more worthy of note than I did, but the CNC router has hither too been nothing but reliable, so I had no reason to suspect anything like this would happen.
So, what went wrong? At this point I still don’t know and getting to the bottom of this is my top priority right now, as guitars #5 and #6 are blocked on getting the CNC router back in action. There’s a long thread on the Makespace mailing list as we try to diagnose it, and I’ve done a number of tests myself just running my designs on air or foam, and I’ve yet to be able to reproduce the failures again. But I’m no leaving an expensive (and potentially physically dangerous) failure like this down to chance, so investigation will continue on Monday once I get back from my weekend trip to Liverpool.
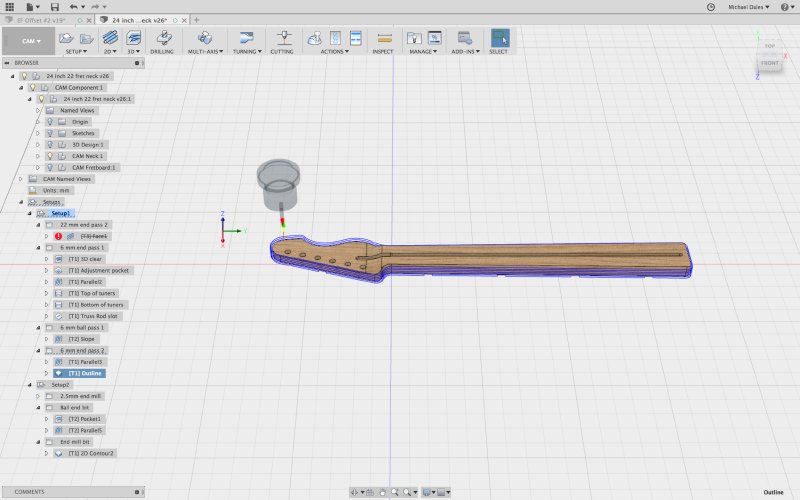
One thing we did manage to rule out was whether I’d messed up the design export from Fusion; Occum’s Razor after all implies that as still a relatively new person to wood working (just two years :) it would be myself that had done something wrong rather than the machine. I use Fusion 360 to generate the commands that drive the CNC router, but because each router machine is different, you have to be quite careful on the settings used when exporting. I went back to Fusion and checked the toolpath I thought I’d generated, and as you can see here all looks well:
So next I needed to validate that the command file exported from Fusion 360 that I fed to the router also made sense. I discovered a nice website call NCViewer, which lets me load the command files Fusion generates for the CNC router, and in both cases it let me see that the command files made sense:
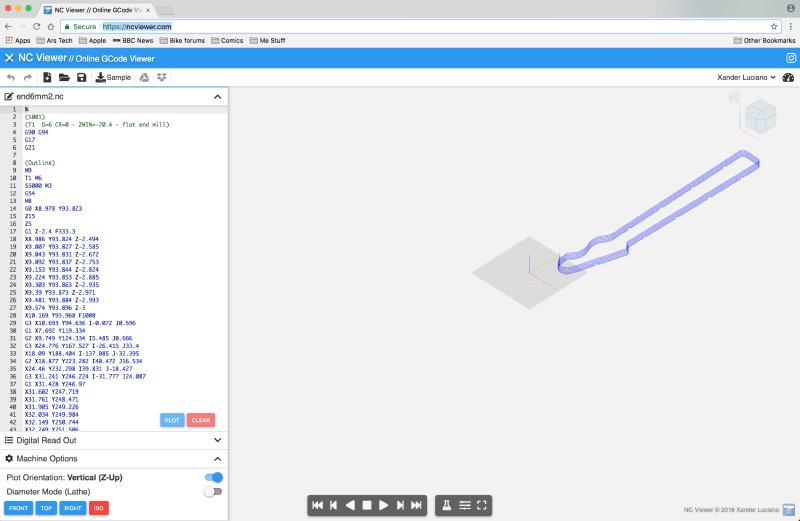
This, along with a review of the machine settings leaves us pretty convinced that it’s nothing I’ve done wrong on the input side, and that there’s an intermittent fault with the machine itself somewhere. On Monday I’ll start by checking all the wires and cabling and trying to get that moving forward again.
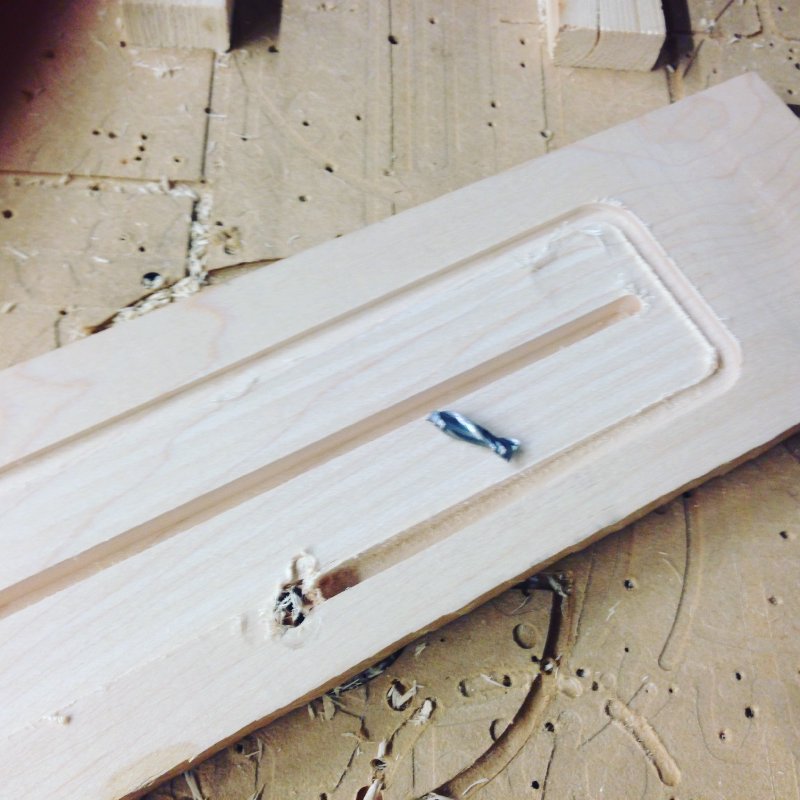
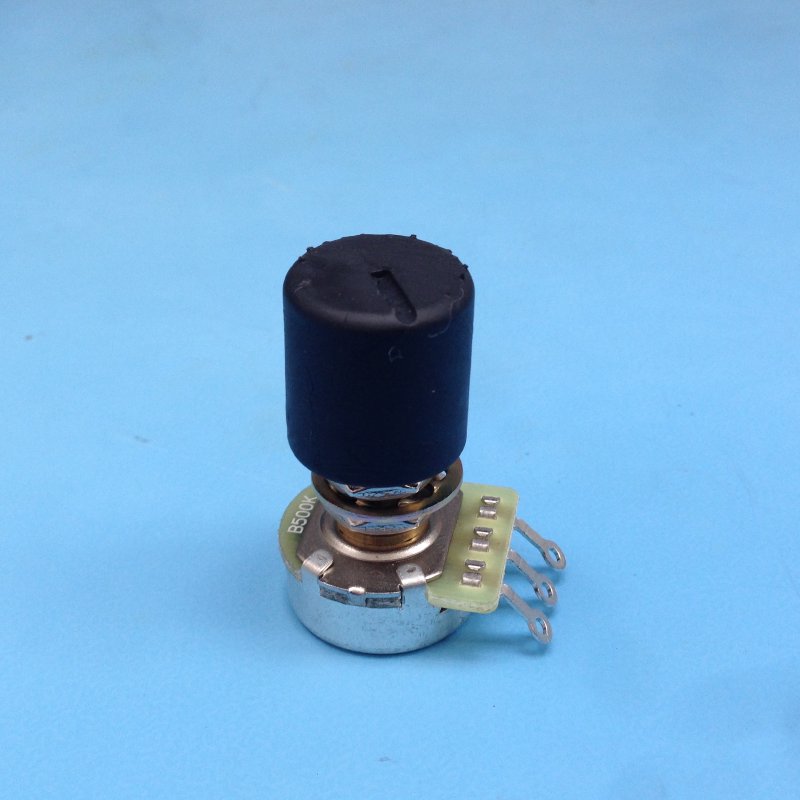
Waiting for advice on the CNC machine from people more educated on it than me left me with some time do swap out the old resins on the FormOne 3D printer we have for newer resin stock, as we’d been having a lot of failed prints, and we put this down to the resin having expired. To test this I did something I’d wanted to try for a while, which is printing my own control knobs for guitars. The fiddly bit here is ensuring they fit nicely on the potentiometers used for the volume and tone controls.
So I knocked up a quick design in Fusion with what seemed a suitable interface for mounting on the pots I use, and got that ready for printing:
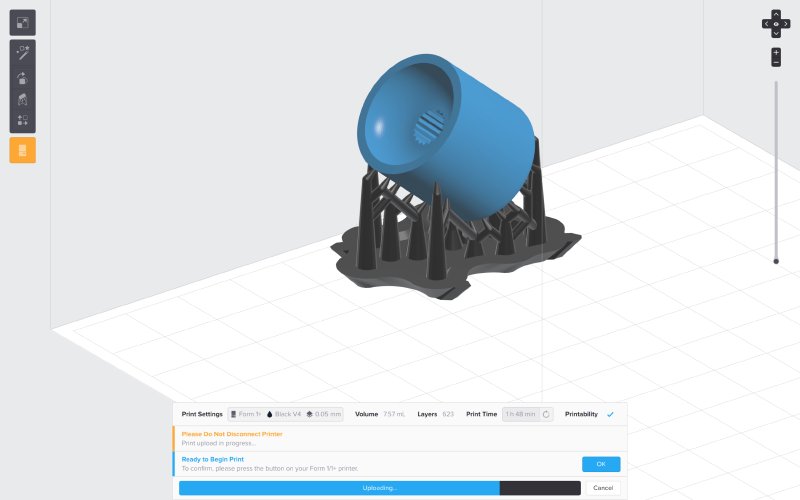
And then printed that out:
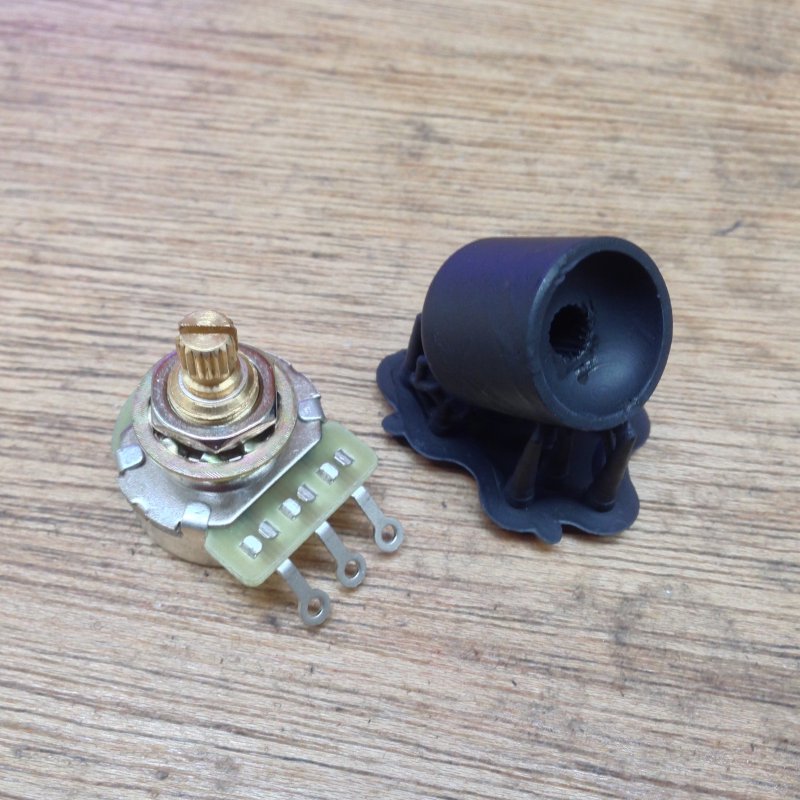
And much to my delight it fits pretty well:
Which was a nice end to an otherwise frustrating week. Not sure these are a design I’d use, but it’s a nice example of rapid prototyping in action.
Before I finish up, just a quick reminder that I’m talking about the highs and lows of guitar building on Wed March 28th in Cambridge at CamCreatives. Do come along if you want to learn more about how I got started on this, and see/hear the guitars in action!