A week in the shop(s)
10 Jul 2018
This week was topped and tailed by trying to better understand two CNC routers in an attempt to get back to where I want to be production wise, and the middle bit was learning to cope without a reliable CNC machine.
I started the week in Liverpool. Following on from MakeFest last week, I spent a couple of days visiting DoES Liverpool. DoES is a maker space/co-working space/event space set in Liverpool’s Fabric District, and in part I was visiting as they’ve taken delivery of a new CNC router, and I wanted to investigate if it’d be a viable alternative for me to use whilst the one in Cambridge’s Makespace is giving me grief.
Thanks to the help of some DoES regulars, notably “Nuclear” Sean and Adrian McEwan, I was able to have a look at their machine and try it out. The machine itself is a CNCStep High-Z router with a 720x420mm bed. Despite being smaller than the one we have in Cambridge, it’s actually rated for metal work which ours is not, which is pretty cool. However, because the machine was new, it was still in the process of being set up; notably they didn’t have a proper sacrificial bed set up, and they had a limited range of collets, which meant I couldn’t use the router bits and drill bits I’d need to make guitar parts there and then. However, I did my best to help document what they had and work out what kind of collets etc. they needed to get things up and running properly, so whilst the trip didn’t lead to any guitars being made, I did do my best to try help move them forward given my time there.
My plan is to go back in a month or so (modulo the madness that will be August travel wise) to both try do some work on the router and continue to try contribute to the DoES community by running my Fusion 360 training course for their members. It will also just nice to be back to hang out with the DoES crowd - they have some great makers up there, so if you’re in Liverpool I can recommend going along to some of their events and meeting the crew.
Back in Cambridge we had an unsuccessful attempt to breath confidence back into the CNC Router at Makespace by replacing it’s controller with a new one. We’re fairly convinced that all the errors we’ve seen with it are software bugs in the controller, and we found a roughly equivalent pendant controller for the router similar to the one we have. Whilst there are many wonderful other ways you can control a CNC Router, we had hoped to replace the existing controller with something roughly the same to avoid having to re-train everyone at Makespace.
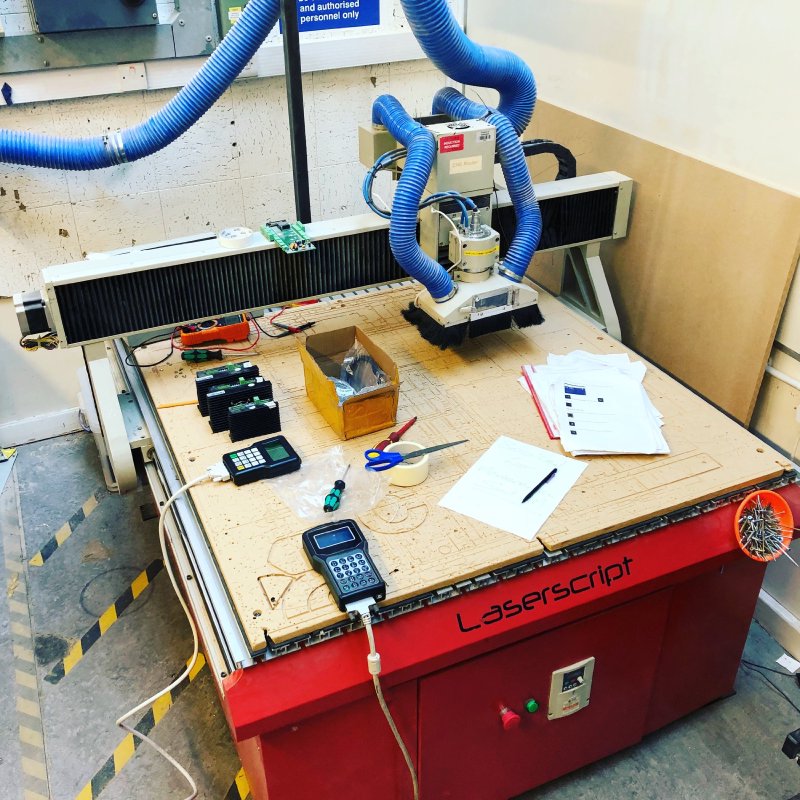
So a group of us on Saturday tried to swap the controllers, and despite what we though was initial success when we managed to get the new controller and it’s breakout board installed and controlling the motors and responding to switches etc., the moment we started to try loading actual CNC g-code into the new controller it started crashing and losing its settings, which is quite dangerous on a machine like this. Thus we had to roll back to the original controller and replan.
Despite the failure, I learned a lot about how a CNC router is put together this week, so overall I feel better positioned to try help move things forward now.
Back in the workshop I’ve continued to try and get around all this CNC router nonsense by doing more by hand, so I can get these commissions done. The body that I talked about patching last week needed two more stages done to it: it needed to lose some depth, and it needed the holes put into it.
When I thickness the planks to make a guitar, I always leave a couple of mm more than I need for the CNC router to face off. Unfortunately now I’m not using the CNC router to finish the recovered body, I needed to by hand take those 2mm off by hand. Whilst it may not seem like much, this body is made from American Ash, which is quite dense, so anything I can do to keep the weight manageable is worth it. So, it was out with my trusty number 7 hand plane, a bit of time sharpening the blade, and then an hour or so of hard graft in this week’s high temperatures.
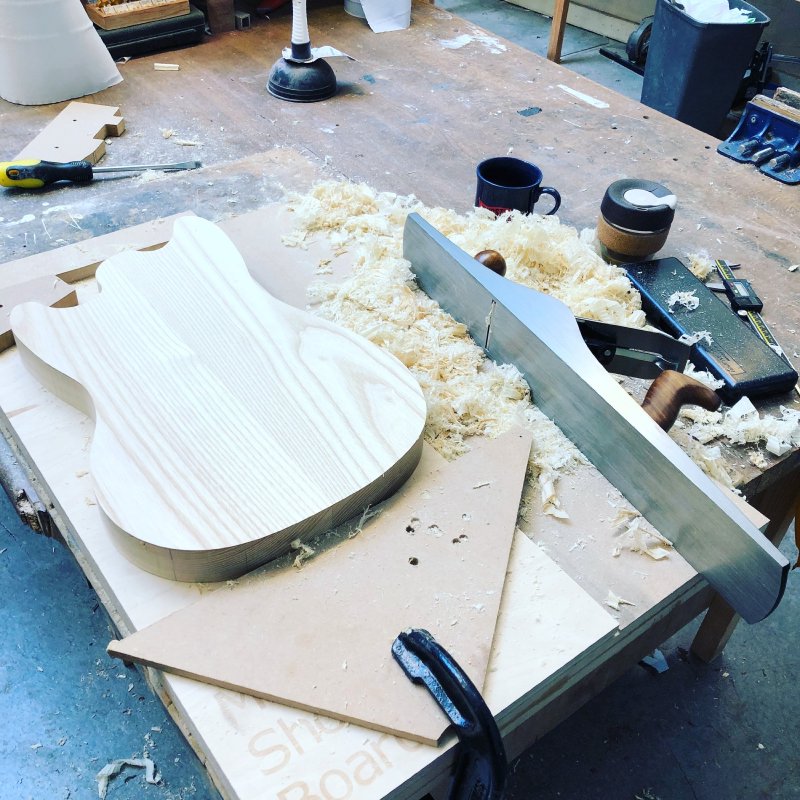
The results are great. I don’t use the plane enough to be an expert, so it took me a little while to get back into it, but in the end I had a nice flat back to the guitar and it was down to the size I wanted.
Next up was to use the templates to add the holes to the body for the neck, bridge, and through body string holes. I was a bit wary of doing this, as when I did the first guitar I did all these by hand, and whilst I did an okay job, it wasn’t nearly as good as the CNC router can do with it’s mechanical precision. However, using the MDF templates I made along with a lot of careful alignment on the pillar drill, I was able to get everything lined up and I’m really pleased with the results.
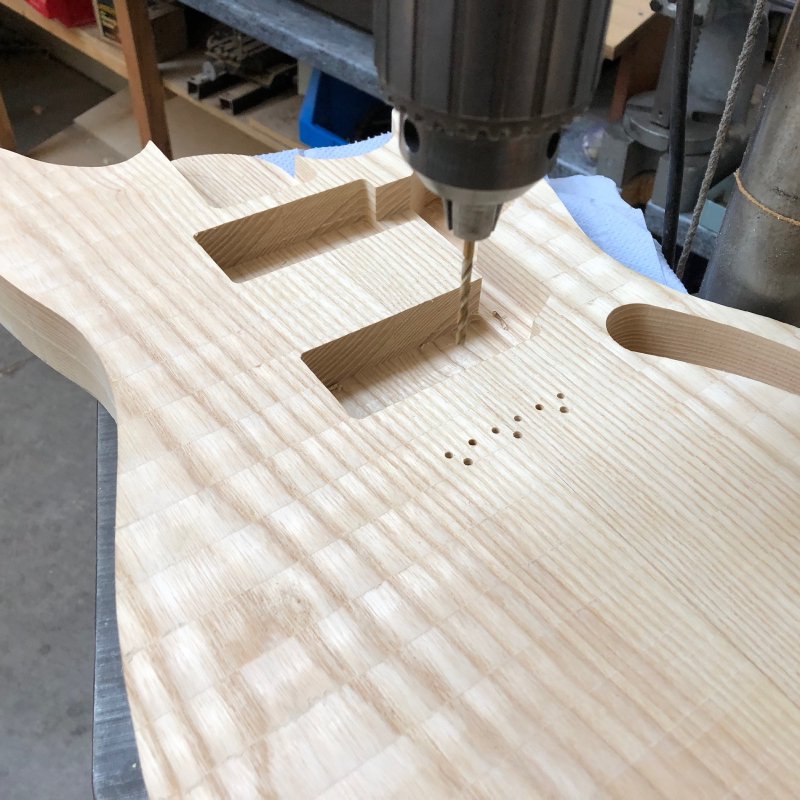
I’m now fairly confident that with the templates I have I can make a regular solid body shape by hand. The only bit that I still need to figure out is the headstock transition on the neck, which I’d just got happy with using the CNC router, as I wasn’t happy with the results of using a drum sander on a pillar drill.
I’ve taken another pass at trying to tweak my pickup selector switch on the prototype offset. I’m super happy with the ergonomics of the switch, but The 3D printed part just isn’t tough enough to rotate the selector switch without slipping. So, after chatting with Matt at Fidelity for a bit, he suggested I should try adding a grub screw to it. Thus I broke out Fusion and tweaked my design to accommodate that:
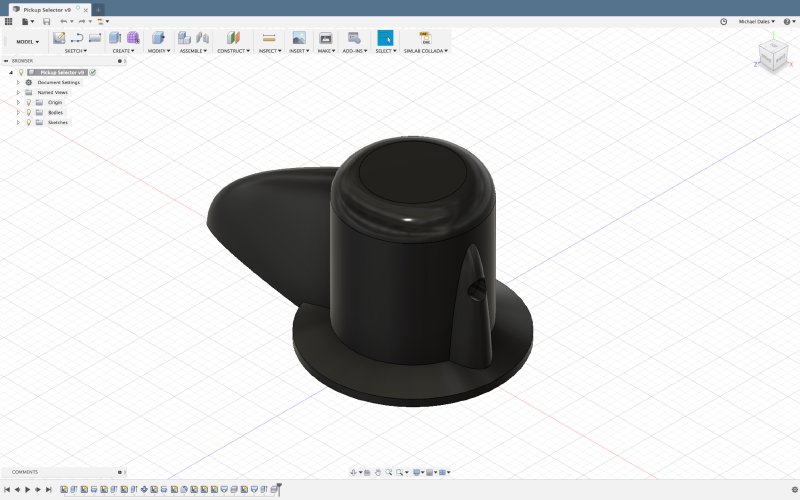
I had to add a rear section to the selector to give me enough depth to hide a grub screw, as before there was nothing on the back and it was too shallow. But I think actually the switch looks nicer as a result, making the selector look less like Beaker from the Muppets :). I’ve printed one out, and I’m just waiting for some pointed grub screws to arrive in the post for me to test it.