A week in the shop and in Liverpool
Published 2 Jul 2018
Tags: blues deluxe, makefest, pheonix offset
This week was the run-up to Liverpool MakeFest, and so the week was in somewhat dominated by preparation for that. Liverpool MakeFest is a chance for the public to come and see lots of maker projects and hopefully this will inspire them to try their hands at making themselves. As such, as I did last year, I used my stand to try and teach people how an electric guitar is made and de-mystify the process somewhat. To do this I had a table that tells the story left to right: on the left we have wood blanks for the body, neck and fretboard, in the middle we have an in progress build, and on the right we have the finished product. I then use this to guide people through the process so that hopefully they understand how an electric guitar comes to be.
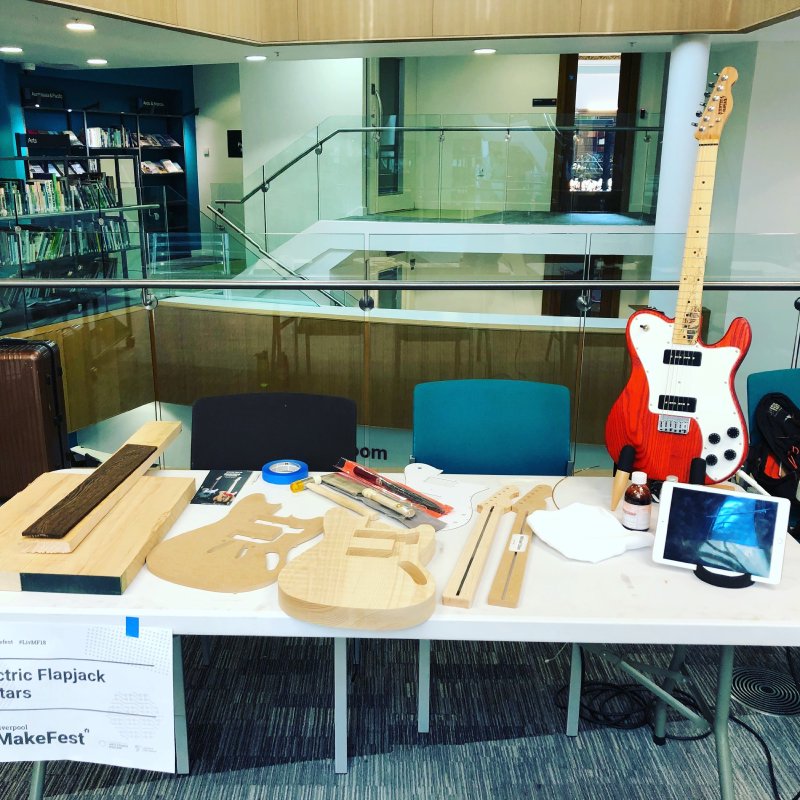
I also had stashed under the table my trusty Blackstar Fly BT workbench amp, so I could let anyone who wants to have a play. Originally I planned to take the newly finished prototype offset, but I realised at the last minute that the Blues Deluxe guitar shown above was actually one of the in progress pieces I had on display last year, and that made for a nicer story for the few repeat visitors we had.
As with the year before, the day of MakeFest was nicely busy. Doors opened at 9am, and whilst the first hour was slow, I was talking to people all day until doors closed at 5pm without much of a break. I had lots of great conversations with people about guitar building, playing, types of wood, how fretting is done, and I took fun trying to get children to see the guitar in the wood blanks (which I’d laid out in the rough shape), then talking them through the process (comparing routing to tracing on paper etc.) to the end, and then going back and seeing if they could see the guitar in the blanks afterwards, and typically they could. I really was a fun day, and I got to crank up the amp as loud as I could after close and belt out some White Stripes in a public library, just because you don’t often get the opportunity to :)
Many thanks to everyone who stopped by to chat, those who played the guitar, to Laura for helping get me set up, Jason for coffee, and obviously a huge thanks to the organisers and volunteers running Liverpool Makefest - hope to see you all again in 2019!
To get things to show for MakeFest I decided to get the failed body and neck I have hanging around into some presentable state, so they could be examples of in progress work. Last week I talked about how I’d routed out the body that was half cut then damaged by the CNC router using templates and a hand router. This week I patched up that body, and I also went through the same process of finishing the CNC router’s job by hand on the neck it damaged.
With the guitar body being fully cut out the next job was to patch the hole that the CNC router had made in the body as best I could:
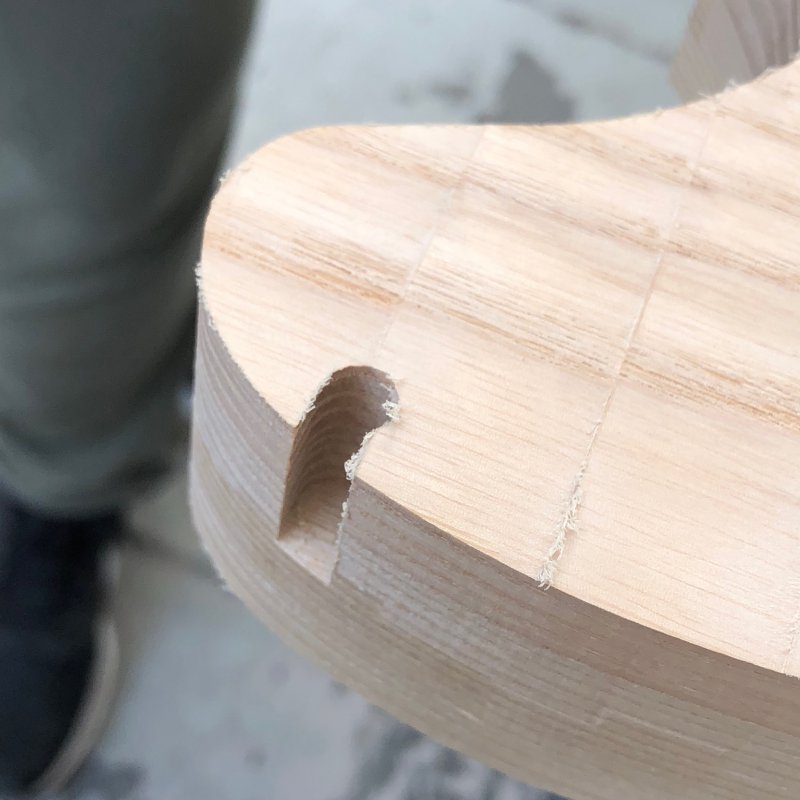
A traditional approach to this would be to cut out more material to make it a regular shape and then fill it with a plug made of the same wood in that shape. However, inspiration (or insanity) struck me, and I thought I might be able to plug it without taking any more material out if I took a rubbing of the hole on paper, imported that into Fusion 360, and then CNC cut a plug that matched exactly. This crazy plan actually worked, much to my mild surprise. I’ve written up the process in full over here, but the end result is like this:
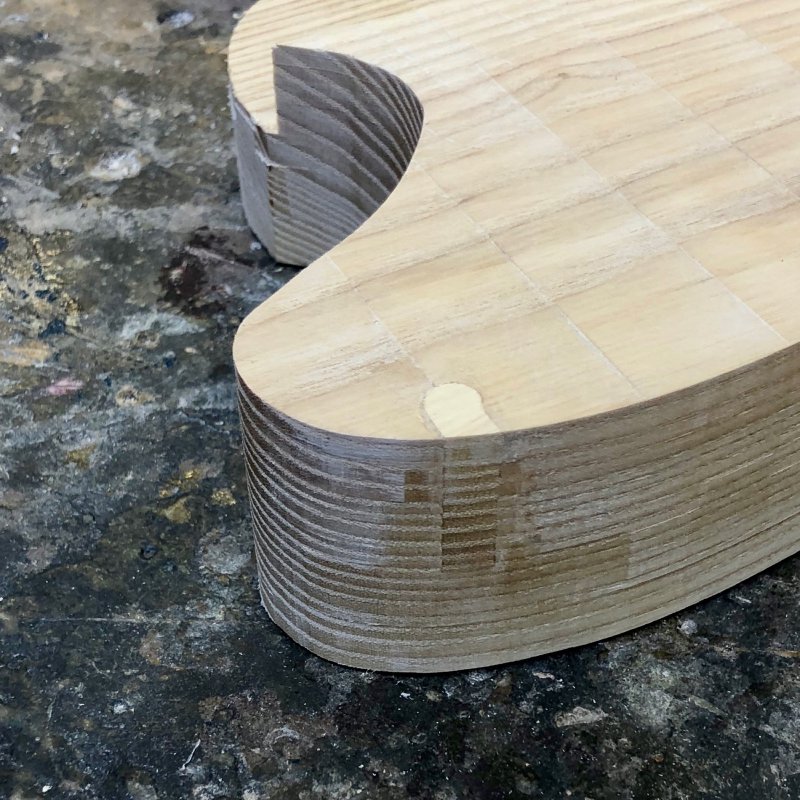
The colour match isn’t perfect, but it’s certainly a perfect fit, so with a dark stain or painted over you’d not know that this was patched, so a great success as far as I’m concerned. I could possibly have got a better colour match had I managed to hold onto a bit of offcut that was closer to where the damage occurred, but I didn’t realise the colour of the wood changed from side to side until too late. Still, this is all important learning.
I’m very grateful to the encouragement I’ve been given by Ray at Black Swamp Guitars and Matt at Fidelity Guitars on coming to understand that mistakes will happen as they do in any line of work, and just because you can’t hit undo doesn’t mean you give up and start again. Similarly theres just going to be defects in wood that you only uncover part way into a build, so you really do have to be prepared to react to what’s happening as you go along, and not (as I’ve been doing) despairing the moment things aren’t perfect.
Having sorted out the body ready for show at MakeFest, the next step was to get the neck where I had my first incident of the CNC router going rouge cut out. On this one the neck was almost complete and the CNC router doing the final contour cutout stage when it decided to plunge the bit into the wood as it cut, shattering both the wood in that area and my expensive router bit. Ultimately though this is another time where the plan is to just make the hole more of a regular shape and then plug it. The trick I did for the body won’t work here as the hole really is irregular on all axis, not just a 2D irregularity.
First step then was to use the bandsaw to cut off the bulk of the wood that wasn’t the neck, a task made easier by the fact that the router had done 3/4 of a contour pass giving me nice guidelines to use. For the rest I just pencilled around the MDF neck template I’d made previously and used that as a guide, keeping 10mm or so clear.
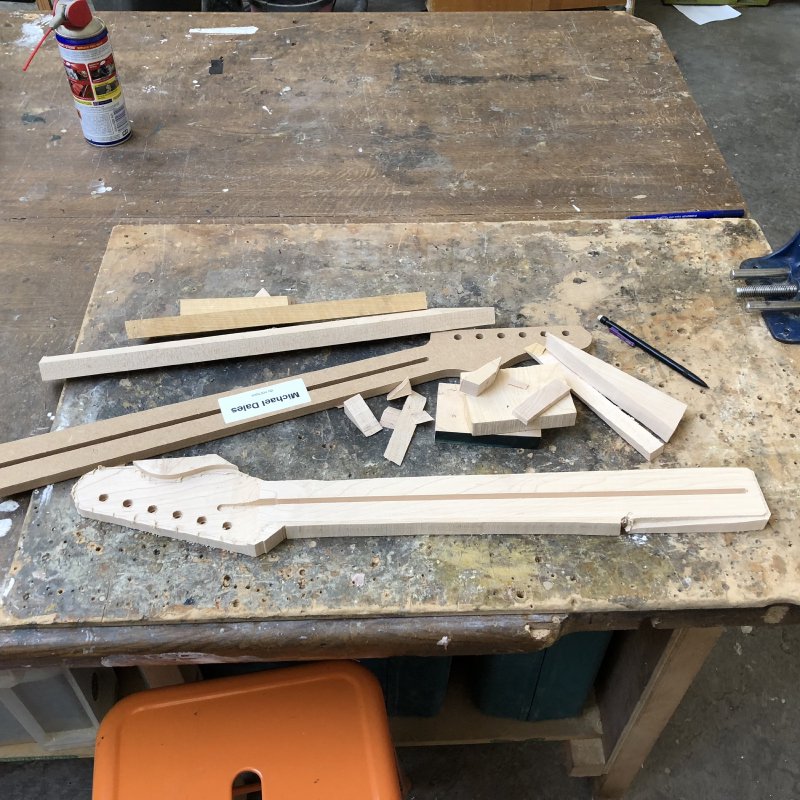
The neck now roughly freed I screwed on the template to the top side that would be hidden by the fretboard, and used the router to follow around the main part of the neck. This didn’t work for the headstock though, as I’d already cut away the face of the headstock, so I then had to flip things around and use clamps to hold the template on the back of the neck and clear the headstock. This done, I could now see the damage more clearly.
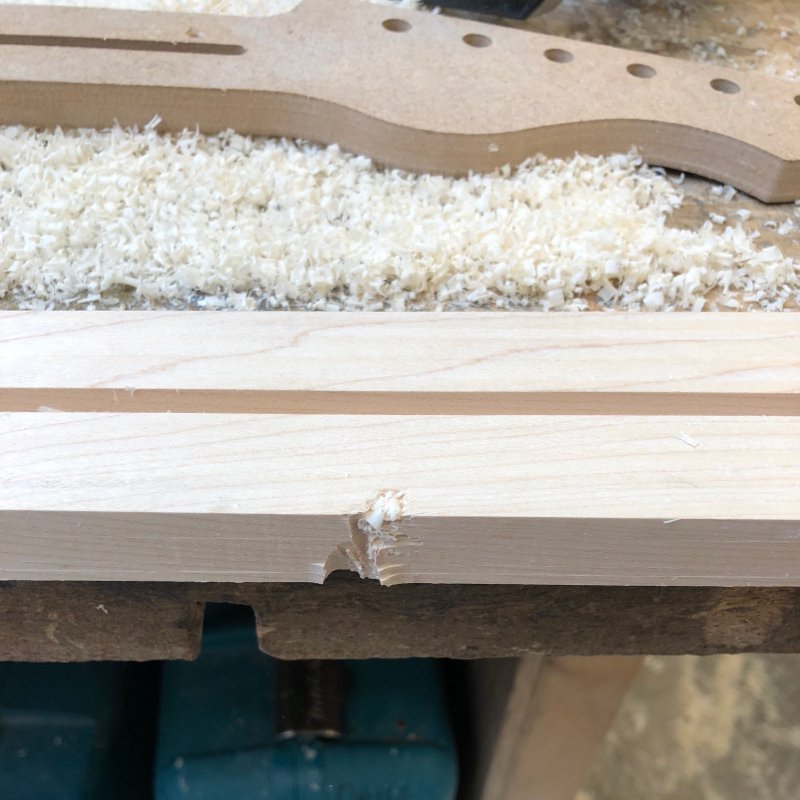
Thankfully it actually isn’t as bad as it looks: the damage is around the 12th fret area, which means the neck will be curved on the back still at this point, so actually only a tiny amount of damage will need to be patched, not the entire hole. My plan now is to to the initial roughing pass on the back of the neck just to get a 45˚ face on the back of the neck, then patch it. However, I stopped at this stage due to lack of time this week, and the neck in the template cut state was good enough to show people at Makefest.
On the topic of necks, given my new found distrust of CNC Routers, I wondered how I’d do the truss rod channel without a CNC router; it’s easy to do the outside lines of the neck as I’d just done, but getting the truss rod channel is much harder. For this I’d need a jig, so I decided to make one.
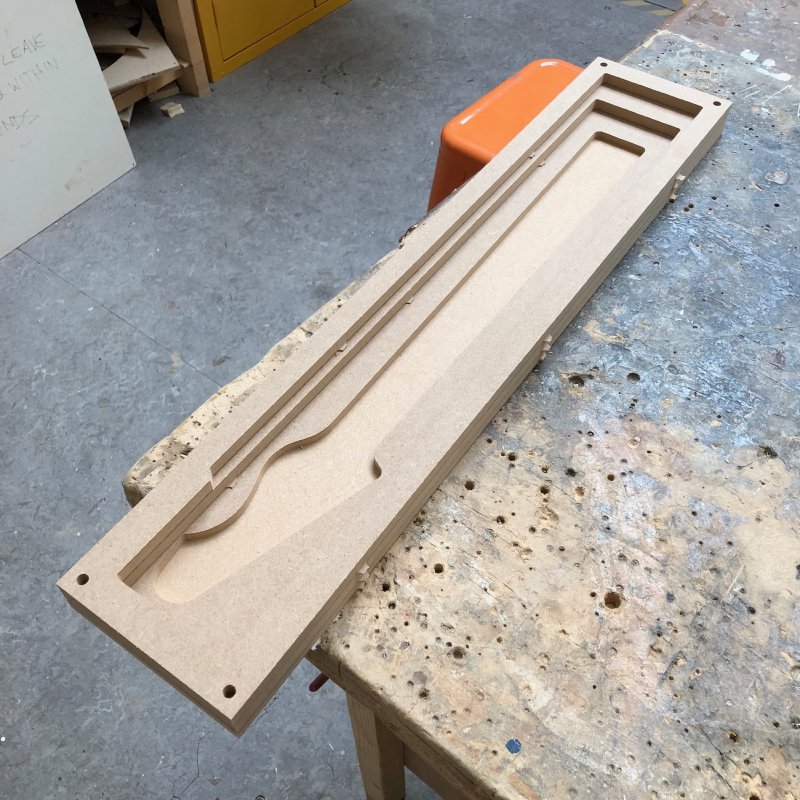
For this jig I’d need basically two parts to it: the first part is a bit at the bottom to hold the neck snug and in a known position, and then a second part above that where I can insert my hand router and run it along with stops on all sides to ensure the only bits I cut are those needed for the channel. I decided to knock this design up in Fusion 360 and make it out of MDF. Note I don’t need it for the above neck, it already has a truss rod channel, but I just wanted to understand what was required to help me become more confident that I can make guitars without the crutch of a CNC router that will never fail.
You can see the jig above. It’s designed to be made out of 3 bits of 12mm MDF. The bottom layer has a pocket the exact shape for the necks I’m currently making, which will hold the newly templated neck in place. The second layer is a spacer, and provides a bed for the hand router to site on. The top layer is sized so that the based of the hand router can’t move side to side, ensuring the channel is straight down the middle, and it can’t move to far at either end, so the channel is just the right length. Having designed it, I then cut it out in MDF and I have it ready for action.
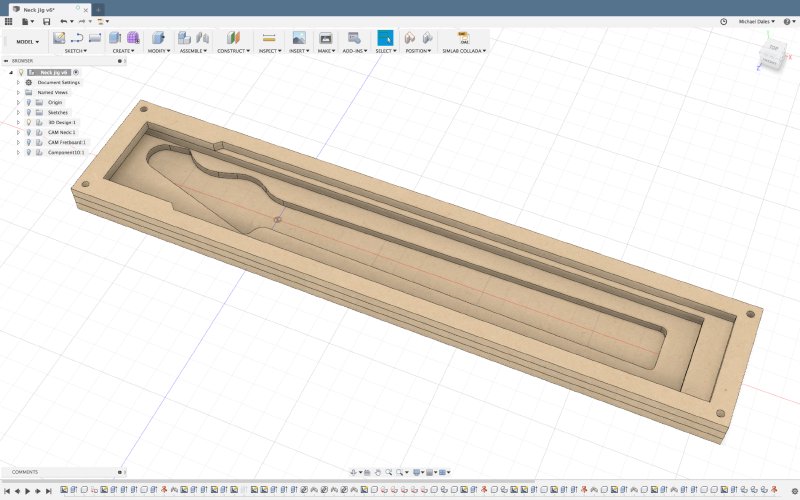
I’ve always been unreasonable scared of making jigs; it seemed something quite complicated to get right, so building this was quite confidence building. Thanks to my neck design being in Fusion already, generating the jig design that exactly matched too less than half an hour, and cutting it out on the CNC router didn’t take that long either (again, although the CNC Router will occasionally fail and damage bits, I’m still happy to cut MDF on it as the cost of failure is low: I just don’t trust it to cut guitar parts as the cost of failure there is high).
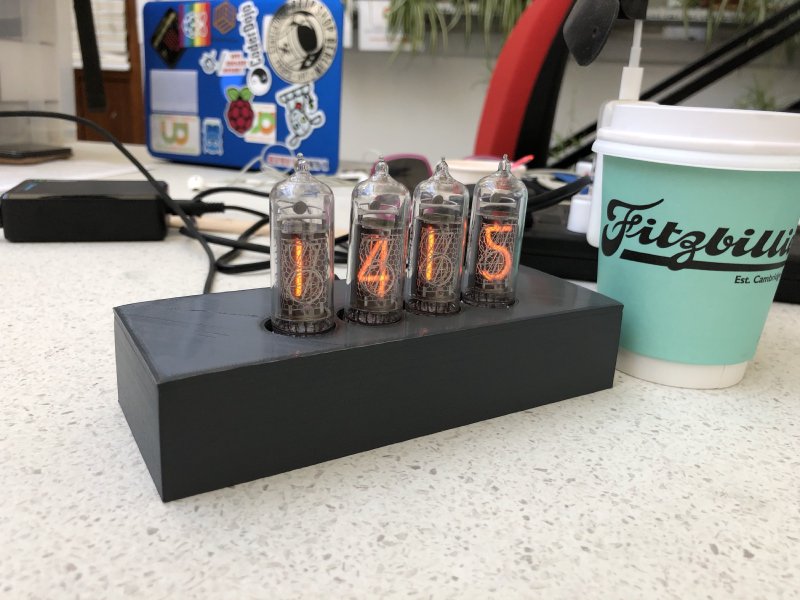
The other fun project this week was working with my friend Jason, who’s visiting over from the US. Jason’s recently been working on some amazing electronics projects, including his Anytime Nixie tube based clock that shows the time of where his friends are in the world. Whilst Jason was in Cambridge we thought it’d be fun to work on something together, and so I’m helping him make a wooden case for the clock in Makespace.

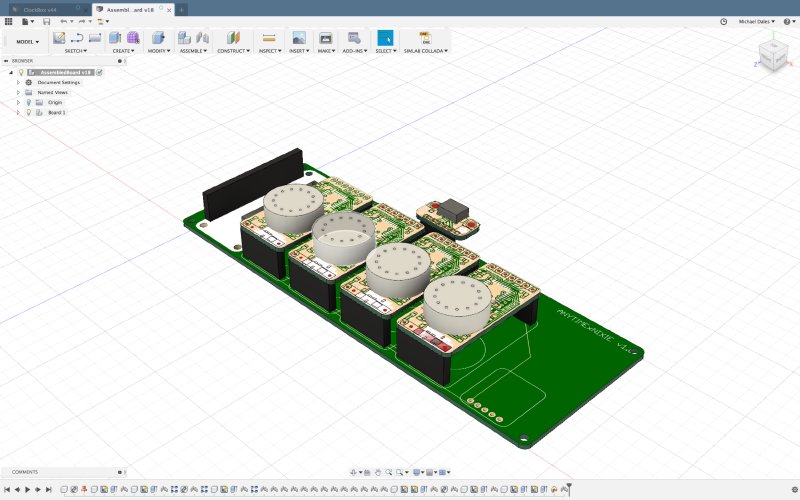
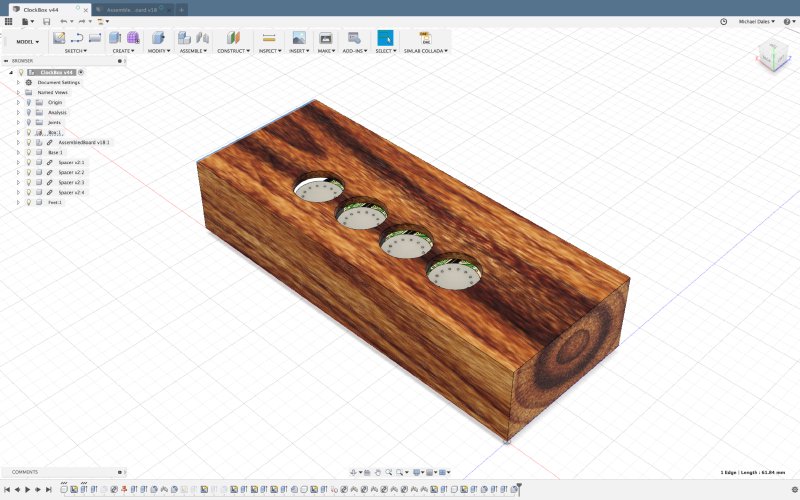
The clock currently looks like the above picture: a set of boards with the 4 nixie tubes on top, and it’s powered by a USB micro port on the back. Obviously I want to design and build the base using Fusion 360, as that’s the tool I’m familiar with (as is Jason). Thankfully Jason did his PCB layouts using Autodesk Eagle, which will export the PCBs into Fusion 360 with the correct board sizes and surface silkscreens, making it really easy to get started with. I just had to model the headers connecting them and the nixie tube holders, and I’d very quickly got a mock up of Jason’s latest physical version of the clock.
From here I then did a quick rough model of the case before Jason arrived, and then together we refined it and did a series of test 3D prints until we got a design we were happy with. It’s really quite powerful having access to a 3D printer for this kind of thing. Although I want to machine the final case in wood, that’s a slow process that will need constant watching, so quite expensive for throw away prototyping. But a 3D printer will make a case design in a few hours and I don’t need to baby sit it for that time. So we were able to go from this:
To this:
with next to no effort. Similarly we wanted an acrylic base sheet, and designing that and getting a test cut using the laser cutters in the workshop took literally ten minutes. We’re truly living the rapid prototyping dream :)
Having got his far, the next step once back from Liverpool will be to mill out a wooden model in scrap wood, before finalising the design and making it out of some nice textured wood so that Jason has a lovely looking clock he lave running in his home without it looking like a lab experiment.
In last week’s notes I celebrated finishing the prototype offset build, this week I sat down to try do the setup, and immediately learned why people have a love/hate relationship with vibrato units (or as they’re more commonly and incorrectly known, tremolo units) on guitars: the sound is nice, but getting them to behave is a real pain. At first I just assumed either I was an idiot or it was broken, but eventually (buried in some youtube comments somewhere) I found some advice about making the Mustang style dynamic vibrato bridge work.
The general advice is ensure the springs are as far down the posts under the bridge as possible, and that the cigar tube bit the strings are into is as low as possible too, but not with the strings touching, you want space for them to move a little. Having done this you then just tune up, use the vibrato (not gently either, but also not dive bombing it), at which point it’ll go out of tune, and then you tune again and repeat until things are roughly stable. Even at this point, I still find it goes out of tune more than I’m used to, but at least I can get through a song using the vibrato without being out of key.