A week back in the shop
Published 11 Sep 2018
This week I was properly back in the shop, determined to move guitars forward. Although I am doing some contracting at the moment, I managed a good 4 days in the workshop last week, and it felt good to be back, even if it wasn’t all plain sailing, as we’ll see.
Given it’s been a while since we talked properly about progress on guitars, let’s do a quick recap of what I’ve got on the go right now:
- I have the first commissioned offset that is my top priority to get shipped. The body is being sanded smooth in my spare moments, and the birds eye maple neck has been routed out, and next needs to be mated with a fretboard.
- I have the factory seconds offset that is made from the body and neck that the Makespace CNC router tried to ruin that I’ve patched up to let me continue to learn/experiment on. This is now acting as a sort of advance party for any new approaches I want to try whilst building the commission.
- I have the completed prototype offset where I’m not quite happy with the vibrato. I have all the bits to experiment with the mustang dynamic vibrato (both softer and stiffer sprints and infant a whole second bridge), but whilst it’s tempting to try get this done, I really feel I need to get this first commission off my shoulders. The commission will be a fixed bridge, so it isn’t blocked by me understanding vibrato bridges.
So that’s the three guitars I have in various states of progress right now. I do have a second commission for a friend that is not yet started, and a potential fifth that I’m ignoring right now until I make progress on the first. To say this year hasn’t gone to plan is an understatement.
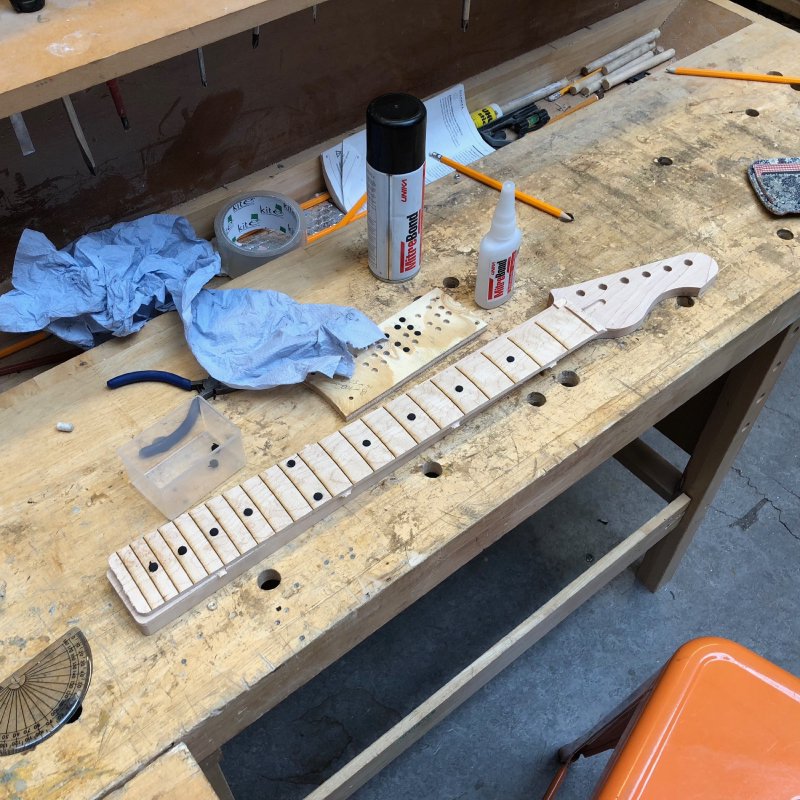
The next step on the commission offset is the fretboard. In the past I’ve radiused the fretboards using a radius sanding block, but as I mentioned a few of weeks ago, that’s very hard to get spot on, and so I’ve been wondering how I might improve that process to make things more reliable/repeatable. There’s two paths I could follow here: I can try using a hand plane to put in the radius (which is how Juha Lottonen said he makes his when I visited last week, and how Ben Crowe at Crimson Guitars makes their hand built guitars), or I can try CNC routing in the radius when I cut the general shape out of the blank. This CNC router approach being the one I’d already started testing with before going away (when I messed it up due to a combination of rushing and being tired), so I had another go at making a fretboard this way.
I used Fusion 360 to map out a roughing tool path on the CNC router that used a larger 6mm bit to remove the bulk material over the fretboard, and then a second pass that used a much smaller 2.5mm end mill to carve the radius into the fretboard, using 1mm steps.
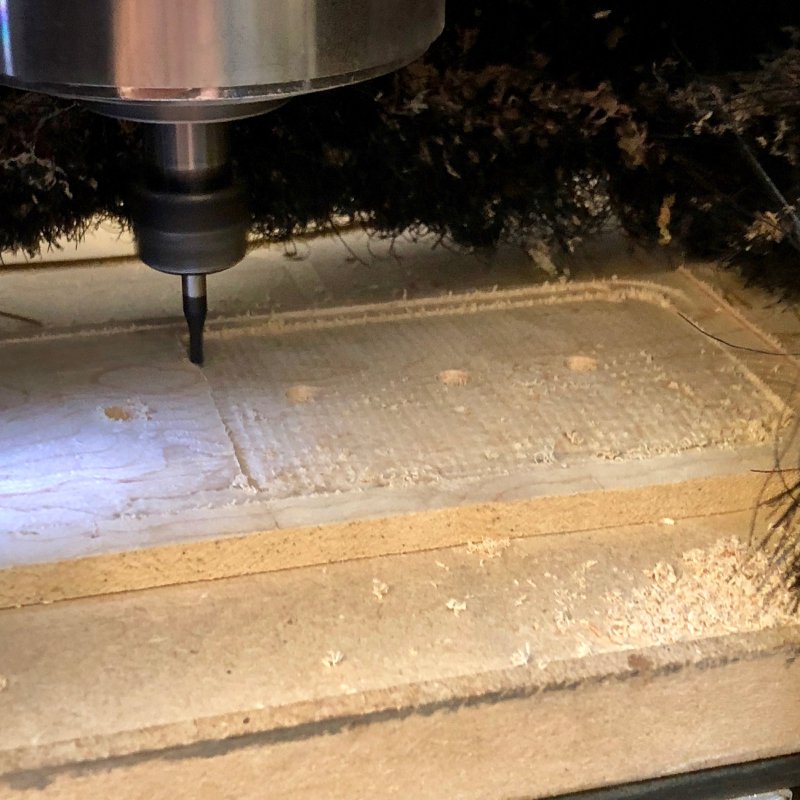
This wasn’t as slow as I’d feared it might be, and gave a wonderful finish better than I’d expected: it only took a light sanding to get that looking close to perfect. Given I was doing the radiusing I also got the CNC router to make the inlay holes and the nut slot.
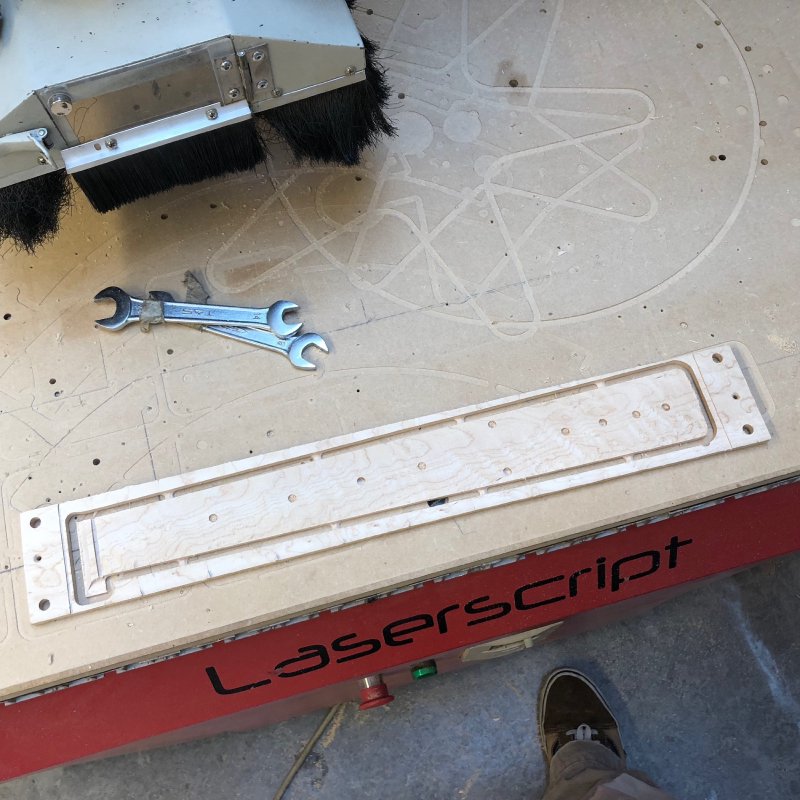
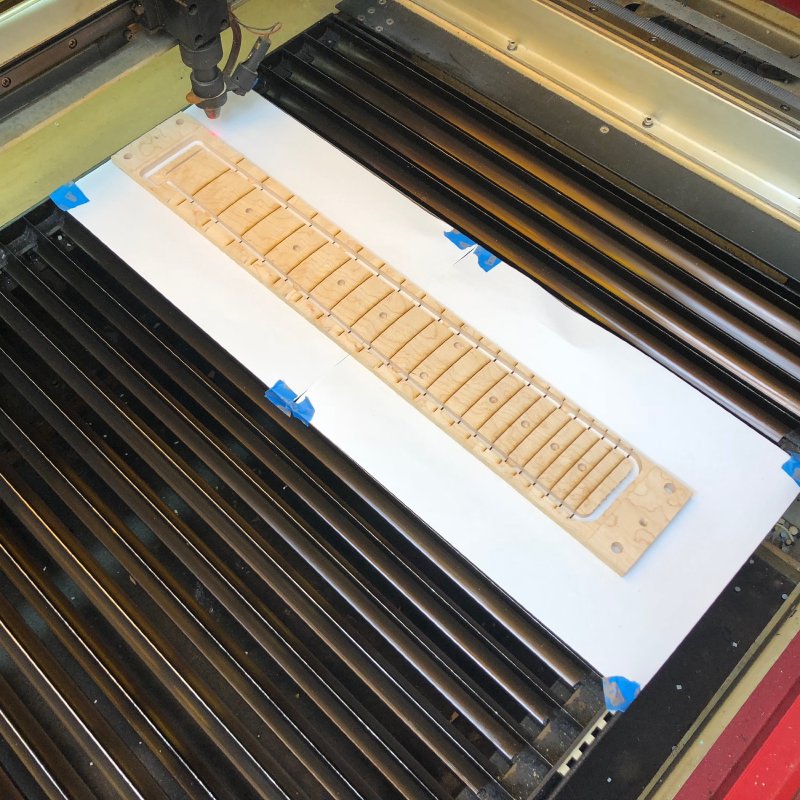
Having got the rough shape done, the next step was to laser etch the guides for the fret slots, so I can then saw them in properly in the correct position. Doing any job on multiple machines means you need to have a strategy for aligning the piece on the second machine so that the cuts you did on the first machine all line up. My technique for doing this on the laser cutters is to tape paper to the bed and score the outline of the piece using the laser into the paper first to give me a reference. When doing this I try to use the most distant pair of corners I can to minimise any error due to angles being wrong, and the score marks in the paper are very fine so you don’t get much margin for misalignment from them either, so all in all it’s a reasonably accurate way to position things. Once the piece is aligned on the paper I then adjust the laser cutter height to have the focus plane on the top of the fretboard rather than the bed, and away we go with the etching.
It all came out well as far as I can tell at this stage; I’ll not be able to properly tell until I string it up if I got it spot on. However, guitar frets aren’t perfect anyway: if they were mathematically prefect they’d not be straight, so there’s some scope for a tiny amount of error in there.
Slot guides etched, the next step is to get the fretboard inlays made. For this maple fretboard I did what I did for the Blues Deluxe guitar I made a while back, where I laser cut the dots out of a sheet of Rocklite that is about 3mm thick. The fretboard inlay holes are notionally 6mm in diameter, so you might expect I can just laser cut a 6mm diameter circle, but it’s not as easy as that. The router bit will not be perfect, nor will the CNC router, nor will the laser cutter, which will burn off some edge material as it cuts etc. In the end after a bunch of test pieces I found that I had to make 6.5mm circles of rocklite to fit snuggly the holes in the fretboard. These I then super-glued home.
The next stage is to glue the fretboard to the neck itself, and this is where I struggled a little bit, and I’m not sure why. I first clamped the fretboard to the neck without glue, and all the seams looked nice and flush with no gaps. But once I added glue, the fretboard and neck joined less well, with a small gap at points along the joint line. I combatted this with more glue along the seam and more clamps, but it wasn’t an ideal situation, and I wish I understood why it looked okay before glue and not after - please do drop me a line if you have any thoughts on what I might do better.
I’ve had one other failure like this before: that neck had quite large gaps I couldn’t fill with just glue, so it’s now sat on a shelf waiting for me to decide its fate. This one mostly seems to have come out okay, but it was a fretful 24 hours whilst I waited for the glue to dry and I could remove the clamps. Even though the gaps seem to have been mostly filled up, I was left with more excess glue than I’d have liked over the outside the I had to sand down. Still, it’s not ended up on the scarp pile, so that’s okay.
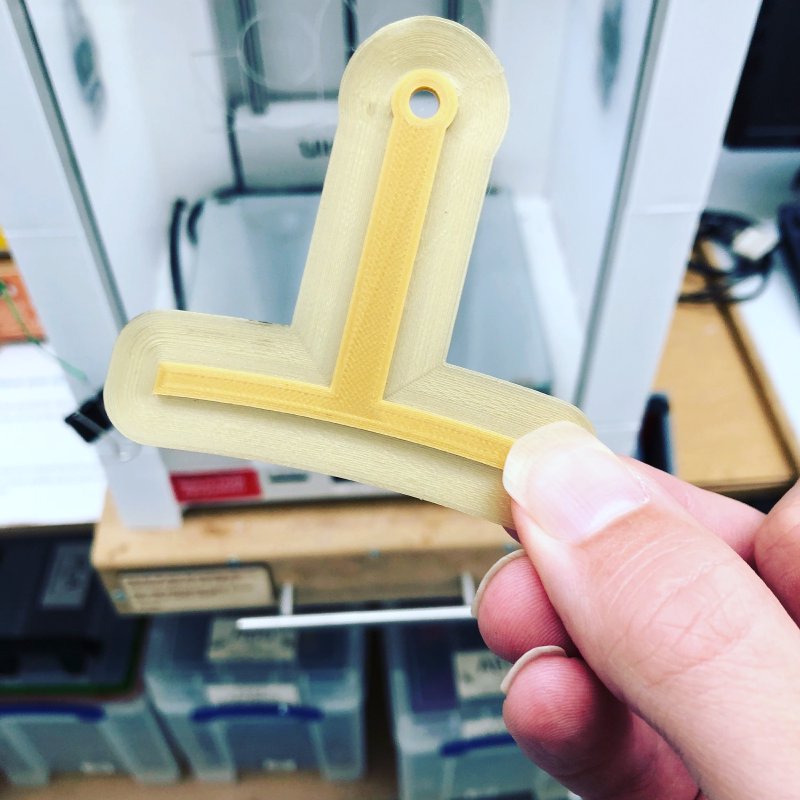
The observant of you (that can see the pictures that is) may have noticed a little square of material near the headstock transition, and wondered why that was there.
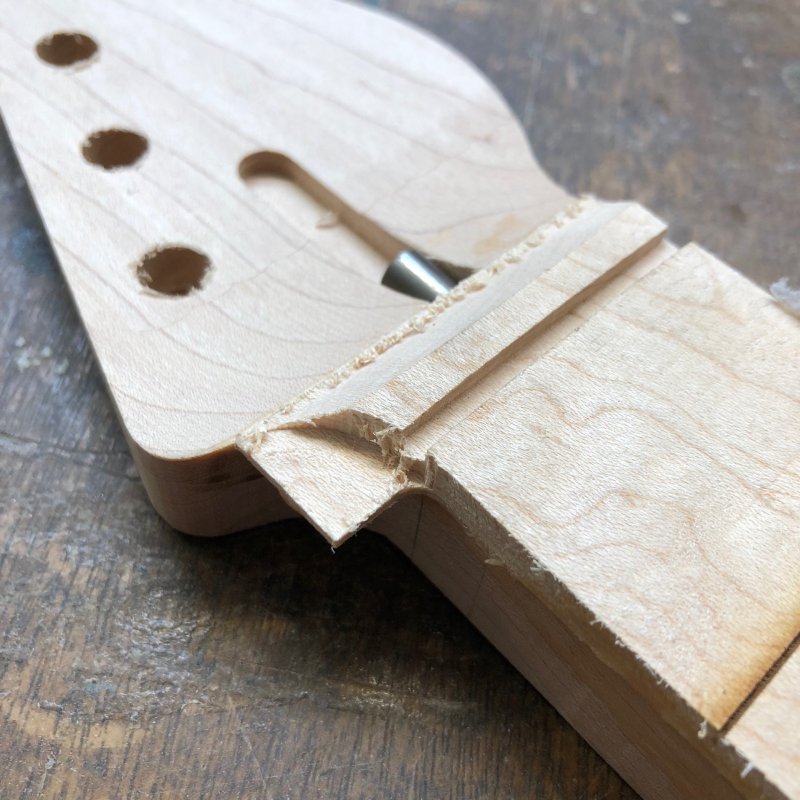
The reason is that the last time I cut out a fretboard on the CNC router, although I didn’t radius it, I did do the slope down to the headstock to get that nicely aligned with the neck. However, you can see it goes to quite a fine point on the left hand side there, and this became a weak spot and as such I lost the tip of the point to the CNC router, and then hand to sand in a new transition later on in that build. So this time I left some excess material so there was no weak point when I cut the neck out on the CNC router, and now that the fretboard is glued to the neck it’s supported by the neck material underneath, so I could use the hand router to cut off the excess with no risk of tearing the tip point. This worked a charm, and after hand routing to smooth the transition between the neck and the fretboard it looked perfect.
In fact, it worked doubly well, as I aligned the jutting out edge with the nut slot so I had a nice clear reference point for fret 0 when trying to align the fretboard on the laser cutter for etching the fret slots: a double design win!
Speaking of the slots, the next step was to cut the slots with my trusty Japanese fretsaw, which went smoothly (and slowly, but that’s also why it went smoothly).
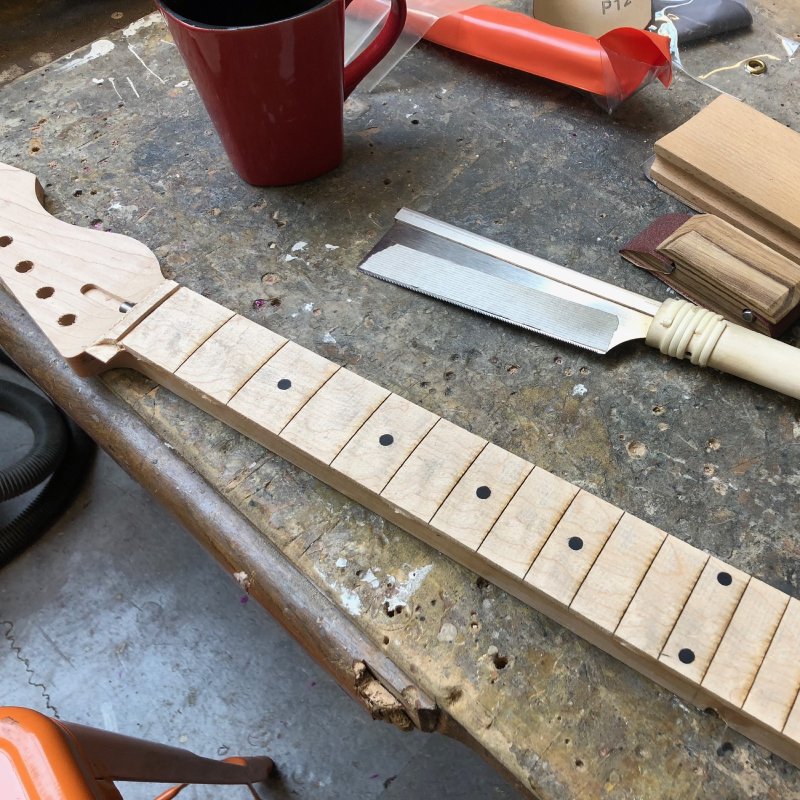
Slots cut, it was then time to do the side dots, as this is the last point where there is a nice flat side on the neck for its entire length.
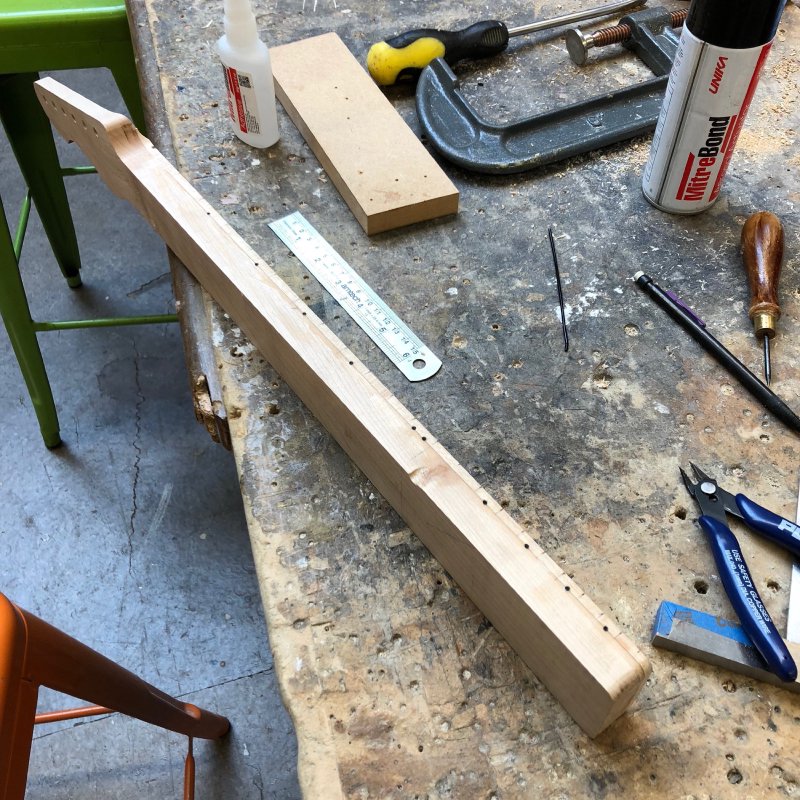
I started doing the carve on the back, but didn’t get to do more than start that process, so I’ll have to finish it in the coming days.
Overall this new fretboard process went well, but I am a little concerned about that gluing incident. The birds-eye maple neck I need to tackle next is not cheap (£50 quid in material) and I didn’t think about that cost when I was working out the spec on the commission. It’s not that the customer didn’t mind paying a little extra to get a nicer guitar at the end, but whilst I’m still a little unsure at how well a neck will glue (I’ve had 1.5 failures out of 5 necks I’ve made, this being a half failure in my book) I’m now very nervous about the next stage I have to do as the cost of failure is high. But do it I must: we’ll just have to see how it goes, and hope the fact that mostly it’s gone right will carry us through, so my next task is to repeat all this again with some wenge and get the commission neck through the same steps I’ve just described.
One thing I realised early in the week was that my fretboard gauges were not in the workshop, but at home. However, rather than head home to get them, or indeed order a second pair for the workshop from Amazon Prime, I realised I could make my own! Sometimes I forget that I’ve levelled up in manufacturing in the last year. So in half an hour I’d designed and printed my own radius gauge:
Better yet, to save others the hassle, I’ve shared the design I made, both as a parameterised Fusion 360 file so you can make one of any radius you like, and as a series of STL files for common radius sizes you can just send to your 3D printer. My first bit of open source hardware :)
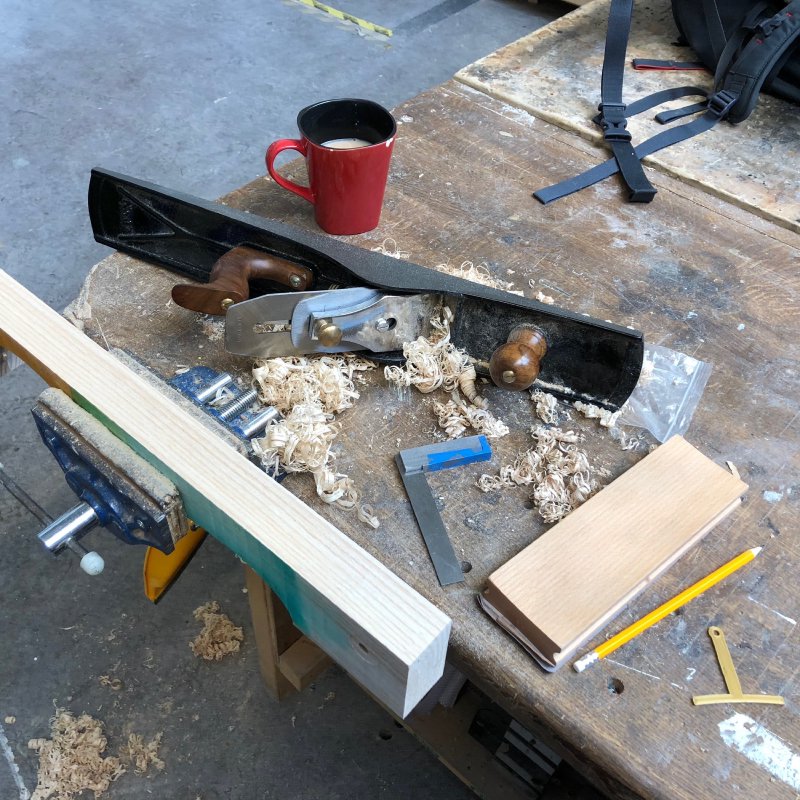
As I mentioned at the outset, hand planes have been on my mind this week, so it was fortuitous timing that fellow Makespace member Graeme who is an experienced woodworker spotted me with my hand plane and offered to each me how to set it up properly and get the blade nicely sharpened. Although I’d had a go at this myself in the past, I figured getting a lesson from an expert wouldn’t go amiss, and boy was that the right choice.
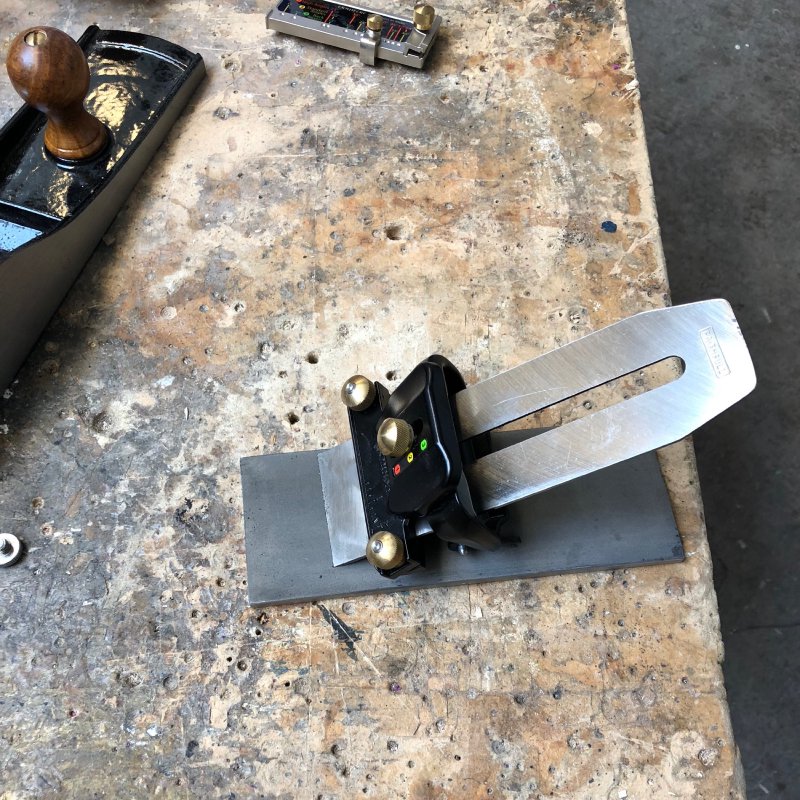
Graeme walked me through both how to sharpen and correctly bevel the blade using a veritas guide, and he also taught me how to quickly get the plane set up to the correct blade height and cutting properly. In the end taking my blade from not properly maintained to correctly sharpened took an hour, but the effort was worth it: my hand plane is now a joy to use, and I’ve started practicing trying to radius bits of wood with it. Whilst the CNC is accurate, it’s not very satisfying, so eventually I’d like to have another go at hand radiusing them.
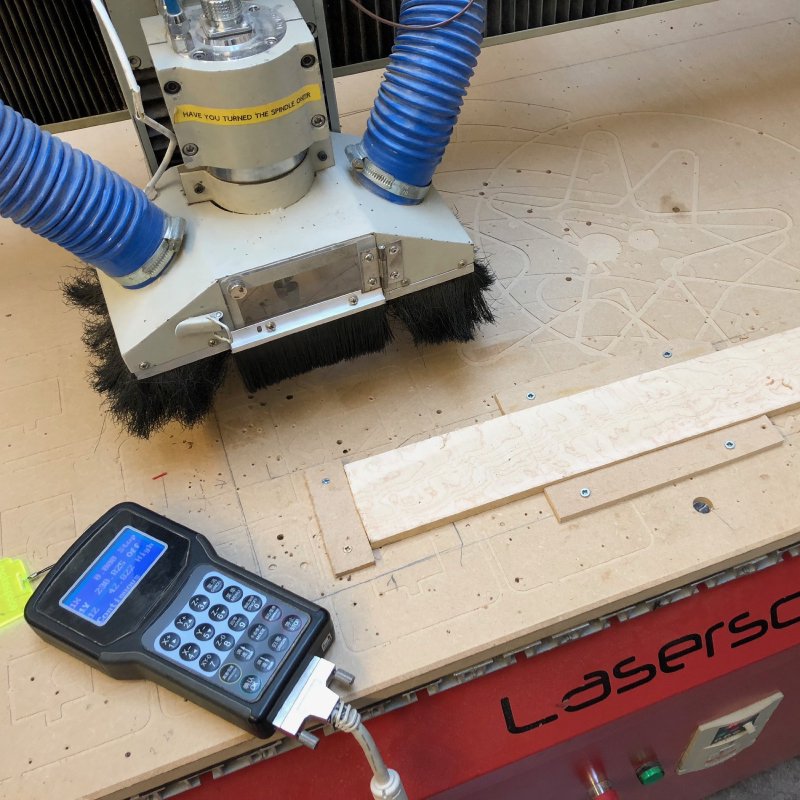
I spent a lot of time this week also trying to help others with weird behaviour they were having on the CNC router; I’m now considered a local expert, which is a little unnerving, but I’m definitely happy to try share what I know. Eventually we got to the bottom of the issues, but all of it just left me convinced that the sooner we get off our current CNC router controller at Makespace to a better understood unit the better.
One person was struggling due to the fact the Fusion 360 post-processor we use generates g-code seems to work for the common case with our router, but in his case didn’t. Given our CNC router controller is a random unit from China with little documentation that’s hardly surprising, so a move to a GRBL or Linux-CNC based controller would certainly help there. We didn’t find a solution, but at least we know how to work around the issue now.
The second person’s issue turned out to be one we diagnosed quickly as a mis-setting in software, but it took us an age to then get things to work, as the CNC router controller cached that old mis-setting even though we fixed it, so until we tried in desperation turning it off and on again it didn’t take effect. And people wonder why I find the idea of using a hand-plane more appealing than the CNC router…
Finally, out of the shop, I got a new toy to go on my pedalboard: the Hall of Fame 2 reverb by TC Electronic.
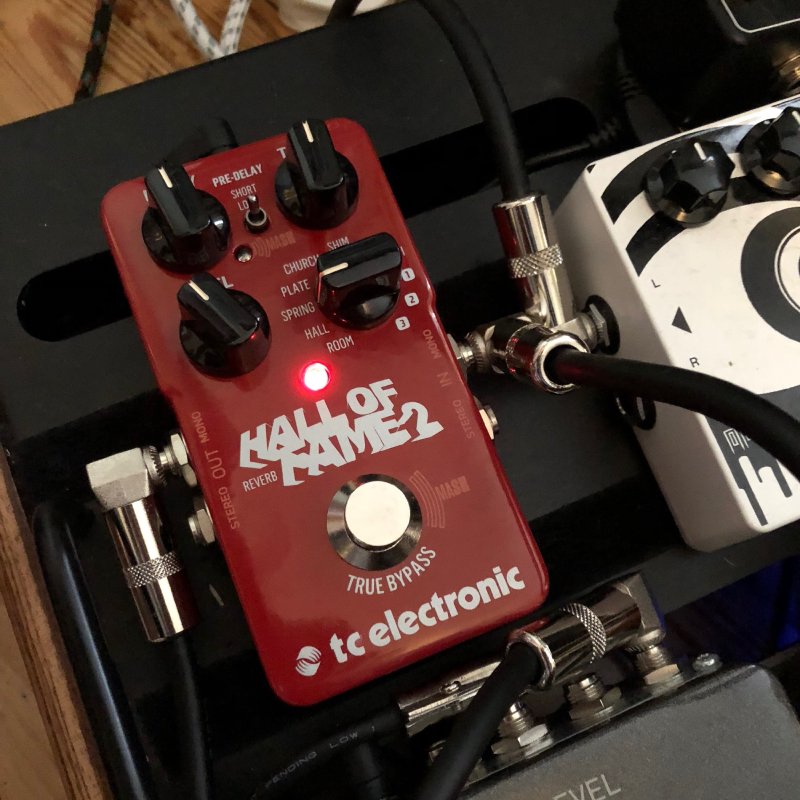
I had found that I was struggling with motivation of late playing guitar, but this has been a much needed injection on inspiration. I’ve written some more about it here, and I’ve posted a few videos to youtube of playing with it on.