A week in the shop
7 Jul 2019
No big headlines in the shop this week, as I tried to catch up on all the things I put off outside of guitar building in the run up to Liverpool Makefest last week. I did however spend some time moving the new commission forward.
My aim is to get this new guitar to the same stage as the Corvette build so that I can move them along in parallel: I generally finding having two guitars on the go at once is more productive than just having one on its own. Having two on the go lets you switch between them when you feel the need for a break or need to stop and think about some particular troublesome bit, but means you’re still building a guitar when you switch away.
The first thing then was to joint the body wood. Last week I had thicknessed the swamp ash to about 5mm from where I wanted it. I don’t take it all the way down, as when jointing I never get the side edge planed to exactly 90˚, so there’s always some height variance across the joined body blank that I’ll need to take down afterwards, so that extra 5mm is to allow for that (it’s actually a bit excessive, next time I’ll make it smaller).
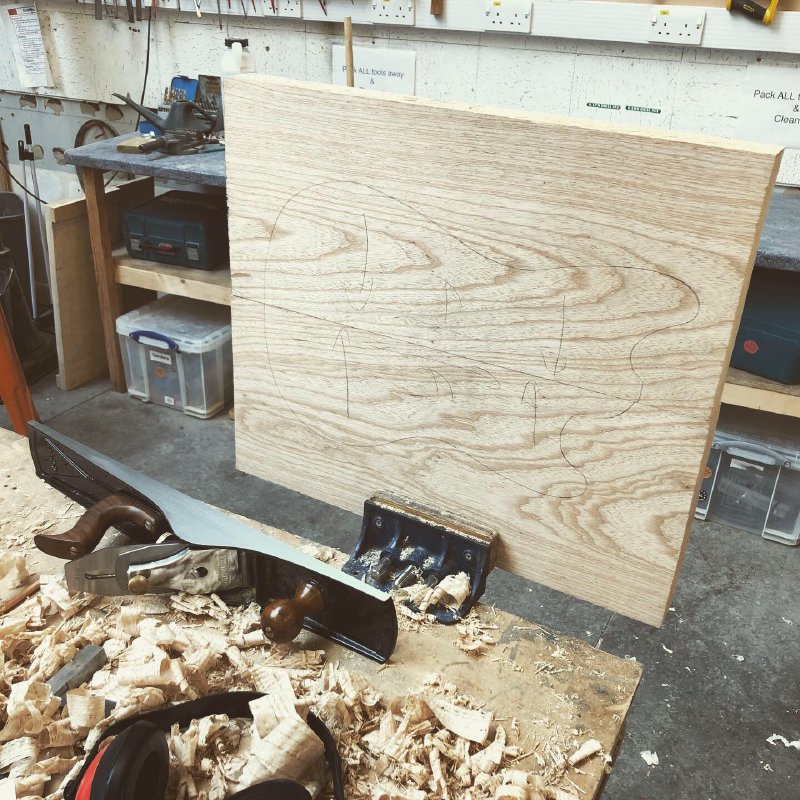
Before I start jointing however, I lay the bits of wood out and work out where the guitar is going to be in the two halves.

What I’m aiming for here is two-fold. Firstly, I want to identify any defects in the wood I’d like to avoid (such as knot holes etc.), and secondly I want to try and align the grain as best I can so that the join line is less obvious. Whilst with a properly jointed edge you shouldn’t see a glue line, an obvious discontinuity in the grain can give things away. Sometimes it’s not possible, but if you can get roughly the same direction of grain on both sides of the join line people will generally struggle to spot it’s not a single piece of wood. Once you’ve decided on how the two halves are going to go together, mark the faces on both side with a pencil so you don’t forget when you go to glue it.
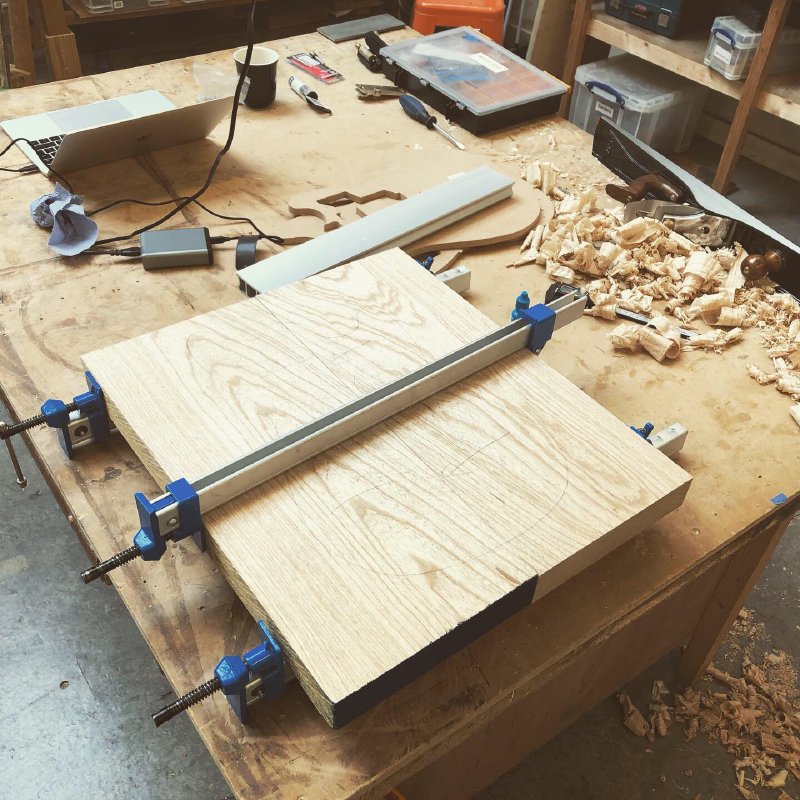
Whilst we have a thicknesser at Makespace, we don’t have a planer, so I do the jointing the old fashion way using a No 7 hand plane. The more I do this the faster it’s getting, but I’m still at that stage where I get it flat on one axis but knock it out on the other axis etc. It took me about half a day to get this just about perfect and glued up (which is half as long as what it took last time, so that’s progress for you).
Once you’re happy with the edges you’re jointing, it’s into a set of sash clamps for 24 hours, and then voila, you now have one bit of wood for the body rather than two.
A common question I get in the workshop is whether I use any dowels or biscuits on the joint to give it extra strength, and the answer is no, I don’t, and it’s not something I’ve seen other luthers do either. Modern wood glues are very strong (stronger than the wood itself), and you have a nice big surface here for the joint. Also, the joint itself isn’t going to be under a lot of stress: the pull of the strings is not going to be causing the two halves to want to come away from each other, so glue alone will hold it fine.
One thing I did do here, and thanks to Makespace workshop regular Stefan for this tip, is to use beeswax to help make planing such a large area easier. I was finding with these particular bits of ash that even going with the grain that the plane was stuttering a bit, no matter how I had the blade set; I guess you have quite a large surface area of friction on a joint like this between the wood and the sole of the plane. Although you wouldn’t want to use any form of synthetic lubricant that might soak into the wood, beeswax is apparently the thing to help get the plane to move along smoothly without clogging up the wood. I can report it worked a charm.
Once glued up, the next task was to take out any slight bow in the blank due to any slight inaccuracy in getting the jointed edge perfectly perpendicular to the faces. On this one I actually seemed to have got it close to bang on, but even with that there’s still the glue excess that needs removing. The body blank is now too broad to fit on the thicknesser we have (which will cope with 330mm but the blank at this point is about 460mm wide), so I’m back to the CNC router to use it as a thicknesser briefly.
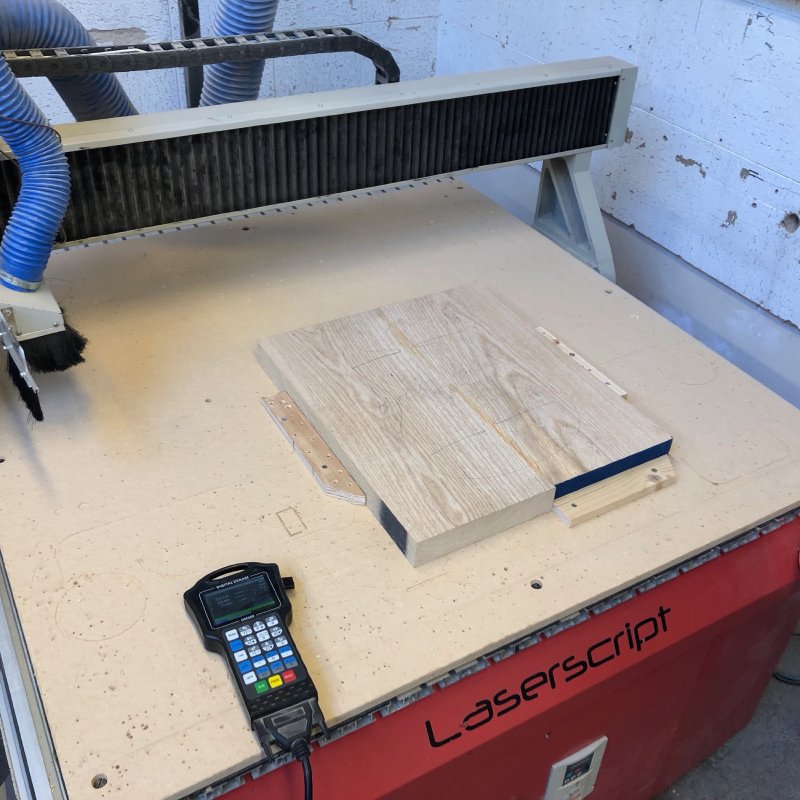
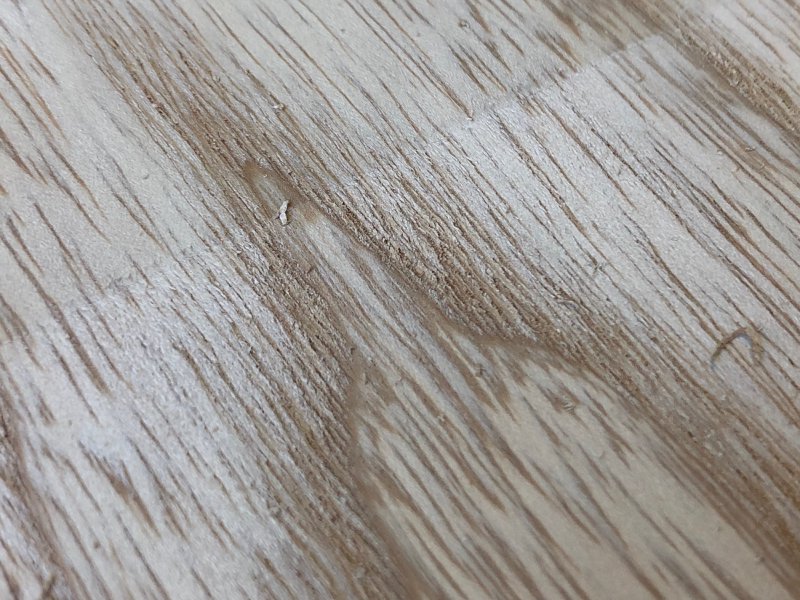
However, this didn’t go as well as I’d hoped. I suspect the facing off bit we have isn’t sharp enough, but I found it was tearing the grain on this particular bit of ash quite terribly.
I let the CNC remove half a millimetre from both sides (just to get rid of the glue excess mostly) and then stopped, which left me with still about 4mm to remove to get the body blank to my target thickness for this guitar. What I think I’ll have to do here is trim the blank down on the bandsaw so that it fits through the thicknesser, which I know doesn’t tear the grain on this wood from when I did the original thicknessing of the two halves. This will need careful marking - the design of this guitar body is just over 300mm wide, and isn’t perfectly symmetric about the centre line, so I’ll need to get the template cut and mounted, and then trim things down from that before thicknessing. Fun.
Speaking of templates, the more eagle eyed of you might have spotted I already had an MDF template above for this guitar, so why do I need to cut a new one? There’s two reasons for this. Firstly, the above template was designed for the Phoenix Offset, where the guitar was partly cut on the CNC Router before it failed and I had to finish the job by hand. I failed to plan ahead and didn’t put any suitable mounting points on it for how I’d like to make a new body. Secondly, I want to have one made from clear perspex as I did on the Corvette guitar I cut a few weeks ago, as I can mark the centre line etc. on the clear acrylic and do a much neater job of lining everything up when I can see through it.
One problem: Makespace had run out of the acrylic I normally use, so I had to order some new in, which turned up just as the week closed:
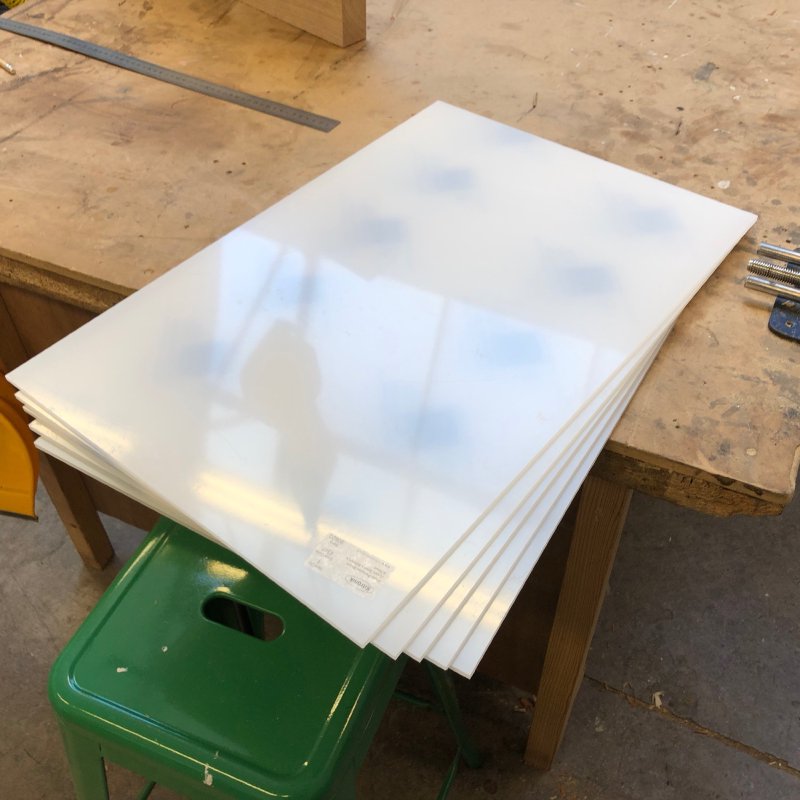
Five sheets should be enough for a few more guitars worth of templates.
Final bit on the new commission this week: I thinknessed the maple for the neck, ready to cut that out using a template in the near future.
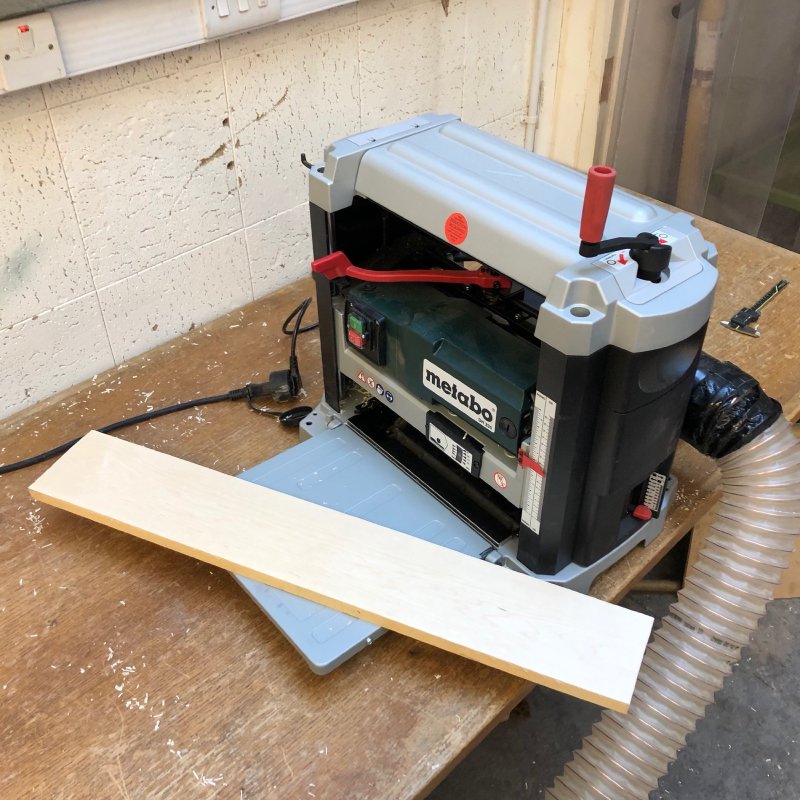
Even though it’s still not yet fully commissioned in the space (we’re waiting for improvements to the workshop extraction piping) the thicknesser has been getting lots of use by the workshop regulars, which is great to see (given I was the one who pushed for us to get one). However, it’s had one knock on consequence we’d not considered until the extractor unit clogged up: it’s the first thing in our workshop that generates large offcut particles, and as such we need to manage the extractor waste better!
Our extractor has two bins: one for dust and one for larger bits sucked up, and given the kind of machines we’ve had until now it was mostly dust we were getting rid of. However, with just a week of using the thicknesser, the heavier particle bin had clogged up with shavings.
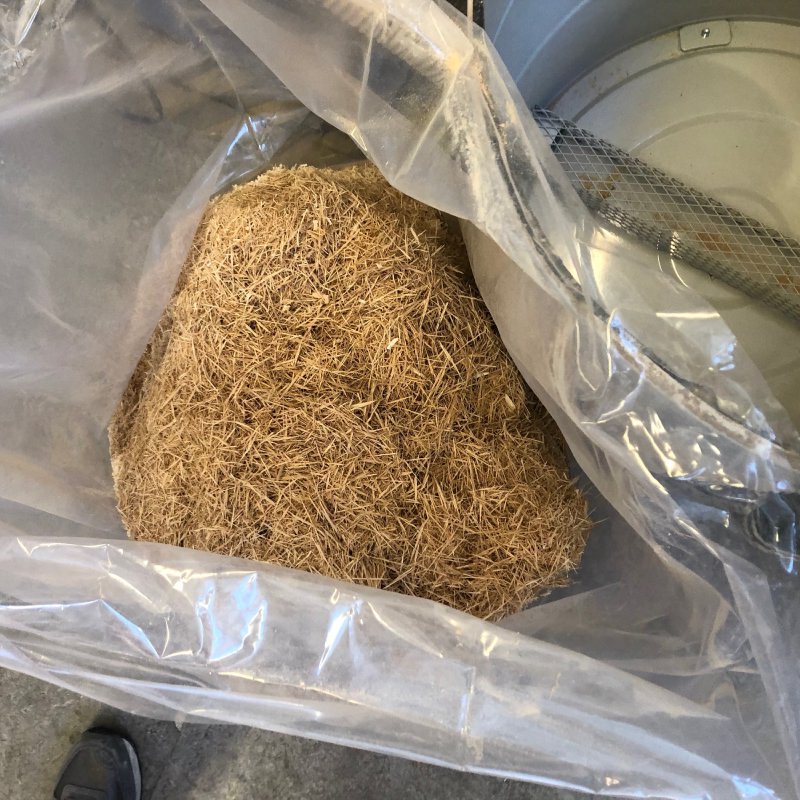
It’s somewhat obvious in hindsight, but its funny how just one new addition to the workshop can expose the bad habits of several years - we’ll be checking the second bin regularly from now on!
The only other real progress I made this week was a I created a portfolio page for the now completed Phoenix Offset, and a reverb sale page for it. I have one final tweak I want to make the guitar, then I can get that listing to go live and hopefully find it a new home.