A week in the shop
Published 11 Oct 2020
Tags: the corvette
I ended last week by starting to dress the frets on the Corvette neck, and I began this week by finishing that task off. I didn’t do the very final polishing stage, I’ll do that once I’ve strung things up and know that they’re good to go height wise, but they’re certainly at a playable stage for testing.
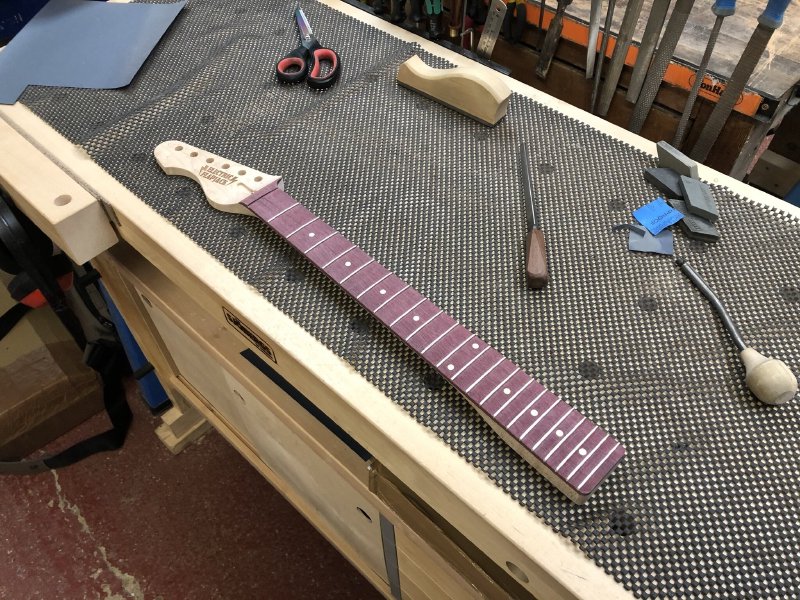
I’m still of the opinion that this has been the fastest I’ve got a fret job to this level this quickly. Perhaps, despite not intending to go down the thicker slot and glue route (as detailed in the previous post), I should be doing this for all my guitars in future.
The only issue I need to resolve with this neck is that I’ve cut the headstock slightly too narrow for the Gotoh tuners I plan to use. Back when I was using the CNC router to make my necks, I was using vintage tuner posts that have ferrule inserts on the front face of the headstock to keep the post straight, and there the thickness I was using wasn’t an issue. However, the vintage tuners require a stepped hole that is narrower on the back to guide the post, and wider on the front to fit the ferrule, and doing this with just a pillar drill accurately is more tricky. So instead I switched to more modern tuners that just use a straight 10mm hole through, but instead of a ferrule they instead use a plug on the front that screws into the rear section, and it’ll only screw in so far (you can see if you visit the product page the part I’m talking about) before stopping. My headstock thickness is just 1mm shorter than that distance.
As ever, the root cause is I didn’t measure, I assumed.
I hit this issue on another neck I cut at the same time I cut this one, before I realised my mistake. On that guitar I just used an extra washer to fill the gap, which works fine and you’d not know unless you went looking for it, and since then I’ve cut the headstocks slightly thicker to deal with it (I did a longer write up of that issue and how I tried several approaches to solving it back a year ago if you’re interested).
Here I’d like to do the same, but finding shim washers the right diameter/thickness is proving a pain as they’re not of a standard/common size; last time I just used the washers from an old set of tuners that I didn’t want any more, but that doesn’t really scale as an approach. What I might do is laser cut some shims out of acrylic or wood if I don’t find some suitable chrome washers of the right size in the next few days.
Despite that one issue I need to solve, one thing I could do, which is always a magic moment for any guitar build was attach the neck to the body this week for the first time:
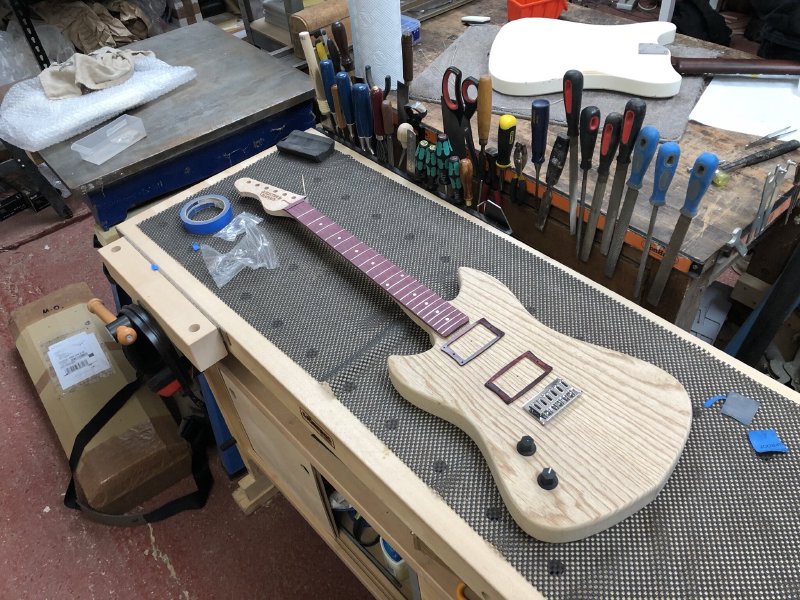
This looks a lot like a picture I posted a couple of weeks ago, but the important difference is there’s nothing supporting the neck here ;)
What made this particularly nice is this is the neck joint here is a new design, using ferrules to hold the neck screws rather than a large metal plate as is traditional with bolt-on neck guitars:
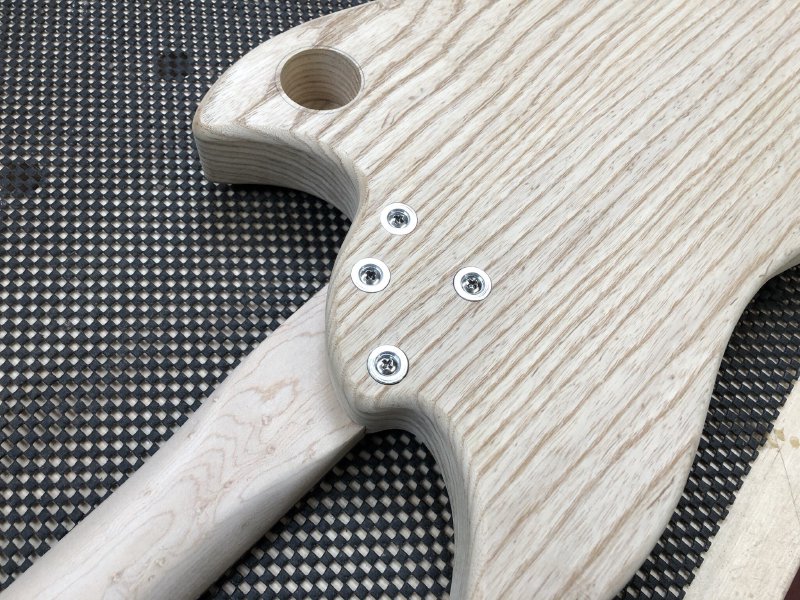
I’m really pleased with how this has turned out. The ferrules themselves are perfectly fitted so look neat and tidy, and because I didn’t need to match the profile of an off-the-shelf neck plate I had more freedom to make a nice sweeping wave on the back that’ll give plenty of access to the upper frets and avoid any sharp edges in the shape.
There’s a practical upside to this as a builder too. Normally when I put the guitar up to tension before finishing it the neck plate will leave an impression on the unfinished wood that I then have to buff out again, but here that’s not a problem, so it’s both practical, ergonomic, and (to my eyes) pretty.
I know this isn’t to everyone’s tastes, so I’ll happily use plates if the customer asks for it, but I think this will be my default from now on for new bodies unless asked not to.
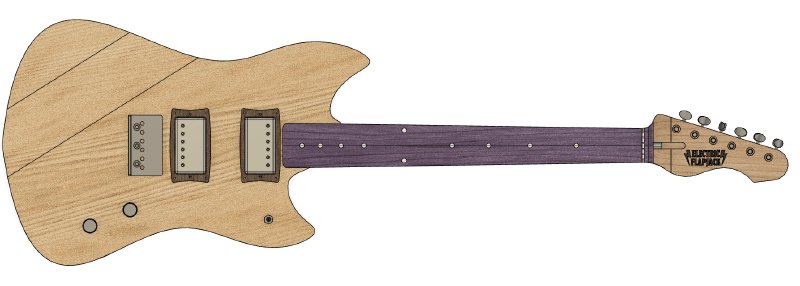
With the neck on, I laid out the pickup mounts again (as you can see above), and I decided that on this shorter scale length guitar, two full sized humbuckers felt a bit crammed in. Originally I had designed this model with a telecaster bridge and humbucker layout:
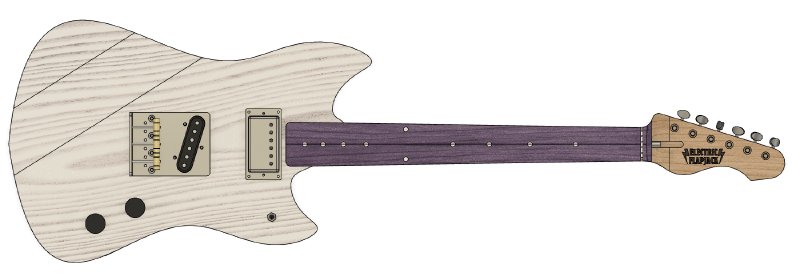
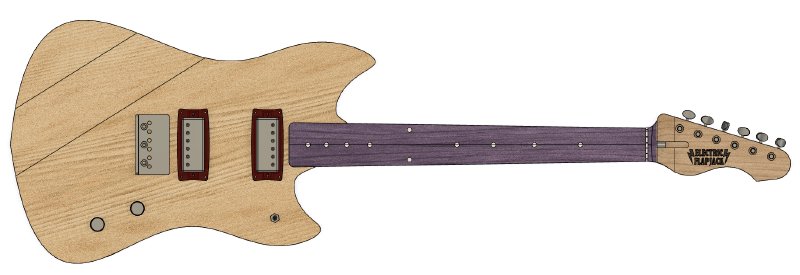
I liked this in CAD, but as I mentioned recently in these notes, when I put the bridge on the body in the real world I felt the telecaster bridge really didn’t go well with the overall body shape, so I opted to switch it to a regular hardtail bridge. With regular humbuckers this looks better, but feels a bit cramped (again, more obvious in reality):
So instead I’ve opted to go for mini-humbuckers, which should pack a similar punch to regular humbuckers, but in a smaller space, letting the guitar layout breath a bit more visually:
Thankfully, through the power of parametric design, tweaking the CAD model to test different layouts like this, and generate new pickup mounts, was a relatively easy operation.
I’ve had a chat with the ever helpful Matthew over at House of Tone Pickups and we’ve come up with a somewhat special twist on this layout that I’ll talk about once its with the client, but I’m pretty excited about where this build is going now.
Last week I glued up the neck on the workshop test build that still needs a name, and left it clamped over the weekend. This week I came in and removed the clamps to find no surprises there:
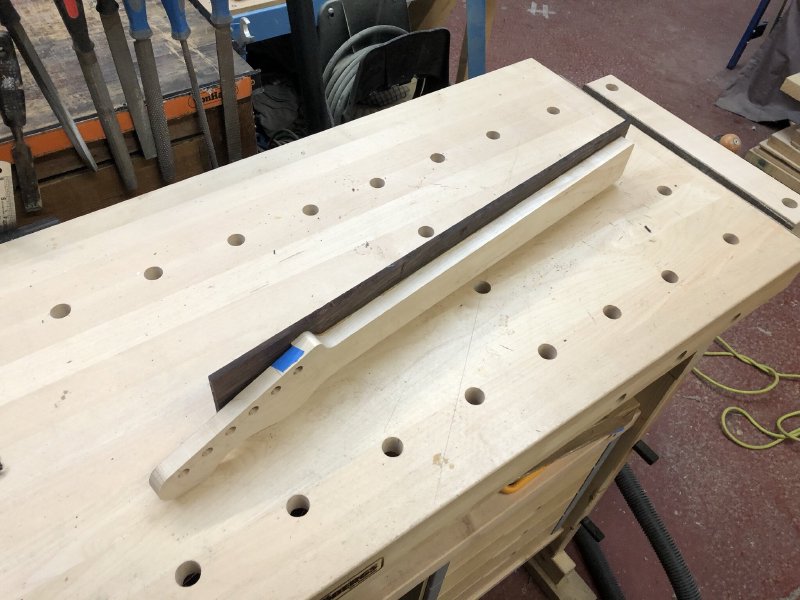
The next thing I need to do is band-saw the excess off before routing the fretboard flush. I was going to take this into Makespace, but in theory my own band-saw should be with me in the next couple of weeks, so I’ve decided to hold off for that arriving, rather than carting valuable bits of wood between my workshop and Makespace in the currently damp autumnal weather.
Besides, it’d be sad if my band-saw turned up and I didn’t have anything that needed cut :)
That’s about it in the workshop. I did spend a bunch of time at home doing CAD tweaking and pickup research for the Corvette model changes outlined above, and I had to order some particular router bits and workshop things that aren’t that interesting in abstract, but I’ll talk about more when I put them to use in the coming weeks.
Earlier this week I was doing my guitar practise, when I noted my sound was getting quieter and quieter and then nothing and a very acrid smell filled the room as my amp, which I built myself several years ago, died. The amp is a very simple tube amp based on the original Fender Champ design from the 1950s, so there isn’t much to it to go wrong, and I assumed that when I opened it up I’d find it was one of the capacitors in the voltage rectification circuit would have burnt out. However, upon opening it up (and ensuring there was no power in the capacitors still!) there was no obvious signs of burning, but it did seem like the input power transformer was the source of the acrid smell.
Time hasn’t allowed me to do a proper investigation on this, so for now I’m having to slum it using my workbench amp on the mantelpiece at home:

I say slum it, but in fact the wee Blackstar Fly is a pretty smashing amp for its size. Whilst it doesn’t have the range of a small tube amp, it certainly has a clarity that other amps at this size/price tend to lack, and is plenty loud enough for home playing.