Catching up in the shop
Published 12 Jul 2021
I’m trying to get getting back towards the “week in the shop” format, however between camping trips and my second vaccine jab I’ve yet to get back into a regular workshop routine, but I’m working on it. Here’s a quick write up from the last couple of weeks of when I have managed to get into the workshop to try and keep the momentum going.
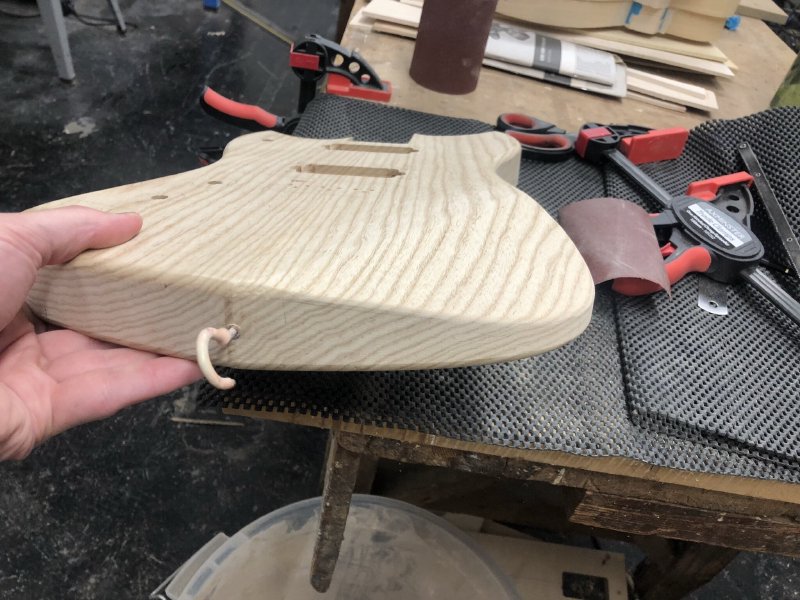
In the last notes from the workshop I walked through the adding of all the additional holes to the body for the Corvette guitar build. Since then, I’ve been in the workshop to complete the remaining bits of work on this body to get it ready for finishing.
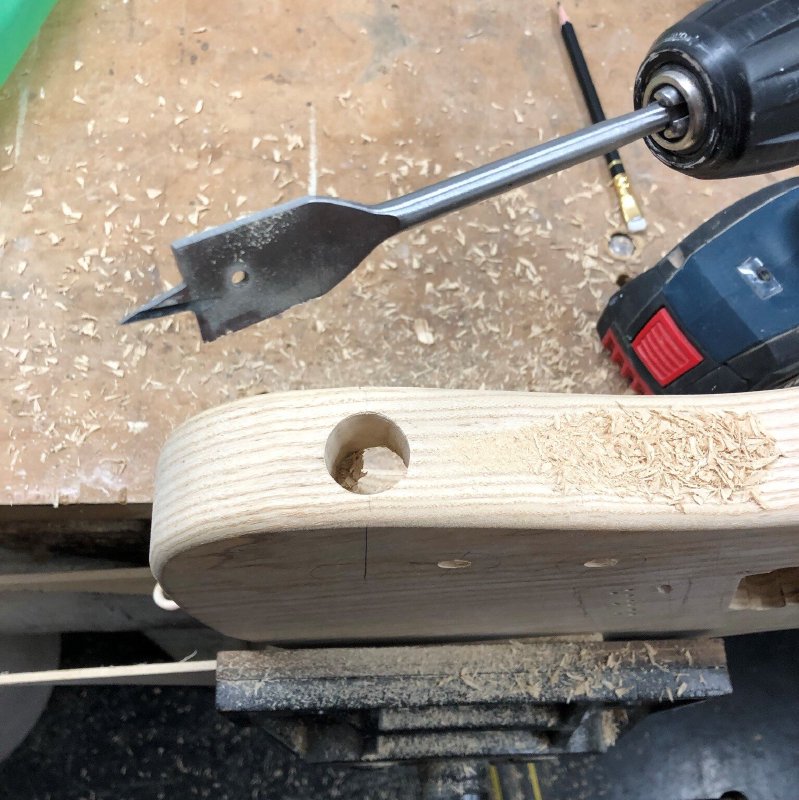
The first task was adding the one last hole required, which was for the cable jack. I never like drilling this hole, as it means using the large spade bit, which feels quite brutal and I worry it’ll be hard to control. The last few guitars I’ve made all had the jack mounted on a control plate on the front, so I’d avoided this task for a while. Still, all went well thankfully:
With that last hole done, I could then finally carve the body for ergonomics: on the back of the body for the belly cutout and then rounding over the front of the guitar for the strumming/picking arm. These get left to last as they make the guitar much more awkward to clamp afterwards: this is why it’s worth thinking through the order of your shape changing operations! Indeed, of the two carves here I do the belly carve first for the same reason: if I did the arm carve first, it’d be harder to clamp the body to do the belly carve.
For all the CAD and measurements that go into the guitar, I have to confess that at this point I just eyeball these, marking them out by hand using a pencil:
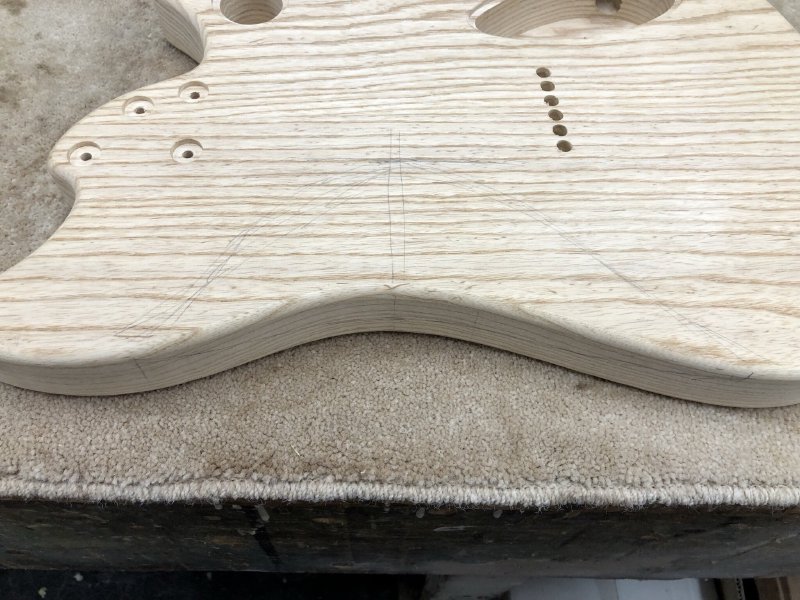
Having done a few of these now I feel comfortable sketching them freeform like this, but it does amuse me that I do this given how pedantic I am about making sure everything is parameterised and specified in the initial CAD designs. But that’s one of the tricks to guitar building: there’s places where you need to be highly accurate, such as anything to do the strings (i.e., fret positions, bridge placement, and so on), and then there’s areas like this where it’s less about precision and more about ensuring it feels right in terms of ergonomics. Obviously it also comes a little with practice too - I’ve done enough of these to feel confident that this will work out.
Pencil lines down, it’s then out with the Shinto rasp, and time for my upper body workout!
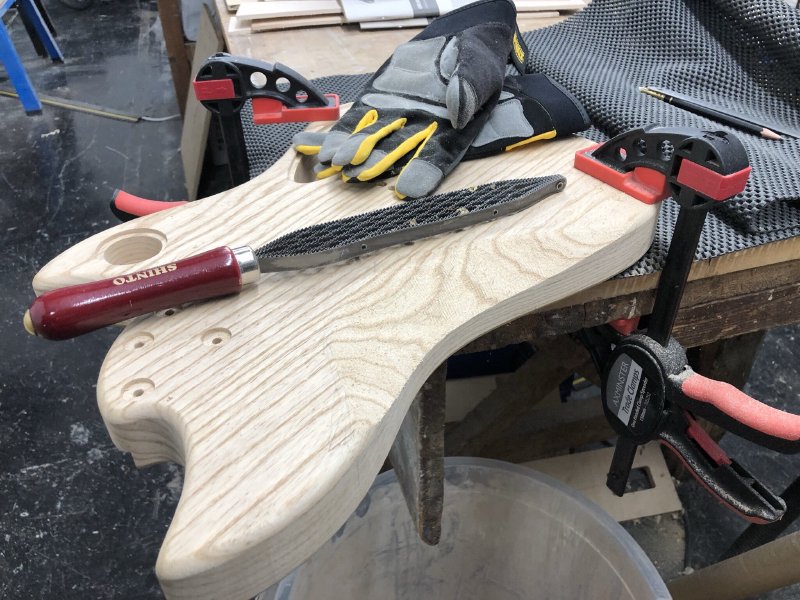
Doing these by hand is a lot of effort, but something I find quite satisfying. I guess although this is cut by hand, I’m following a template, and this is one of the few parts where you really work the wood by hand unaided. As you work through it you can feel how even you’ve made things and how smooth the transitions are using your hand, working until you’re happy that you have removed enough material to ensure the guitar will be comfortable to play.
That said about touch, this is one where you want gloves, as you’ll be resting your palm on the sharp rasp blade to guide it, and it’ll leave your palm nicely shredded if you’re not careful. I bought some Dewalt DPG215L gloves, which I’m quite pleased with for this job: flexible enough on the joints, but with leather pads on the contact points to prevent abrasion damage for jobs like this, where the otherwise excellent neoprene gloves you get would suffer.
Once the shape is right using the Shinto rasp I then work it over with some 80 grit strong backed sand paper to remove the marks and any hard edges that I’ve introduced. The upside of the Shinto is it removes material fast, but the downside is that it does leave the material fairly rough, so you want either some finer rounded files or strong sandpaper to let you work those out.
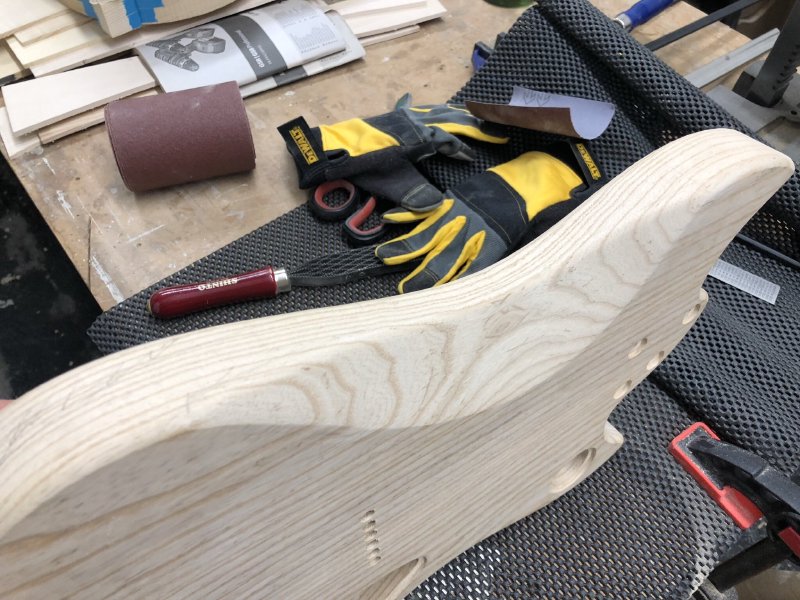
The belly carve done, I get to do it all again for the arm carve:
Here you can see my guide lines: I take the shape back all the way across one line at a time, slowly working my way back into the body. By doing this I’m able to keep the entire thing level as I go, so I don’t accidentally remote too much on one side compared with the other and have to try straighten it out later.
Job done! Except for the sanding. Oh, the sanding.
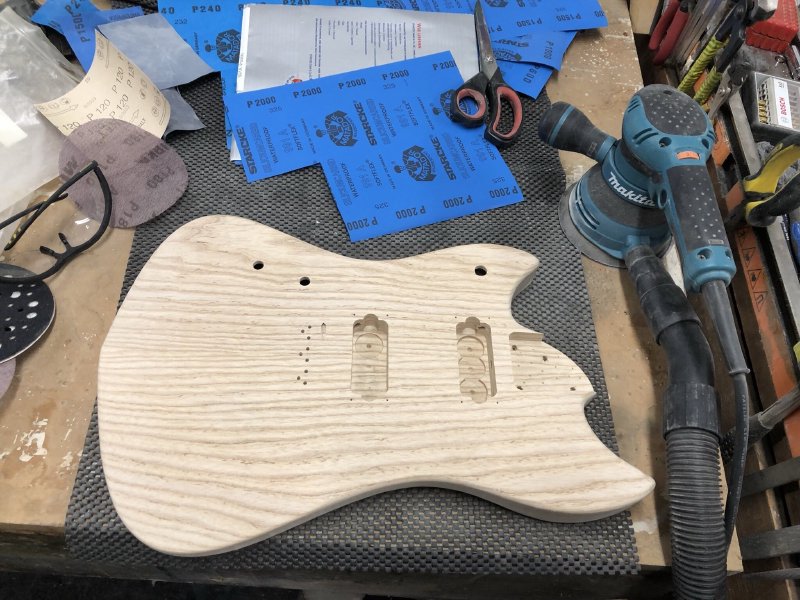
With the body the right shape, all that remains is to sand it ready for finishing. This means removing any machining marks, ensuring transitions remain smooth (or become smooth) and then taking up through the grits until it feels silky smooth to the touch, rubbing it with a wet cloth to make the grain ends stand up (at which point it’ll feel all icky compared to the smooth finish you had), letting it dry, and sanding it up through the grits again. The wetting means that it won’t be your first coat of stain or oil that causes the grain to stand up.
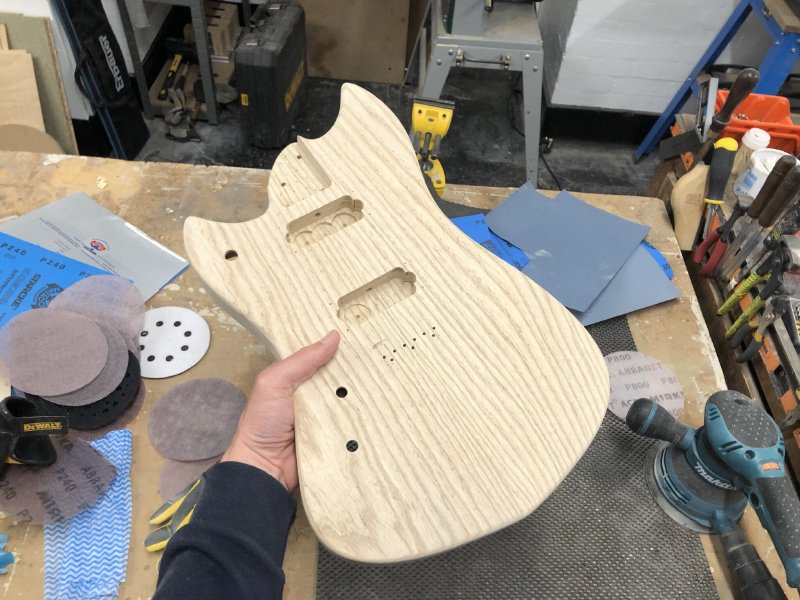
All done! Such a good feeling to get to this stage on a build.
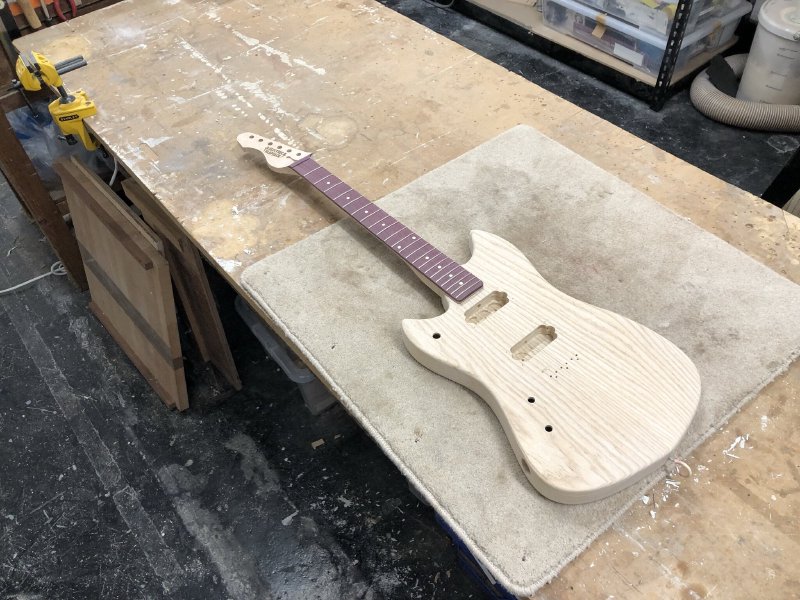
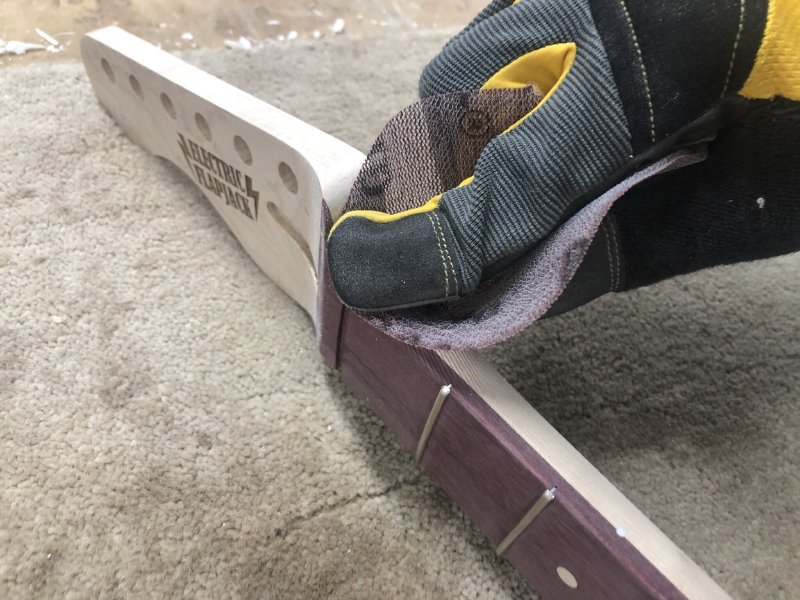
With the body ready for finishing, my next task was to get the neck to the same level of completeness.
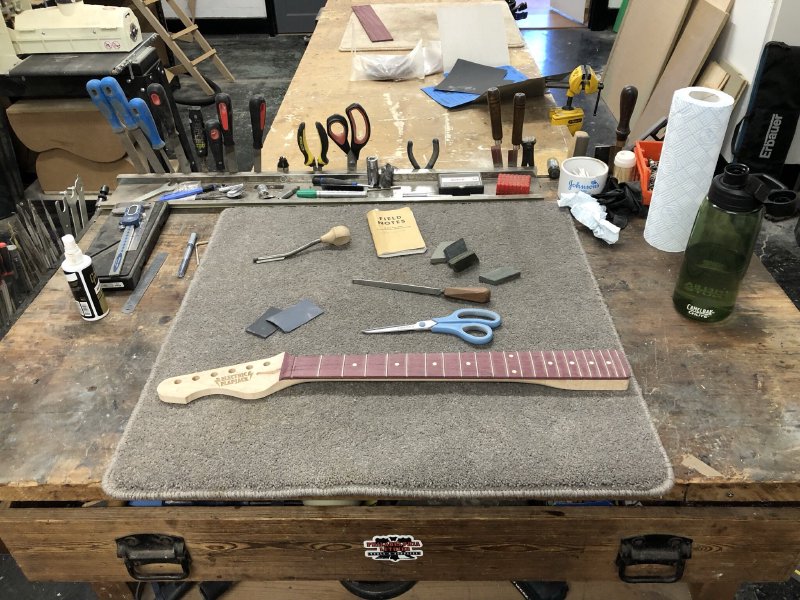
Shape-wise the neck is complete, but it needed the fret ends dressing and sanding the wood to the same silky smooth finish as I applied to the body.
I still find fret dressing something that takes me a lot of effort to get right and something I’m very keen to improve on, which is why in part my new guitar design is all about the neck being hand made and the other bits of the guitar being built using other novel techniques: I want to have a guitar design that lets me work on the bits I need to spend time on.
When you have the frets in place, you’ve levelled them, and filed/sanded the edges flush you are left with something like this:
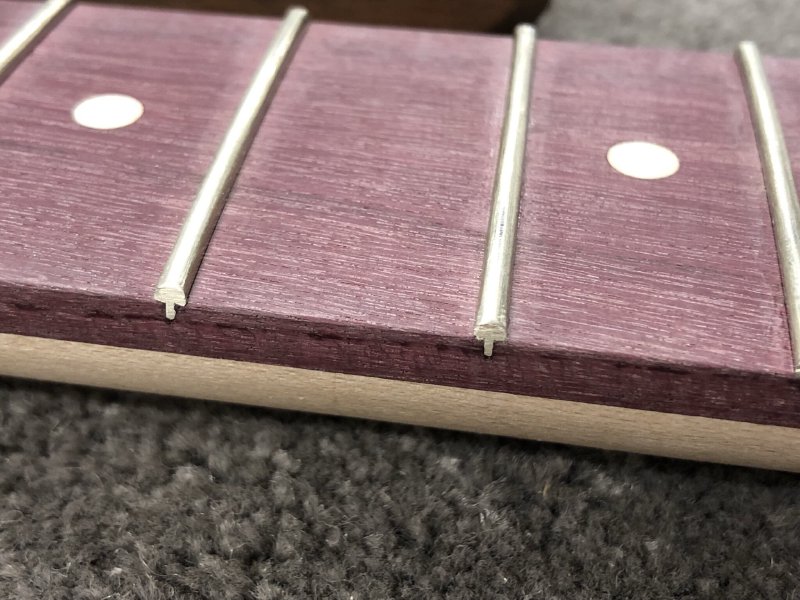
Whilst those look flush with the fretboard edge, the edges are still distinct enough that your hand will feel them as you run your hand up and down the neck whilst playing. Thus I spent a couple of hours with a file and sand paper rounding over the edges to the point where you don’t feel them catching at all. Normally I’d tape up the neck before doing this work to protect the fretboard from marks, but the purpleheart wood is so tough that I didn’t need to bother this time.
The small fret rounding file, which you can see in the middle of the first picture in this section (the file above the scissors), has a triangular profile with smooth rounded edges and abrasive faces, so won’t cut the fretboard as you file the frets, however, it might leave compression marks on softer wood. With purpleheart, whilst there was a little bit of notable smoothing from the smooth edge rubbing on the fretboard, it wasn’t anything that wouldn’t sand out quickly as part of the final sanding pass anyway.
Once the fret ends where smoothed over, I then got sanding again. But the end of my time in the workshop that day the neck was in the same state as the body: awaiting its oil finish.
Nice to see the end coming into sight for this build after a long interrupted process.
The original design for this guitar involved staining the body white, but after a discussion with the recipient it’s now just going to be left natural with an oil finish. As a consequence, I’ve revisited the plans to make the pickup mounts out of tortoise-shell acrylic. I fear that’s just going to be too similar in tone and visual texture to both the stained body and the burnt chrome pickups, and wanted to find a better suited material.
In the end I found another purpleheart fretboard that I’d marked up with the laser cutter but not used a while ago. I ran this through the thicknesser to remove my laser markings and get the depth down as close to 3mm as I could (thicknessers don’t go infinitely thin, as they’d just destroy weak material).
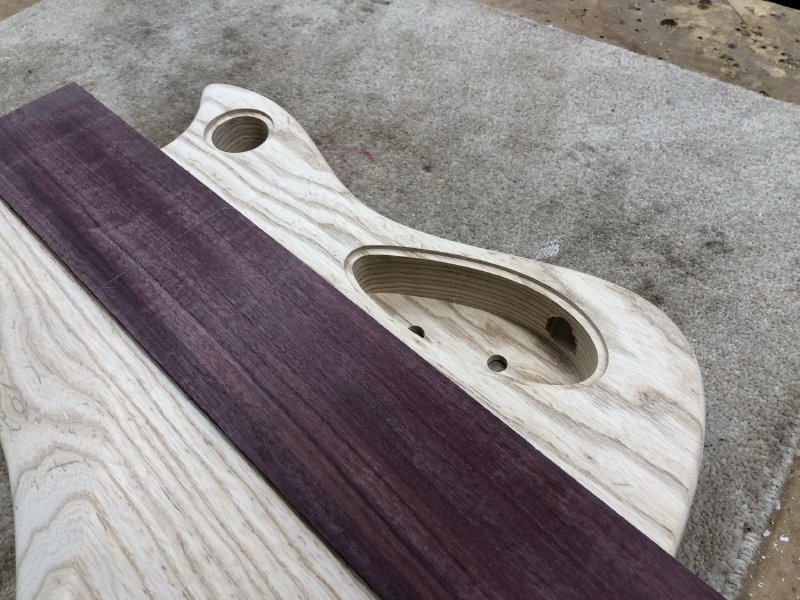
So now I’ll use this for both the pickup mount rings and the rear control covers, both of which I’ll cut on my next visit to the laser cutter at my local maker space.
Personally, I’m not so keen on guitar designs where everything that can be is made from wood. I understand that luthier’s are skilled woodworkers, and so it’s just something that is a natural fit for them, but I like my guitars to have a mix of textures to them. But in this case I think the simplicity of the purpleheart pickup mounts and the loud non-woodness of the burnt chrome pickups should work out okay. And also ultimately it’s not a guitar for me, so it’s less about my personal tastes than that of the recipient!
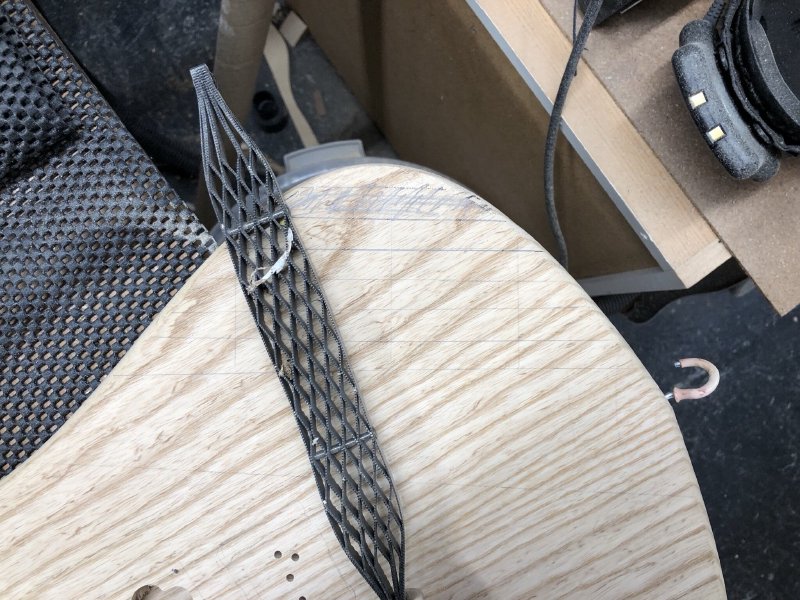
As a quick aside, given all the talk of sanding, a note on the wonderful Mikra ABRANET “net abrasive” sanding disks that I use. I’ve used them for so long that I’d forgotten that they’re not that common, but they cropped up in a discussion on The Prepared’s slack (an online maker community I joined recently), and I was reminded they’re still not that widely known.
I’ve been a fan of them for a while, ever since my workshop-mate Matt alerted me to them, and would never consider going back to regular sanding disks now. Because they’re made of a mesh they don’t clog up as quickly as traditional sandpaper does, and the extraction airflow the sander I’m using is much more effective because you don’t need to line up specific holes. They’re definitely not as cheap as regular disks, but they more than make up for it in my book given how long they last and how much less dust ends up in the atmosphere.
They also are useful just by hand when trying to sand irregular surfaces, of which guitars have many. For example, trying to sand out the contours of the neck as it transitions from fretboard to headstock is made so much easier using these compared to regular sandpaper which will tend to want to fold on just one axis rather than follow the contours of the wood.
I say, not cheap, but definitely worth it if you can stretch to it.
I’ve also been doing some CAD modelling of the new guitar last week, but I’ll save that for the next catch-up notes: I find that having them alternate between “what’s happened in the stop” and “working on future designs” has been a nice way of dividing the notes up, so I’ll continue to do that for the near future. So more on that next week!