A week in the shop
Published 22 May 2022
Tags: 3d printing, älgen, delfinen, fusion 360
This week was a mixed time in the shop, with as much being spent making dust as it was pushing lines around in Fusion 360 - but both were quite productive as I try and push forward on the two builds in progress.
Älgen
After many setbacks, at a stage in the build that I didn’t really think would give me this much trouble, I finally got the 3D printed wings mounted on the wooden core for my Älgen guitar design, a small step in of itself, but a significant milestone none the less:
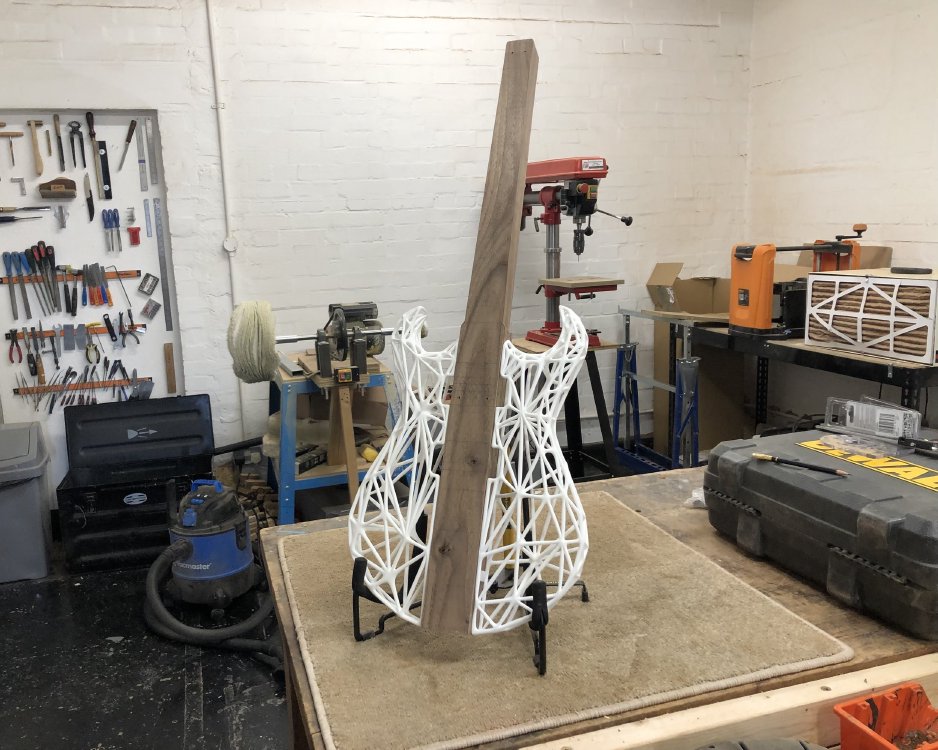
There’s still a long way to go on this build, but after a good number of stumbling blocks, it felt good to get to this stage.
This was the result of the new jig that I put together last week and then ran out of time to put into practice. You can read about the jig here. Just to close up on some of the design notes from that report, here you can see how the extra lines I cut to help me line up the second guide work:
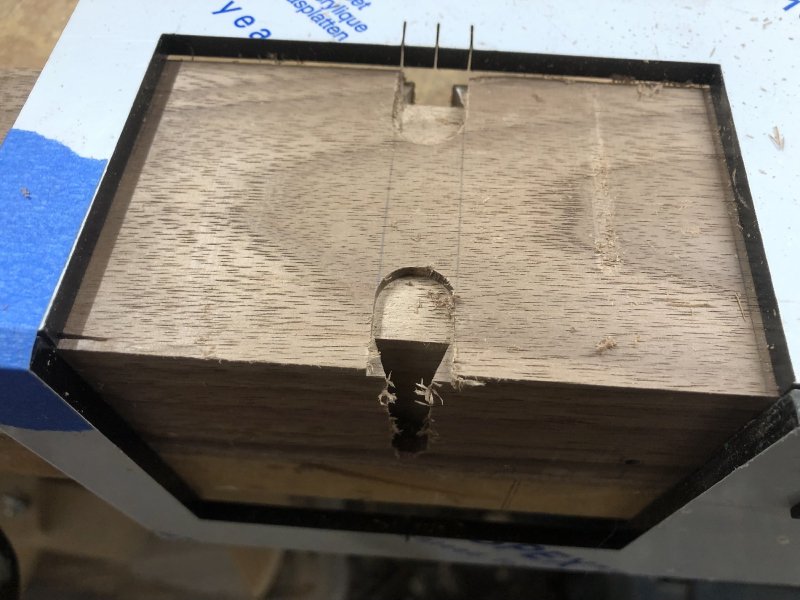
and here you can see how my depth guides worked:
The depth guide didn’t work perfectly. Unlike the one I had built into the larger MDF jig I used in the past (which you can read about the design of here), this one suffers a bit from parallax error as I line things up by eye, rather than being something I just push the bit down to a physical stop with. As a result I initially cut the channel a little too deep, which meant the opening of the dovetail slot was too narrow and I had to re-cut it a second time after adjusting the depth. I think really I should build a separate depth jig to mimic the functionality I had on the old one. Too deep is better than too shallow at least, but I’d be nice to not have to worry about this one in future.
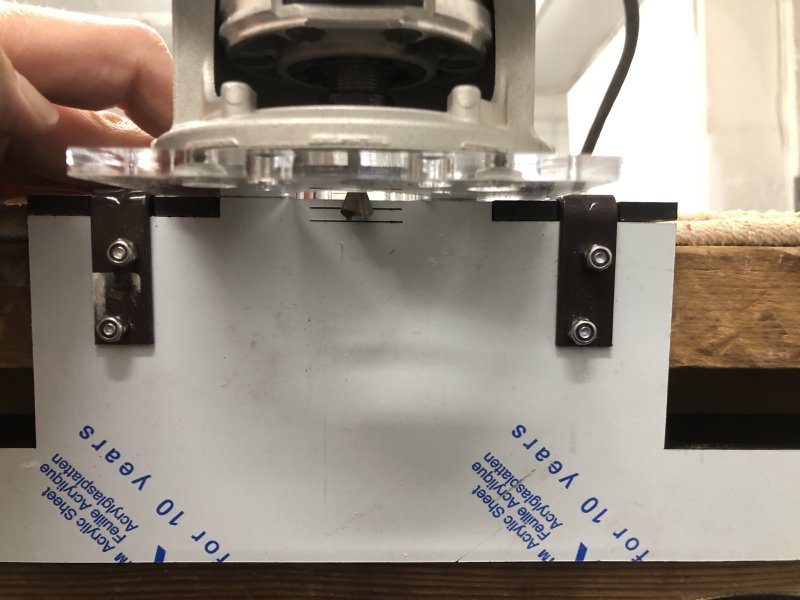
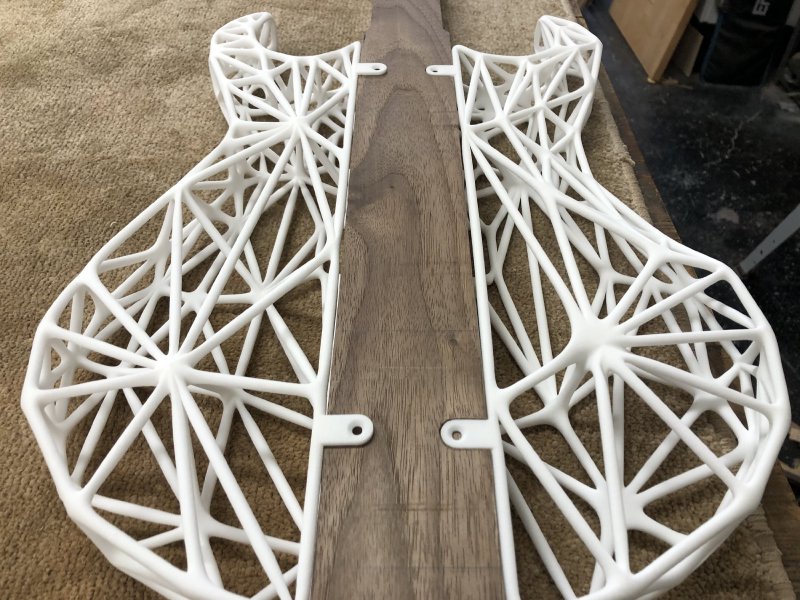
Also, the plate part of the template didn’t cut across the body enough, leaving the plates floating on the first pass, as shown on the left side here:
But this is all down to fettling the process: overall the new jig and the move to using the palm-router with a custom base works well enough for me to consider it de-risked as a process (which is different from the process being risk free :).
This body has now had the channels on one side cut repeatedly with different templates, so the fit on there is a little loose, but for now I’m going to resist the temptation to start the body over until I’ve convinced myself of the rest of the build process. I might try glue in some vaneers to tighten the fit up at some point if this body gets close enough to a finished guitar without any other disasters befalling it. It’ll still look a little shonky, and not something I’d want to sell as a finished guitar, but my friend Adrian tells me that this’ll really be the model that sells for tens of thousands in fifty years as the original prototype, so I guess I shouldn’t scrap it just yet :p
My deadline for this build was to be Liverpool Makefest, which is at the end of June, and if I’m honest with myself it’s now looking somewhat unlikely that I’ll have a final finished build by then, but I’d like to have it perhaps at least strung up and in some playable form even if it’s not finished. In order for that to happen, I need to get the custom headstock piece 3D printed in metal.
To recap, this guitar will be a headless design with a tunable bridge, with the strings anchored in a custom headstock, as I couldn’t find an existing piece out there that matched what I wanted, either from a mechanical sense or a design sense. So I went through a bunch of iterations before I settled on this design:
I got this 3D printed in plastic a while ago, and whilst I had tested that strings fitted in it, just as I was about to order the production version, I realised I’d never actually screwed it down - I thought I’d do that on the actual guitar before ordering, but that got caught up in my earlier delays. With time running out, I decided to skip testing it on the guitar and just screw it down onto some scrap:
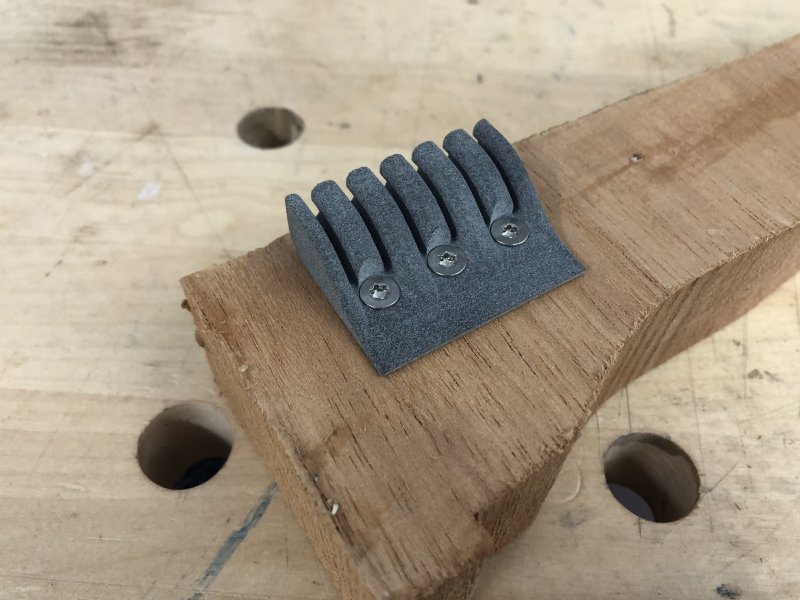
I’m glad I did this: whilst it does kinda work, the screws do rub against the cut outs behind them, which makes it awkward to get the screw to go in where I wanted it to. On the middle one, which I did last, there’s even some scraping damage, as by that point the bridge could no longer move, which is why the first two screws didn’t cause the same issue.
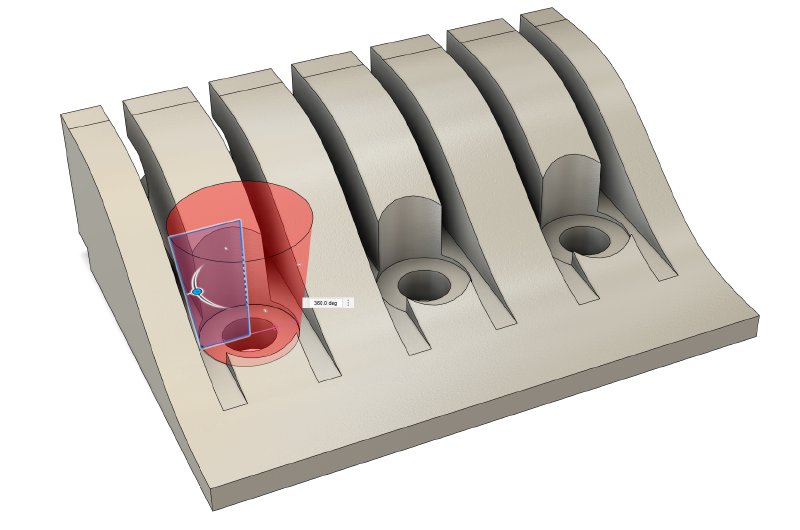
So, I went back to Fusion and tweaked my design thus:
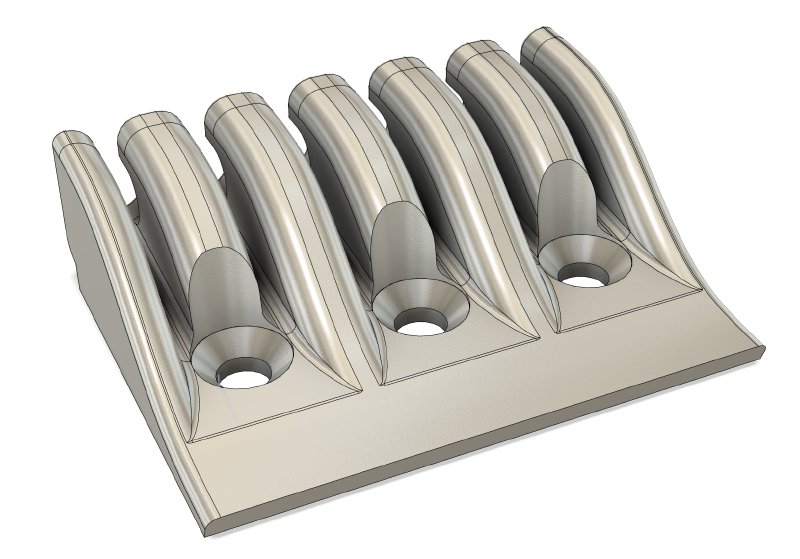
It looks pretty much the same, but I’ve made chamfer for the screws a fraction larger, and I’ve raked back the cut out slightly, cutting the channel with a cone rather than a cylinder:
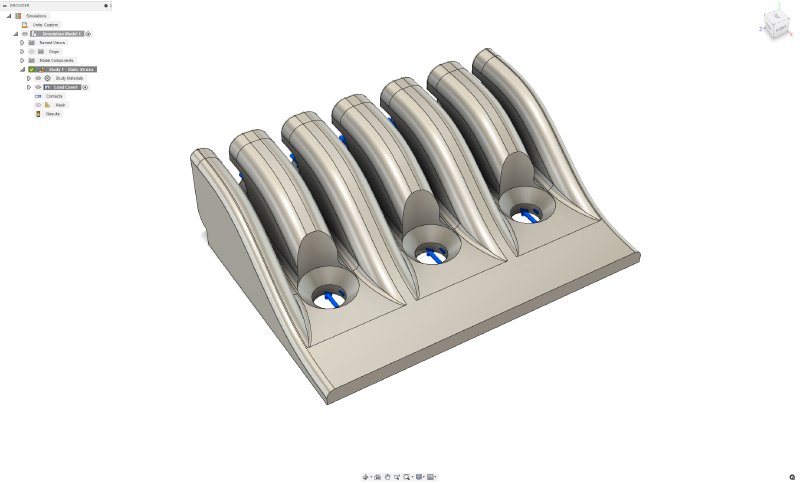
Running these changes through the stress simulator in Fusion 360 showed everything was still well within tolerance, so the small amount of material I removed hasn’t caused any issues on that front. Hopefully these clearance changes will be enough: it was so close with that last print, and I suspect I could get away with that design version, but I think these changes will make it less hassle to install.
In an ideal world I’d have done another plastic print iteration, but that’d mean I’d definitely not have a strung up guitar for Makefest, and so I’ve taken a small gamble and ordered the aluminium print from Shapeways (along with some other bits, more on which below). In theory these bits should turn up with a week or so to spare for Makefest, so fingers crossed!
The guitar formally known as corvette
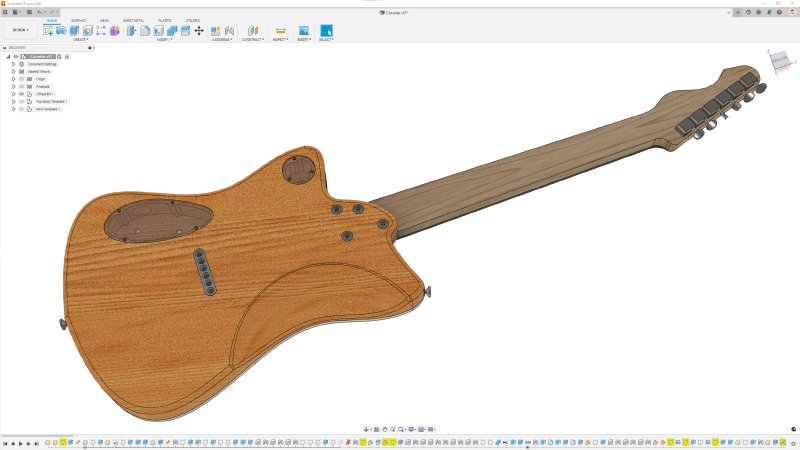
Last week I detailed the unfortunate incident with the body for my corvette build, and how in a silver lining, the changes I planned to the body shape actually looked better to my eyes, so it was a sort of happy accident from that perspective. When I wrote last week’s notes the design looked like this:

Since then I’ve spent a good chunk of time in Fusion 360 updating the design to fill in a bunch of details around other changes I had in mind to get to a final model, such that I can laser-cut some templates for the new shape. I thought I might get away without new templates, but the old neck-pocket template for the original Corvette build has gone missing, and if I’m going to have to cut a new template I might as well update it based on things I learned from the original build.
Thus, after much tweaking, this is where the guitar now sits, and I’m really quite pleased with how it’s going:
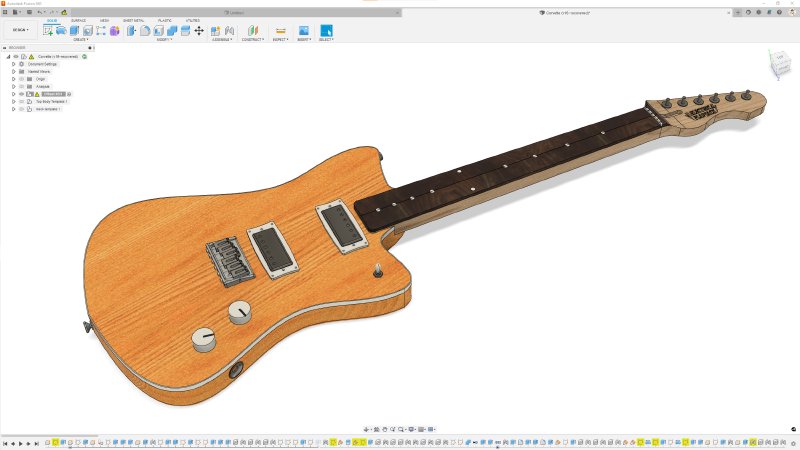
So what’s changed since last week, other than the colour? Let me take you through some of the highlights.
One important, but subtle in the picture, change is the bridge. The Corvette build had a custom hardtail bridge that I milled out of purpleheart, which is a very tough wood that matched the fretboard and the pickup rings:
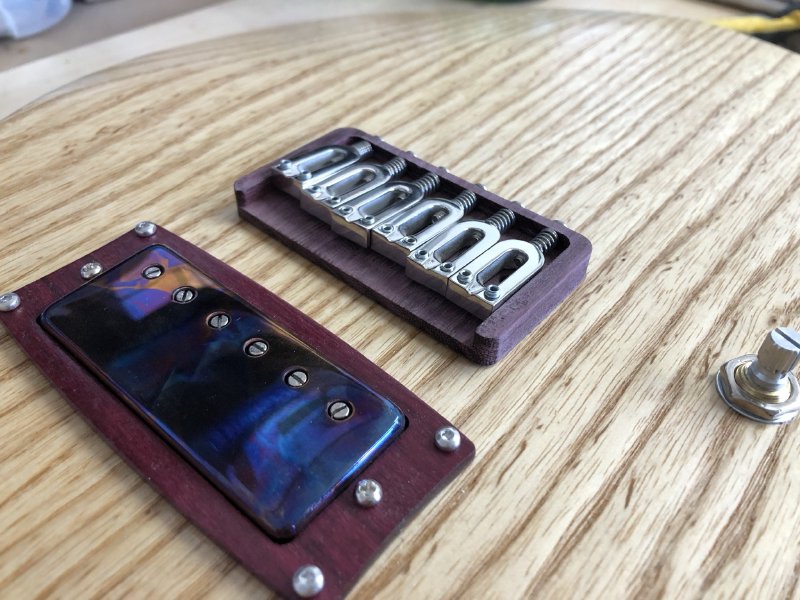
However, for this build whilst I still wanted to keep that custom bridge feature, I didn’t fancy milling it out of wood again.
In a similar fashion to how I documented all the subtle design decisions that go into a jig last week, making my own bridge plate in for the Corvette taught me a lot about what goes into such a seamingly simple part, and there were definitely things I’d want to improve upon for the kinds of building techniques I use.
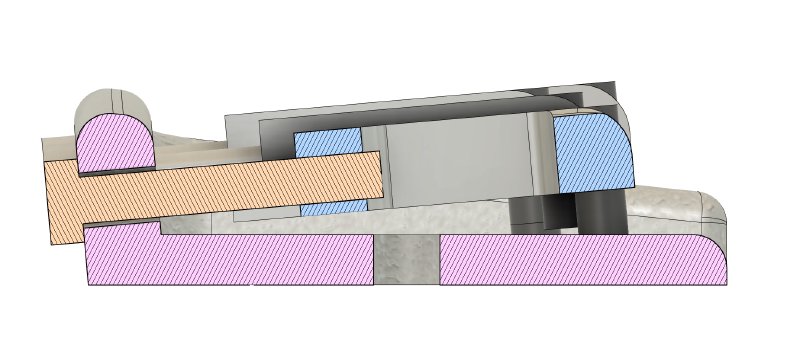
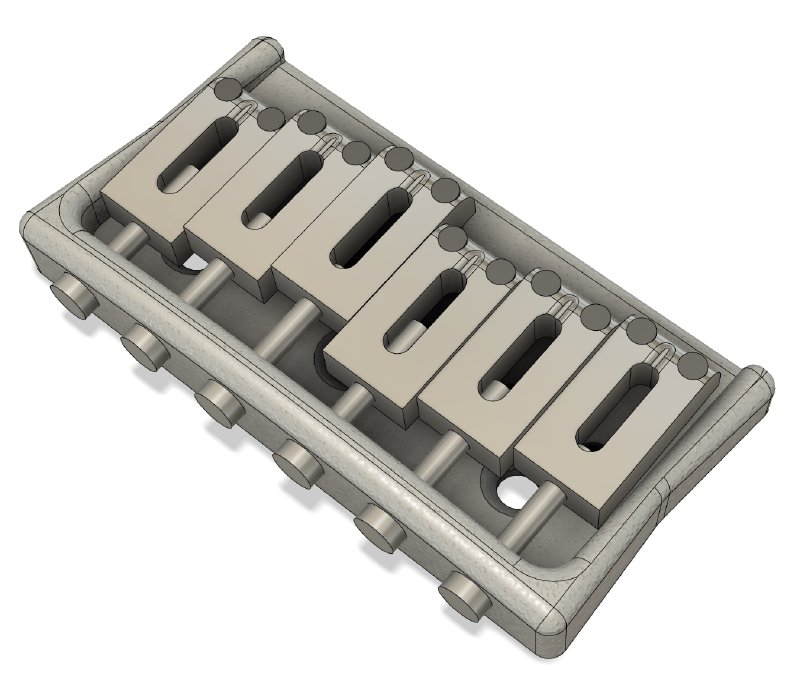
For instance, most hardtail bridges have sides that are perpendicular to the face of the guitar, which makes sense when you consider that they are probably milled out of metal, and for my wooden version I just followed the same process effectively. However, all these perpendicular sides go against the nature of the saddles, which tend to rest at a slight angle once string up. This means that the screw-head on the back of the bridge that holds the saddle in place is only touching on the bottom edge. But if I’m 3D printing my part I can fix that! I can rake the sides, so that the back wall is at a more neutral angle with respect to the saddles.
Similarly, hardtail bridges tend to have a straight row of holes for the saddles, despite the fact that the saddles will be adjusted to follow the arc of the fretboard radius. Makes sense when when you are milling thing again, and when you part has to suit all fretboards out there, regardless of radius. But if I’m 3D printing it then I can just print it at the correct radius:
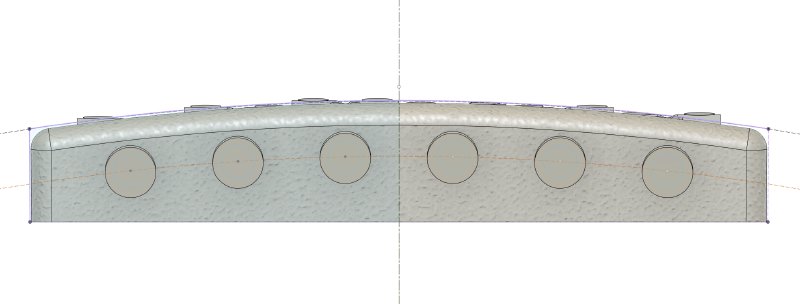
Now, it may well turn out that either one or both of these ideas is disasterous and there’s reasons other than manufacturing constraints that lead to the very flat shape of modern hardtail bridges, but I think it’s worth asking why things are the way they are if you’re going to be building your own version.
So I bought a set of Gotoh S21 saddles, measured them up, and now I have my own hardtail bridge desgin ready to go:
I’ve sent this design off to Shapeways (along with the headstock part above) to get a plastic test print made, and if that works then I’ll also get that printed in aluminium eventually. Price wise, once you include the price of the saddles, an aluminium print of this will cost similar to a high end hardtail bridge piece. So not cheap, but also not out of bounds for a custom guitar.
The other part I ordered for the new guitar is a string ferrule block, which you can see on the back of the guitar here:
I was tempted to 3D print one of these also, but I need to reign the costs in at some point, and I found a nice block made by Grainger Guitars in the UK that was a good price, certainly way better than I’d expect to pay for anything I 3D printed in metal.
In the past I’ve used individual string ferrules, but never again: the holes for the ferrules always need some level of manual reaming which takes an age, and is probably one of the least fun bits of any build. With a block like this I can route out the cavity based on a template, which hopefully will save me a bunch of effort and my sanity.
Whilst we’re looking at the back of the guitar, you can also see I’ve added support pillars to to where the rear access covers screw in. On the Corvette build it was quite tight getting the mounting screws to sit in the lip alone, so in this iteration I’ve given them a bit more material to sit in. It’s nice being able to iterate designs like this to make constant improvements.
It is tempting to do something funky like use magnets to clip on the covers, as who doesn’t like magnets? But it should be very rare that access is actually required to these cavities, and so I do think a screw is a better solution, even if it is a more mundane one. But magnets are still cool :)
Enough CAD now, back to the workshop. I didn’t get to do a huge amount, but I did get the neck moved forward. First it was cutting the truss-rod channel for the neck:
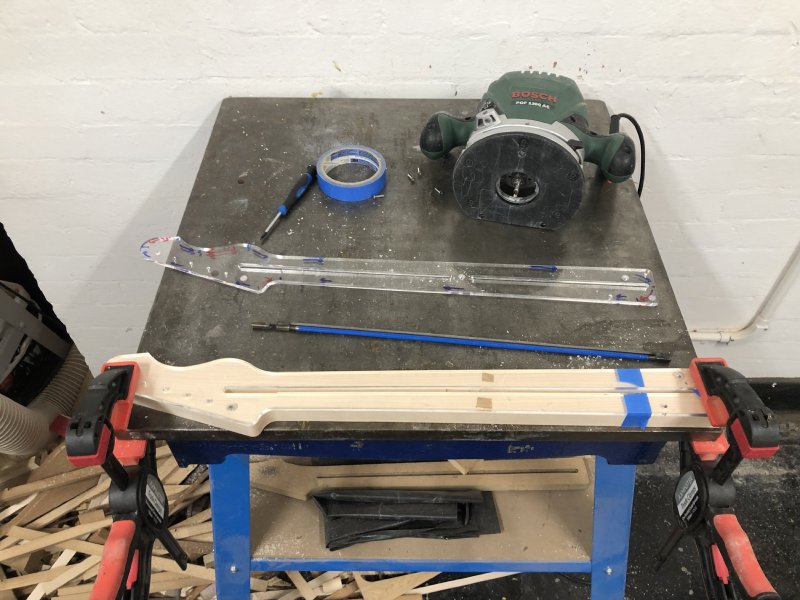
I actually needed to use both my new and old template to get this done, as I used the old template to let me route the section in the middle where I’d added the reinfocement on the new design. Good thing I’d not thrown it away :) I keep putting off making a proper jig for routing the truss-rod channel, which would be better than using the template here. I suspect if I’m going to do more of these offsets then I’ll invest in making such a jig again - I did one for 25.5" necks a long time ago after I made my initial few guitars at that scale length, but then all my clients wanted 24" necks, so it never got used.
Anyway, the truss-rod channel was still the least hassle I’ve had doing this thanks to the less flexible primary template I talked about last week.
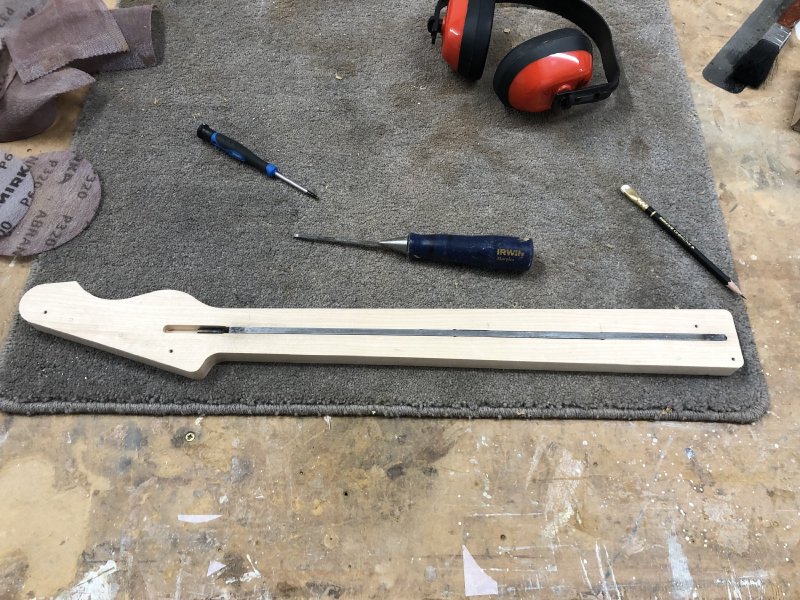
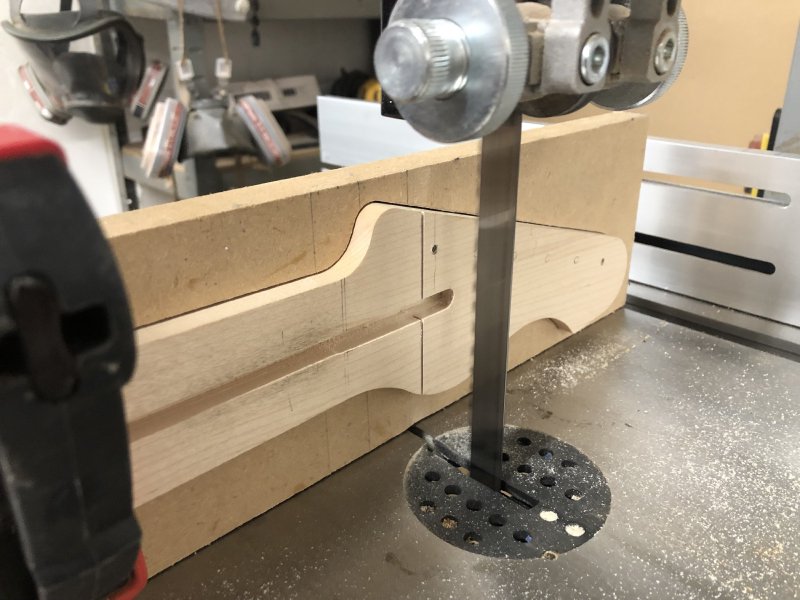
Then it was onto the bandsaw to cut the headstock face to the right depth. Because of our golden rule (measure, measure, cut), and because I’d not done anything precise on the bandsaw for a while, I spent a bit of time making sure everything was true before I did the headstock. I got both the table true and then the fence true, sacrificing many bits of scrap until my cuts came out even both along their length and both on top and bottom. All this makes this bit slightly less terrifying… Cut number one:
and then cut number two:
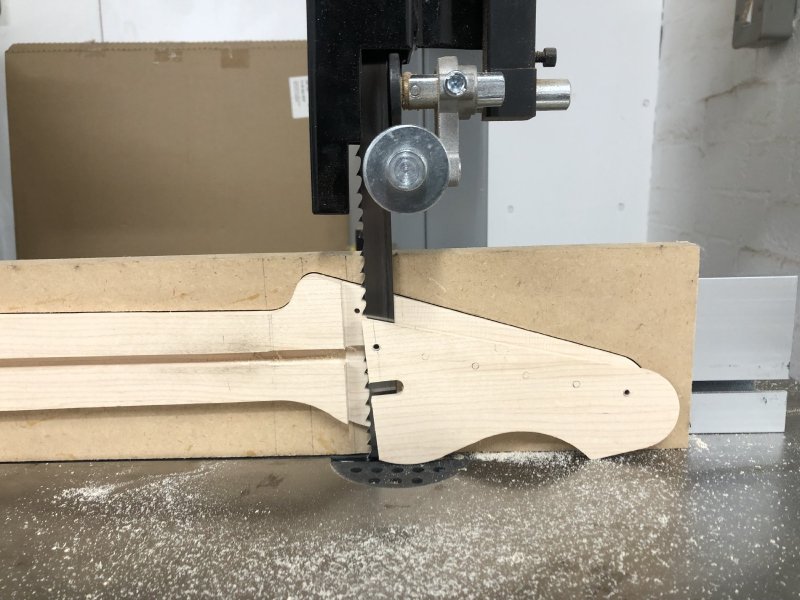
Nice and clean and, most importantly, true. I give thanks once more to Graeme Durant, who taught me the magic of a well set-up bandsaw back in the Makespace days, and I hope is proud that what he taught me has stuck and is still being put into practice.
Now that neck is ready for a fretboard to be glued on. I had a look in my stock and it seems I only have a couple of rosewood blanks in stock, so that’s what it’ll be :)
And that’s it for another week. A productive week, but also one where I start to feel the pressure mount slightly as I have to have something together for Liverpool Makefest. I think, to be fair, I’ll be able to pull something together regardless, but the more finished I can get one of these guitar builds, particularly the Älgen build, the happier I’ll be about being able to construct a narrative for my stand around building guitars using hybrid manfucturing. Fingers crossed!