A week in the shop
Published 28 May 2018
This last week has been a productive week, with lots to talk about, so let’s get to it.
As mentioned last week, given the issues I’ve had with the CNC router I have access to, to be able to make progress again on the commissions I have I’ve decided to switch to using templates to get the rough shaping done. Last week I designed the templates in Fusion, so I started this week by cutting them out:
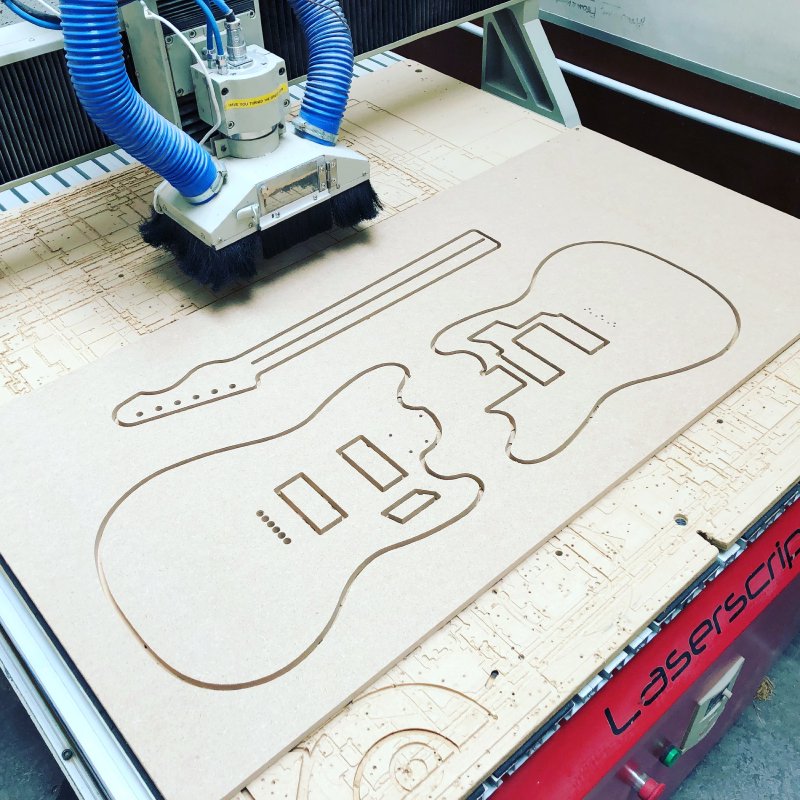
Obviously this time the CNC router played ball, but I still don’t trust it with anything critical (or at least cheap to replace like this MDF). Now that I have the templates the next stages are to make a new body blank for guitar #5, and to practice making the string holes and bridge mounts via a template. Clearly it’s very feasible to do this, as this is how lots of luthiers without access to CNC make guitars, but I need to just practice using the pillar drill with a template to line things up precisely.
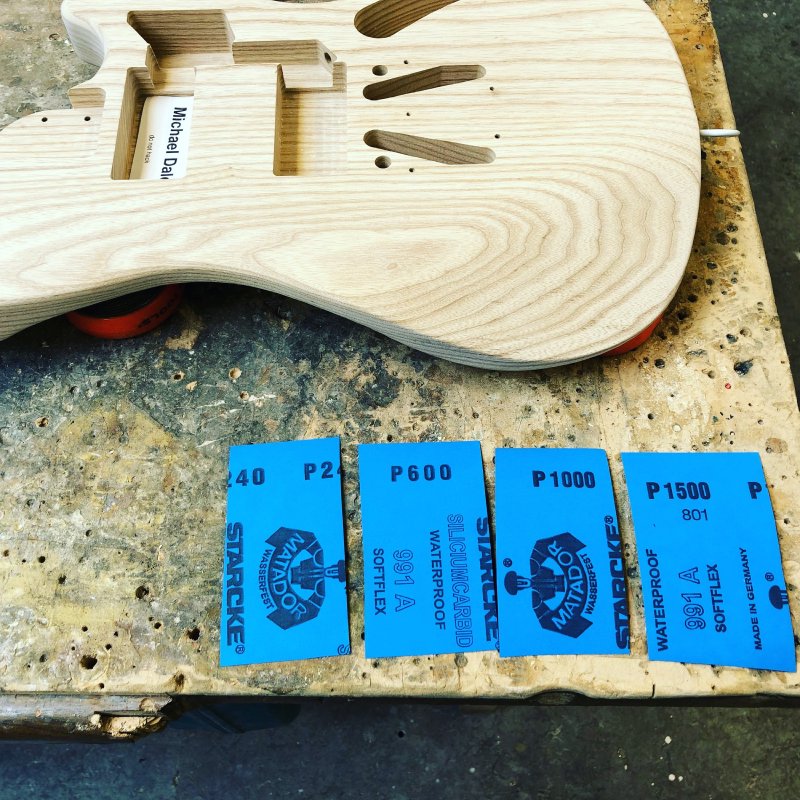
I made progress on the demo offset I’ve been making. I’ve set myself the goal of getting this done before Liverpool Makefest (where I’ll be explaining to people how guitars are made), so I can have something non-t style to show. I spent a lot of time with sand paper getting the body just right before starting to apply the stain. You can’t rush this stage if you’re going to stain/oil finish on the wood, as any scratches you miss will show up clearly in the stain, even if you couldn’t spot them before. So it’s a lot of starting low, and working up through the grits, from 120ish up to 2000. It’s really amazing how the texture of the wood totally transforms as you do this.
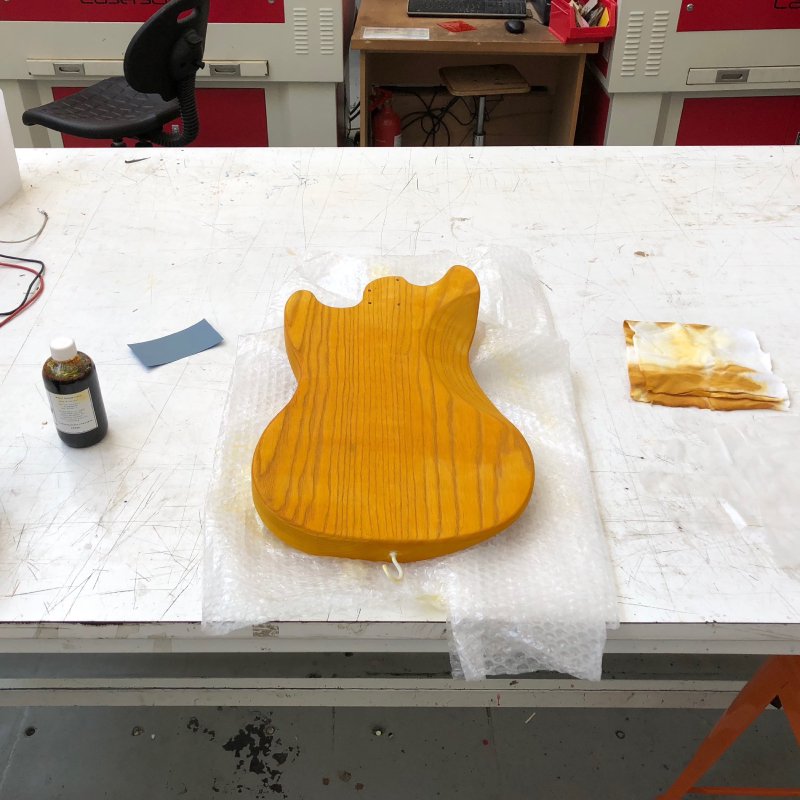
All sanded down I went with a yellow stain for the demo offset. This guitar will have a traditional mustang style vibrato bridge and single coil pickups, and I think a nice bright and fun colour will go with what should be a bright and fun guitar. Currently it’s four coats in, of what is normally six coats of stain, which will be followed by another six coats of oil. This is the slow stage of a guitar build, as you can only do at best two coats a day really, and partly why I like to have multiple builds on the go.
I also mostly finished the neck, which was roughly done, but just needed the polish to get it ready to oil when I start oiling the body. There was a lot of sanding here too, and I also needed to put the logo onto the headstock. In the past I made the laser etched logo in a slightly adhoc fashion: I exported the Electric Flapjack logo in DXF from Adobe Illustrator, and after many goes at getting the right export settings would be able to import it into the laser cutter software we have at Makespace. Then I’d guess a size based on measuring the space on the headstock, and after doing some trial runs on off cuts from the neck, line up things by hand on the laser cutter bed, and then hope I got it right :)
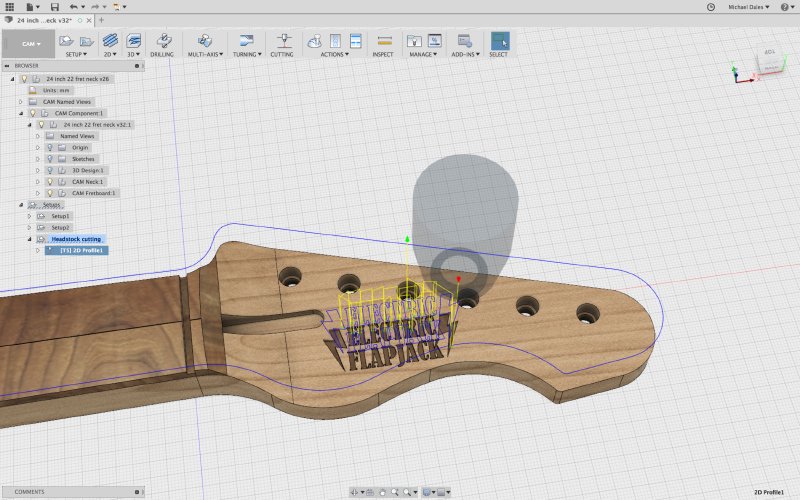
This time however I was able to improve on things, thanks to moving the whole task into Fusion 360 and having the logo as part of my CAD design. First I exported the logo from Illustrator as SVG and importing that into a sketch in Fusion 360. There I could size and position it in Fusion before making it part of my neck design:
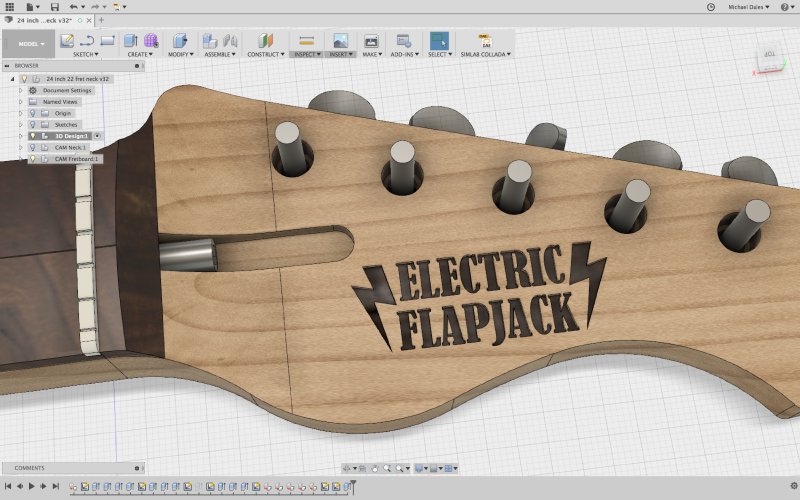
Now there’s no guessing involved: I can see exactly how the the logo is going to look, and adjust the position, angle, and size all I want until I’m happy in Fusion. That done, I then generated laser cutter toolpaths (as explained in this post) for both the logo and the headstock itself:
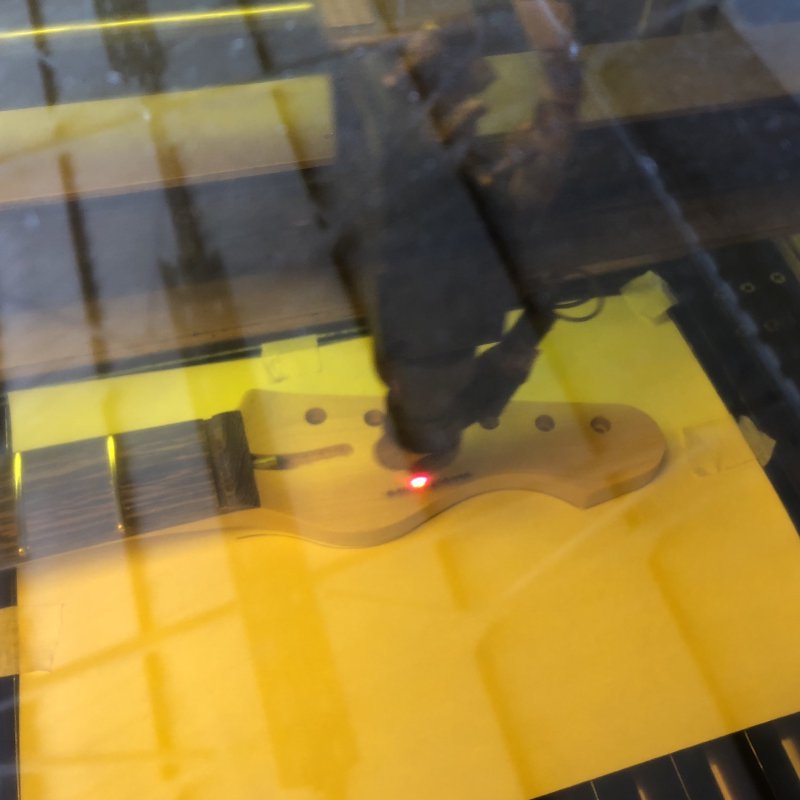
Once I imported these into the laser cutter software, I taped some paper to the bed of the laser cutter and scored the outline of the headstock into the paper and used that to position the neck on the cutter bed before doing the etching itself:
As part of the etching you end up with a sticky residue on the surface of the headstock where the maple has burnt, and but with a little bit of sanding that all clears up nicely, and you have the finished product:
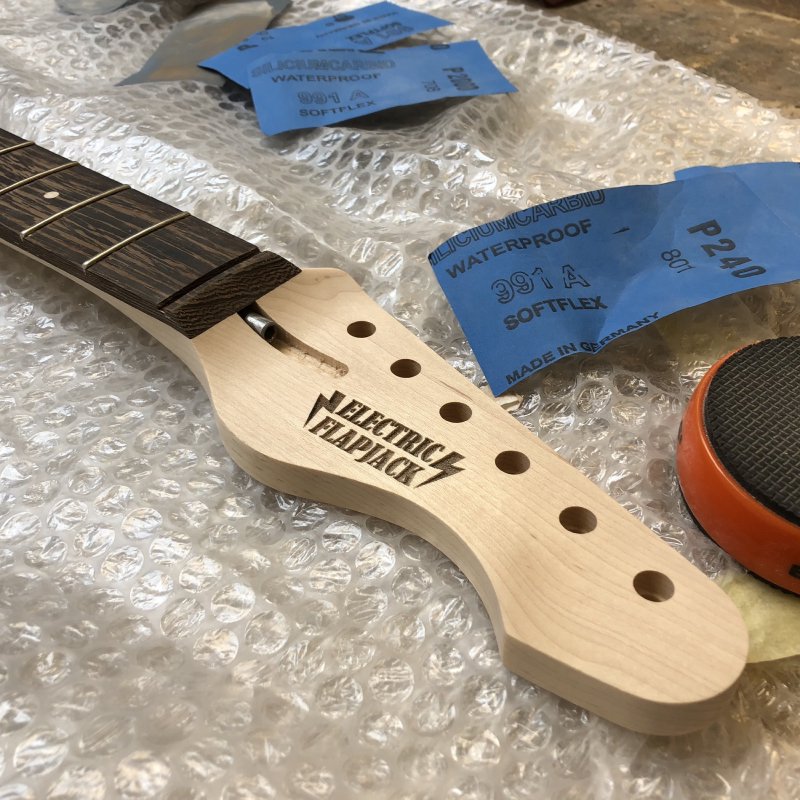
This done I’m almost ready to oil the neck, I just need to tweak the frets a little again as I sanded down the sides of the neck a little and they need refinishing.
Finally, I also spent some time over the weekend doing setups on the guitars #1 and #4, both of which I still play regularly (indeed, I don’t play anything else). Both had seen quite a bit of playing since I last gave them a service, and they were in need of a little TLC. The rosewood fretboard on #1 was starting to dry out a little, so I removed the strings, gave it a clean with some fretboard cleaning fluid I had to remove the gunk that builds up from lots of sweaty rehearsal room sessions, and applied some fretboard oil. Between that and a fresh set of Elixir Polyweb stings it plays like new:
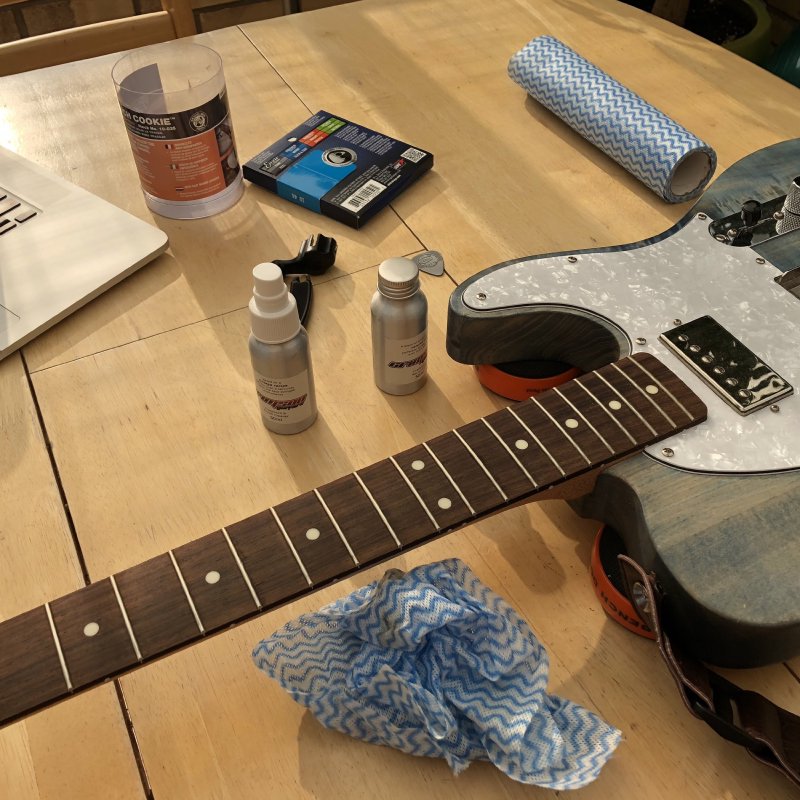
The neck of #4 being a sealed neck hadn’t dried out but needed a clean and a bit of a general check over as this was its first service. I tightened up all the pots again, adjusted the pickup heights a little, and also gave it a fresh set of the same strings.
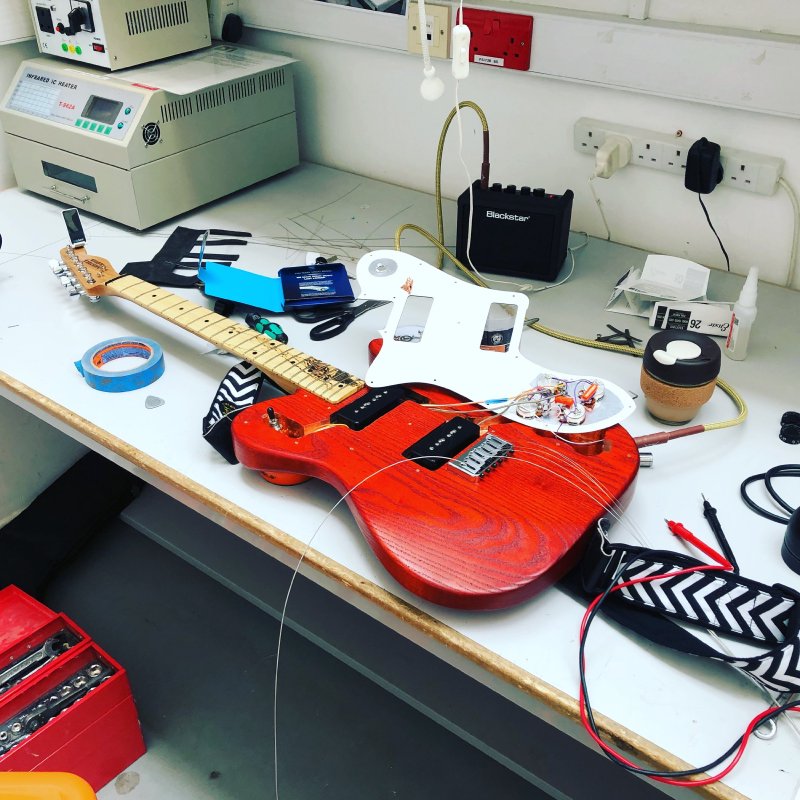
Whilst adjusting the the pots I accidentally rotated one so that it shorted against the copper shielding in the body, causing the bridge pickup to drop out. It took me an hour to figure out the cause, but was easy to fix (and apply some masking tape over the copper shielding to prevent it happening again in future). Tele style guitars have really compact control compartments, something I’ll avoid on my own designs!