A Week in the Shop
26 Apr 2024
Thanks to everyone who got in touch about the piece about me and Älgen on SVT - I really appreciate it!
A brief week in the shop, but I wanted to get back into the cadence of doing posts more regularly.
Älgen
Last week I talked about how I replaced the 3D-printed bridge plate on Älgen for one that had a fixed intonation, as the previous adjustable one was too spindly to let me make a strong carbon-fibre layer in the print. Having had that print on for a couple of weeks now, it seems to be holding steady, which is great.
Now that I have some confidence that I won’t be swapping it out any time soon, I did a full setup again on the guitar:
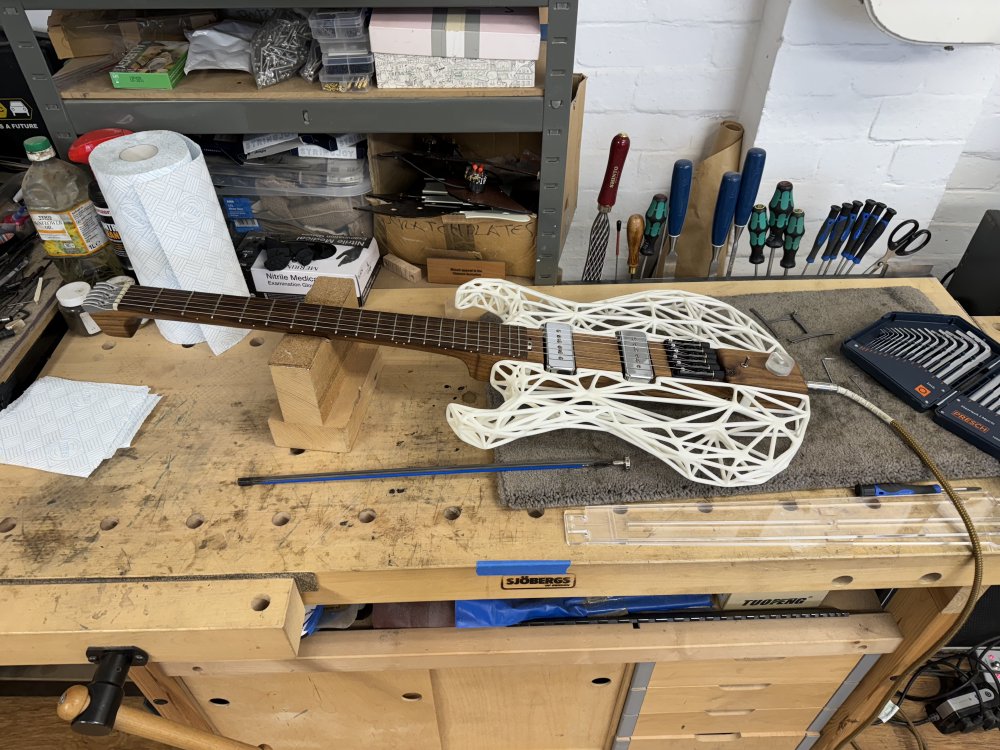
There was a bit of buzz with the new bridge, so I guess the curving of the old one did give it slight height boost on the saddles, and I had to raise them to compensate. One thing doing all the saddle height adjustments made me realise was that I should have just put the fretboard radius into the part itself, to let me just set them all to the same height! Next time I swap it over I’ll give that a go :)
OG Guitar
I’m trying to clean out my backlog of things in the workshop, and so I thought I’d get the electronics replaced on the OG family guitar I learned to play on which has been sitting in the workshop for a while.
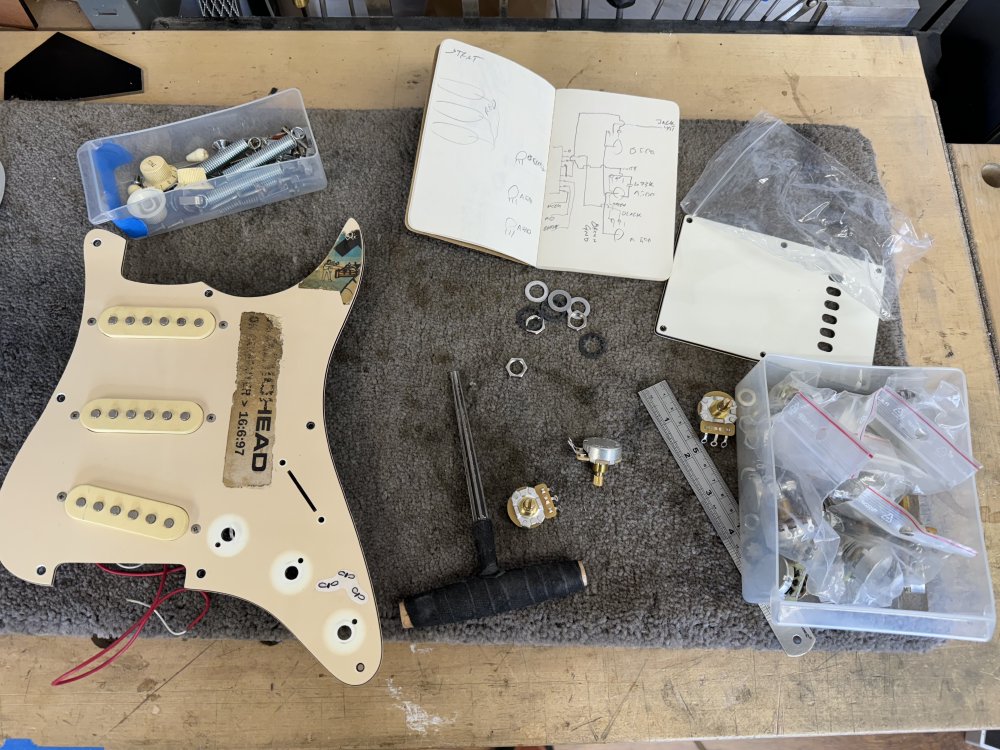
Having been in the family for around thirty years at this point, and been the first guitar for many people, it was long overdue a service: all the pots were crackly and/or stuck and the pickup selector switch was bent and only worked in certain positions. I have in the past given it a good clean already too, as it was a bit manky also.
The pickups, as far as I could tell on my brief play on it originally, sound pretty good, so I left those as is, but I got some good quality CTS pots, a 5-way switch and a good quality jack for the replacement parts, so hopefully it’ll last a long time once I put it back into the family. The cost was nudging £40 once postage is in, but if it lasts another thirty years then it’s month well spent.
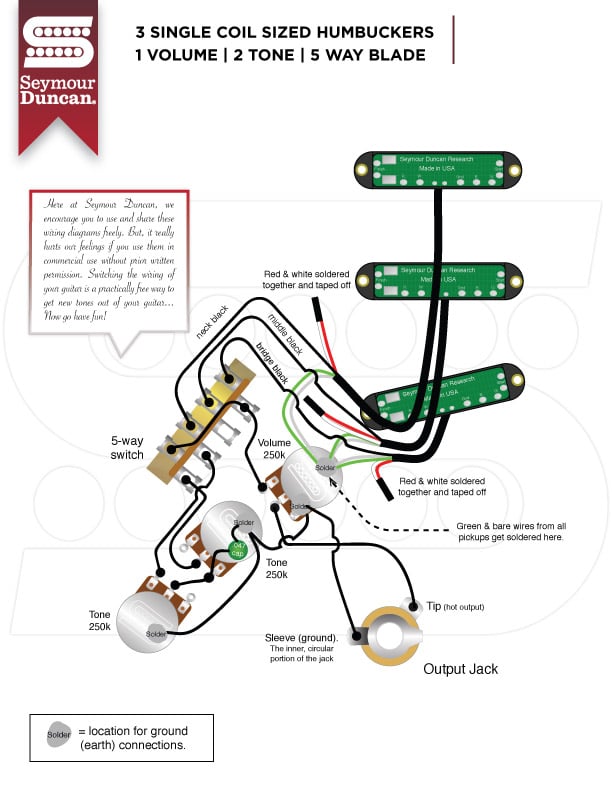
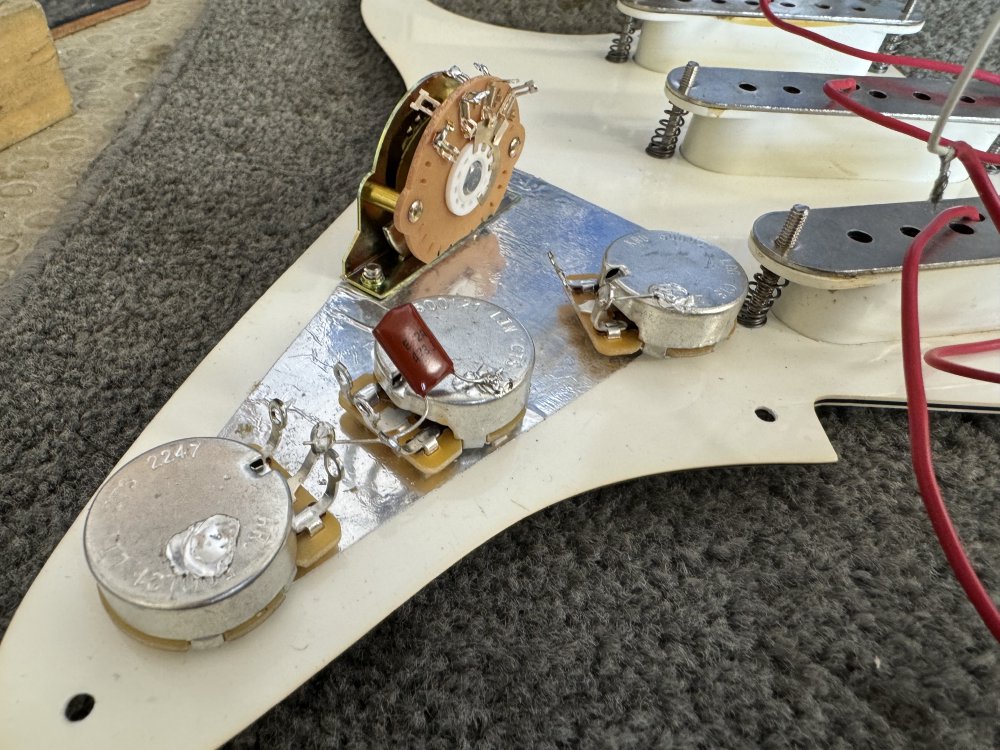
After the crazy wiring I did with Deflinen a few weeks back re-wiring the strat was pretty straight forward thankfully. I kept notes on how the wiring went before, but as ever also kept the wiring diagram from Seymour Duncan to hand. Usually for single coil pickups you’d expect to see 250k pots being used, but this guitar had 500k pots in it when I opened it up, so I switched them for the same value, given I liked how it sounded before.
The thing I wasn’t expecting was that the original pots were super tiny, so I had to ream out the holes on the pickguard to fit standard size pots!
I have to confess my first instinct was to use a drill for this, but workshop-mate Matt guided me to using the reamer and I’m glad he did, as it was both easier and more accurate this way, and the new pots fit perfectly afterwards thanks to Matt having taped the reamer to have just the right radius on it for this use case!
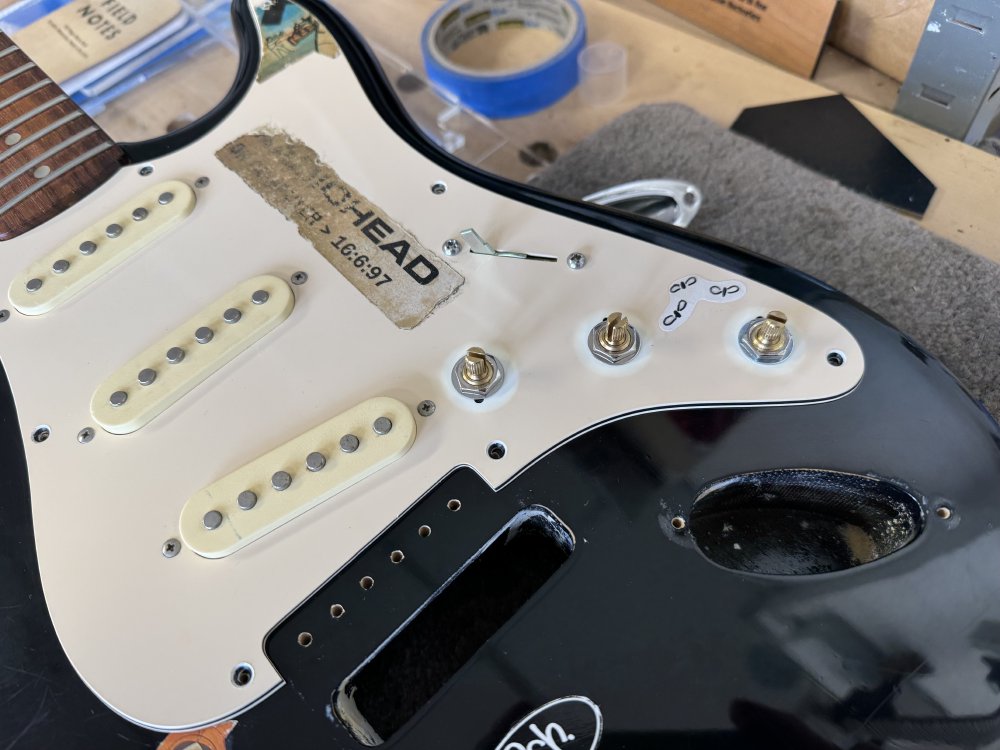
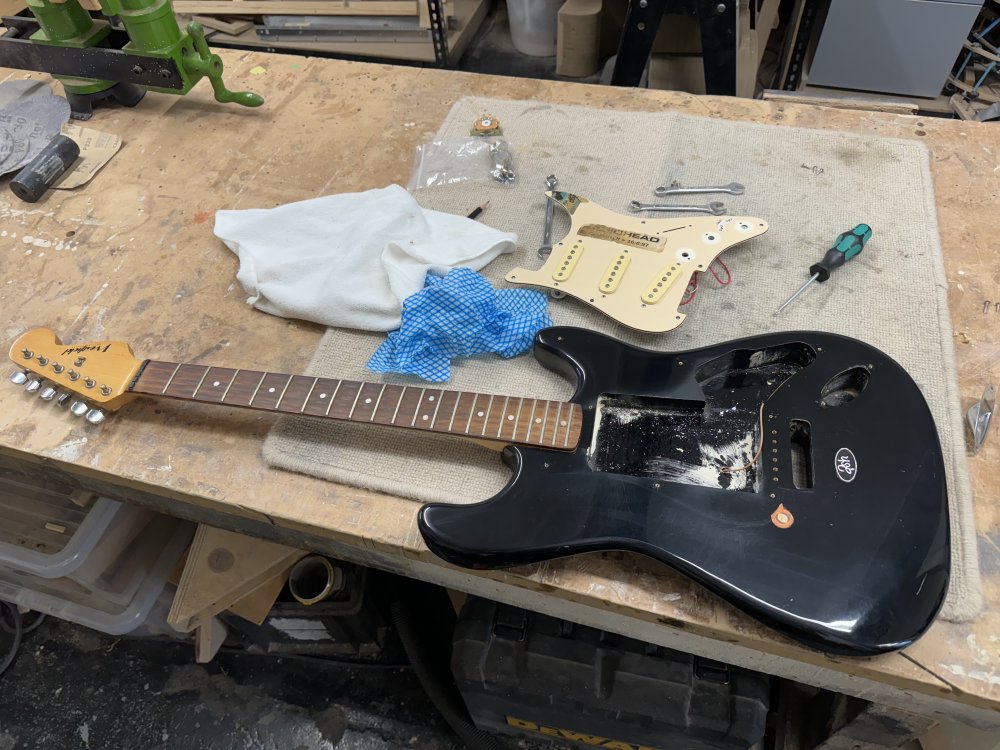
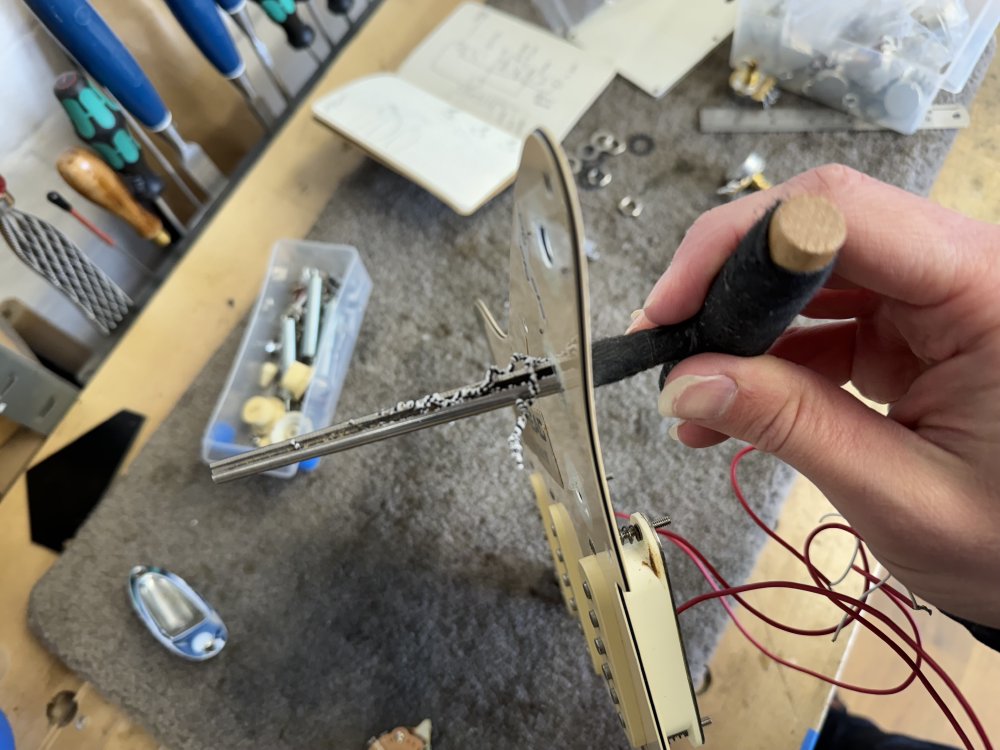
The old switch was one of the easy-to-solder switches with the “just wire pickups here, just wire pots here” layout, and I swapped it with a classic 5-way selector switch, as I prefer them personally (not for any real reason I have to confess). The one thing I didn’t think about is that the old-style switches are a bit taller, and you might notice that I had to bend the solder lugs on the switch flat to get it to fit. Thankfully that was sufficient without me having to remove wood from the guitar (which I’m not adverse to, just it’d be yet another job).
Once in place it was over to the soldering bench, getting all the fixed parts in place before I did the wiring:
And then in go the fiddly wires:
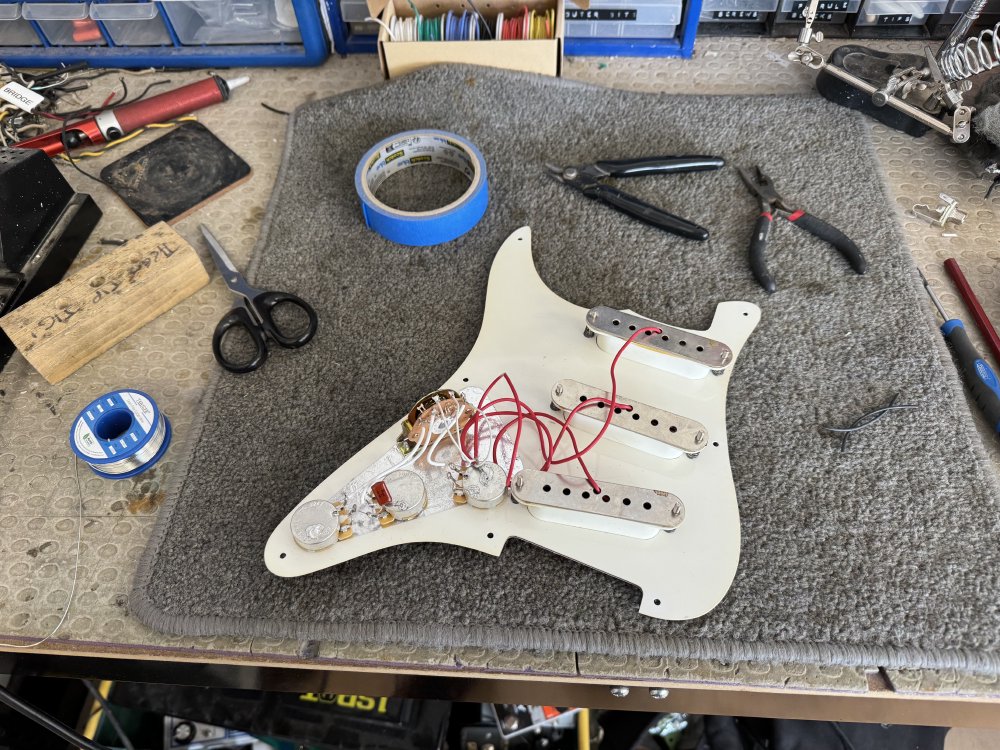
With the electronics done I got the pickguard back together and put back in the guitar, and now I have two more fiddly jobs that remain. Firstly, there is a chip in the fretboard, which isn’t too hard to solve: I have some rosewood offcuts I can turn into dust and mix with woodglue to make a filler. The second one worries me more: the old nut is chipped, but is glued tight in place. It seems to be plastic, so I can’t heat it to weaken the glue, so I suspect I’ll need to drill most of it out and then clean up with a chisel, which I’m not looking forward to.
Still, you can see the state of the guitar in this little video I made:
I always feel a bit silly adding these, but people have given me positive feedback on them, so I guess I’ll keep trying to do them, at least when there’s no one else in the workshop to see me doing it 😅