A week in the shop
Published 29 May 2022
Tags: älgen, cnc routing, delfinen
Another hectic week as I push forward the two guitar builds I’ve got going, and a lot of time spent with hand routers again this week, as is par for the course at this early roughing-out part of the build. However, this does seem to cause people to ask me the same, very valid, question often: why don’t I use a CNC-router to do this stage of the guitars?
I thought I’d write down some notes on why it is I don’t, given I get asked this a lot. If you just want to see pretty wood-working in action pictures, then feel free to skip this part :)
When I started out, I did use the CNC-router quite a bit: the first few guitars I made where roughed out entirely on the CNC-router at Makespace. Looking back through my week-in-the-shop posts from 2017 I can see I was starting to flex my CNC-router muscles off the back of the successor those first few builds, going beyond just using it as a 2D cutting machine and starting to machine things like the headstock transition and body-comfort carves, more complex machine operations where you have transitions in all three dimensions at once.
Unfortunately, as I documented at the time (random example), that CNC-router became problematic, with it occasionally ruining what I was working on for client guitars, which started to get expensive as I lost both nice wood and good router bits. So I switched to using other tools to get the shapes I wanted: hand-routers, a well tuned bandsaw, and even hand-planes - a transition certainly helped by good mentorship being available at the shared workspace I was in. I’d make templates to guide me through some of these stages, and for those I’d use the CNC-router, as a ruined jig is less heart-wrenching than a ruined guitar part. So it was a practical reason I gave up CNC-routing at the time, but it taught me a lot more woodwork in the process, and I found that with a good tail wind I can hand-shape a body to the same rough stage as the CNC-router at Makespace did in roughly the same time.
Now I’m in a workshop where there are a couple of CNC-routers that I could potentially use - both my workshop makes have one - but I’m loathed to do so as they both rely on these machines day-in and day-out for their work, and I’ve had enough fights with CNC-routers to know that they take time to get to know and understand the quirks of, and I don’t want to do that on someone else’s machine that they depend on for their livelihood. If I had my own, or there was a community one that I could, then I’d happily do so. But I’m still at the stage where I’m figuring out my build process, and so I think the hands-on process is useful for me, despite all the issues I hit this last month or so with doing things with jigs and a hand-router.
But that’s not to say I don’t see the advantages and draws of CNC-routing: it’s an excellent tool for making something repeatably and (usually) reliably, and I think there’s a lot of fun to be had in using the process for more than an automation of the manual stages that you’d do otherwise. For example, Frank Brothers guitars really do push the art of CNC-routing for custom guitar building. Alas, they usually post videos as Instagram stories, which vanish after 24 hours, so I can’t find any examples, but they really are inspirational in this regard. For example, they will finish a guitar body - that includes paint, varinsh, the works - before putting it back on the CNC router to route out the pickup cavities: it really is disconcerting to watch a pristine looking guitar have holes machined into it, but it works a charm. Another cool trick they do is putting the binding on the guitar before there is a guitar to bind! They’ll route a channel for the binding into the body blank, glue in the binding into the channel, and then when that’s dried rout out the body, which gives you the bound edge without having to do lots of taping and trimming (you can kind of see this in progress here and here - you can see the blank has an outline like the guitar, but it will eventually be cut back to where the binding is).
So there’s lots of cool stuff to be done in that space, and it’d be fun, just I don’t have access to a CNC-router where I feel I could experiment and practice to a point where I could do that sort of fun. Had the CNC-router I started out with been more reliable perhaps that’s the route I’d have gone in my push to mix modern and traditional building, but that’s not where things went.
Finally, whilst I’m just doing a small number of commissions and I can get away with it, I think my clients have appreciated the more hands on approach to building. And I personally like the idea that my guitars combine a mix of whacky cutting-edge fabrication techniques mixed in with hand-crafted at the other end of the spectrum. That doesn’t scale were suddenly I to need to build even half a dozen, but for now it’s a fun place to be.
C2
This week we’ll start with the guitar formally known as Corvette, or C2 as I’ve been calling it in my notebook; it needs a better name, so suggestions on a postcard to the usual address please. We’re starting with C2 as this is a more traditional build (at least this week’s work is) and it’s interesting to compare and contrast this with the less typical Älgen build later.
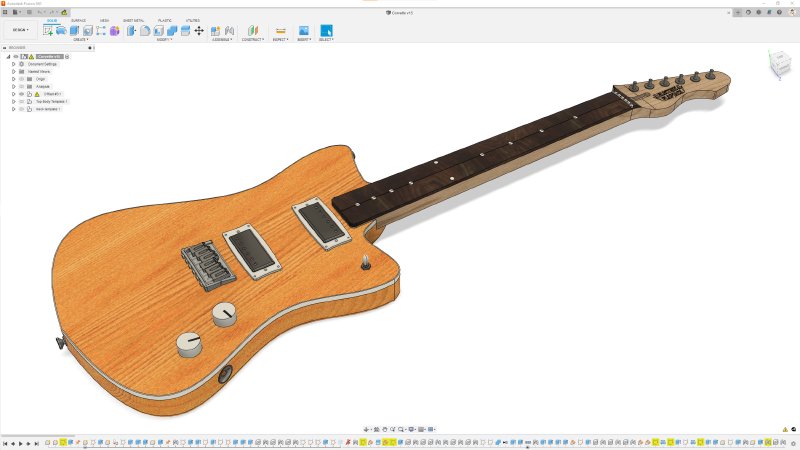
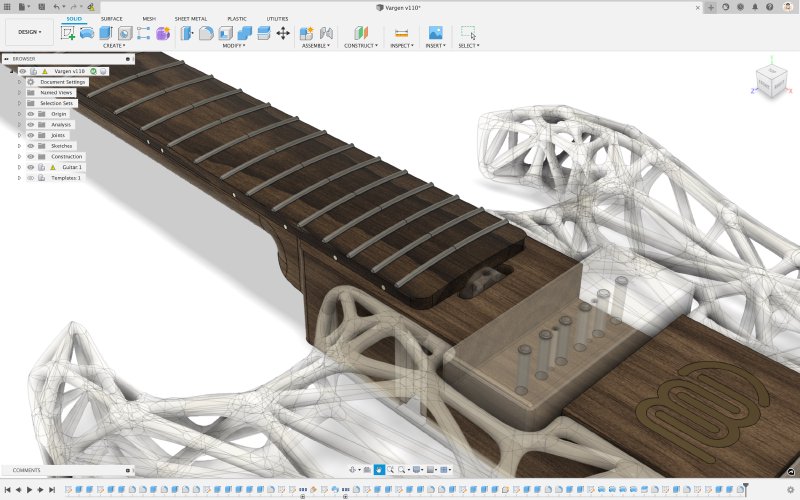
Last week, after I’d had my unfortunate mishap whilst cutting the Corvette on the table-router, and I’d gone back to Fusion 360 to update my design and in part re-imagine the guitar. This is what the virtual version now looks like:
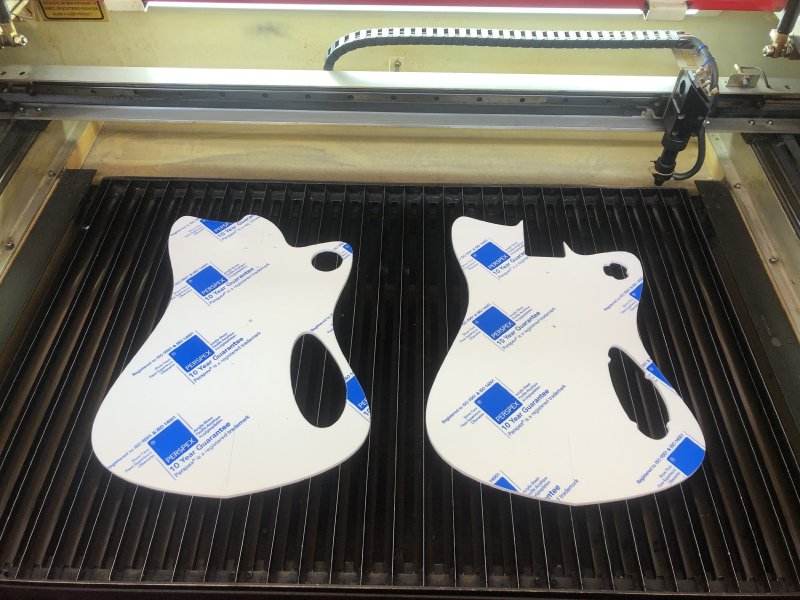
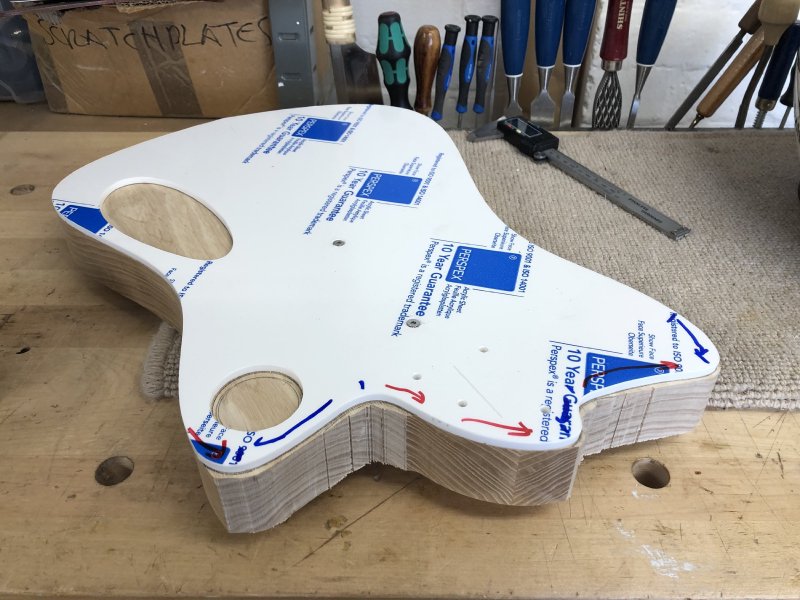
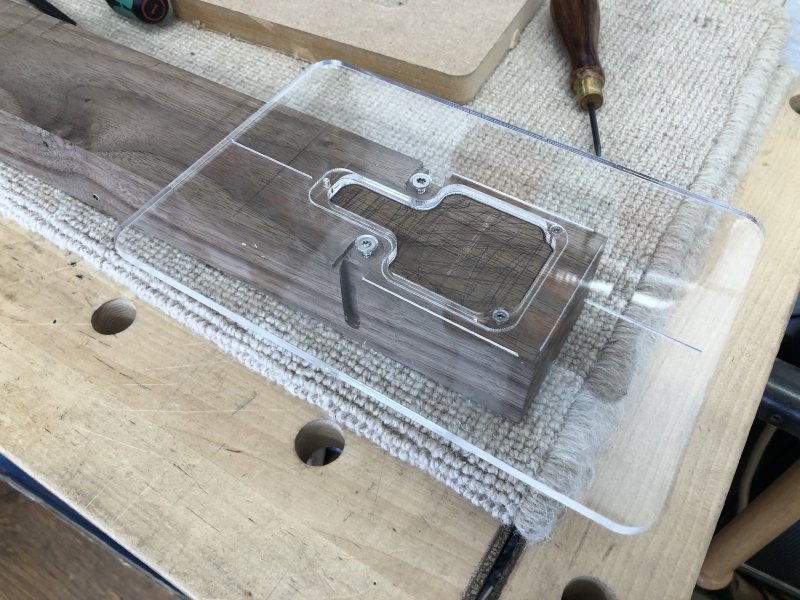
The first thing to do now that the guitar has a new look and direction was to cut some new templates, letting me cut the new shape. As ever I made my templates using 5mm acrylic on the laser-cutter, but unfortunately I couldn’t get hold of any clear acrylic quickly - I guess it’s all currently being used in shops since the pandemic hit - so I made do with opaque white:
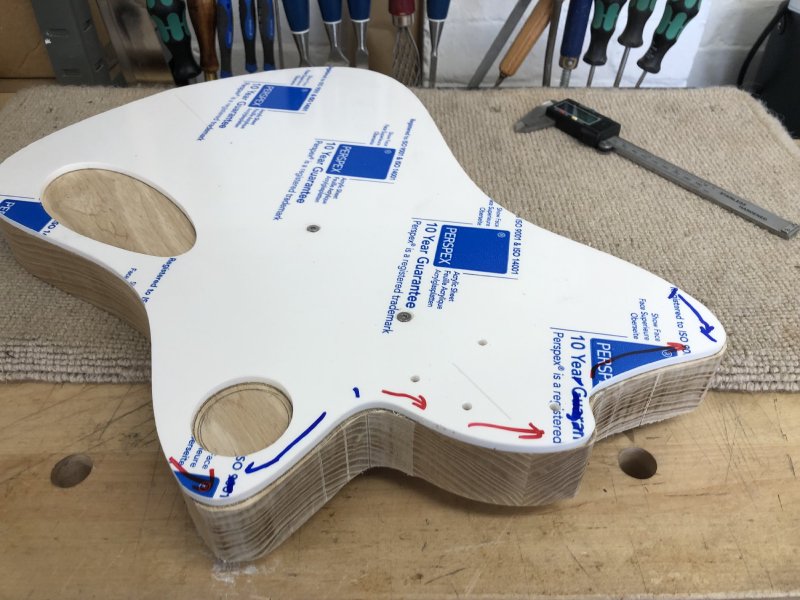
Making these new templates was a chance to fix something that went wrong with the template for the original corvette model, which you can just about see here (but is more obvious when you hold the body after routing):
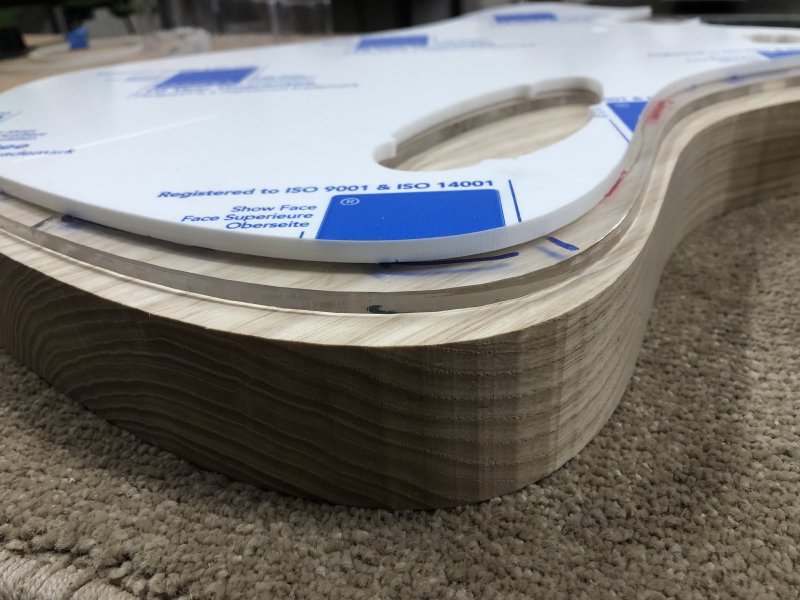
Here you can see the new template, and the old template, both on top of the C2 body, in a section where the two designs are the same. The thing you can just about make out is that the old template was slightly faceted, rather than being a continuous flowing curve, which is not what we want - the low-poly aesthetic may work for Älgen, but isn’t wanted here!
For some reason between the original CAD model and the laser cutter software the smooth curves got turned into choppy lines, which is then reflected in the wood when you cut it with the template. It’s not the end of the world, as you can take it out with a spindle-sander (which I needed to do anyway to remove machining marks from routing), but it’d be nice not to have to do that. I didn’t deliberately do anything to fix this, so I’m not sure what’s changed in any of the three tools needed to get my templates made in the couple of years since I made the original template (Fusion 360 -> Adobe Illustrator -> Laser Cut 5.3), but I’m glad it’s resolved itself.
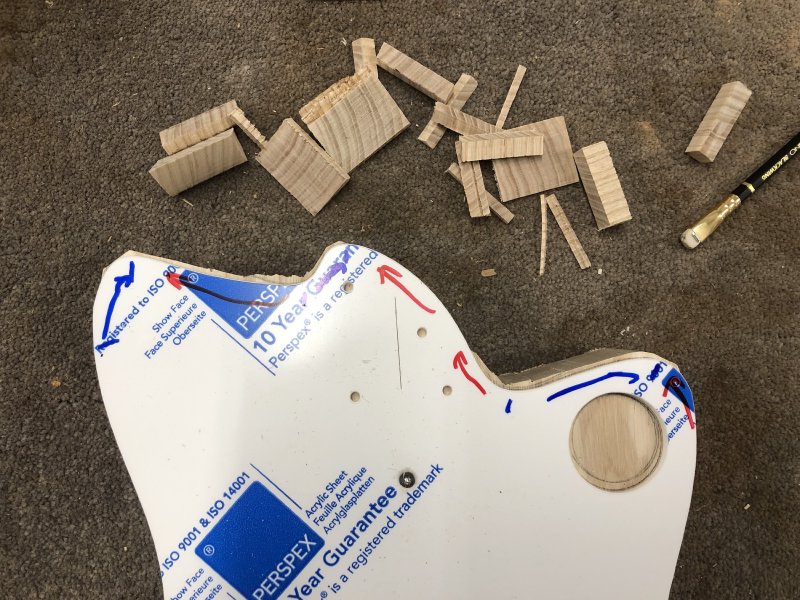
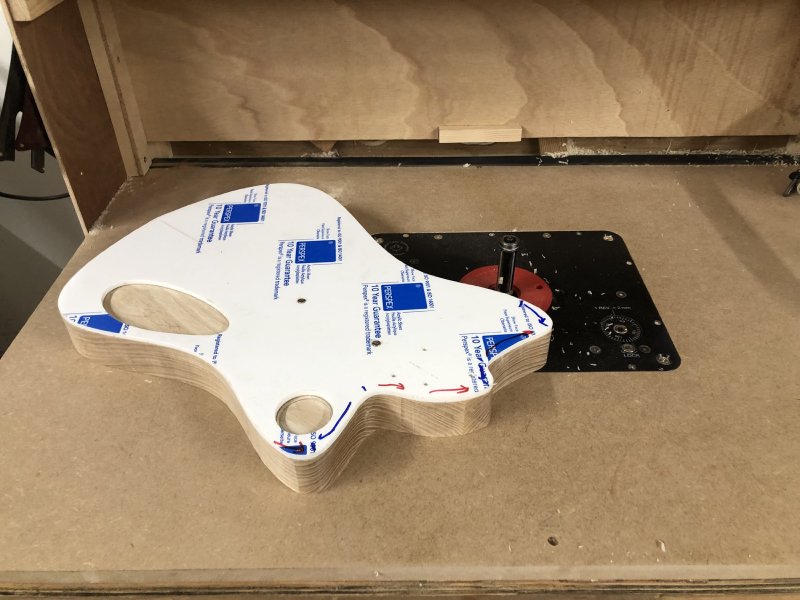
With the new template cut, the first thing to do was remove as much of the remaining material as I could before I went back to the table-router.
I was still a little concerned about the transition points either side of the neck joint, which is what caught me out last time, so after a chat with workshop-mate Matt, I followed his suggestion and used the spindle-sander to get things as close to the template as I could before returning to the table-router. We went from this:
To this:
Thankfully, after being re-introduced to the table router everything worked fine this time:
The next thing I wanted to do was cut the channel for the binding. The binding is the white plastic strip that you can see in the opening CAD picture going around the top of the body. I imagine that traditionally this will have been used to hide the joint for a top cap or veneer, but these days it is just as much a stylistic choice, and I think it suits this guitar well.
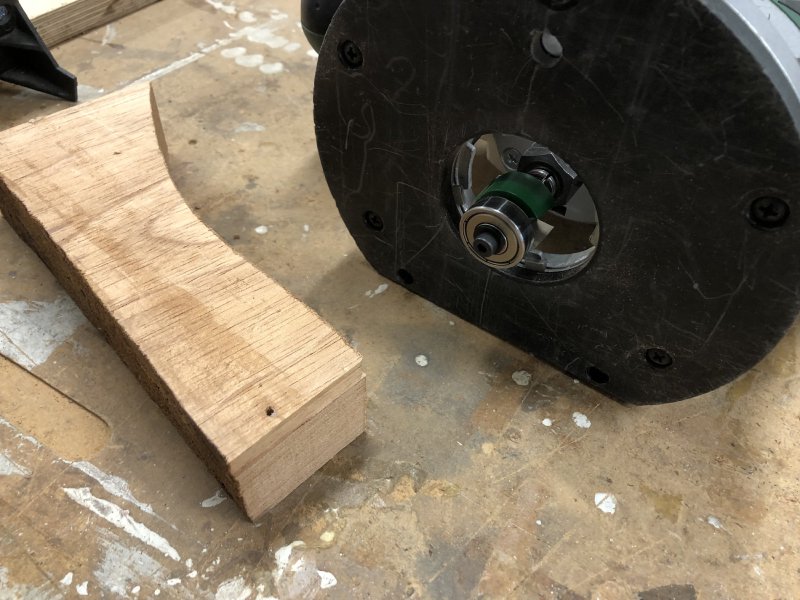
To make room for the binding you use a router with a follow-bit, like you’d do with a template, but you use one where the guide bearing is just a bit smaller than the cutting blade so as to cut a shallow channel in the body. Here is an example I did on some scrap, and you can see the bit in the background:
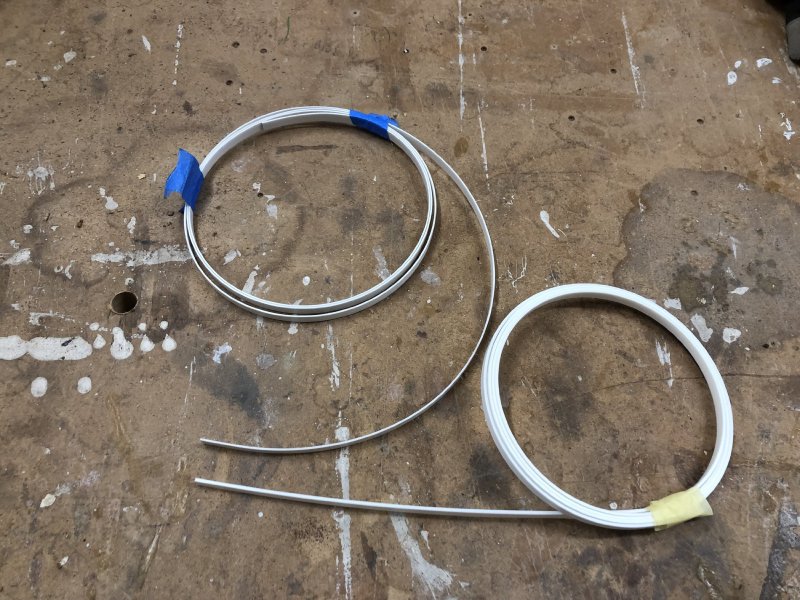
I had some binding already in stock - I bought it ages ago for a neck and never used it - and so I assumed I’d use that. However, I found that the binding I had was a bit too thin compared to the channel I can cut - the binding is 1.1mm, and the channel I cut is 1.1mm, so it’s in theory the perfect depth. However, the guidance I got from my workshop-mates is that you want a bit of overhang with the binding both above the top of the body and out to the side so you can sand it flush. Whilst I could cut a shallower channel, then the binding is getting pretty thin and any over-sanding mistakes would be very obvious. So instead I ended up ordering some slightly thicker binding material, which just turned up at the end of the week:
This works much better with my router-bit, so hopefully we can route that channel next week and get it gluing. Note I had to use the spindle sander to remove that vectorised edge first, otherwise that’d show up in my binding channel!
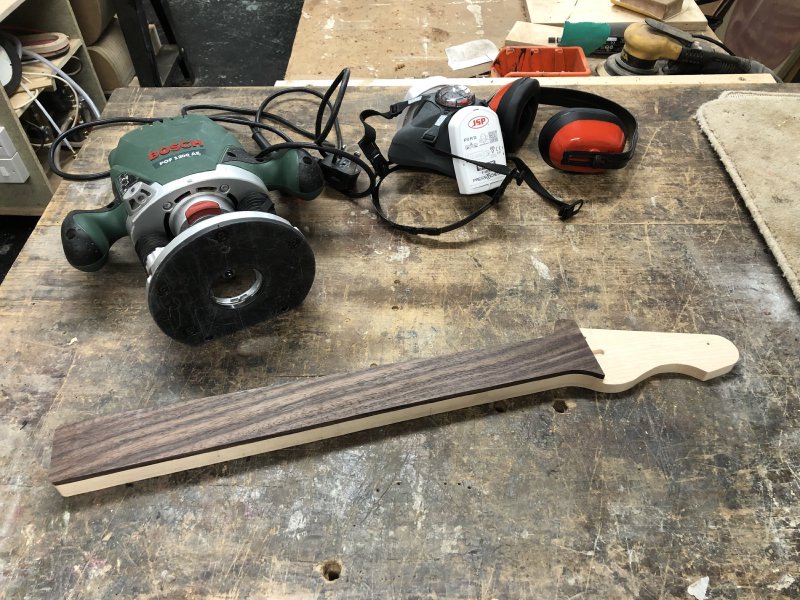
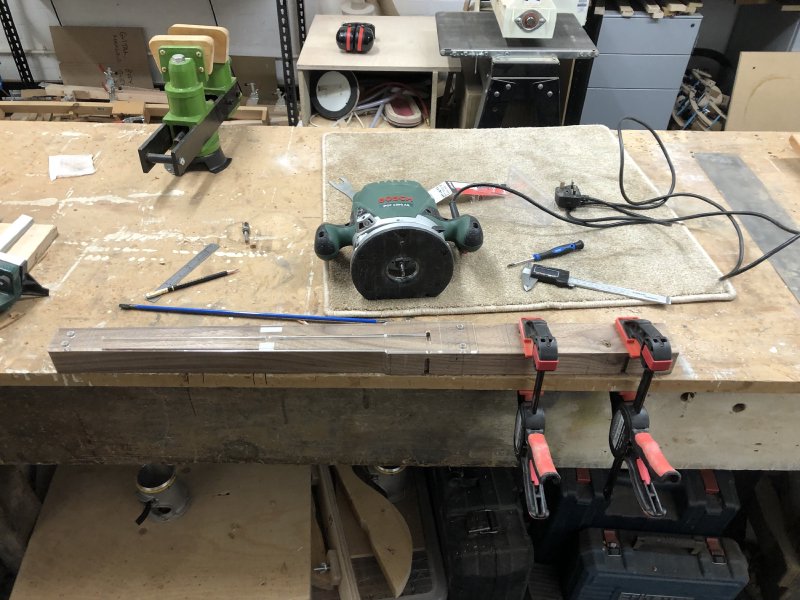
Last week I’d got the back half of the neck for the C2 into shape: it had the truss-rod channel routed and the headstock face cut to the right depth. So this week I introduced the fret-board to it. Both this guitar and Älgen have hit the fretboard stage at the same time, so I was working on both at once this week:

In the above picture I’m just about to apply the glue to the maple part of the neck - the tape is to stop glue getting on the truss rod channel, and I remove it just before clamping the fretboard on. Once the glue set I then trimmed the excess wood off with a combination of bandsaw and hand-router until I was left with a neat looking blank:
Next up for this will be rounding out the headstock transition using the spindle-sander, and then marking out and cutting the fret slots. But that’s now a task for next week.
Älgen
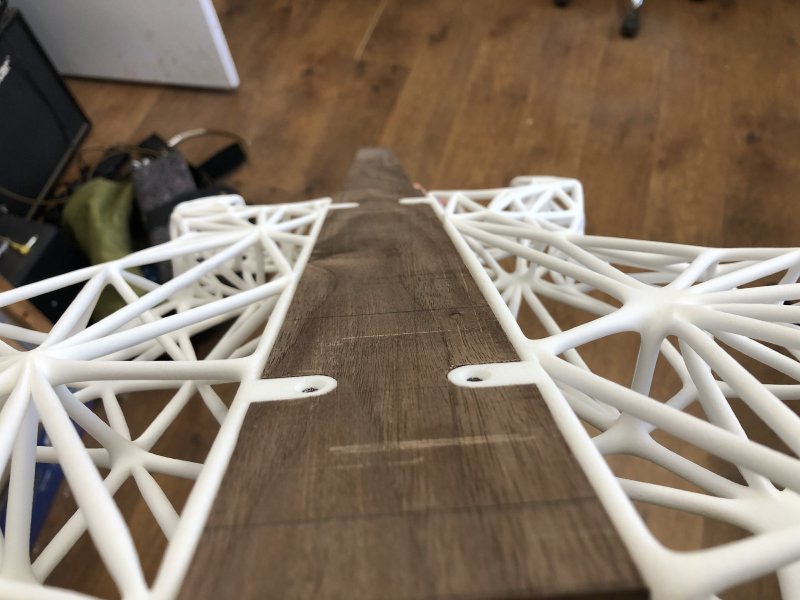
Switching over to the other build now, at the end of the last week I’d managed to mount Älgens 3D printed wings to its wooden core, but things we’re quite perfect, as the plates used to secure the wings on weren’t quite flush on one side:
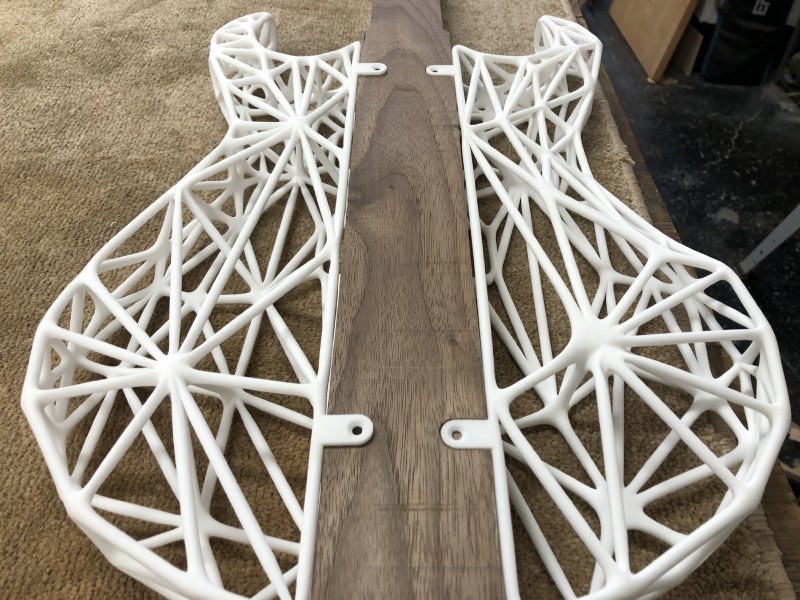
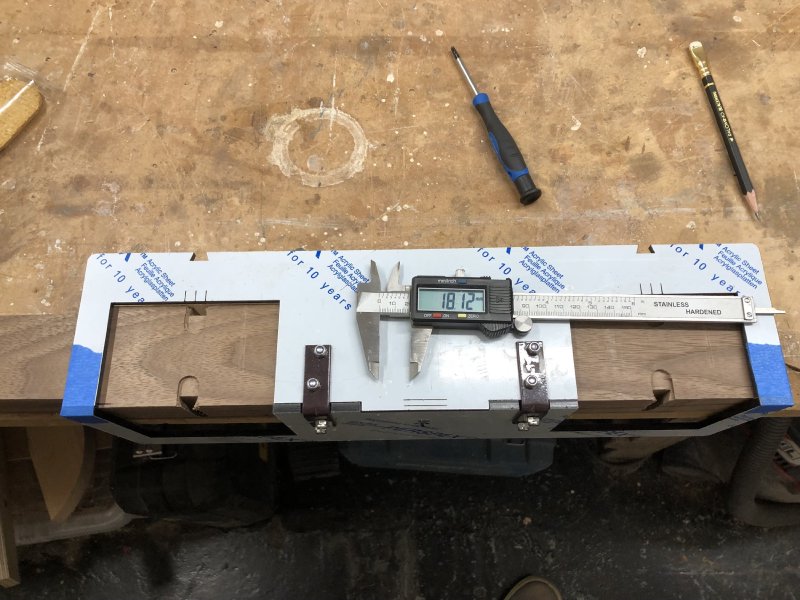
The side that isn’t flush is the side which I’d cut with my new template. The right hand side there, which is flush has now been cut multiple times with multiple jigs, so it’s slots are a bit over sized and hence why that one is looking okay (at least in this shot - it looks less good from other angles). Measuring the slot I found it to be short of what I expected by half a millimetre - 18.1 not 18.6mm. A tiny amount off, but enough to cause things not to fit. What vexed me was why hadn’t the slots cut far enough? Had I messed up my CAD model when accounting for material thickness? Had just I just mis-measured something? Do I need to make yet another iteration of this seemingly simple jig?
I went back through my CAD model to check, and I re-measured the 3D prints, and I just could not find where this error had crept in. Eventually I tracked it down to the metal brackets that I’d used: they were slightly less than 90 degrees, and so that pinching was enough to push the jig back from the body ever so slightly 🤦♀️ I manually bent them slightly, re-ran the router, and then it was much better, though not perfect - I had a slight skew on one side - I fear the two panels are ever so fractionally misaligned. But a little work with a fine chisel though fixed that, and finally everything was home true:
Two things I learned from this: firstly, measure the channels after I cut them before I remove teh jig, just to be sure I’ve cut them as intended; and secondly, I should probably build in a slight margin of tolerance into my jig to allow for tenth of a millimetre sized offsets. The problem with doing things in CAD is you get to believing the numbers there, but in the real world a little tolerance is needed between parts when mating them like this.
As an aside, we weighed the guitar at this point, and it’s currently 1.4 kilograms, which is really quite light. It’ll be interesting to see how that changes over time: I’ve still got bits of wood to remove, but there’s also metal hardware to be bolted on too, so my guess is it’ll climb slightly, bu but not substantially. To put the current weight into context, a standard telecaster would weight around 3.5kg, with 3kg being considered “light”.
I’d assumed, naively, that perhaps walnut was just a light wood, but it’s density is similar to maple and mahogany, with an average of 650 kg/m3. It just goes to show how much of a guitar’s weight is dictated by the body mass.
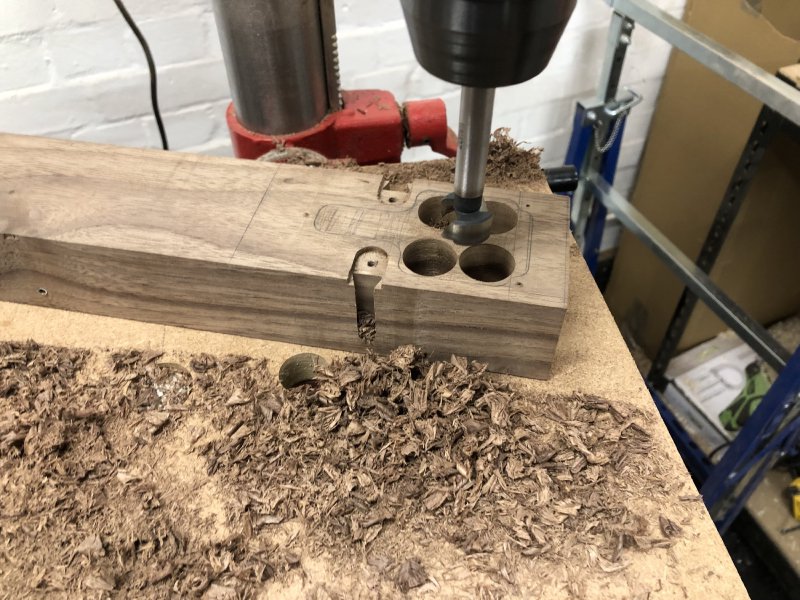
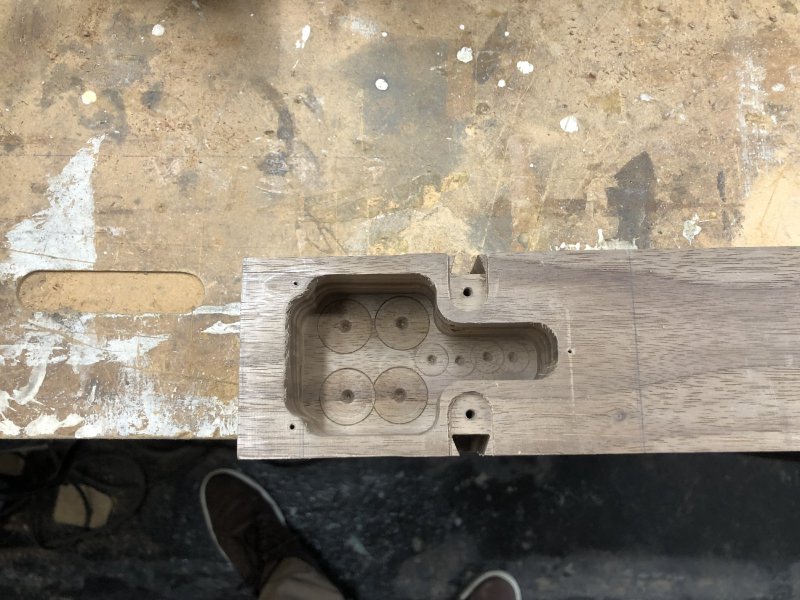
With the 3D printed parts mounted, the rest of the week’s work on Älgen has become much more like a conventional guitar build. Next up was routing out the cavities for the electronics and the truss-rod.
The electronics are all going to sit in the tail. The template I made neatly re-uses existing holes to mount: it uses the two wing mount holes and two of the holes where the control cover will screw in.
At least, it would be neat if one side hand’t been cut many times with different templates as I tried to debug that jig process; as it is the gap between the cover route and the mount plate means there will be next to no material left, which will be a bit unsightly, but that’s prototypes for you.
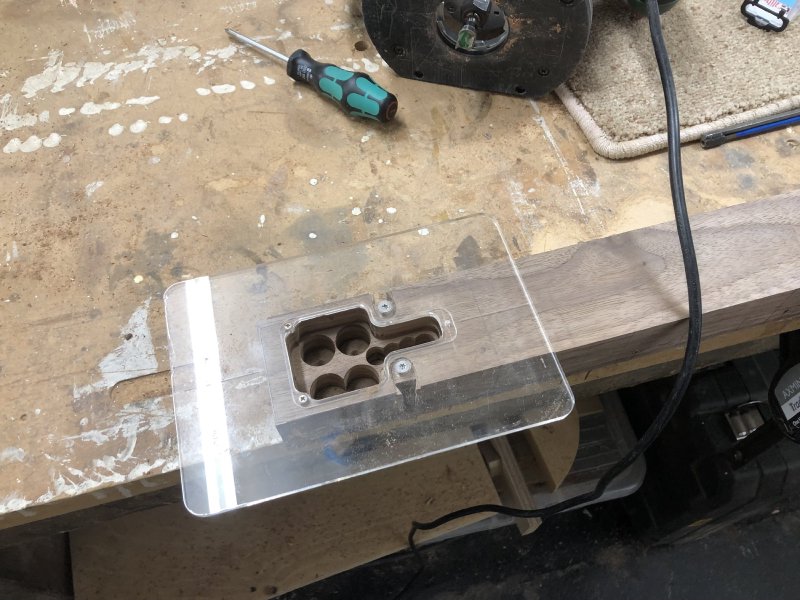
As ever, once I had marked out the cavity space, it was time to remove a good chunk of the waste material using the drill-press:
Then it was out with the hand-router to remove the rest:
This picture here, taken half way through, you can see on the near side where the overside plate hole is going to run into the control cover space - the outer line on the template is where the cover will run to. I am tempted to tweak the control cover shape to fix that, but I’ll try to resist: this is a prototype, and already clearly not going to be perfect, so I should concentrate on getting the process right for the next one! See if my perfectionism lets me stick to that in the coming weeks :)
Anyway, a couple more passes and we’re all done:
Then it was time to flip it over and repeat for the truss-rod cavity:
I started out with the bigger hand-router out of habit, but as I got to just trying to trim the channel down to the perfect height I did switch to using the palm-router, which is much better suited for small jobs like this:
There’s still more wood to be removed, but next up is going to be mounting the fretboard, as that’ll determine the position of the nut, which in turn will determine the position of the bridge, and thus the position of the pickups, etc.
As you saw with the C2 progress earlier, usually I liked to glue the fretboard before cutting the fret-slots, as life is easier that way: gluing a pre-slotted fretboard has to be very carefully lined up, as parts like to slide around as you clamp them for gluing. However, what I did on the C2 build relies on me being able to trim the fret-board blank to shape after gluing, and with this build I can’t do that, as the fretboard extends over the wider core part of the neck:
Thus this time I’ll need to shape the fretboard and then glue it on. To do this I’ll use a technique whereby you use locator pins to ensure things line up: before applying glue and clamping you drill a small hole through the fretboard and through into the neck, and then use pins in these holes when gluing to ensure that the two parts remain aligned. Now, clearly we don’t want visible holes in the fretboard, so the trick is to put the locating pins in the fret slots, so the holes will be covered by the frets. This all sounds very complicated, which is why I’ve not used this technique thus far, but workshop-mate Jamie uses this technique on his guitars, and assures me it’s going to be fine :)
Anyway, this all means that everything is backwards compared to what we did process-wise on the C2: first I have to cut the slots on the fretboard blank, then I can trim it to shape, and then I’ll glue it. I’m cutting the slots first because on this neck the fretboard terminates at the nut, rather than has the nut sit in it, so when I use my template to cut the fretboard to shape I need to line everything up with fret-zero.
Here’s the template I’ll be using to cut it:
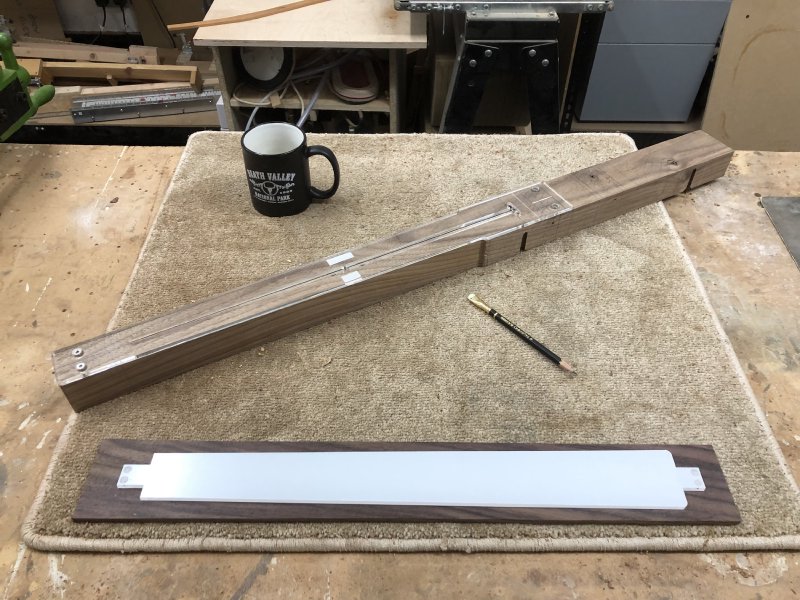
In the last I’ve done the fret-slot marking out with the laser-cutter, and then sawn from that reference. However, I don’t have a laser-cutter in this workshop so I used workshop-mate Matt’s slot cutting jig, which has a bunch of different sides for different scale lengths:
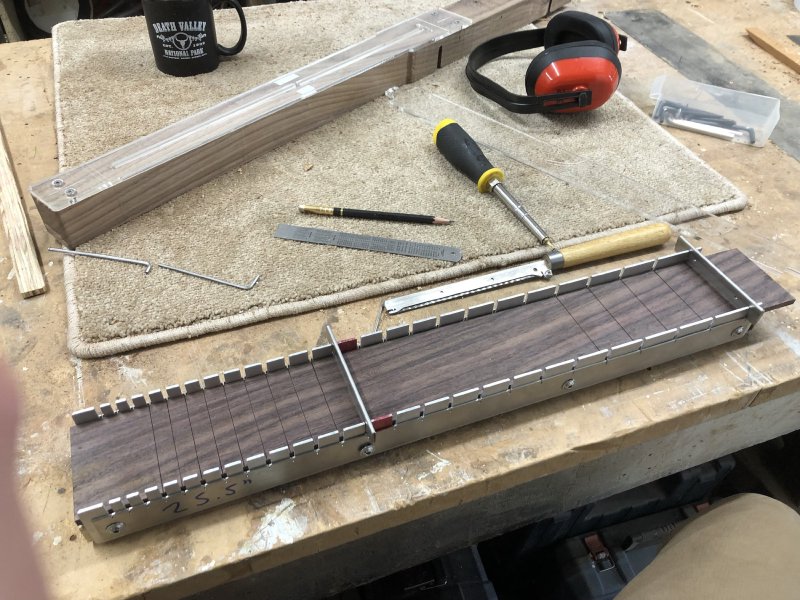
An hour or so of careful manual labour later, and we have a blank ready to shape:
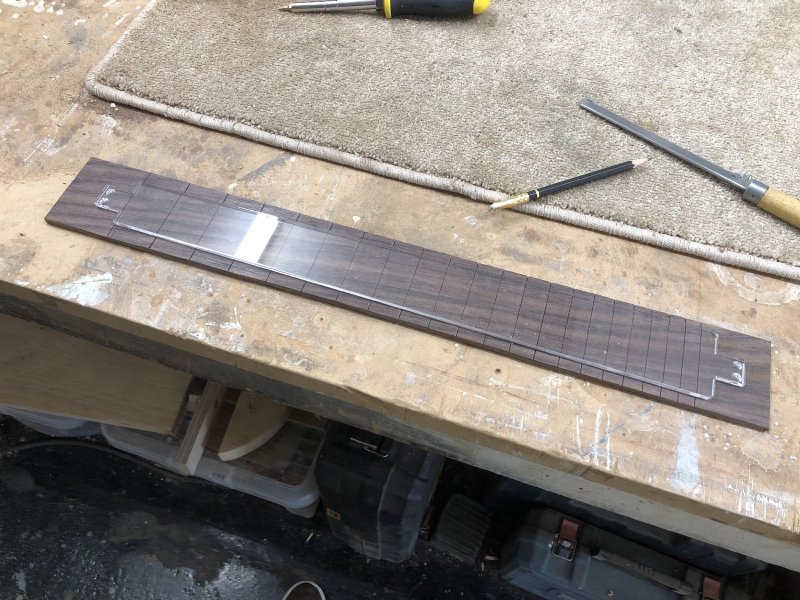
And again at this stage I ran out of time - so that’s now a next week problem.
So both guitars are continuing at a pace, which is great. Whilst it might seem like one build is stealing time from the other, in practice I find I’m definitely more productive this way, being able to switch between the builds when one temporarily stalls, or just when I need to switch to a different task as my focus is going.
The main thing this week for me was that both builds have become somewhat normal in their progress; particularly for Älgen, it now feels like a guitar build rather than some weird art project :)